
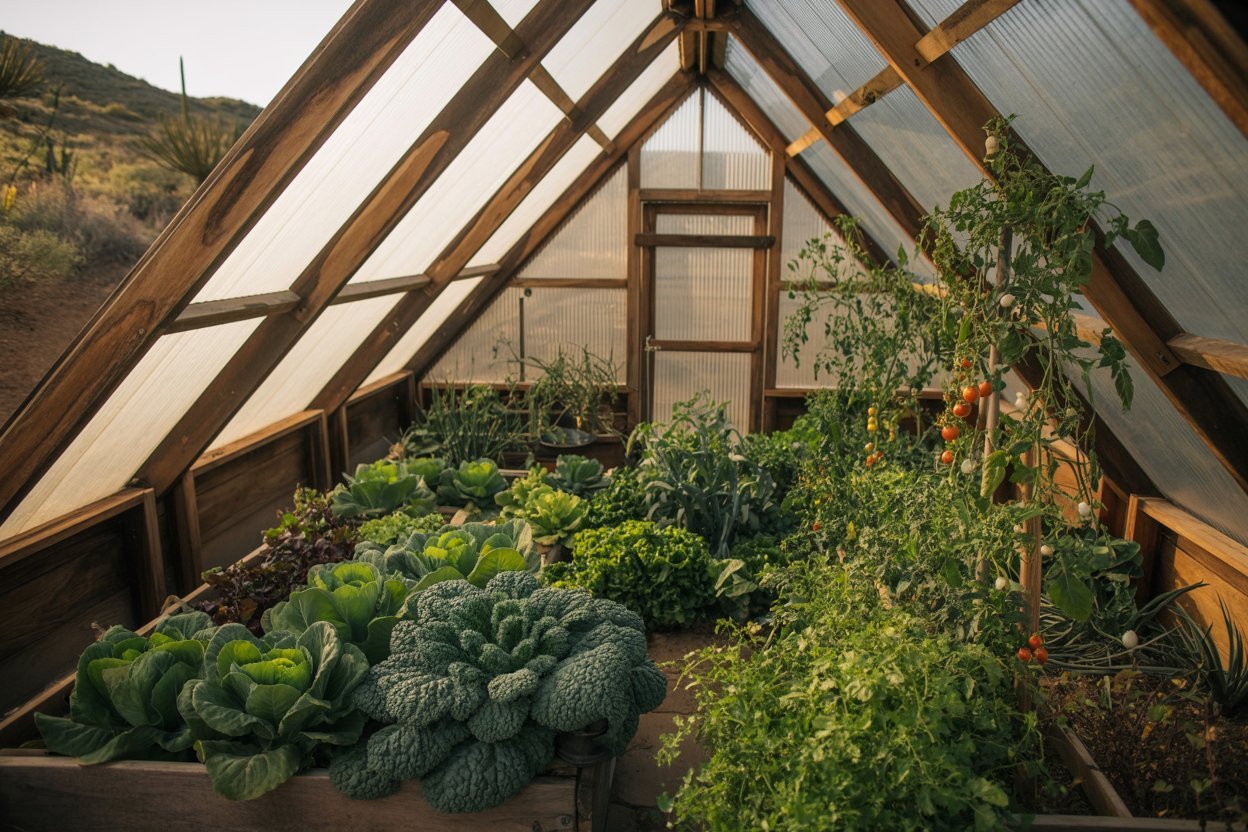
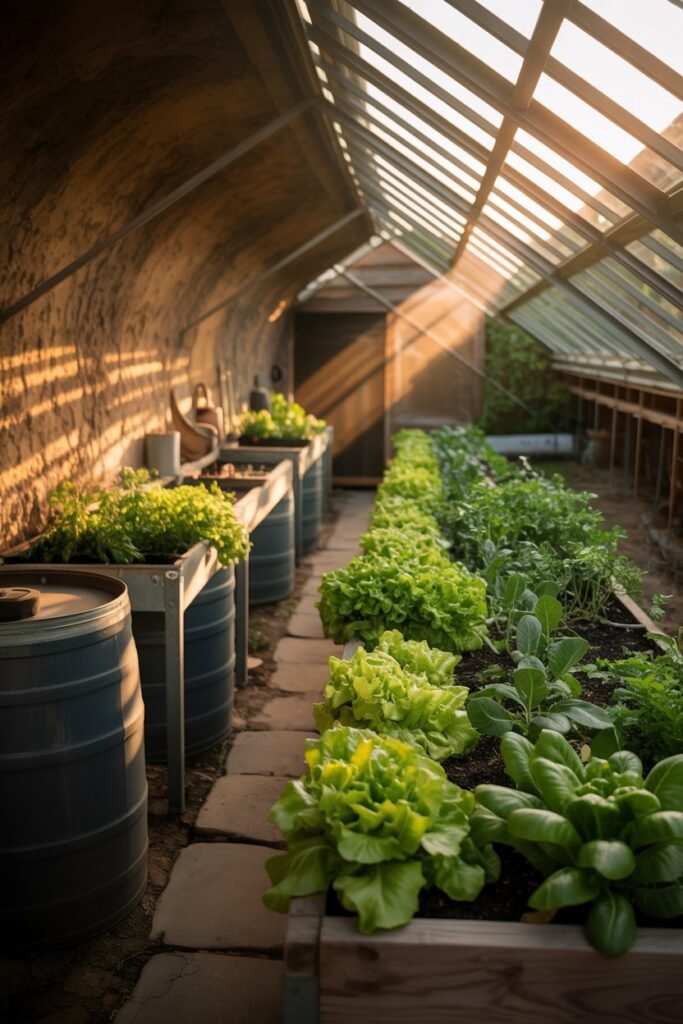
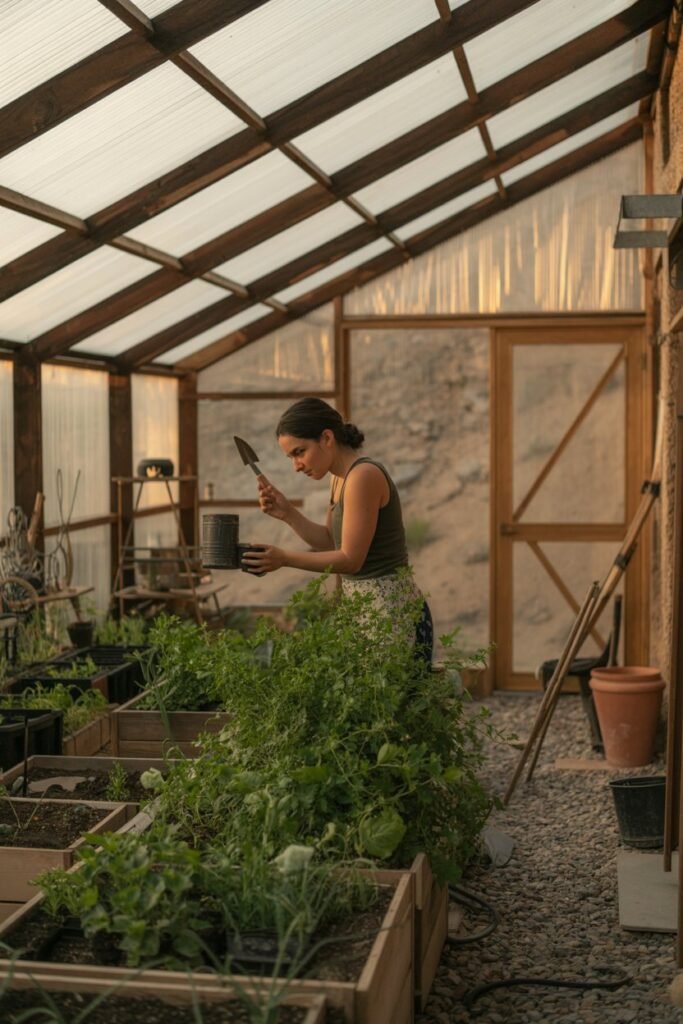
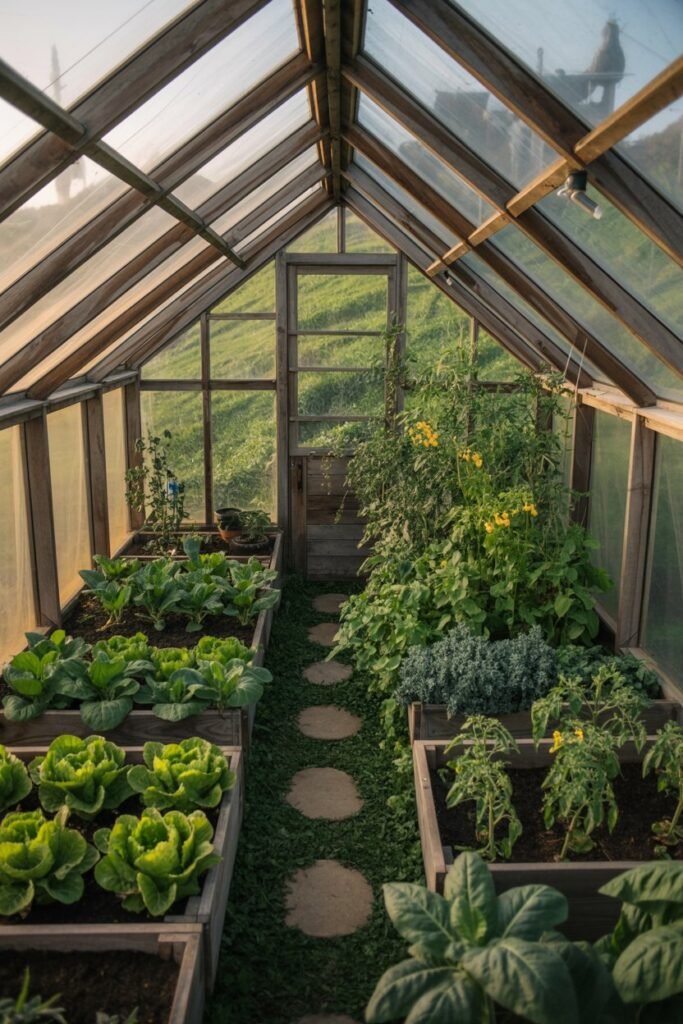
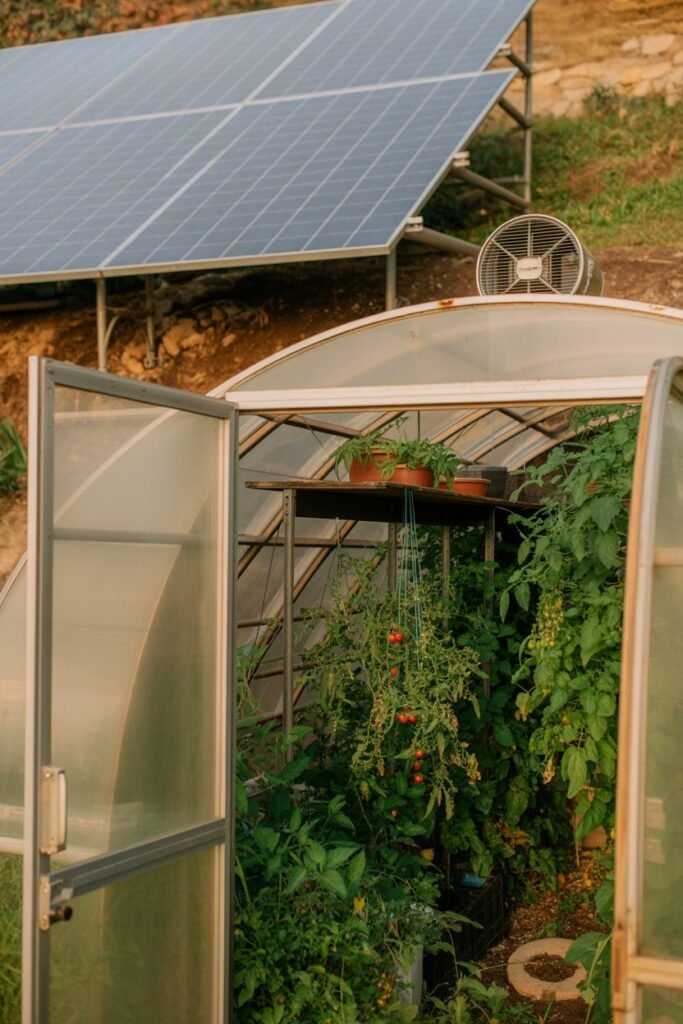
The first time I stepped down into my underground greenhouse, I remember pausing halfway down the stairs.
Above me, the Arizona sun was blazing dry, sharp, relentless. The kind of heat that makes you squint and second-guess every tomato plant you’ve ever loved.
But below? Cool air wrapped around me like a soft exhale. The soil smelled alive. My lettuce wasn’t wilting. My spinach wasn’t bolting.
And for the first time since I started gardening in a hot, dry climate, I felt like I wasn’t fighting nature anymore.
I was working with her.
Building an underground greenhouse completely changed the way I garden and if you’re a beginner, a homesteader, a sustainable living lover, someone in a harsh climate, or even an urban gardener trying to stretch your growing season, this might change everything for you too.
Let’s talk about what an underground greenhouse really is, how it works, how I built mine, what I learned (including the mistakes), and how you can create one yourself.
But first let me show you exactly what you’ll need.
Supplies You’ll Need to Build an Underground Greenhouse
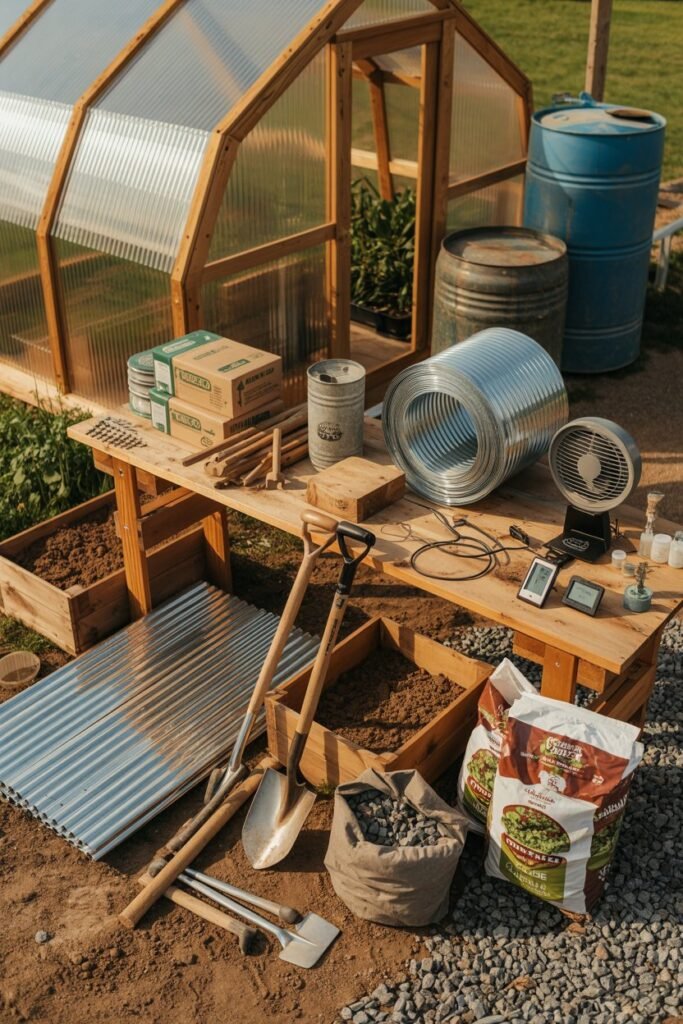
Every item listed below is easily available on Amazon. I’m listing the product types and names (no links, just what to search).
Structural & Framing Materials
- Palram Nature Series Greenhouse Panels (Polycarbonate Sheets)
- YARDGARD Galvanized Hardware Cloth
- Simpson Strong-Tie Structural Screws
- VIVOSUN 6 Mil Greenhouse Plastic Sheeting
- ShelterLogic GrowIT Steel Frame Connectors
- Pressure-Treated Lumber (2x4s and 4×4 posts)
- Galvanized Steel Corrugated Panels (for retaining walls)
Digging & Foundation Tools
- Fiskars Long-Handle Round Point Shovel
- Truper Tru Pro Pick Mattock
- BOSCH Self-Leveling Rotary Laser Level
- Stanley 25-Foot Tape Measure
- DEWALT 20V MAX Cordless Drill
Drainage & Moisture Control
- ADS 4-Inch Perforated Drain Pipe
- Miracle-Gro Perlite
- Landscape Fabric Heavy Duty Weed Barrier
- Sump Pump with Float Switch (Wayne CDU980E)
- Gravel (bulk)
Ventilation & Climate Control
- VIVOSUN 8 Inch Inline Duct Fan
- iPower Automatic Shutter Exhaust Fan
- Inkbird Temperature Controller ITC-308
- Digital Hygrometer Thermometer
- Automatic Greenhouse Window Opener (Univent)
Raised Beds & Soil
- Greenes Fence Cedar Raised Garden Bed
- FoxFarm Ocean Forest Potting Soil
- Espoma Organic Garden-Tone Fertilizer
- Worm Castings Organic Fertilizer
Irrigation
- Raindrip Drip Irrigation Kit
- Orbit B-hyve Smart Hose Timer
- Soaker Hose 50ft
Lighting (Optional but Helpful)
- Barrina LED Grow Light T5 Strips
- GE BR30 LED Grow Light Bulbs
What Is an Underground Greenhouse?
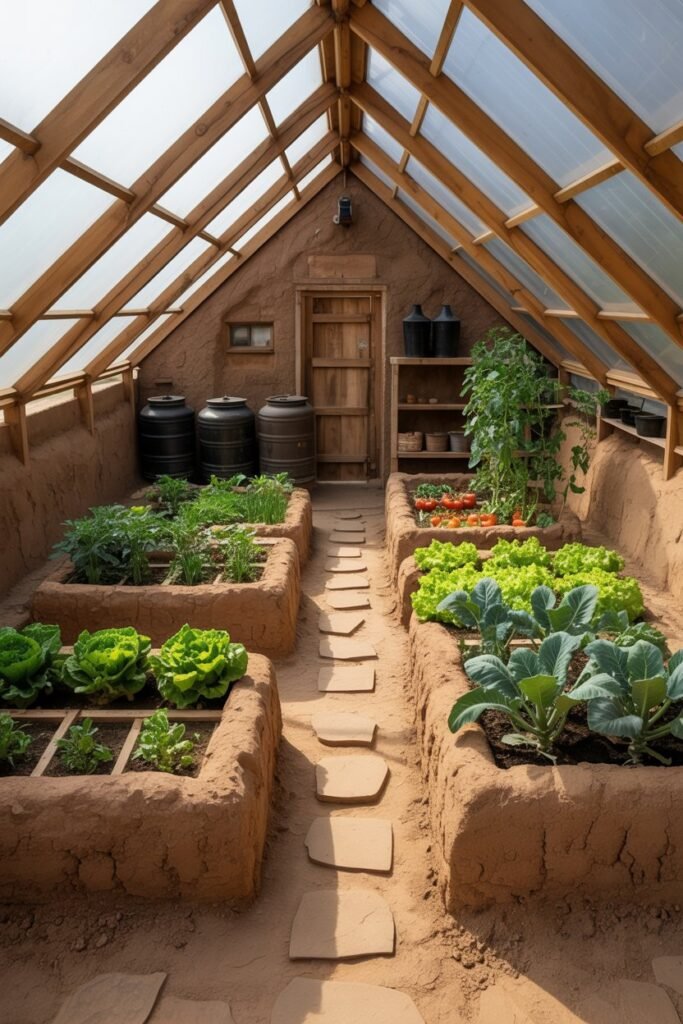
An underground greenhouse sometimes called a walipini is a greenhouse built partially or fully below ground level. Instead of standing tall above the surface, it uses the earth itself as insulation.
And here’s the magical part: soil naturally maintains a stable temperature a few feet below ground. In Arizona, when the outside temperature hits 105°F, the soil six feet down can stay around 55–70°F. That stability is everything.
Instead of battling heat swings, frost, or harsh winds, you’re harnessing the earth’s natural thermal mass.
Think of it like building a cozy garden cave that captures sunlight but holds onto coolness or warmth as needed.
Why I Built Mine in Arizona’s Hot, Dry Climate
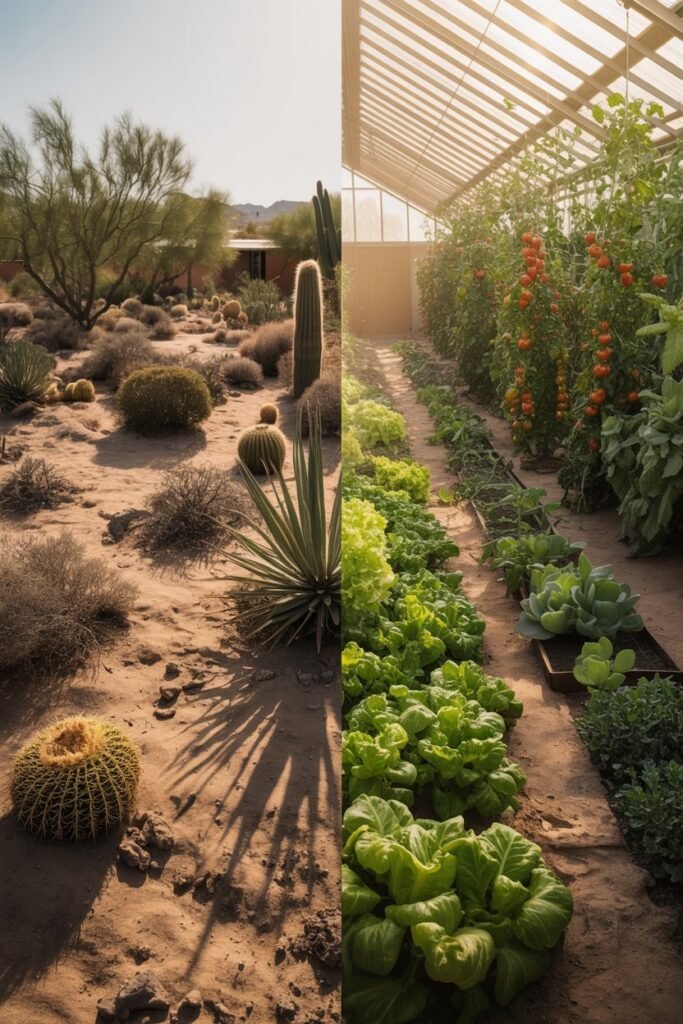
Gardening here felt like a constant uphill battle.
Challenges I Faced:
- Tomatoes frying in late June.
- Lettuce bolting before I could harvest.
- Soil drying out within hours.
- Windstorms snapping young plants.
- Water evaporating too quickly.
- Shade cloth helping… but not enough.
I was spending more time rescuing plants than enjoying them.
After researching sustainable growing methods, I discovered underground greenhouses. The concept made so much sense for extreme climates instead of shading from above, insulate from below.
So I decided to build one.
And honestly? It was one of the best gardening decisions I’ve ever made.
How an Underground Greenhouse Actually Works
Let’s break this down simply.
The earth is a natural insulator.
When you dig down:
- You escape surface temperature extremes.
- You block harsh wind.
- You reduce evaporation.
- You create a microclimate.
The roof usually angled and covered with polycarbonate or greenhouse plastic allows sunlight in. The underground walls trap stable temperatures.
In winter, it holds warmth.
In summer, it stays cooler than the outside air.
It’s passive climate control. No expensive cooling systems. No overworked fans. Just thoughtful design.
Planning Before Digging (What I Wish I Knew)
Before I even picked up a shovel, I had to consider:
1. Sun Direction
In Arizona, south-facing exposure matters. I positioned mine so the angled roof captures maximum winter sunlight.
2. Depth
I dug mine about 6 feet deep. That gave me access to stable soil temperatures.
3. Drainage
This part is critical. Even in dry climates, flash floods happen. I installed:
- Perforated drain pipes
- Gravel base
- Landscape fabric
- Slight floor slope toward a drainage corner
Skipping drainage would be a disaster.
4. Size
Mine is 10×14 feet manageable but productive.
If you’re a beginner, start smaller. You can always expand.
Step-by-Step: How I Built My Underground Greenhouse
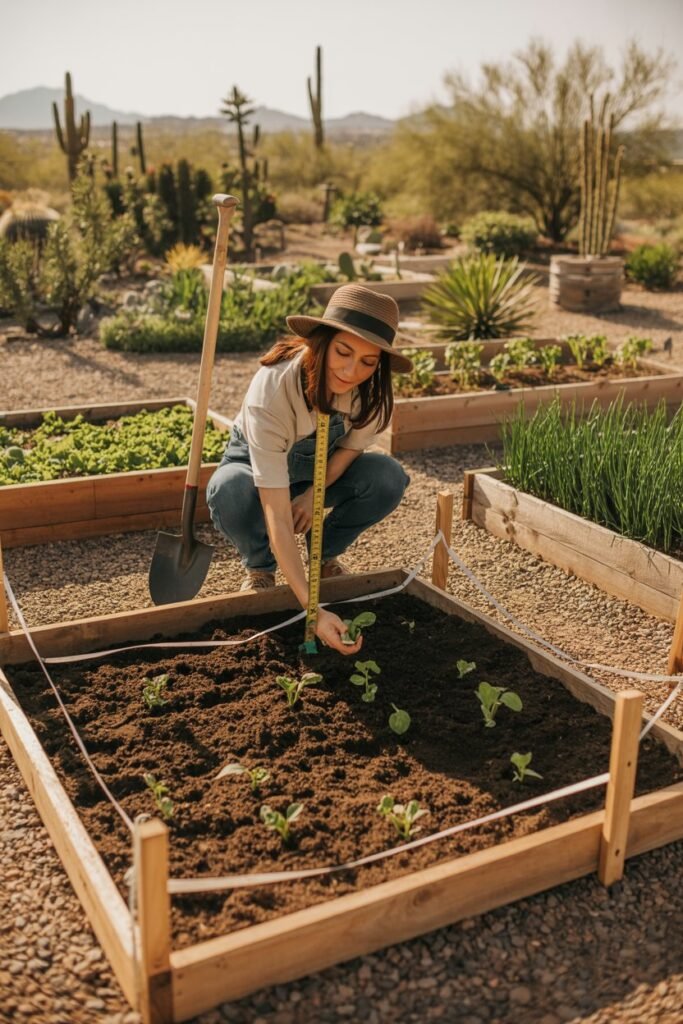
Step 1: Marking the Area
I measured carefully and staked the perimeter. Precision matters more than you think.
Step 2: Digging
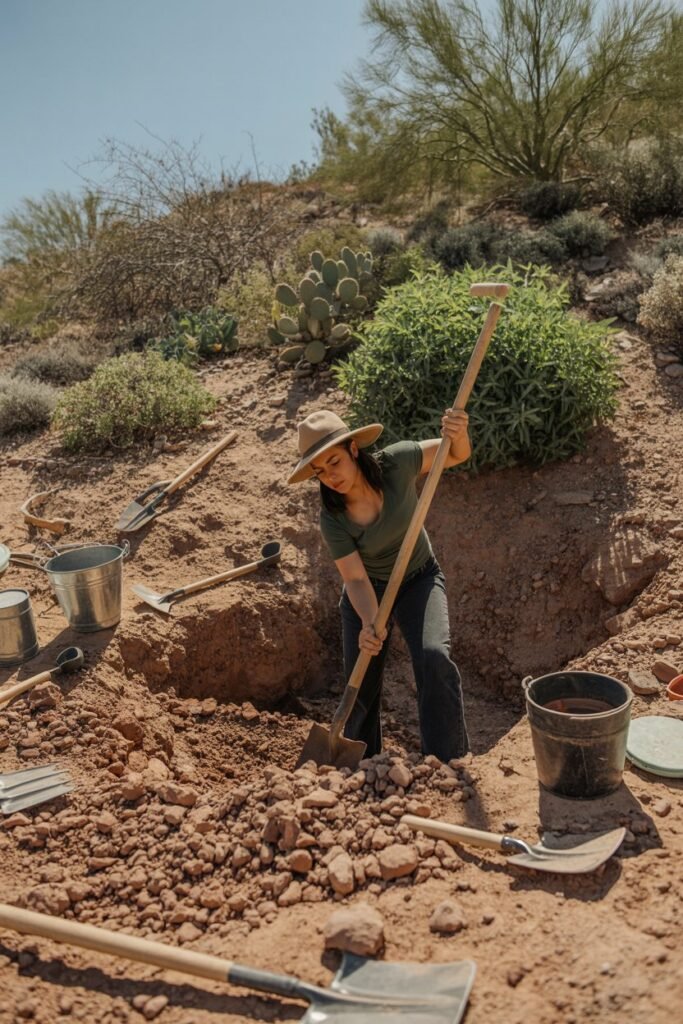
This was the hardest part. The soil was rocky. I used a pick mattock constantly.
It took weeks.
If you can rent a mini excavator, do it. I did part manually and part with help.
Step 3: Reinforcing the Walls

I used:
- Corrugated galvanized steel panels
- Pressure-treated wood framing
- Structural screws
You must prevent soil collapse.
Step 4: Drainage Layer
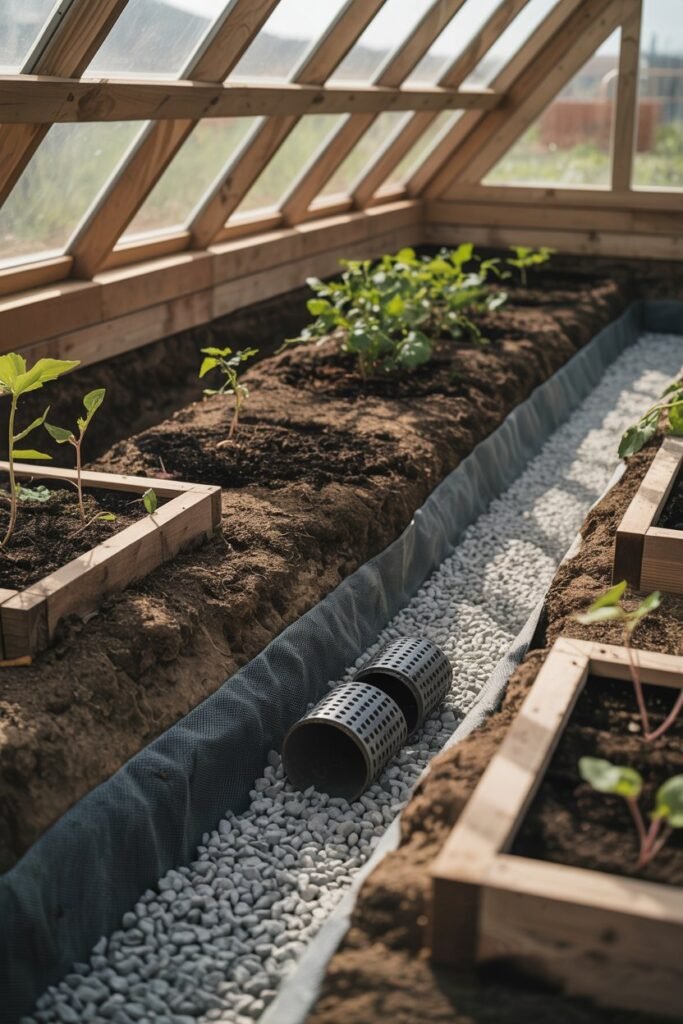
- 4 inches gravel
- Perforated drain pipe
- Landscape fabric
- Slight floor grading
This step gave me peace of mind.
Step 5: Roof Installation
I built a slanted wooden frame and attached polycarbonate panels.
The roof angle matters it should capture sunlight while shedding rain.
Step 6: Ventilation
Even underground spaces need airflow. I installed:
- An exhaust fan
- An intake vent
- An automatic window opener
Air movement prevents mold and overheating.
The Challenges I Faced (And How I Solved Them)
Challenge 1: Hard Soil
Solution: Rent equipment. Save your back.
Challenge 2: Initial Cost
Solution: Build in phases.
Challenge 3: Overheating in Peak Summer
Yes even underground, it can heat up.
Solution:
- Shade cloth over roof
- Ventilation fans
- Early morning watering
Challenge 4: Psychological Fear
Climbing down into a structure below ground felt intimidating at first.
Now? It feels like a sanctuary.
The Benefits I’ve Seen
This is where my heart lights up.
Longer Growing Season
I grow cool-season crops even when it’s blazing outside.
Less Water Usage
Evaporation dropped dramatically.
Wind Protection
No more shredded leaves.
Healthier Soil
Moisture stays balanced.
Plant Stability
No extreme stress swings.
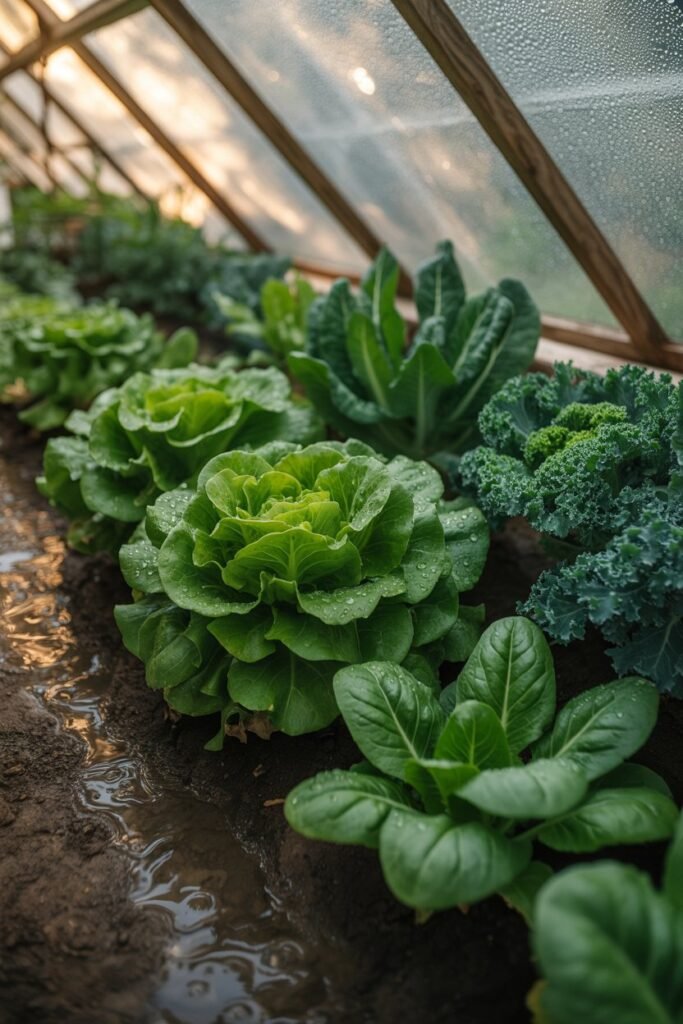
What I’m Growing Inside
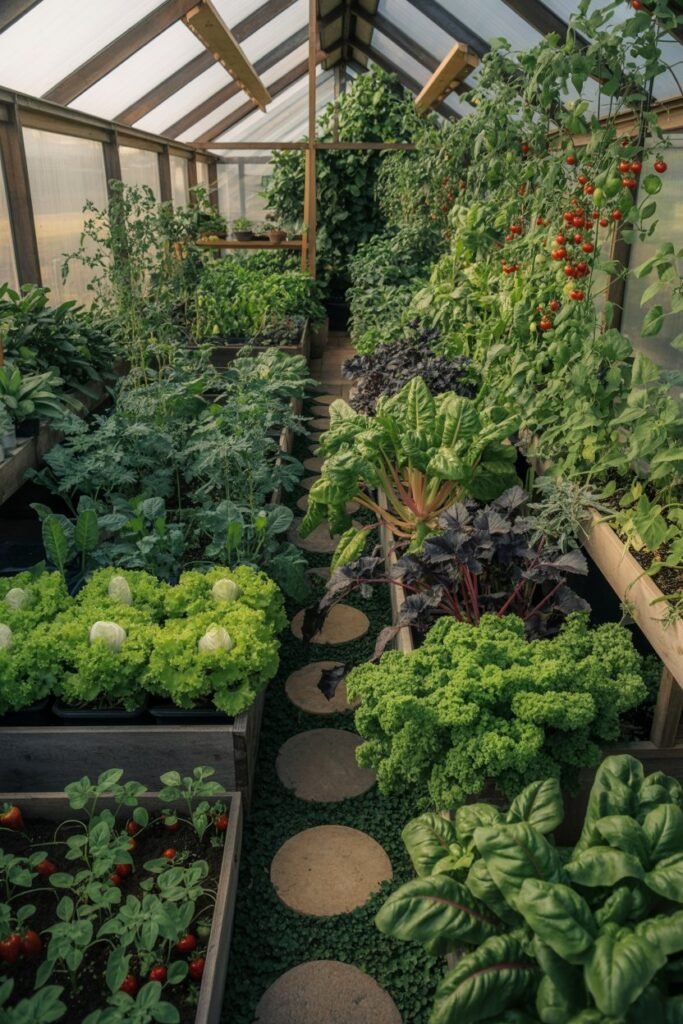
Right now, my underground greenhouse holds:
- Butterhead Lettuce
- Spinach
- Kale
- Swiss Chard
- Arugula
- Basil
- Parsley
- Cherry Tomatoes
- Green Onions
- Strawberries
In Arizona heat, these would struggle outside in summer. Inside? They thrive.
Is an Underground Greenhouse Good for Beginners?
Yes but only if you plan carefully.
Start small.
Understand drainage.
Think about sunlight.
Budget realistically.
If digging feels overwhelming, you can try a partially sunken greenhouse first.
Costs Breakdown
Mine cost approximately:
- Excavation help: $800
- Framing materials: $1,200
- Roofing panels: $900
- Ventilation: $300
- Soil & beds: $500
Total: Around $3,700
It sounds like a lot but compared to constantly replacing failed plants? It’s worth it.
Maintenance Tips
- Check drainage monthly.
- Clean roof panels seasonally.
- Monitor humidity.
- Rotate crops.
- Keep airflow steady.
Underground doesn’t mean maintenance-free.
Who Should Build One?
This is perfect for:
- Homesteaders wanting year-round food.
- Sustainable living lovers reducing water use.
- Hot climate gardeners.
- Cold climate gardeners.
- Urban gardeners with limited above-ground space.
Absolutely, sweet friend I’m going to expand your post properly and weave these new sections in beautifully, keeping the same gentle, nurturing, conversational tone and making them detailed, practical, and special.
You can insert these sections after your “How It Works” and “Maintenance” sections, or I can restructure the full article later if you’d like.
Here are your expanded additions:
Design Principles That Make Underground Greenhouses Energy Efficient
One of the reasons I fell so deeply in love with my underground greenhouse is because it doesn’t feel wasteful. It doesn’t depend on constant electricity or expensive cooling systems. It works with nature instead of fighting her.
But here’s something I learned very quickly: simply digging a hole and putting a roof over it is not enough.
The real magic is in the design.
Energy efficiency in an underground greenhouse doesn’t happen by accident. It happens because of intentional choices choices that determine whether your space becomes a thriving year-round garden or an expensive mistake.
Let me walk you through the principles that made mine successful.
Choose the Best Location for Sunlight and Heat Retention
Location is everything.
Before I even picked up a shovel, I spent weeks just watching the sun.
In a hot and dry climate like Arizona, sunlight is abundant sometimes overwhelmingly so. But winter sunlight is different from summer sunlight. It’s lower in the sky, softer, and precious.
I positioned my underground greenhouse on the south-facing side of my property. This allows the angled roof to capture maximum winter sun while still giving me control over summer intensity.
Here’s what to look for:
- A south-facing slope (ideal)
- No tall trees blocking winter sunlight
- Protection from prevailing winds
- Slight natural elevation to prevent water pooling
Even in a dry climate, flash floods can happen. Avoid low spots.
If you’re in a cold climate, this positioning becomes even more important because your winter sun exposure determines how much passive heat your greenhouse can collect.
The right location reduces your need for artificial heating dramatically.
Design the Roof for Maximum Solar Gain
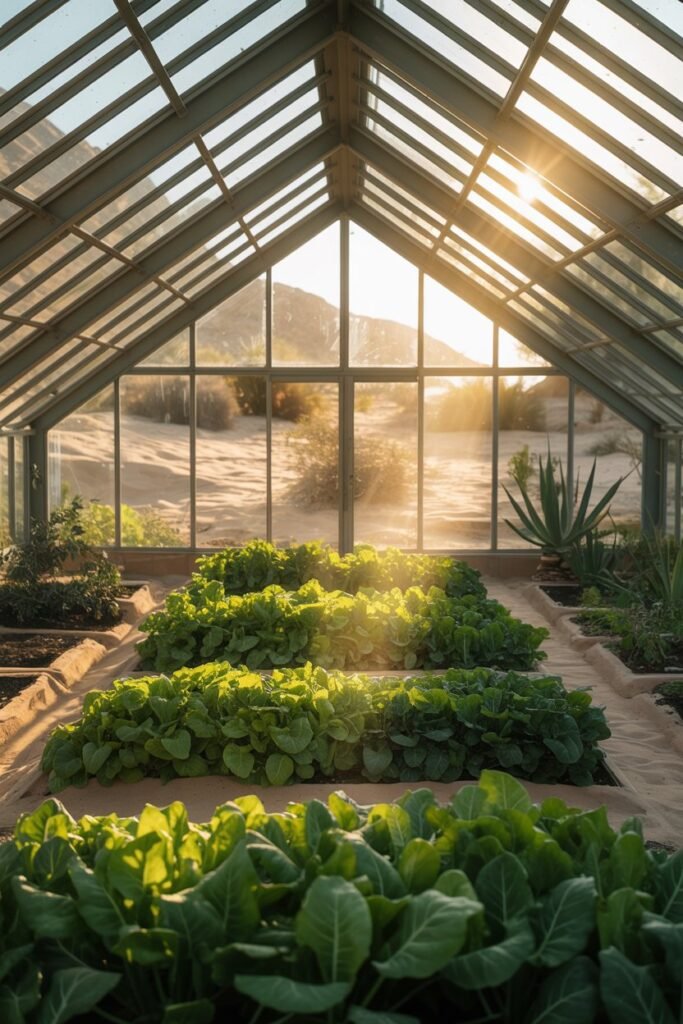
The roof is not just a cover. It’s the heart of the system.
Mine is angled at approximately 35 degrees which aligns closely with optimal winter sun angles for my region.
Why does this matter?
Because winter is when you need solar gain the most. A flat roof won’t capture sunlight efficiently. A steeply angled one allows light to penetrate deeply into the growing space.
Here’s what made mine effective:
- South-facing slope
- Double-wall polycarbonate panels (better insulation than single-layer plastic)
- Tight sealing to prevent heat loss
- Removable shade cloth for peak summer
In summer, I add a 50% shade cloth over the panels. In winter, I remove it completely.
This flexibility gives me seasonal control without needing heavy mechanical systems.
And honestly? Watching sunlight pour in on a winter morning feels like stepping into a quiet sanctuary.
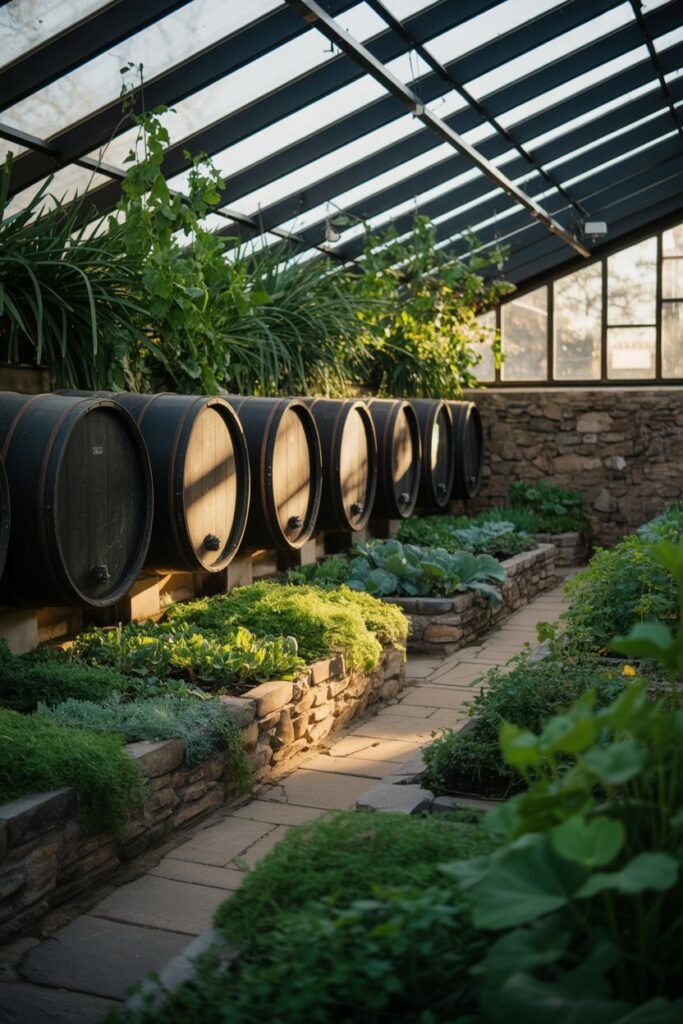
Use Thermal Mass Materials to Store and Release Heat
Thermal mass is one of the most beautiful scientific principles in gardening.
It simply means using materials that absorb heat during the day and slowly release it at night.
The earth itself is thermal mass that’s the foundation of the underground greenhouse concept. But you can enhance it.
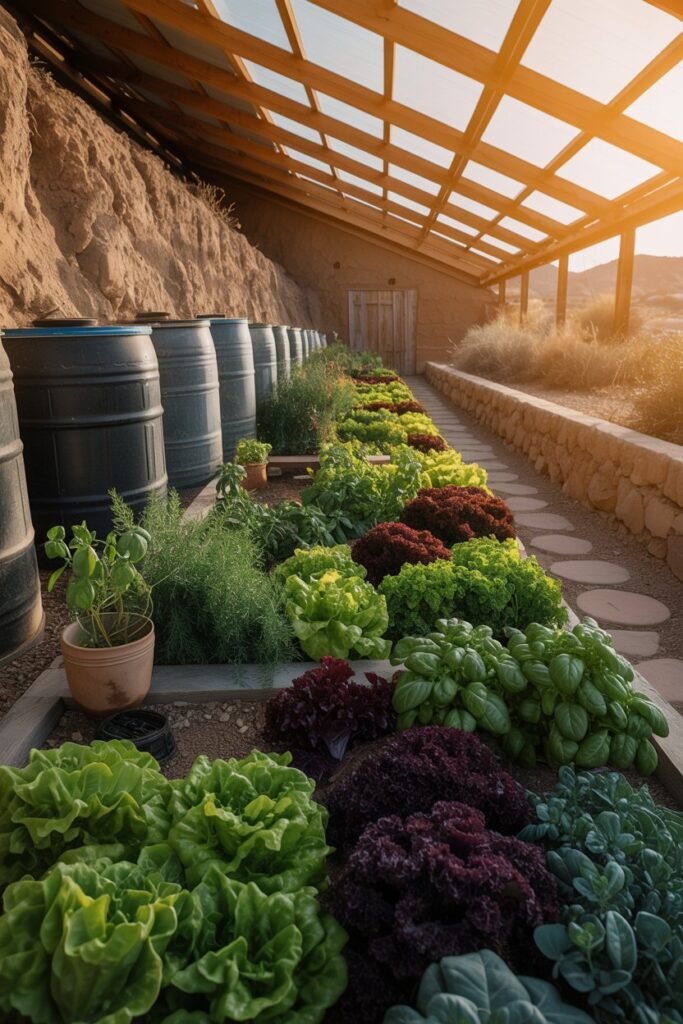
Here’s what I added:
- Stone pathway along one side
- Concrete block retaining walls
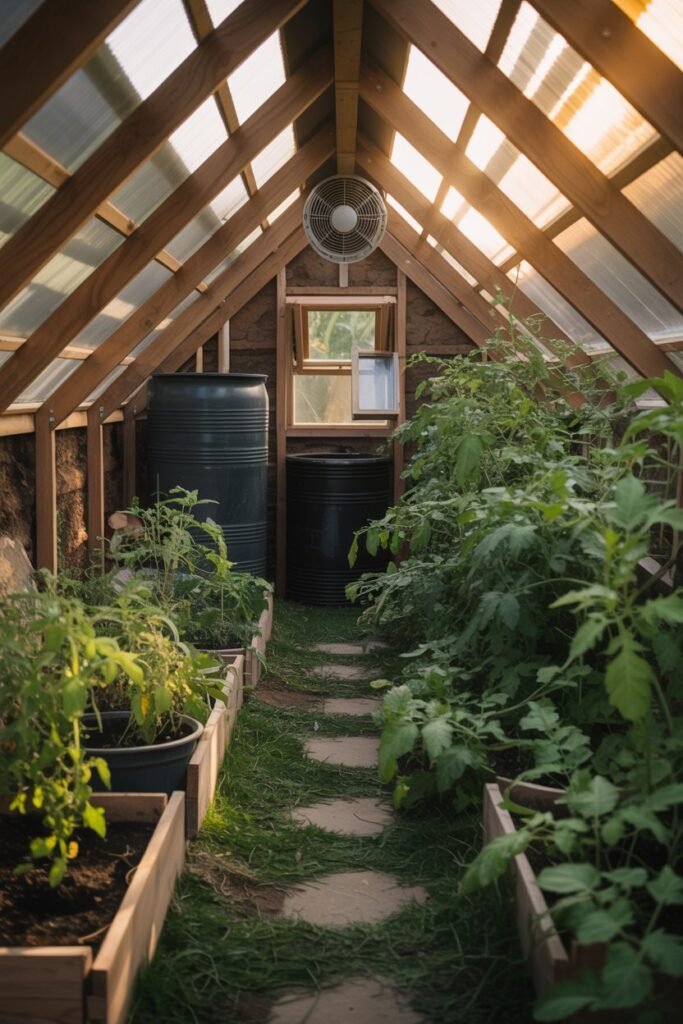
- Water barrels painted black
- Thick soil beds
Water is especially powerful. A simple 55-gallon barrel of water absorbs daytime heat and releases it slowly overnight, stabilizing temperatures.
In winter, my nighttime temperature drops are far less dramatic because of this stored heat.
In summer, the surrounding soil helps buffer against extreme spikes.
Thermal mass reduces the need for electric heaters or cooling systems which makes the greenhouse more sustainable and more affordable long-term.
Paint Surfaces Black to Boost Heat Absorption

This one surprised me at first.
Black absorbs heat more effectively than lighter colors. So I painted my water barrels matte black.
The difference was noticeable.
They warm faster during the day and hold that warmth into the evening.
Some growers even paint the north interior wall black to increase heat absorption during colder months.
In Arizona, I use this strategy seasonally more aggressively in winter, less so in peak summer.
This simple adjustment costs very little but improves efficiency beautifully.
Can You Automate an Underground Greenhouse?
When I first built mine, I wanted everything manual. I wanted to feel connected to the space.
But life gets busy.
And automation doesn’t take away the magic it supports it.
Yes, you absolutely can automate parts of an underground greenhouse. And depending on your climate, automation can protect your investment.
Let’s walk through what’s realistic and what isn’t.
Solar-Powered Ventilation Systems
Ventilation is non-negotiable.
Even underground, heat can build up especially in Arizona summer.
I installed a solar-powered exhaust fan. During the brightest, hottest part of the day, it automatically pulls hot air out.
The beauty of solar ventilation is simple:
- It runs hardest when the sun is strongest.
- It requires no grid electricity.
- It lowers internal temperature without constant monitoring.
Paired with intake vents near ground level, it creates passive airflow that keeps plants comfortable.
For sustainable living lovers, this is a beautiful solution.
Automated Watering Options
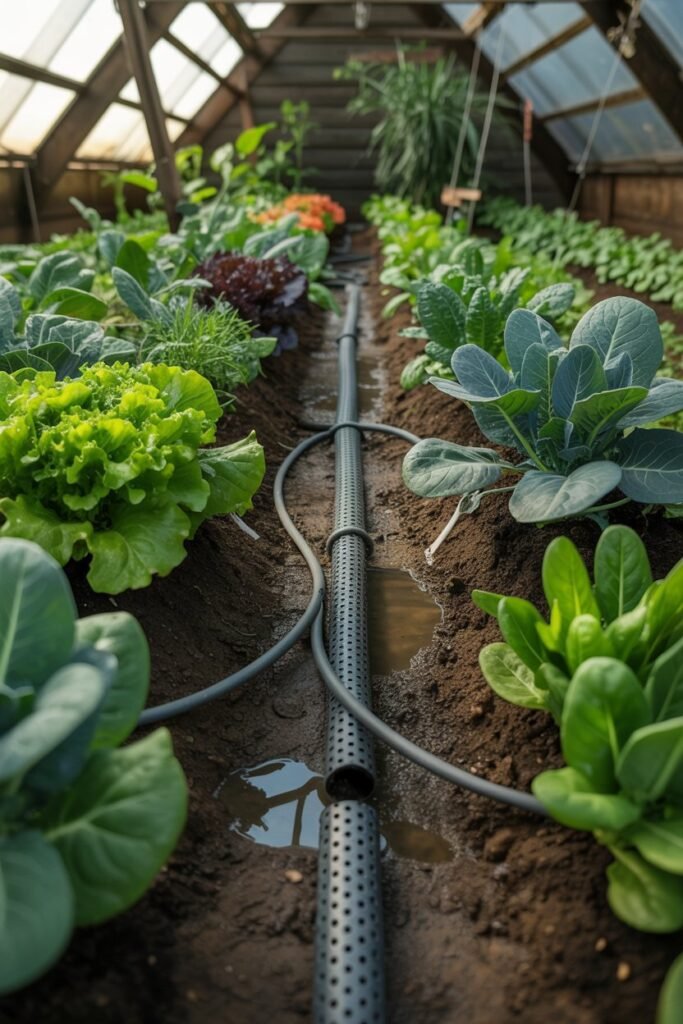
Water conservation is precious in hot, dry climates.
I installed a drip irrigation system connected to a smart hose timer.
Here’s what this does:
- Waters early in the morning automatically.
- Delivers moisture directly to roots.
- Prevents evaporation waste.
- Maintains consistent soil moisture.
Consistency changed everything.
My plants stopped experiencing stress cycles. Growth became more even. Harvests became more reliable.
You can use:
- Drip lines
- Soaker hoses
- Gravity-fed irrigation (for off-grid systems)
Automation doesn’t mean you stop observing it just creates stability.
Temperature and Air Quality Monitoring
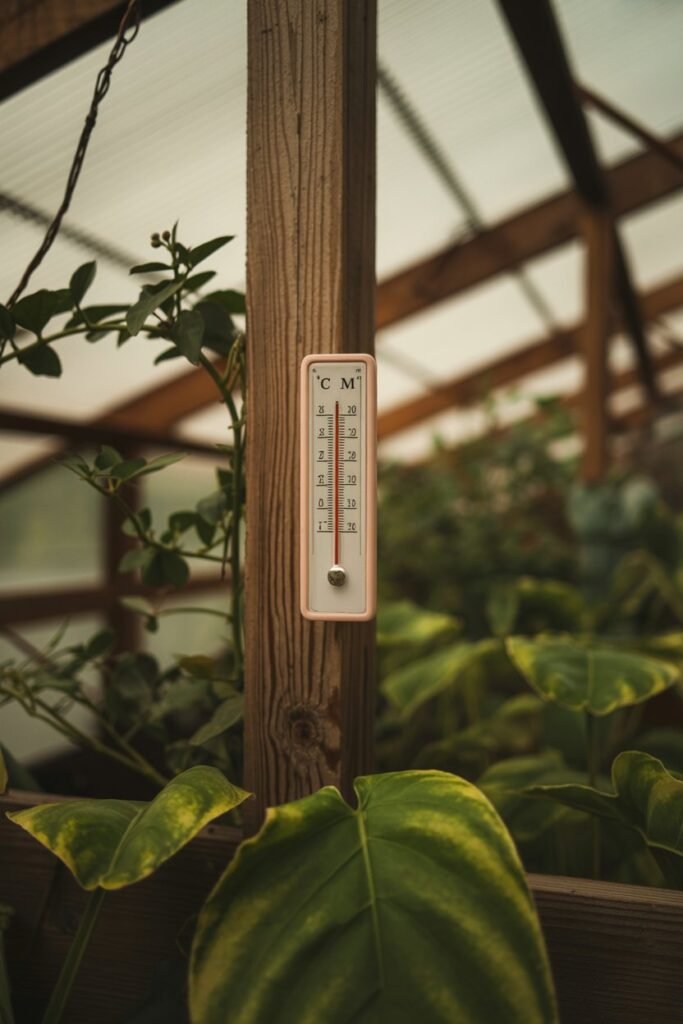
This is where technology truly shines.
I use:
- Digital thermometer/hygrometer
- Temperature controller for fans
- Optional CO₂ monitor
Monitoring allows you to:
- Prevent overheating
- Catch humidity spikes before mold develops
- Track seasonal changes
- Adjust ventilation timing
Underground spaces can trap humidity if airflow is poor. Monitoring protects your crops.
In the beginning, I checked readings obsessively. Now, I glance at them calmly, like checking on an old friend.
Limitations of Automation
Now let me gently say something important.
Automation is helpful but it is not a substitute for presence.
Underground greenhouses still require:
- Weekly inspection
- Seasonal adjustments
- Occasional manual watering
- Pest monitoring
- Structural checks
Technology can fail. Timers can malfunction. Solar panels can get dusty.
You must still show up.
Also, full climate automation (like commercial greenhouses) can become expensive quickly. If your goal is sustainability and energy efficiency, keep it simple.
Passive design first. Automation second.
That order matters.
Final Thoughts (From My Heart)
Walking down those steps each morning feels grounding literally.
My underground greenhouse taught me patience. It taught me to observe the earth more closely. It taught me that sometimes the solution isn’t to fight the environment, but to design with it.
If you’ve been struggling with harsh weather, unpredictable seasons, or discouraged by repeated plant failure — this might be your fresh start.
Gardening should feel nurturing, not exhausting.
And sometimes, the most beautiful growth happens just below the surface.
