
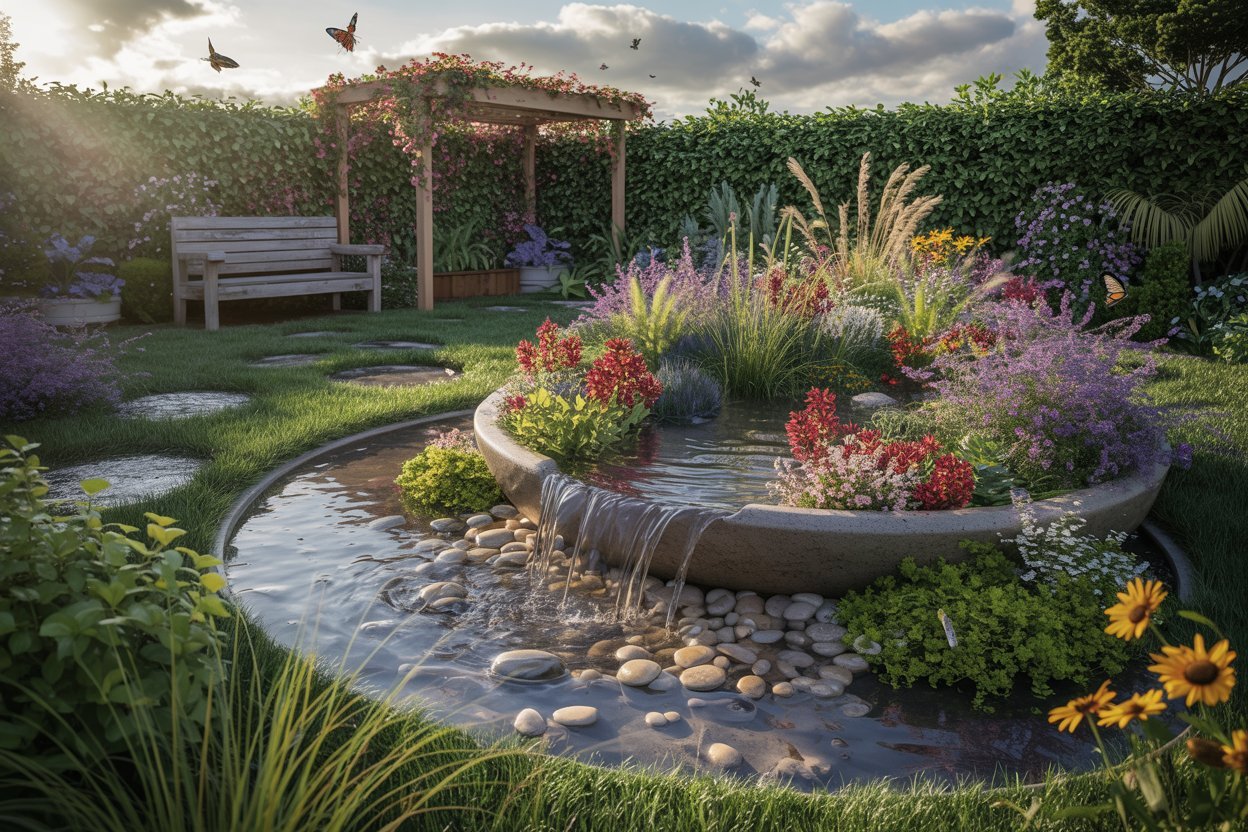

Rain has a unique way of bringing life back to a garden, and creating a Rain Garden Pod lets you make the most of every drop.
Imagine stepping into a peaceful outdoor space where colorful native flowers bloom after every shower, birds gather around, and rainwater naturally nourishes the landscape instead of washing away valuable soil.
Whether you want to reduce yard flooding, improve drainage, support local wildlife, or simply build a relaxing green retreat, a rain garden pod offers an attractive and practical solution.
This guide will walk you through every step, making the entire process simple, rewarding, and enjoyable.
What Is a Rain Garden Pod?
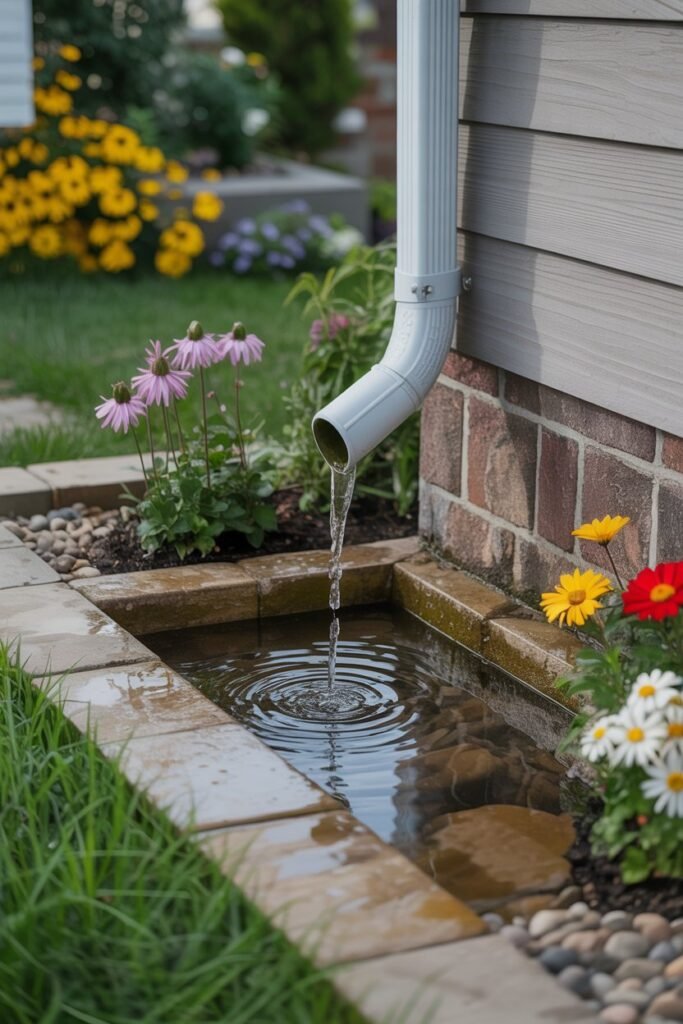
A Rain Garden Pod is a thoughtfully designed garden area that captures and absorbs rainwater from rooftops, driveways, patios, and other hard surfaces before it can flow into storm drains.
Instead of allowing rainwater to rush away, the pod temporarily holds the water, giving it time to soak naturally into the soil.
Unlike a decorative pond, a rain garden pod is not meant to stay filled with water. After rainfall, the collected water should drain into the ground within 24 to 48 hours. This prevents standing water while helping replenish groundwater supplies and reducing surface runoff.
Think of it as a natural sponge built into your landscape. During heavy rain, the garden gently slows water movement, filters out dirt and pollutants, and allows clean water to return to the soil.
During dry periods, the same garden continues to provide beauty, habitat, and greenery.
The term “pod” often refers to the garden being designed as a defined outdoor room or self-contained landscape feature.
It can be created in a front yard, backyard, courtyard, or even incorporated into larger landscape designs.
Many homeowners surround their rain garden pod with seating, pathways, decorative stones, or pergolas to create a relaxing outdoor retreat.
A well-designed rain garden pod combines three important purposes:
- Stormwater management by reducing runoff and erosion.
- Environmental benefits through natural water filtration and wildlife support.
- Landscape beauty with attractive plants, flowers, and year-round interest.
Because these gardens rely on nature instead of complex drainage systems, they are an excellent sustainable landscaping solution for both small residential properties and larger landscapes.
By the end of this guide, you’ll understand how to design, build, and maintain a rain garden pod that not only improves drainage but also transforms your outdoor space into a peaceful green sanctuary.
How Does a Rain Garden Pod Work?
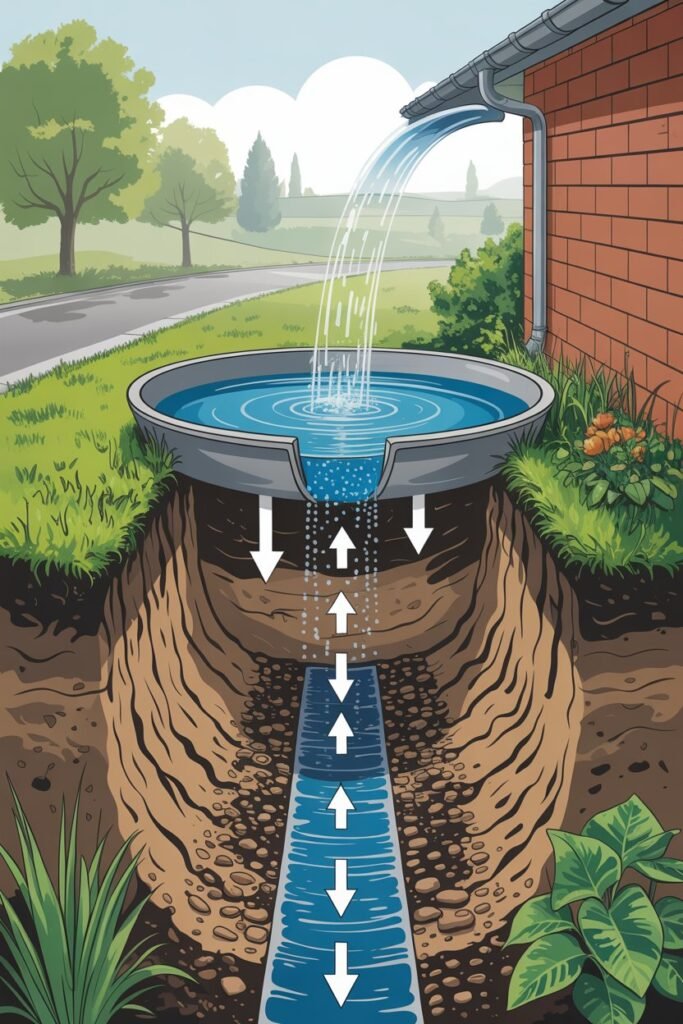
At first glance, a rain garden pod looks like a beautifully landscaped flower bed. The difference lies beneath the surface. Every part of the garden is designed to slow, store, and filter rainwater naturally.
When rain falls on your roof or other hard surfaces, it usually runs quickly across the ground, carrying soil, fertilizer, oil, and other pollutants into nearby storm drains, streams, or rivers. A rain garden pod interrupts this flow by directing runoff into a shallow planted basin.
Here’s how the process works:
Step 1: Rainwater Is Collected
Rainwater flows from gutters, downspouts, or sloped areas into the rain garden pod through a shallow swale, decorative rock channel, or underground drainpipe.
Step 2: Water Temporarily Pools
The basin is intentionally designed to hold a few inches of water after a rainfall. This temporary pooling slows the movement of water and prevents flash runoff.
Step 3: Soil Filters Pollutants
As the water sinks into the soil, layers of sand, organic matter, and healthy garden soil naturally trap sediments, nutrients, heavy metals, and other contaminants. Plant roots also help absorb excess nutrients before they can reach local waterways.
Step 4: Plants Use the Moisture
Native grasses, flowering perennials, shrubs, and moisture-loving plants absorb the stored water through their root systems. Deep-rooted species are especially effective because they improve soil structure and create channels that help water infiltrate more quickly.
Step 5: Groundwater Is Replenished
Instead of becoming runoff, much of the rainwater gradually soaks into the surrounding soil, helping recharge underground water supplies and maintaining healthier soil moisture levels.
The Key Components of a Rain Garden Pod
Every successful rain garden pod includes several essential elements:
Collection Area
This is the surface that supplies rainwater, such as a roof, driveway, walkway, or patio.
Inlet
The inlet guides water safely into the garden without causing erosion. Many gardeners use gravel-lined channels or decorative stone streams for this purpose.
Shallow Basin
The basin is the heart of the rain garden pod. It holds rainwater briefly before allowing it to infiltrate into the ground. Most basins are only 4 to 8 inches deep.
Healthy Soil
Well-draining soil enriched with compost allows water to infiltrate efficiently while supporting healthy plant growth.
Native Plants
Plants with deep root systems stabilize the soil, absorb water, support pollinators, and create a resilient ecosystem that requires less maintenance over time.
Overflow Area
During exceptionally heavy storms, excess water needs a safe exit. An overflow spillway directs surplus water away from buildings and into an appropriate drainage area without damaging the garden.
By combining these features, a rain garden pod becomes both a functional water management system and an attractive landscape feature that enhances your outdoor living space.
Benefits of Building a Rain Garden Pod
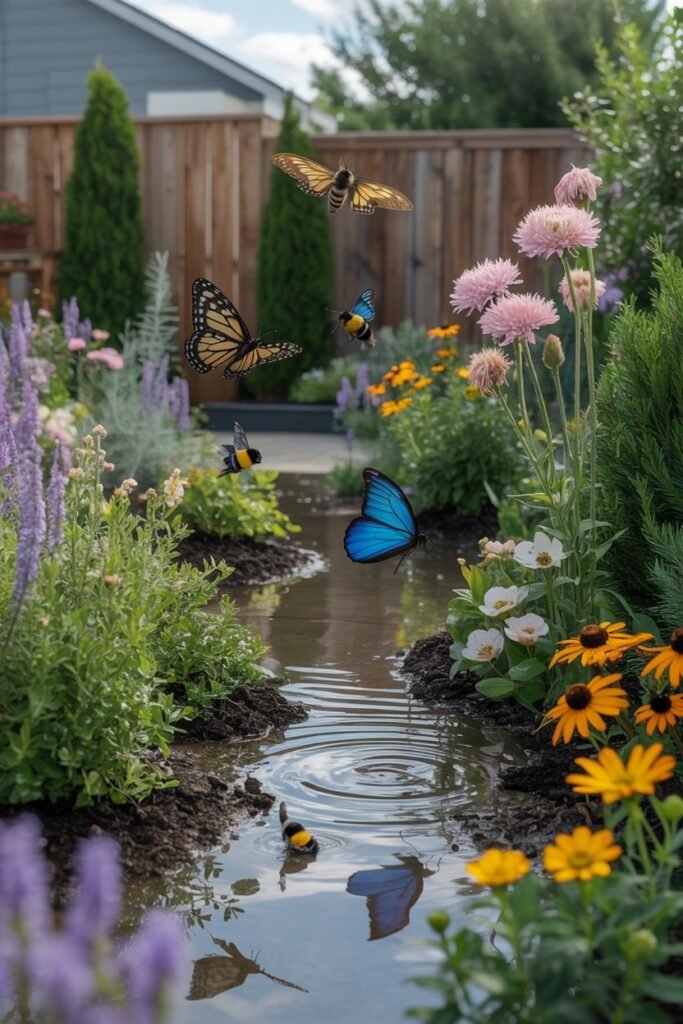
A Rain Garden Pod is much more than a beautiful landscaping feature. It is a practical investment that improves your yard, supports the environment, and creates a peaceful outdoor space you can enjoy throughout the year.
Whether you have a small suburban garden or a large backyard, a well-designed rain garden pod offers lasting benefits that go far beyond its appearance.
Below are some of the biggest advantages of creating your own rain garden pod.
1. Reduces Yard Flooding
One of the primary reasons homeowners build rain garden pods is to solve drainage problems. Heavy rain can quickly overwhelm compacted soil, causing water to pool in low spots or flow toward your home’s foundation.
A rain garden pod helps capture this runoff and allows it to soak gradually into the ground. Instead of creating muddy patches or standing water, rain is directed into a designated area where it can be safely absorbed.
This makes your yard more usable after storms and helps prevent long-term water damage.
2. Protects Your Home’s Foundation
Poor drainage around your home can lead to costly repairs over time. Excess water collecting near foundations may contribute to cracks, basement leaks, or soil erosion.
By directing runoff away from your house and into a properly designed rain garden pod, you reduce the amount of water that reaches your foundation. This simple landscaping feature can become part of your home’s natural drainage system while adding beauty to your landscape.
3. Improves Water Quality
Rainwater often picks up dirt, fertilizer, pesticides, oil, and other pollutants as it travels across driveways, sidewalks, and lawns.
Instead of allowing these contaminants to wash into storm drains and nearby rivers, a rain garden pod acts as a natural filter. Soil particles trap sediments while beneficial microorganisms and plant roots help break down pollutants before they reach local waterways.
This natural filtration process supports cleaner streams, lakes, and groundwater.
4. Conserves Water Naturally
A rain garden pod makes excellent use of free rainwater. Rather than relying solely on irrigation during the growing season, many of the plants receive moisture directly from rainfall stored in the soil.
Once established, many native plants require little additional watering, making the garden both environmentally friendly and cost-effective.
This can also help reduce your household’s overall water usage, especially during warmer months.
5. Supports Pollinators and Wildlife
A thoughtfully planted rain garden pod quickly becomes a thriving habitat for local wildlife.
Native flowering plants attract:
- Bees
- Butterflies
- Hoverflies
- Moths
- Beneficial insects
Shrubs and ornamental grasses provide shelter for birds, while shallow moisture can attract frogs and other small wildlife in some regions.
By choosing a variety of plants that bloom throughout the growing season, your rain garden pod can provide food and shelter for pollinators from spring through autumn.
6. Helps Prevent Soil Erosion
Fast-moving rainwater can wash away valuable topsoil, leaving behind bare patches and damaging nearby plants.
The deep roots of rain garden plants stabilize the soil while slowing water movement. Mulch, stones, and ground covers also help protect the surface from the impact of heavy rainfall.
Over time, your soil becomes healthier, more stable, and better able to absorb future rainfall.
7. Creates a Beautiful Landscape Feature
A rain garden pod doesn’t have to look purely functional. With careful planning, it can become one of the most attractive areas in your landscape.
You can include:
- Colorful native flowers
- Ornamental grasses
- Decorative boulders
- Curved garden borders
- Wooden benches
- Stepping stone pathways
- Bird baths
- Small seating areas
The result is an outdoor space that feels like a private garden retreat while quietly performing an important environmental role.
8. Increases Biodiversity
Traditional lawns often consist of a single type of grass with limited value for wildlife.
A rain garden pod introduces a variety of plant species with different heights, bloom times, textures, and root systems. This diversity creates healthier ecosystems that support insects, birds, and beneficial soil organisms.
Greater biodiversity also makes your garden more resilient to pests, diseases, and changing weather conditions.
9. Requires Less Maintenance Than Many Traditional Gardens
Although a newly planted rain garden pod requires regular watering, weeding, and monitoring during its first growing season, maintenance becomes much easier once the plants are established.
Native plants are generally adapted to local weather conditions, meaning they often require:
- Less watering
- Less fertilizer
- Fewer pesticides
- Less pruning
Seasonal tasks usually include removing weeds, refreshing mulch, trimming old growth, and checking that the inlet and overflow areas remain clear.
10. Adds Value to Your Property
Well-designed landscaping can make a positive first impression on potential buyers.
A professionally built or neatly maintained rain garden pod demonstrates thoughtful landscape design and sustainable gardening practices. Buyers increasingly appreciate outdoor spaces that are both beautiful and environmentally responsible.
While property values depend on many factors, an attractive landscape can enhance curb appeal and make your home stand out.
11. Helps Reduce Local Flooding
When many homeowners install rain gardens, the combined effect can significantly reduce the amount of stormwater entering public drainage systems.
Less runoff means:
- Lower pressure on storm drains
- Reduced flooding during heavy rain
- Less erosion in nearby streams
- Improved groundwater recharge
Even one small rain garden pod contributes to healthier local water management.
12. Encourages Sustainable Gardening
Building a rain garden pod is an excellent way to garden with nature rather than against it.
Instead of treating rainwater as a problem, you transform it into a valuable resource. This approach encourages environmentally friendly gardening practices such as planting native species, improving soil health, reducing chemical use, and conserving water.
Over time, your garden becomes a balanced ecosystem that works in harmony with natural rainfall.
13. Provides Year-Round Visual Interest
A well-planned rain garden pod offers beauty in every season.
- Spring: Fresh green growth and early flowering perennials emerge.
- Summer: Bright blooms attract butterflies, bees, and hummingbirds.
- Autumn: Grasses develop rich golden tones while seed heads feed birds.
- Winter: Dried flower heads, ornamental grasses, and evergreen shrubs add texture and structure to the landscape.
By selecting plants with different bloom periods, foliage colors, and seasonal features, your rain garden pod remains attractive all year long.
14. Offers a Peaceful Outdoor Retreat
Beyond its practical benefits, a rain garden pod creates a calming space where you can relax and reconnect with nature.
Adding comfortable seating, natural stone paths, gentle lighting, or even a small pergola can transform the area into a quiet garden room.
The sound of rainfall filtering through plants, birds visiting for food, and butterflies drifting among the flowers creates a soothing atmosphere that encourages you to spend more time outdoors.
Many gardeners find that this becomes their favorite place to enjoy a morning coffee, read a book, or simply unwind after a busy day.
Why a Rain Garden Pod Is Worth the Effort
Building a rain garden pod is one of the most rewarding landscaping projects you can undertake. It solves common drainage issues, supports wildlife, filters rainwater naturally, and adds lasting beauty to your property.
With careful planning and the right selection of plants, your rain garden pod becomes more than just a garden bed it becomes a sustainable outdoor retreat that works with nature, improves your landscape, and provides enjoyment for years to come.
Choosing the Perfect Location for Your Rain Garden Pod
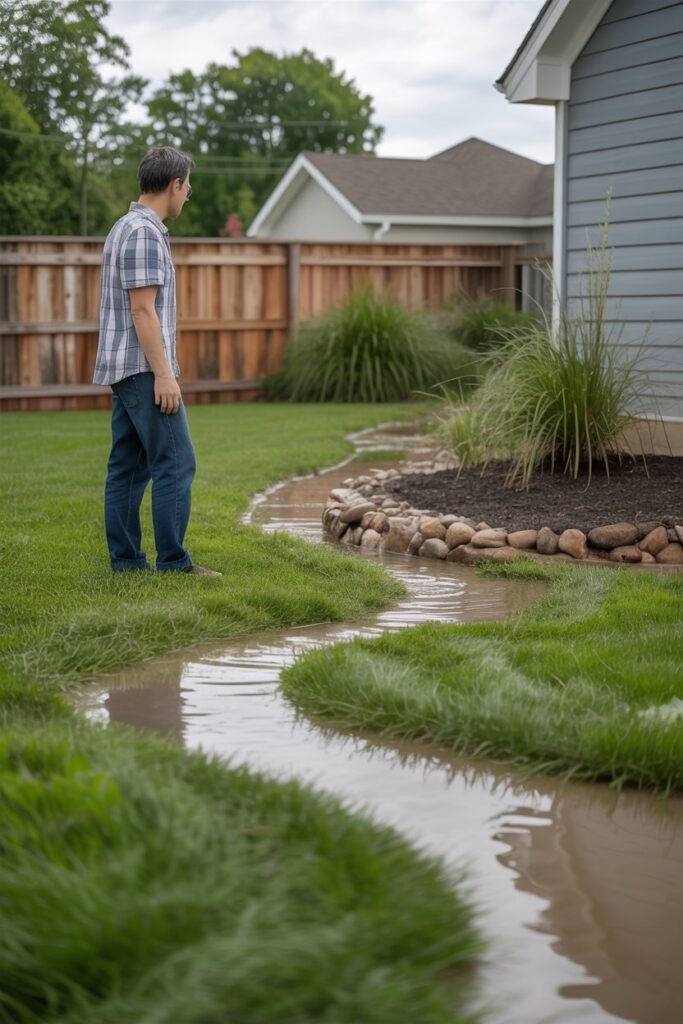
Selecting the right location is the most important step when building a rain garden pod. Even the best design and the healthiest plants won’t perform well if the garden is placed in the wrong spot.
A carefully chosen location allows the garden to collect rainwater naturally, drain properly, and thrive for years with minimal maintenance.
Before you start digging, spend some time observing your yard during and after a rainfall. Notice where water naturally flows, where puddles form, and which areas dry out quickly.
These observations will help you identify the best place for your rain garden pod.
Look for Natural Water Flow
A rain garden pod should be positioned where rainwater naturally collects or can easily be directed.
Good water sources include:
- Roof downspouts
- Driveway runoff
- Patio drainage
- Sidewalk runoff
- Gently sloping lawns
Rather than pumping water into the garden, let gravity do the work. This reduces installation costs and creates a more efficient drainage system.
If water doesn’t naturally reach the area you want to use, you can install a shallow swale, decorative rock channel, or underground drainage pipe to guide it into the garden.
Keep a Safe Distance from Your Home
Although a rain garden pod is designed to manage water, it should never be placed directly beside your home’s foundation.
As a general rule, position the garden at least 10 feet (3 meters) away from your house. This helps prevent excess moisture from collecting near the foundation and reduces the risk of water-related structural problems.
If your property has a basement, crawl space, or retaining walls, increasing this distance can provide additional protection.
Avoid Areas That Stay Wet All the Time
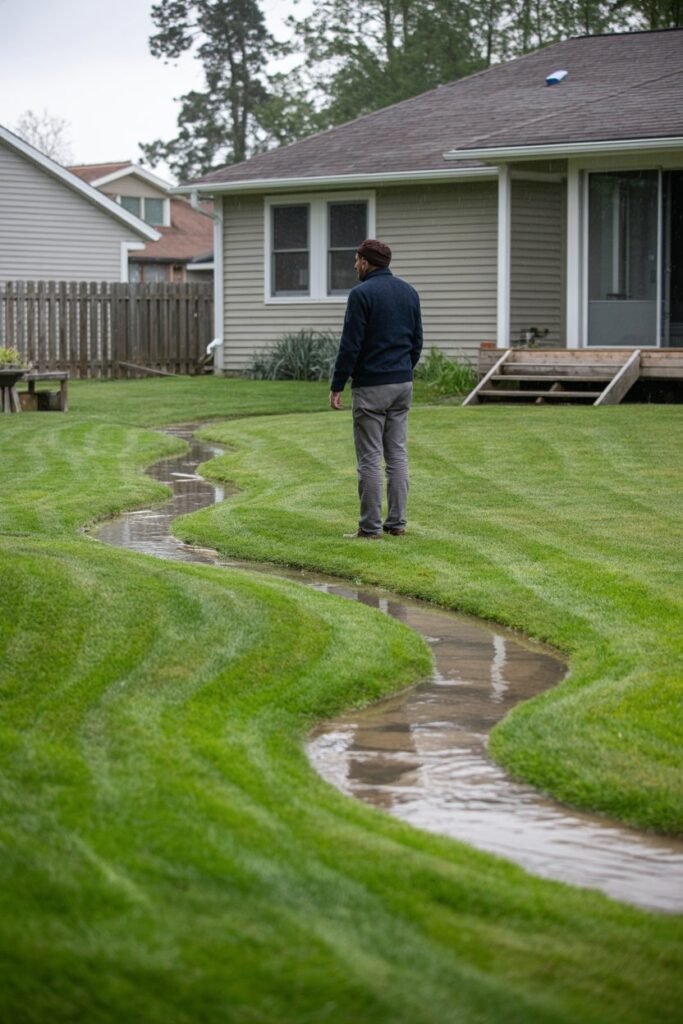
A rain garden pod is not the same as a pond or bog garden.
After a rainfall, water should drain away within 24 to 48 hours. If an area remains flooded for several days, the soil may drain too slowly, making it unsuitable for a traditional rain garden.
Constantly saturated soil can lead to:
- Root rot
- Mosquito breeding
- Unhealthy plants
- Poor drainage performance
If your chosen location stays wet year-round, you may need to improve the soil or consider a different type of water garden instead.
Check the Slope of Your Yard
Gentle slopes work best because they naturally move water toward the rain garden without creating erosion.
The ideal slope is generally between 2% and 10%.
Gentle Slopes
These are excellent for directing runoff slowly into the garden while allowing water to spread evenly.
Flat Areas
Flat yards can still support a rain garden pod, but you may need to shape the basin slightly deeper or create shallow channels to guide water into it.
Steep Slopes
Very steep areas are more challenging because water moves too quickly and can wash away soil and mulch. If your yard has a steep incline, terraces or retaining walls may be needed before installing the rain garden.
Stay Away from Underground Utilities
Before digging, always identify the location of underground services such as:
- Water pipes
- Gas lines
- Electrical cables
- Internet or communication lines
- Irrigation systems
- Septic tanks and drain fields
Contact your local utility locating service before excavation. This simple step helps prevent costly damage and keeps everyone safe during construction.
Consider Sunlight
Different plants have different light requirements, so evaluate how much sunlight your chosen location receives throughout the day.
Full Sun (6–8 Hours)
This is ideal for most flowering rain garden plants and encourages abundant blooms and strong growth.
Partial Sun (3–6 Hours)
Many native shrubs, grasses, and perennials perform well with partial sunlight.
Shade
Shady locations can still become successful rain gardens, but you’ll need to select shade-tolerant plants that thrive in lower light conditions.
Spend a day observing the area or use a garden journal to track sunlight before making your final decision.
Test the Soil Drainage
Even if the location looks perfect, the soil needs to absorb water efficiently.
A simple drainage test can help.
Step 1
Dig a hole about 12 inches deep and 12 inches wide.
Step 2
Fill the hole with water and allow it to drain completely. This wets the surrounding soil.
Step 3
Fill the hole again with water.
Step 4
Measure how long it takes for the water level to disappear.
A suitable rain garden site should generally drain within 24 hours. If water remains much longer, you may need to improve the soil with compost and coarse sand or choose another location.
Think About Visibility
A rain garden pod should be practical, but it can also become one of the most attractive features in your landscape.
Consider placing it where it can be enjoyed from:
- A patio
- Your kitchen window
- A deck
- An outdoor seating area
- The front entrance
Watching flowers bloom, butterflies visit, and birds gather after rainfall adds another layer of enjoyment to your garden.
Allow Room for Growth
Plants that look small in the nursery often grow much larger after a few seasons.
When selecting a location, leave enough space for:
- Mature shrubs
- Spreading grasses
- Flower clusters
- Walking paths
- Garden edging
- Future additions
Avoid overcrowding the area, as good air circulation helps reduce disease and keeps maintenance easier.
Plan for Safe Overflow
Heavy storms may produce more water than your rain garden pod can temporarily hold.
Every rain garden should include an overflow route that safely directs excess water away without causing erosion or flooding.
Good overflow options include:
- A shallow grass swale
- A gravel spillway
- A drainage channel leading to another landscaped area
- Existing stormwater drainage systems where permitted
Never allow overflow water to flow toward your home’s foundation or neighboring properties.
Observe Your Yard Through Different Seasons
Your yard changes throughout the year. An area that seems ideal in summer may behave differently during spring rains or autumn storms.
Spend time observing:
- Where snow melts (if applicable)
- Where heavy rain collects
- How quickly different areas dry
- How sunlight shifts with the seasons
- Whether nearby trees create dense shade later in the year
These observations help you choose a location that performs well all year long.
Quick Location Checklist
Before breaking ground, make sure your chosen site meets these key requirements:
- Receives runoff naturally from roofs or hard surfaces.
- Is at least 10 feet away from your home’s foundation.
- Drains within 24–48 hours.
- Has a gentle slope or level surface.
- Is clear of underground utilities.
- Receives appropriate sunlight for your chosen plants.
- Has enough space for mature plant growth.
- Includes a safe overflow route for heavy rainfall.
- Can be easily accessed for maintenance.
Choosing the right location lays the foundation for a successful rain garden pod. Once you’ve identified the ideal spot, the next step is to determine its size and shape.
Careful planning at this stage ensures the garden captures enough rainwater, blends naturally with your landscape, and remains easy to maintain for years to come.
Planning the Size and Shape of Your Rain Garden Pod
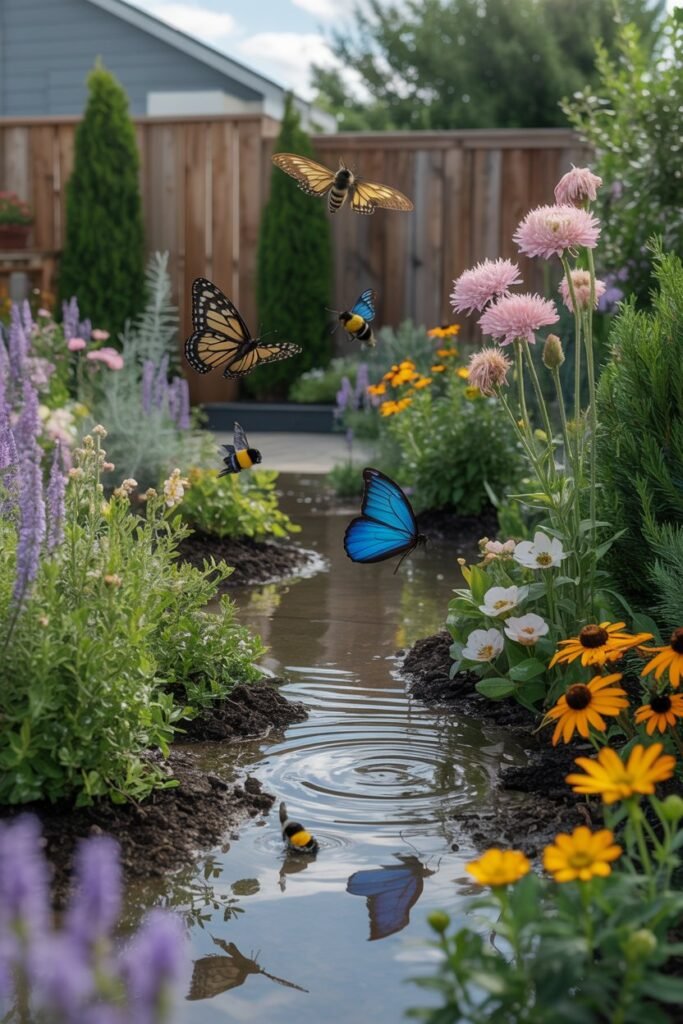
Once you’ve chosen the right location, it’s time to decide how big your rain garden pod should be. The size and shape should fit your available space while being large enough to capture rainwater effectively.
Choose the Right Size
Your rain garden doesn’t have to be huge to make a difference. A small rain garden pod can still help reduce runoff and improve drainage.
As a general guide:
- Small gardens: 50–100 square feet
- Medium gardens: 100–200 square feet
- Large gardens: 200+ square feet
A rain garden is often sized at 20–30% of the area draining into it. For example, if your roof section collects water from a 500-square-foot area, a rain garden of about 100–150 square feet is usually a good starting point.
Decide on the Shape
Rain garden pods can be designed in almost any shape. Choose one that blends naturally with your landscape.
Popular shapes include:
- Kidney-shaped
- Oval
- Circular
- Curved
- Freeform natural designs
Avoid sharp corners or perfectly straight lines if you want a more natural look.
Consider the Depth
Most rain garden pods only need to be 4 to 8 inches deep. This shallow basin temporarily holds rainwater before it slowly soaks into the soil.
A garden that is too deep may hold water longer than necessary, while one that is too shallow may overflow during heavy rain.
Leave Room for Plants
As you plan the layout, think about where different plants will grow.
- Place taller shrubs and grasses toward the back or center.
- Use medium-sized flowering plants around them.
- Add low-growing ground covers along the edges for a neat finish.
This creates layers of color and texture while giving each plant enough room to mature.
Think About Access
Leave space to comfortably reach your plants for weeding, pruning, and mulching. If your rain garden pod is large, consider adding stepping stones or a narrow path for easy access without compacting the soil.
Keep It Balanced
Your rain garden pod should complement the rest of your landscape. A well-proportioned design that matches your home’s style will look intentional and inviting while providing excellent drainage and year-round beauty.
Testing Your Soil Drainage
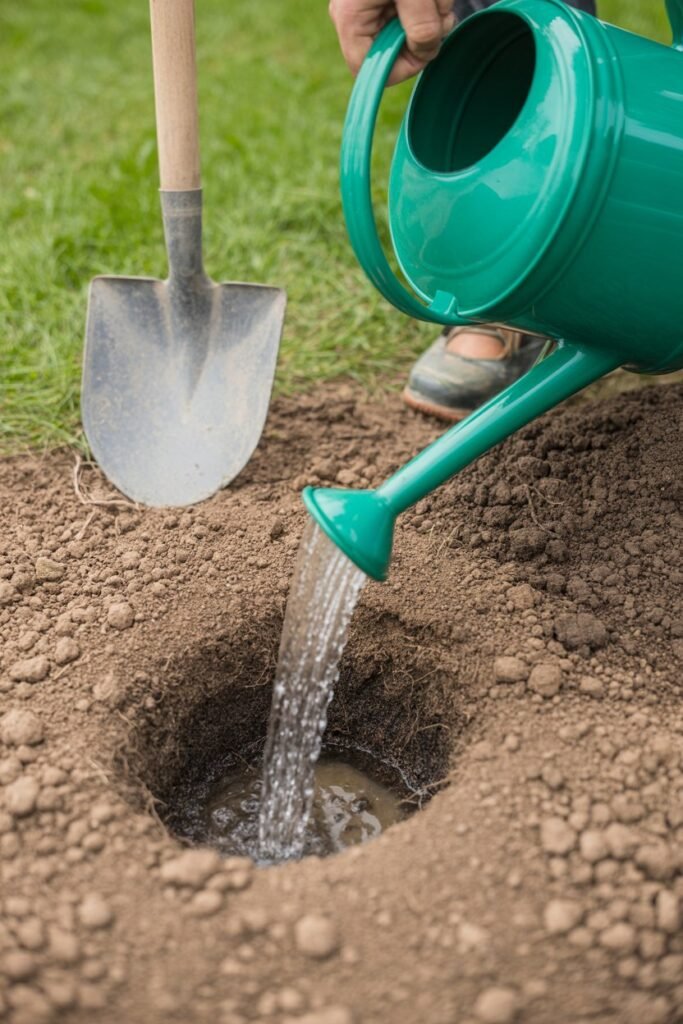
Before you start digging, it’s important to test how well your soil drains.
A rain garden pod is designed to temporarily hold rainwater, but the water should soak into the ground within 24 to 48 hours. If the soil drains too slowly, your plants may struggle, and standing water can become a problem.
How to Test Your Soil
Follow these simple steps:
- Dig a hole about 12 inches deep and 12 inches wide.
- Fill the hole with water and let it drain completely. This saturates the soil.
- Fill the hole again with water.
- Check the water level every hour to see how quickly it drains.
Understanding the Results
- Drains within 24 hours: Excellent! Your soil is well-suited for a rain garden pod.
- Drains within 24–48 hours: Good. The site should work with the right plants.
- Takes longer than 48 hours: The soil drains too slowly and may need improvement before planting.
How to Improve Poor Drainage
If your soil doesn’t drain well, don’t worry. You can improve it by:
- Mixing in compost to increase soil structure.
- Adding coarse sand if recommended for your soil type.
- Loosening compacted soil before planting.
- Avoiding heavy foot traffic that compresses the soil.
Know Your Soil Type
Different soils absorb water at different rates:
- Sandy soil: Drains quickly but may dry out faster.
- Loamy soil: Ideal for most rain gardens because it balances drainage and moisture.
- Clay soil: Holds water longer and may need amendments to improve drainage.
Taking a few minutes to test your soil before building can save time and help ensure your rain garden pod stays healthy, attractive, and effective for years to come.
Designing Your Rain Garden Pod
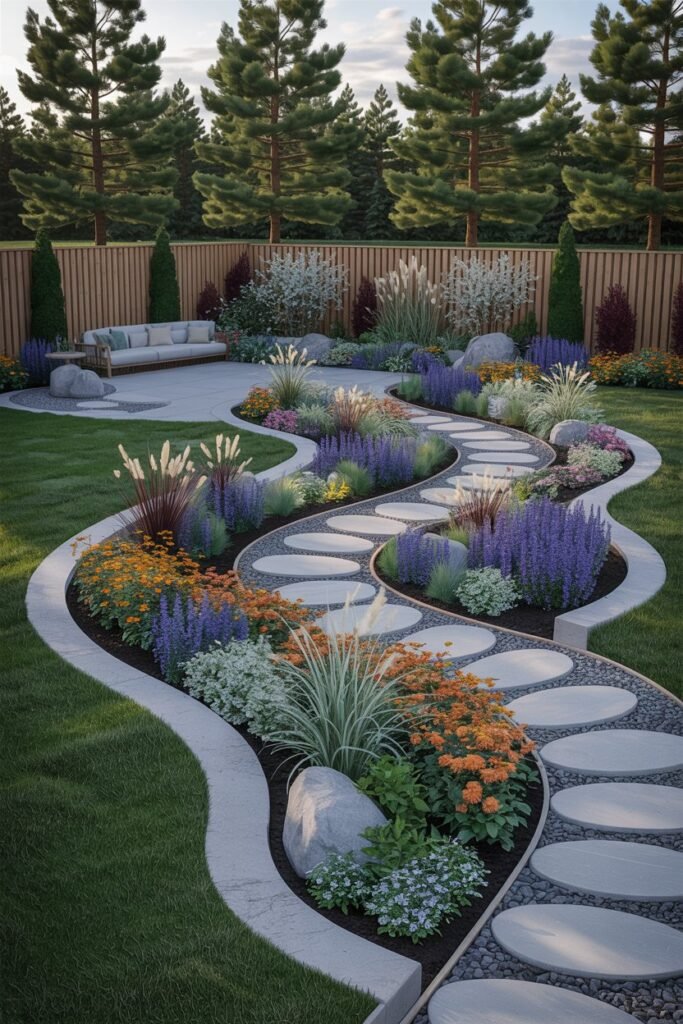
Now comes the fun part designing your rain garden pod. A good design should be both practical and attractive, allowing it to manage rainwater while creating a relaxing outdoor space.
Start with a Simple Layout
Sketch your ideas on paper before you begin. Mark the location of the rain garden, nearby buildings, walkways, trees, and where rainwater will enter and exit the garden.
A simple plan makes the building process much easier.
Create Planting Zones
Arrange plants based on how much moisture they will receive.
- Center: Plant moisture-loving flowers, grasses, and perennials that can handle occasional standing water.
- Middle Area: Choose plants that prefer evenly moist soil.
- Outer Edge: Use plants that like slightly drier conditions since this area drains the fastest.
This planting method helps each plant grow in the conditions it prefers.
Add Decorative Features
Your rain garden pod can be both functional and beautiful. Consider adding:
- Natural boulders
- Decorative gravel
- Stepping stones
- A wooden bench
- A bird bath
- Garden edging
- A small pathway
These features make the space more inviting while blending it into the rest of your landscape.
Choose a Natural Look
Instead of straight lines and sharp corners, use gentle curves to give your rain garden a more natural appearance. Curved edges also help the garden blend seamlessly with lawns, flower beds, and other landscape features.
Plan for Easy Maintenance
Leave enough space between plants so they have room to grow. Make sure you can easily reach every part of the garden for weeding, mulching, and pruning without stepping on the planting area.
A well-designed rain garden pod should be easy to care for while providing year-round beauty and effective rainwater management.
Selecting the Right Plants
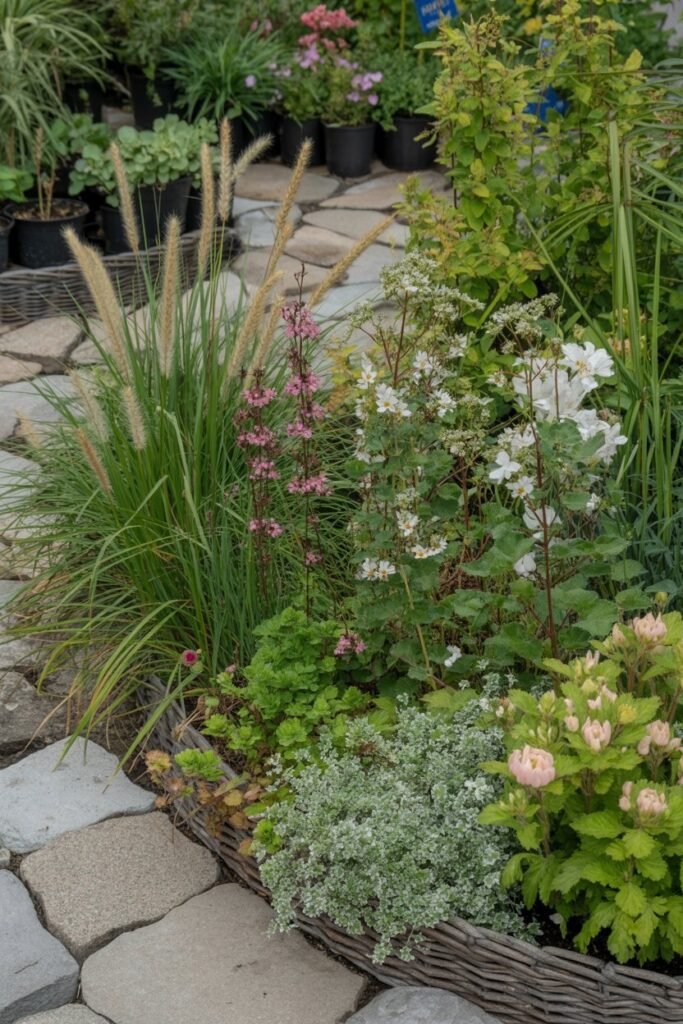
The plants you choose will determine how well your rain garden pod performs and how attractive it looks throughout the year. The best choices are plants that can handle both wet conditions after rainfall and drier periods between storms.
Choose Native Plants
Native plants are the best option because they are adapted to your local climate and soil. They usually require less watering, less fertilizer, and less maintenance once established.
They also provide food and shelter for birds, butterflies, bees, and other beneficial wildlife.
Mix Different Plant Types
A combination of plants creates a balanced and visually appealing garden. Consider including:
- Flowering perennials for seasonal color
- Ornamental grasses for texture and movement
- Shrubs for structure and height
- Ground covers to reduce weeds and protect the soil
Using a variety of plants also extends the garden’s interest throughout the seasons.
Match Plants to Moisture Levels
Not every part of your rain garden pod will stay equally wet, so plant accordingly.
- Center: Moisture-loving plants that tolerate occasional standing water.
- Middle: Plants that prefer consistently moist soil.
- Edges: Drought-tolerant plants that like well-drained conditions.
This planting strategy helps each plant thrive in its ideal environment.
Think About Year-Round Interest
Choose plants with different bloom times, foliage colors, and textures so your garden looks attractive in every season.
Flowers can provide color in spring and summer, while grasses, seed heads, and evergreen shrubs add beauty during autumn and winter.
Avoid Invasive Species
Avoid plants that spread aggressively or outcompete other species. Instead, select well-behaved varieties that will grow without taking over the garden.
With the right mix of plants, your rain garden pod will become a healthy, low-maintenance landscape feature that supports wildlife, manages rainwater, and adds beauty to your yard year after year.
Preparing the Site
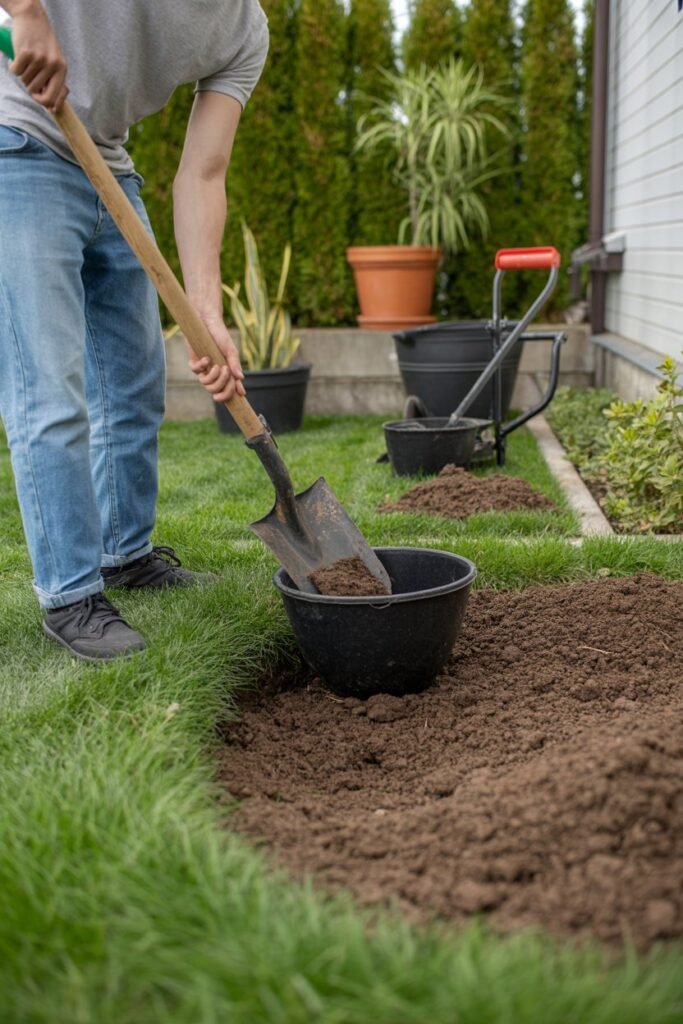
With your design complete and plants selected, it’s time to prepare the site. Taking the time to prepare the area properly will make planting easier and help your rain garden pod function effectively from the very beginning.
Mark the Outline
Start by marking the shape of your rain garden on the ground. You can use:
- Garden hose
- Rope
- Spray marking paint
- Wooden stakes and string
Walk around the outline and view it from different angles. This gives you a chance to adjust the shape before any digging begins. Soft curves usually create a more natural and attractive appearance.
Remove Grass and Weeds
Clear the entire area of existing grass, weeds, and unwanted plants. Removing vegetation now prevents it from competing with your new plants for water and nutrients.
For smaller gardens, you can use a shovel or sod cutter to remove the grass. If you’re working on a larger area, consider renting a sod cutter to save time and effort.
Be sure to remove as many weed roots as possible, especially for invasive weeds, to reduce future maintenance.
Dig the Basin
Using your design as a guide, dig a shallow basin that is 4 to 8 inches deep. Keep the bottom as level as possible so rainwater spreads evenly across the garden instead of collecting in one spot.
Place the excavated soil around the lower edge of the garden if needed to create a small berm. This helps hold rainwater inside the basin during heavy showers.
Improve the Soil
Healthy soil is essential for a successful rain garden pod. If your soil is compacted or heavy with clay, loosen it with a garden fork and mix in organic compost. This improves drainage while adding nutrients that support healthy root growth.
Avoid adding large amounts of fertilizer at this stage, as excessive nutrients can wash away with rainwater.
Create the Water Inlet
Next, prepare the point where rainwater will enter the garden. This could be from a downspout, gravel channel, or shallow swale.
To prevent erosion, line the inlet with decorative stones or gravel. This slows the water as it enters the basin and protects the surrounding soil.
Plan the Overflow
Every rain garden pod should have an overflow area for heavy storms. Shape one side of the garden slightly lower than the rest so excess water can safely flow out without washing away mulch or plants.
Direct the overflow toward a lawn, drainage swale, or another safe location away from your home’s foundation.
Add a Layer of Mulch
Before planting, spread a 2 to 3-inch layer of shredded hardwood mulch over the prepared soil. Mulch helps retain moisture, suppress weeds, reduce soil erosion, and give the garden a neat, finished appearance.
Avoid floating mulches like lightweight wood chips, as they can wash away during heavy rain.
Final Check Before Planting
Before you start planting, take a few minutes to inspect your work.
- The basin is level.
- The inlet allows water to flow smoothly.
- The overflow path is clear.
- The soil is loose and well-prepared.
- Grass and weeds have been removed.
- Mulch is ready to be spread after planting if you prefer to mulch last.
With the site fully prepared, you’re ready for the most rewarding part of the project planting your rain garden pod and bringing your design to life.
Building the Rain Garden Pod Step by Step
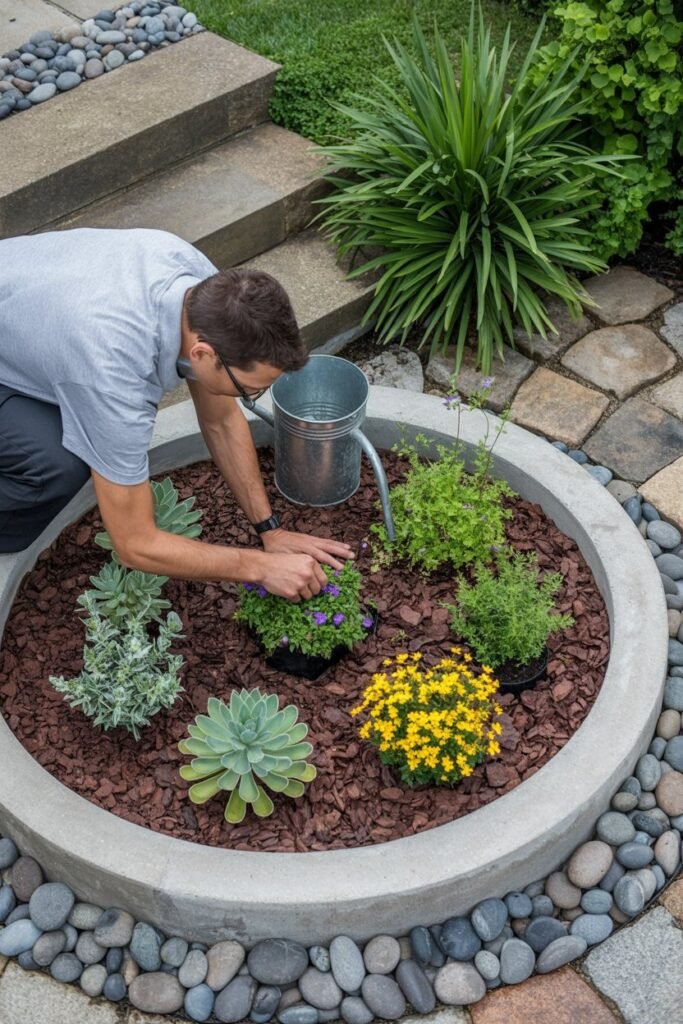
Now that the site is prepared, it’s time to build your rain garden pod. Taking the process one step at a time will help you create a garden that is both beautiful and effective at managing rainwater.
Step 1: Position Your Plants
Before digging any planting holes, place each plant in its pot on the soil according to your design.
Arrange taller plants toward the back or center of the garden, medium-sized plants around them, and shorter plants along the edges. Step back and view the layout from different angles to make sure you’re happy with the arrangement before planting.
Step 2: Dig the Planting Holes
Dig each hole about twice as wide as the plant’s root ball and just as deep as the container it came in. This gives the roots plenty of room to spread while keeping the plant at the correct depth.
Avoid planting too deeply, as this can lead to poor growth and root problems.
Step 3: Plant Carefully
Remove each plant from its container and gently loosen any tightly packed roots. Place the plant in the hole so the top of the root ball is level with the surrounding soil.
Fill the hole with soil, pressing it down gently to remove air pockets without compacting it too much.
Step 4: Water the Plants
Even though your rain garden is designed to collect rainwater, newly planted flowers and shrubs need extra watering while they become established.
Water each plant thoroughly after planting, and continue watering during dry periods for the first growing season.
Step 5: Apply Mulch
Spread a 2 to 3-inch layer of shredded hardwood mulch around the plants. Keep the mulch a few inches away from the base of each plant to prevent rot.
Mulch helps conserve moisture, reduces weeds, and protects the soil from erosion during heavy rain.
Step 6: Check the Water Flow
Once everything is planted, test the garden by running water from a hose into the inlet or waiting for the next rainfall.
Watch how the water moves through the basin. It should spread evenly across the garden without creating deep puddles or washing away soil. If needed, make small adjustments to the inlet, basin, or overflow area.
Step 7: Monitor During the First Few Weeks
Your rain garden pod will need a little extra attention while it settles in. Check it regularly to:
- Remove weeds before they spread.
- Replace any mulch that has washed away.
- Water plants during dry weather.
- Make sure the inlet and overflow remain clear.
- Look for signs that plants are growing well.
With a little care during the first season, your rain garden pod will quickly establish itself. As the plants mature and their roots grow deeper, the garden will become more efficient at absorbing rainwater and require much less maintenance.
Adding Decorative Features
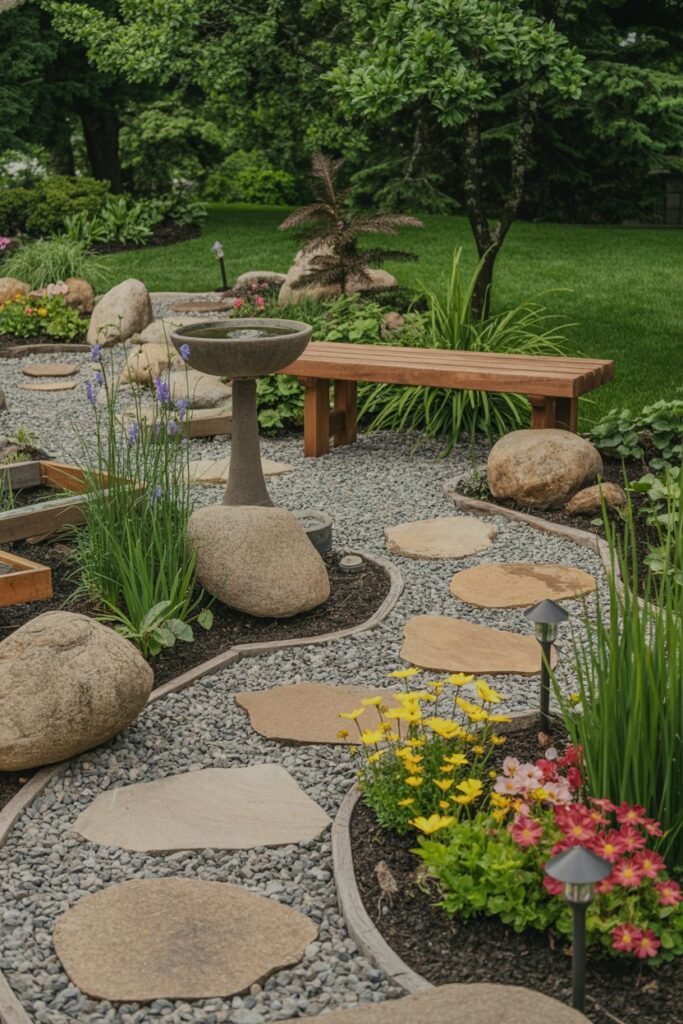
Once your rain garden pod is planted, you can enhance it with decorative features that make it feel like a true outdoor retreat. The right additions not only improve its appearance but can also make the space more enjoyable and functional.
Add Natural Stones and Boulders
Large rocks and decorative boulders give the garden a natural look while helping to slow the flow of rainwater. Place them around the edges or near the water inlet to create visual interest and reduce erosion.
Create a Walking Path
A simple path allows you to enjoy your rain garden without stepping on the soil or damaging plants. Good materials include:
- Stepping stones
- Gravel
- Natural flagstone
- Brick pavers
Curved paths often look more inviting and blend better with the garden’s natural shape.
Include a Seating Area
If space allows, add a small bench or a pair of garden chairs nearby. This creates a peaceful spot where you can relax, watch birds and butterflies, or enjoy the garden after a rainfall.
Choose weather-resistant materials such as wood, metal, or recycled plastic for long-lasting durability.
Install Garden Edging
Edging helps define the rain garden pod and prevents mulch from spreading into the lawn. Popular edging materials include:
- Natural stone
- Brick
- Metal edging
- Timber
- Recycled landscape edging
A neat border gives the garden a polished, finished appearance.
Add Wildlife-Friendly Features
Encourage more wildlife to visit your garden by including features such as:
- A bird bath
- Bird feeders
- Bee hotels
- Butterfly puddling stones
- Small logs or rocks for beneficial insects
These additions help turn your rain garden pod into a thriving habitat for pollinators and other helpful garden visitors.
Use Outdoor Lighting
Low-voltage or solar-powered lights can highlight pathways, plants, or decorative stones while making the garden enjoyable in the evening. Soft lighting creates a warm, welcoming atmosphere without overwhelming the natural setting.
Keep It Simple
Avoid overcrowding the garden with too many ornaments. Let the plants remain the main attraction, and use decorative features to complement the landscape rather than compete with it.
With a few carefully chosen additions, your rain garden pod can become more than a drainage solution it can be a relaxing outdoor space that combines beauty, nature, and practical function.
Mulching the Garden
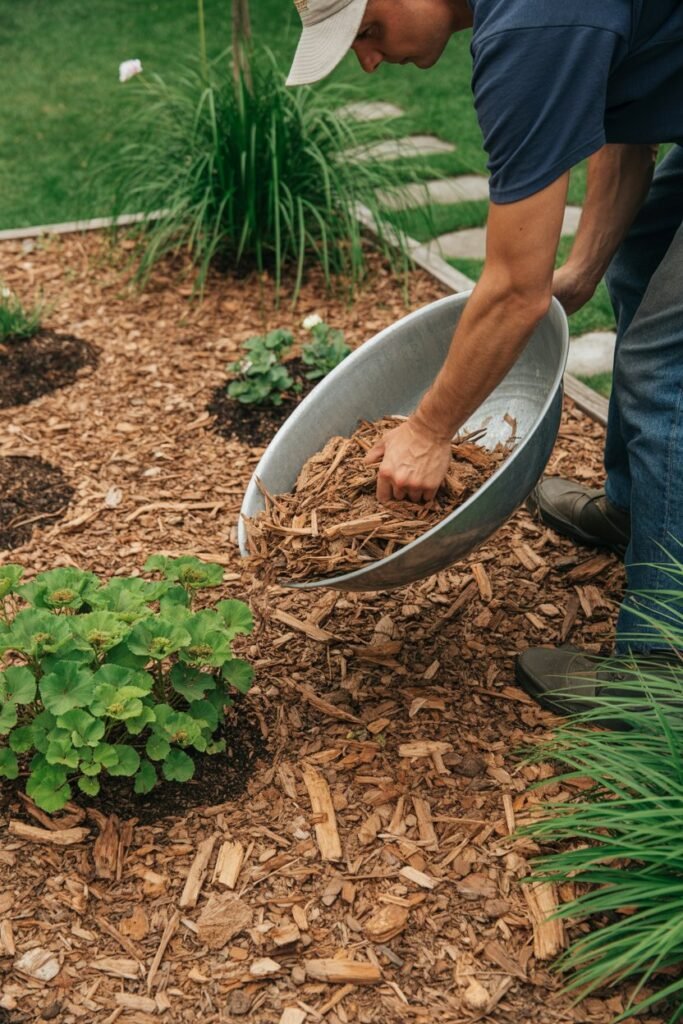
Mulching is one of the simplest yet most important steps in maintaining a healthy rain garden pod. A good layer of mulch protects the soil, helps retain moisture, reduces weeds, and prevents soil from washing away during heavy rain.
Choose the Right Mulch
Not all mulch is suitable for a rain garden. Since the area will occasionally receive large amounts of water, choose a mulch that stays in place and breaks down slowly.
Good options include:
- Shredded hardwood mulch
- Pine bark mulch
- Aged wood chips
- Leaf mulch
Avoid lightweight mulches, such as fresh wood shavings or fine sawdust, as they can easily float away during heavy rainfall.
Apply the Correct Amount
Spread a layer of mulch about 2 to 3 inches deep across the entire garden. This is enough to protect the soil without preventing water from soaking into the ground.
Keep the mulch a few inches away from the stems and trunks of plants to reduce the risk of rot and pest problems.
Benefits of Mulching
A properly mulched rain garden offers several advantages:
- Helps the soil retain moisture during dry weather.
- Reduces weed growth, making maintenance easier.
- Protects the soil from erosion during heavy rain.
- Keeps soil temperatures more stable throughout the year.
- Gradually adds organic matter to the soil as it decomposes.
Refresh Mulch When Needed
Over time, mulch naturally breaks down and becomes part of the soil. Check your rain garden pod each spring and add a fresh layer where needed to maintain the recommended depth.
Also inspect the garden after heavy storms. If mulch has shifted or washed away, simply rake it back into place or add more if necessary.
With the right mulch and regular upkeep, your rain garden pod will stay healthier, require less maintenance, and continue to look neat and attractive throughout the seasons.
Managing Rainwater Effectively
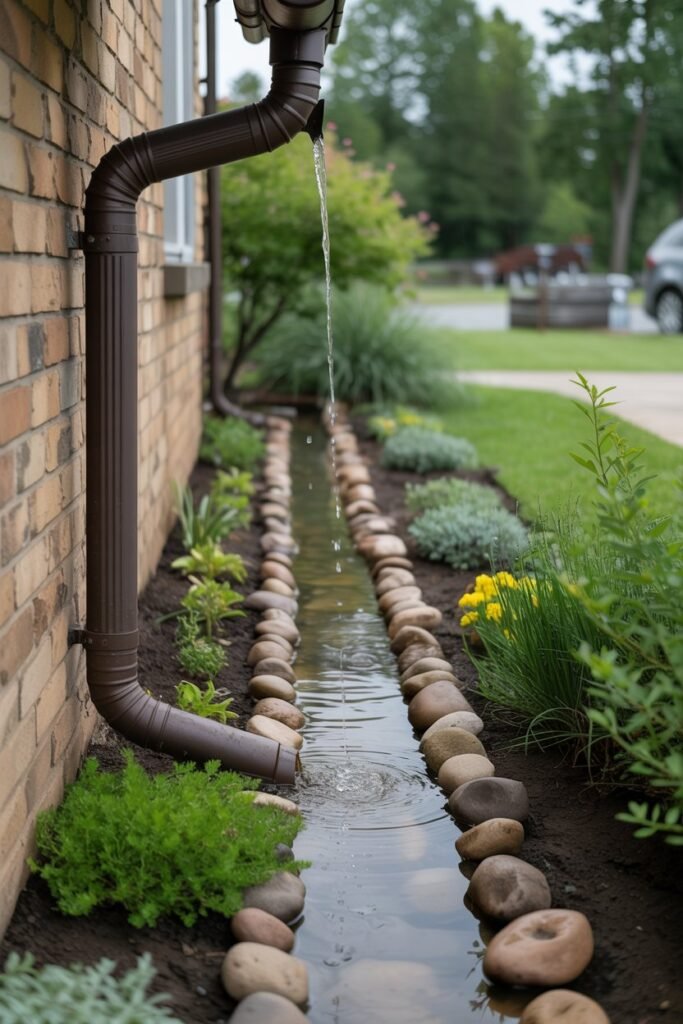
A rain garden pod is designed to capture and absorb rainwater, but it still needs to be managed properly to perform at its best. With a few simple practices, you can ensure your garden handles both light showers and heavy storms efficiently.
Direct Water into the Garden
Guide rainwater from your roof, driveway, or patio into the rain garden using:
- Downspout extensions
- Gravel-lined channels
- Shallow swales
- Drainage pipes
Make sure the water enters the garden gently to avoid washing away soil or mulch.
Check the Inlet Regularly
Leaves, twigs, and other debris can block the inlet over time. Inspect it after heavy rain and remove anything that may prevent water from flowing freely into the garden.
A clear inlet helps the rain garden collect water as intended.
Watch for Standing Water
After a storm, it’s normal for water to collect in the basin for a short time. However, it should drain away within 24 to 48 hours.
If water remains longer than that, it may be a sign that the soil is compacted or the garden needs better drainage.
Keep the Overflow Clear
During very heavy rainfall, excess water should leave the garden through the overflow area. Check that this path is free of mulch, rocks, or plant debris so water can exit safely without causing erosion.
Inspect After Heavy Storms
Take a quick walk through your rain garden after major rain events and look for:
- Soil erosion
- Washed-away mulch
- Blocked drainage paths
- Damaged plants
- Low spots that hold too much water
Fixing small issues early will keep your rain garden pod working efficiently and reduce the need for larger repairs later.
By monitoring how your rain garden handles rainfall throughout the year, you’ll keep it healthy, attractive, and ready to manage every storm that comes your way.
Seasonal Care and Maintenance
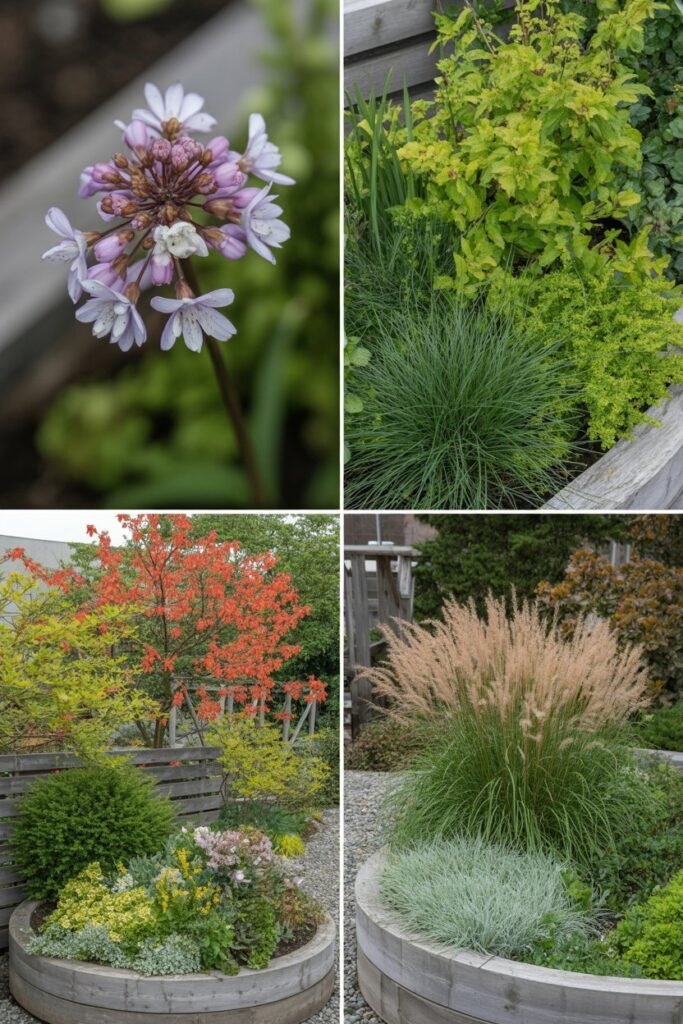
A rain garden pod is fairly low-maintenance once it’s established, but regular seasonal care will keep it looking its best and functioning properly. Spending a little time each season can prevent problems and encourage healthy plant growth.
Spring
Spring is the perfect time to prepare your rain garden for the growing season.
Tasks to complete include:
- Remove leaves and other winter debris.
- Cut back dead stems and grasses.
- Pull out weeds before they spread.
- Add a fresh layer of mulch if needed.
- Check the inlet and overflow for blockages.
- Replace any plants that didn’t survive the winter.
Summer
During summer, focus on keeping plants healthy, especially if your rain garden is new.
- Water newly planted gardens during long dry spells.
- Remove weeds regularly.
- Watch for signs of pests or diseases.
- Prune plants lightly to encourage healthy growth.
- Check that water is draining properly after rainfall.
Once established, most native plants will need very little extra watering.
Autumn
Autumn is a great time to tidy the garden and prepare it for colder weather.
- Remove fallen leaves if they block water flow.
- Cut back plants that have finished flowering.
- Divide overcrowded perennials if needed.
- Add compost around plants to improve the soil.
- Inspect the garden after seasonal storms.
Leave some seed heads and ornamental grasses standing if you want to provide food and shelter for birds during winter.
Winter
Although plant growth slows, your rain garden still needs occasional attention.
- Remove branches or debris after storms.
- Check that the overflow area remains open.
- Avoid piling snow or heavy materials onto the garden.
- Plan any changes or new plant additions for spring.
Perform an Annual Inspection
At least once a year, inspect your entire rain garden pod. Make sure the basin is still level, the inlet and overflow are working properly, and plants are healthy.
Addressing small issues early will help your rain garden continue to manage rainwater effectively for many years.
With simple seasonal maintenance, your rain garden pod will remain a beautiful, functional feature that benefits both your landscape and the environment.
Common Mistakes to Avoid
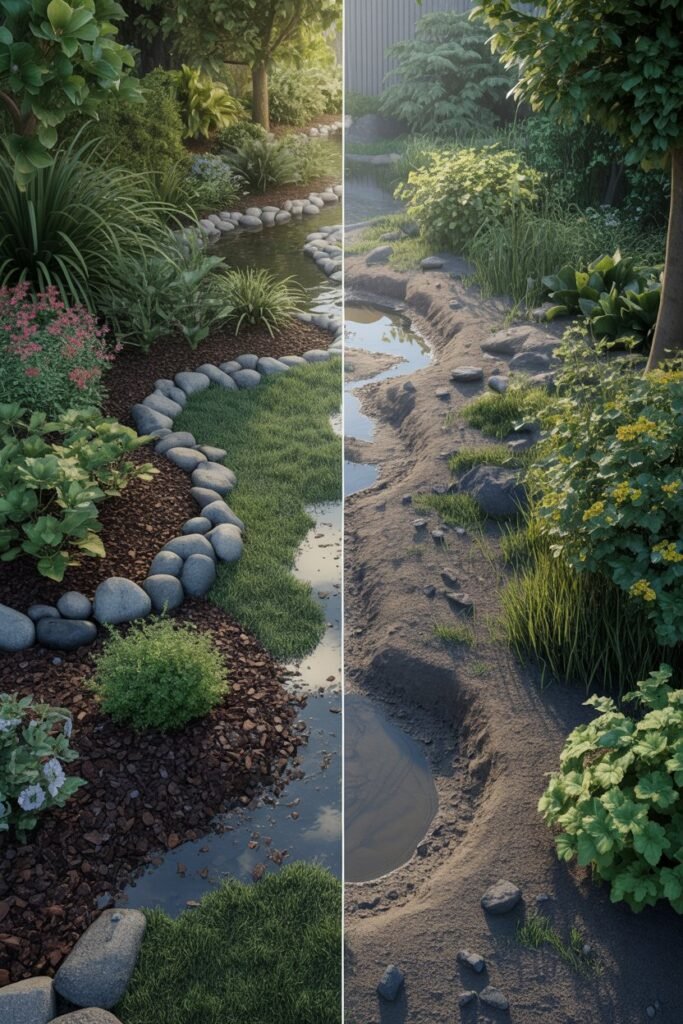
Building a rain garden pod is a rewarding project, but a few common mistakes can affect how well it performs. Avoiding these issues from the start will save you time, money, and extra maintenance in the future.
Choosing the Wrong Location
Placing a rain garden too close to your home’s foundation or in an area that never drains properly can lead to problems. Always choose a location that allows water to soak into the ground while directing it safely away from buildings.
Skipping the Soil Drainage Test
Many gardeners overlook this important step. Testing your soil before you build helps you determine whether the site is suitable or if the soil needs to be improved for better drainage.
Planting the Wrong Species
Not all plants can handle the changing moisture levels in a rain garden. Choose plants that are suited to your local climate and can tolerate both wet and dry conditions. Native plants are often the best choice because they are hardy and require less maintenance.
Making the Garden Too Deep
A rain garden pod is designed to temporarily hold water, not become a permanent pond. Digging the basin too deep can cause water to remain for too long, which may harm plants and attract mosquitoes.
Forgetting an Overflow Outlet
Heavy storms can bring more water than the garden can hold. Without a proper overflow path, water may spill over the edges and cause erosion or flooding in nearby areas.
Using Too Much Mulch
A thick layer of mulch can prevent water from reaching the soil and may wash away during heavy rain. Keep the mulch layer around 2 to 3 inches deep for the best results.
Neglecting Regular Maintenance
Even low-maintenance gardens need occasional care. Remove weeds, clear debris from the inlet, refresh mulch when needed, and check that water continues to drain properly after storms.
Expecting Instant Results
A new rain garden pod takes time to establish. During the first year, plants focus on developing strong root systems. With regular care and patience, the garden will become healthier, fuller, and more effective at managing rainwater each season.
By avoiding these common mistakes, you’ll create a rain garden pod that is attractive, easy to maintain, and capable of handling rainwater efficiently for many years.
Cost of Building a Rain Garden Pod
The cost of building a rain garden pod depends on its size, the materials you choose, and whether you do the work yourself or hire a professional. The good news is that you can create a beautiful and functional rain garden on almost any budget.
Average Cost
Here’s a general estimate:
| Garden Size | Estimated DIY Cost | Professional Installation |
|---|---|---|
| Small (50–100 sq. ft.) | $100–$400 | $800–$2,000 |
| Medium (100–200 sq. ft.) | $400–$800 | $2,000–$4,000 |
| Large (200+ sq. ft.) | $800–$1,500+ | $4,000+ |
Keep in mind that prices may vary depending on your location and the materials you select.
What You’ll Spend Money On
Your budget may include:
- Native plants
- Compost and soil amendments
- Mulch
- Gravel or decorative stones
- Edging materials
- Downspout extensions or drainage pipes
- Garden tools (if you don’t already own them)
- Optional features like benches, lighting, or bird baths
Ways to Save Money
Building a rain garden doesn’t have to be expensive. You can reduce costs by:
- Doing the digging and planting yourself.
- Starting with a smaller garden and expanding later.
- Using locally available stones or recycled materials.
- Buying young plants instead of mature ones.
- Dividing plants from your existing garden or swapping with friends.
- Making your own compost to improve the soil.
Is It Worth the Investment?
For many homeowners, the answer is yes. A rain garden pod can help reduce drainage problems, lower landscape maintenance over time, and create a beautiful outdoor space that supports pollinators and wildlife.
While there is an upfront cost, the long-term environmental and landscaping benefits often make it a worthwhile investment.
Whether you choose a simple DIY design or a professionally landscaped garden, careful planning will help you get the best value for your budget.
DIY vs. Hiring a Professional
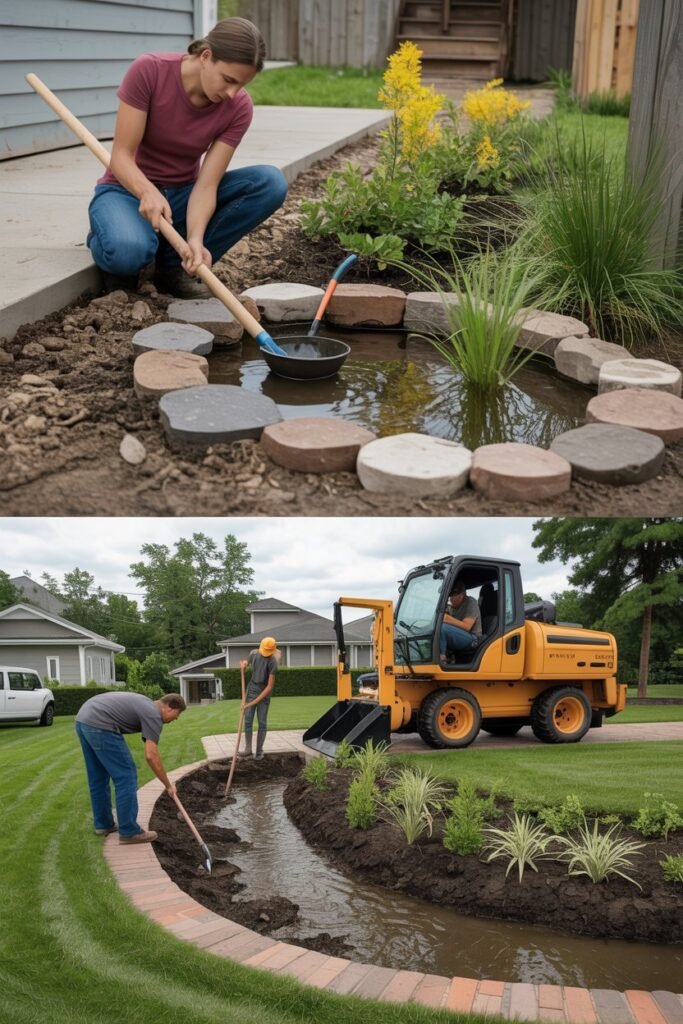
If you’re planning to build a rain garden pod, one of the first decisions you’ll need to make is whether to tackle the project yourself or hire a professional landscaper.
Both options have their advantages, and the right choice depends on your budget, experience, and the size of the project.
DIY: Best for Budget-Friendly Projects
Building your own rain garden pod can be a rewarding experience. It’s a great option if you enjoy gardening and have time to plan and complete the project.
Pros
- Lower overall cost
- Full control over the design
- Learn new gardening and landscaping skills
- Complete the project at your own pace
Cons
- Requires physical labor
- Takes more time to complete
- Mistakes in grading or drainage can affect performance
- You’ll need basic gardening tools and materials
A DIY project is ideal for small to medium-sized rain gardens with simple designs.
Hiring a Professional
If your property has complex drainage issues, steep slopes, or you want a large, professionally designed landscape, hiring an expert may be the better choice.
Pros
- Professional design and installation
- Proper grading for effective drainage
- Faster project completion
- Access to specialized equipment and experience
Cons
- Higher installation cost
- Less hands-on involvement
- Design changes during construction may increase costs
Which Option Is Right for You?
Choose DIY if you:
- Have basic gardening skills.
- Enjoy outdoor projects.
- Want to save money.
- Are building a smaller rain garden pod.
Consider hiring a professional if you:
- Have significant drainage problems.
- Need major landscaping work.
- Want a custom-designed garden.
- Prefer a quicker, hassle-free installation.
No matter which option you choose, careful planning and regular maintenance are the keys to creating a rain garden pod that is both beautiful and effective for years to come.
Frequently Asked Questions
1. What is the purpose of a rain garden pod?
A rain garden pod is designed to collect and absorb rainwater from roofs, driveways, patios, and other hard surfaces. It helps reduce runoff, improves drainage, filters pollutants, and creates a beautiful garden that supports birds, butterflies, and other wildlife.
2. How deep should a rain garden pod be?
Most rain garden pods are 4 to 8 inches deep. This is deep enough to temporarily hold rainwater while allowing it to soak into the soil within 24 to 48 hours.
3. Will a rain garden attract mosquitoes?
No. A properly designed rain garden should drain within 24 to 48 hours, which isn’t long enough for mosquitoes to complete their breeding cycle. If water remains for several days, you may need to improve the drainage.
4. What plants grow best in a rain garden pod?
The best plants are native species that can tolerate both wet and dry conditions. A mix of flowering perennials, ornamental grasses, shrubs, and ground covers will create a healthy, low-maintenance garden with year-round interest.
5. Can I build a rain garden in a small yard?
Yes. Rain garden pods can be designed to fit almost any outdoor space. Even a small garden can capture rainwater, improve drainage, and provide habitat for pollinators.
6. How often does a rain garden need maintenance?
Most maintenance involves seasonal tasks such as removing weeds, replacing mulch, trimming plants, and checking that the inlet and overflow remain clear. Once established, a rain garden pod requires much less maintenance than many traditional flower beds.
7. Do I need to water a rain garden?
Newly planted rain gardens should be watered during dry spells until the plants become established. After the first growing season, most native plants rely mainly on natural rainfall and need very little supplemental watering.
8. Can I build a rain garden myself?
Yes. Many homeowners successfully build their own rain garden pods using basic gardening tools and careful planning. If your yard has steep slopes or serious drainage issues, you may want to consult a professional before starting.
Final Thoughts
A rain garden pod is more than just a landscaping feature it’s a smart and sustainable way to manage rainwater while creating a beautiful outdoor space.
By capturing runoff, improving drainage, and supporting local wildlife, it brings both environmental and practical benefits to your yard.
With the right location, thoughtful design, and suitable plants, you can build a rain garden that thrives for years with minimal maintenance.
Whether you choose a simple DIY project or invest in a larger garden retreat, every rain garden pod helps make your landscape greener, healthier, and more resilient.
Start small if you’re new to rain gardening, learn as you go, and enjoy watching your garden flourish with every rainfall. The effort you put in today will reward you with a peaceful, vibrant space that benefits both your home and the environment for years to come.
