
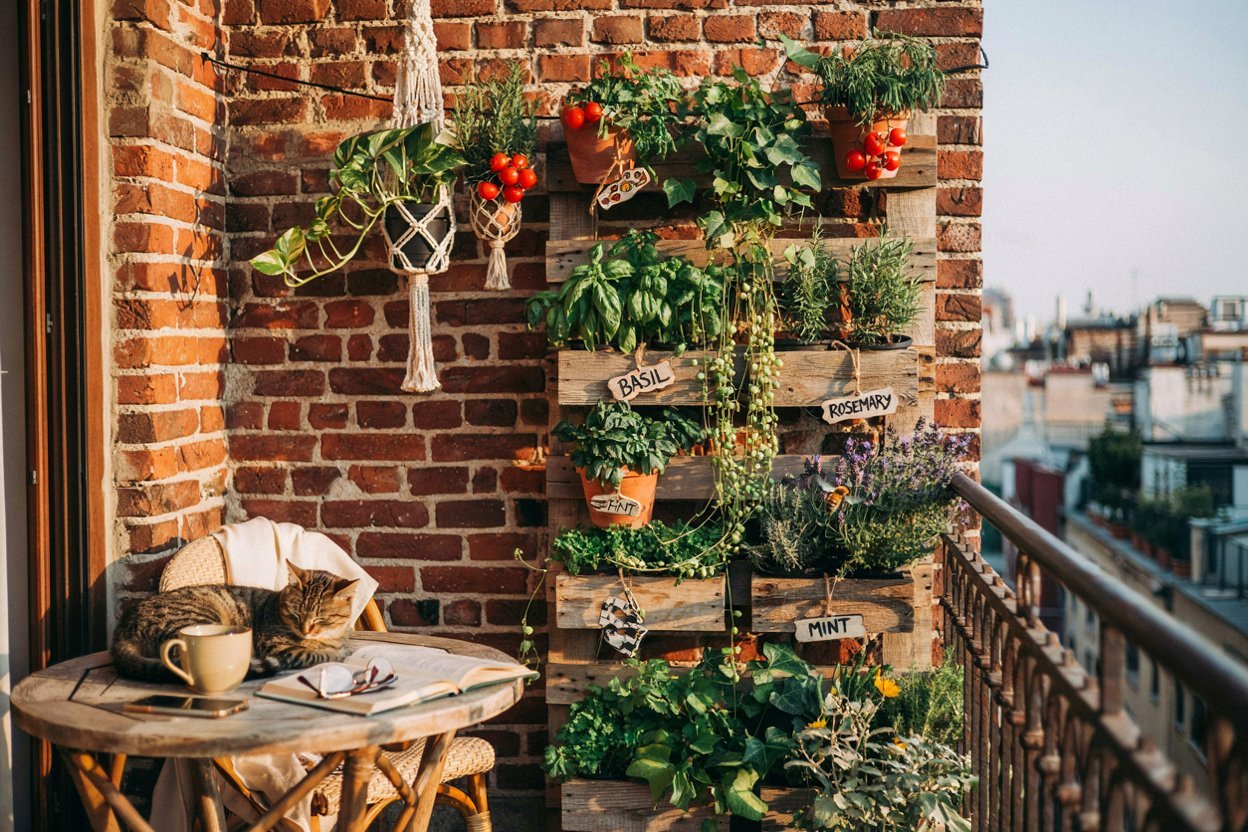

I’ve been gardening on balconies, fire escapes, and tiny patios for the better part of a decade, and if there’s one lesson the soil has taught me, it’s this: you don’t need square footage to grow something beautiful.
You need imagination, a few sturdy hooks, and the willingness to look up instead of out.
My first “garden” was a single wall of terracotta pots stacked on a bookshelf outside my apartment door, and watching those herbs and trailing vines climb toward the sun taught me more about plant care than any raised bed ever did.
If your outdoor space is more postage stamp than backyard, don’t worry I’ve gathered ten vertical garden ideas that have worked for me and for gardeners I’ve mentored over the years, complete with step-by-step guidance so you can start growing upward today.
Why Vertical Gardening Works So Well in Small Spaces
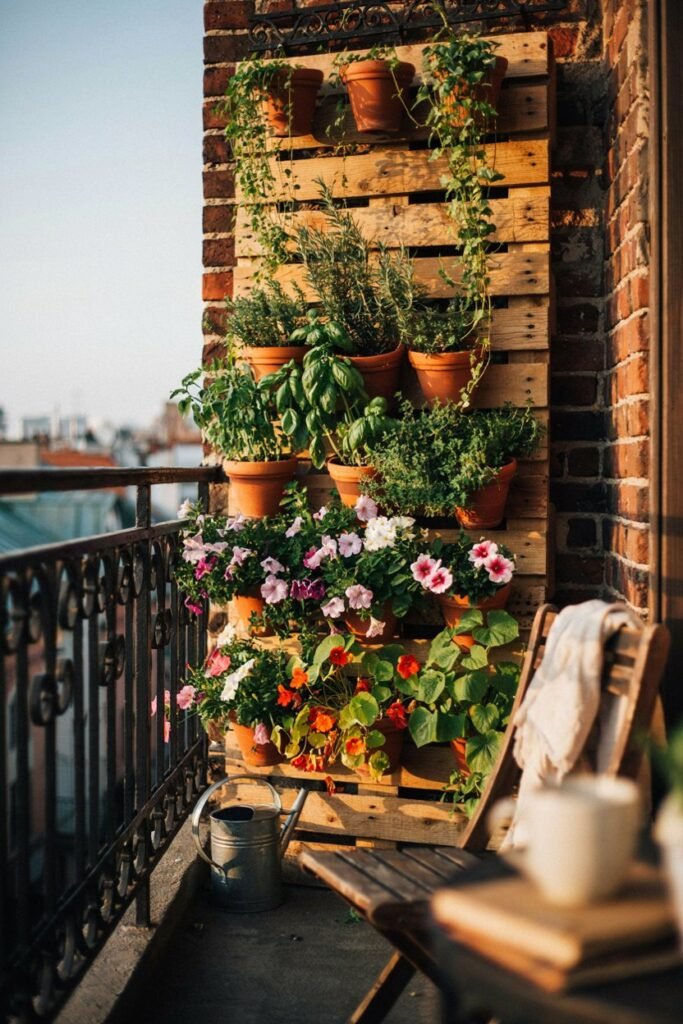
Before we dig into the ideas themselves, let’s talk about why this approach works. When you garden vertically, you’re essentially multiplying your growing area without moving a single fence post.
A wall that would otherwise sit bare becomes six, eight, or even twelve planting pockets. Airflow improves around your plants, which cuts down on fungal issues.
Harvesting herbs and greens becomes easier on your back because everything sits at eye level instead of down at your knees. And honestly, a well-designed vertical garden just looks stunning it turns a plain wall or railing into a living piece of art.
With that in mind, let’s get our hands dirty.
1. Pallet Planters
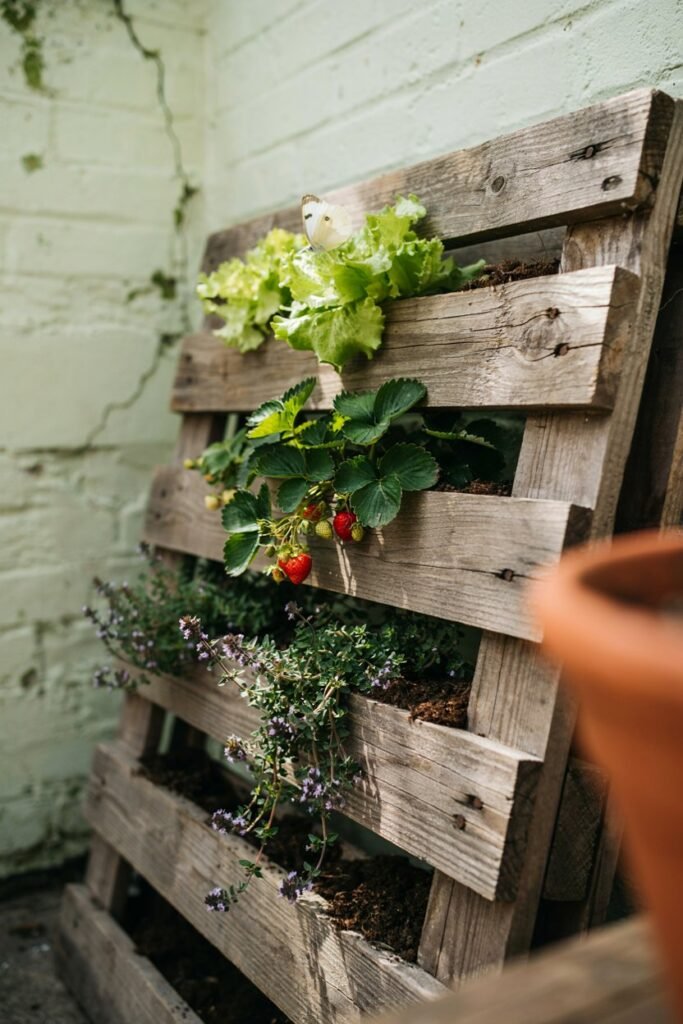
Wooden pallets are the unsung heroes of small-space gardening, and I say that as someone who has rescued more than a few from behind grocery stores (always ask first, and look for pallets stamped “HT” for heat-treated rather than “MB” for chemically fumigated).
Tools & materials needed:
- One standard wooden pallet
- Sandpaper (medium grit) or a sanding block
- Mild soap and water (for cleaning)
- Staple gun and staples
- Landscape fabric
- Lightweight potting mix
- Watering can with a fine rose head
- Work gloves
How to build it:
- Sand down any rough edges and give the pallet a light wash with a mild soap-and-water solution, then let it dry completely.
- Staple landscape fabric to the back and bottom of each slat gap to create a barrier that holds soil in but lets water drain.
- Lean the pallet against a sturdy wall for a day or two before planting, so the fabric can settle and you can check for gaps.
- Fill each slat pocket with a lightweight potting mix, packing it firmly but not too tight.
- Plant shallow-rooted crops like lettuce, strawberries, succulents, or trailing herbs such as thyme and oregano into the gaps between slats.
- Water gently at first using a watering can with a fine rose head, since a strong stream can wash soil right out of the pockets.
Let the pallet lie flat on the ground for the first week or two so roots can establish before you stand it upright. This single trick prevents the frustrating soil-avalanche that new pallet gardeners often run into.
2. Hanging Shoe Organizer Garden
This is the idea I recommend most often to beginners because it costs almost nothing and can be set up in an afternoon.
A canvas or fabric shoe organizer, the kind with rows of pockets meant for sneakers, becomes an instant multi-tier planter when you hang it on a fence, door, or railing.
Tools & materials needed:
- Fabric or canvas hanging shoe organizer
- Scissors or a utility knife
- Landscape fabric (small pieces)
- Potting mix
- S-hooks or zip ties
- Seedlings or seeds of choice
How to build it:
- Choose an organizer with sturdy stitching and grommets at the top for hanging.
- Cut a few small drainage holes into the bottom of each pocket using scissors or a utility knife.
- Line each pocket with a thin layer of landscape fabric to slow soil erosion while still allowing water through.
- Fill each pocket about three-quarters full with potting mix.
- Hang the organizer on a fence, over a door, or from a railing using S-hooks or zip ties.
- Plant one seedling or a small handful of seeds per pocket lettuce, radishes, marigolds, and herbs all do beautifully here.
Because fabric pockets dry out faster than traditional pots, plan to check moisture levels daily during warm weather. A quick finger test in the soil will tell you everything you need to know.
3. Ladder Shelf Garden
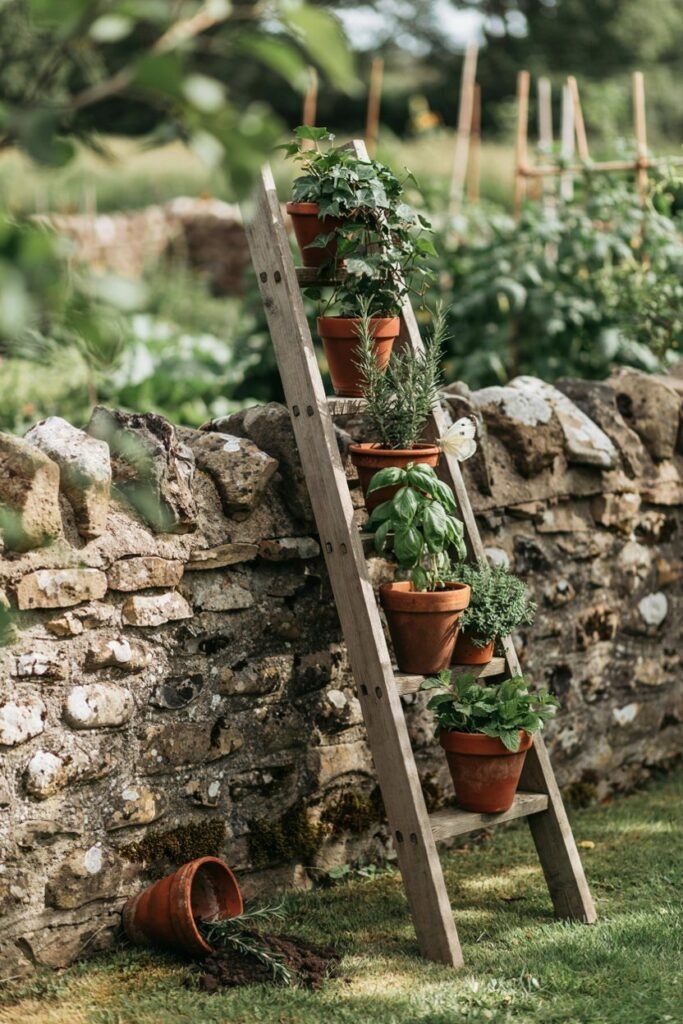
An old wooden ladder, laid flat against a wall or leaned at an angle, makes one of the most charming vertical displays I’ve ever built.
It also happens to be one of the easiest, since you’re really just adding shelves to an existing structure.
Tools & materials needed:
- A wooden or metal ladder
- Sandpaper
- Outdoor-safe wood sealant or finish (if wood)
- Paintbrush (for applying sealant)
- Small pots, crates, or wooden boxes
- Garden clips or twine
- Potting mix and plants of choice
How to build it:
- Find a wooden or metal ladder thrift stores and yard sales are goldmines for these.
- Sand and seal any wood with an outdoor-safe finish so it can handle rain and sun.
- Lean the ladder securely against a wall, checking that it won’t tip when weighted with pots.
- Rest small pots, crates, or wooden boxes on each rung, staggering plant heights so taller varieties sit toward the back or top.
- Secure pots with removable garden clips or simple twine loops if you live somewhere windy.
- Fill pots with a mix of trailing plants like ivy or vinca near the top and upright herbs or flowers toward the bottom.
I like to rotate the pots occasionally so every plant gets an even amount of sun, since the upper rungs often catch more light than the lower ones.
4. Gutter Garden
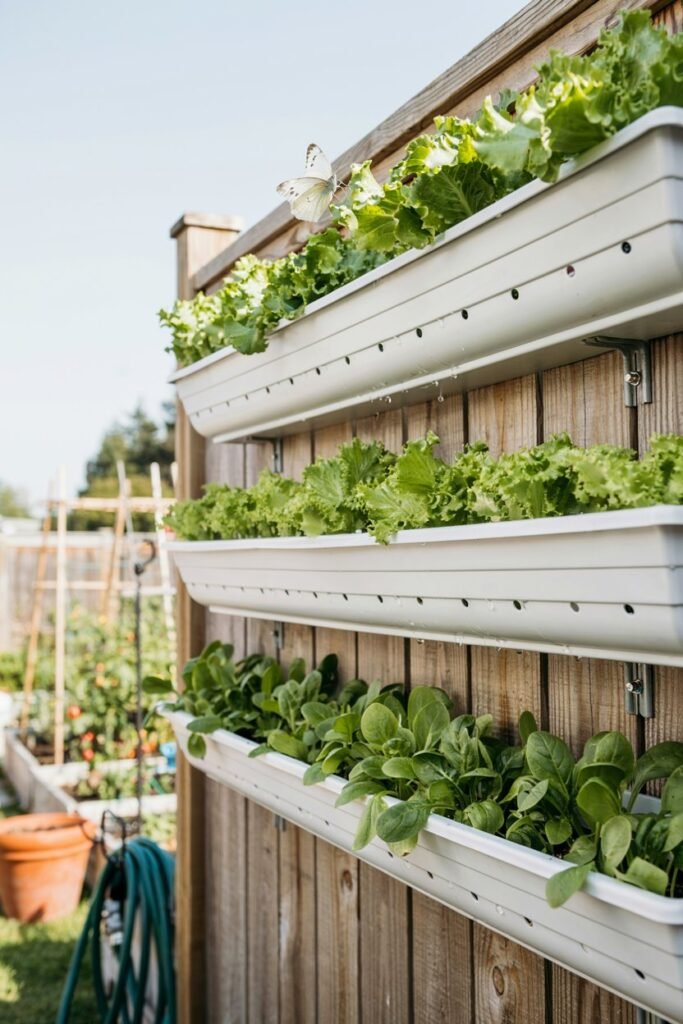
Repurposed rain gutters are lightweight, cheap, and shaped perfectly for shallow-rooted plants. I first tried this with leftover vinyl gutter from a home renovation project, and it’s now one of my favorite ways to grow lettuce.
Tools & materials needed:
- Vinyl or metal rain gutter sections
- Hacksaw
- Gutter end caps
- Waterproof sealant or silicone caulk
- Power drill with a small bit (for drainage holes)
- Mounting brackets and screws
- Screwdriver or drill driver
- Potting soil and seeds or seedlings
How to build it:
- Cut gutter sections to your desired length using a hacksaw, then cap both ends with gutter end caps and waterproof sealant.
- Drill drainage holes every four to six inches along the bottom of each section.
- Attach mounting brackets to a fence or wall, spacing rows about eight to ten inches apart vertically so plants have room to grow.
- Secure the gutter sections to the brackets, making sure they sit level or with a very slight tilt for drainage.
- Fill with potting soil and plant shallow-rooted crops such as lettuce, spinach, strawberries, or herbs like chives and cilantro.
- Water carefully, since gutters hold less soil volume than traditional pots and dry out faster.
Because the soil depth is limited, avoid anything with a deep taproot like carrots. Stick to greens, herbs, and compact flowering plants for the best results.
5. Trellis and Climbing Vine Wall
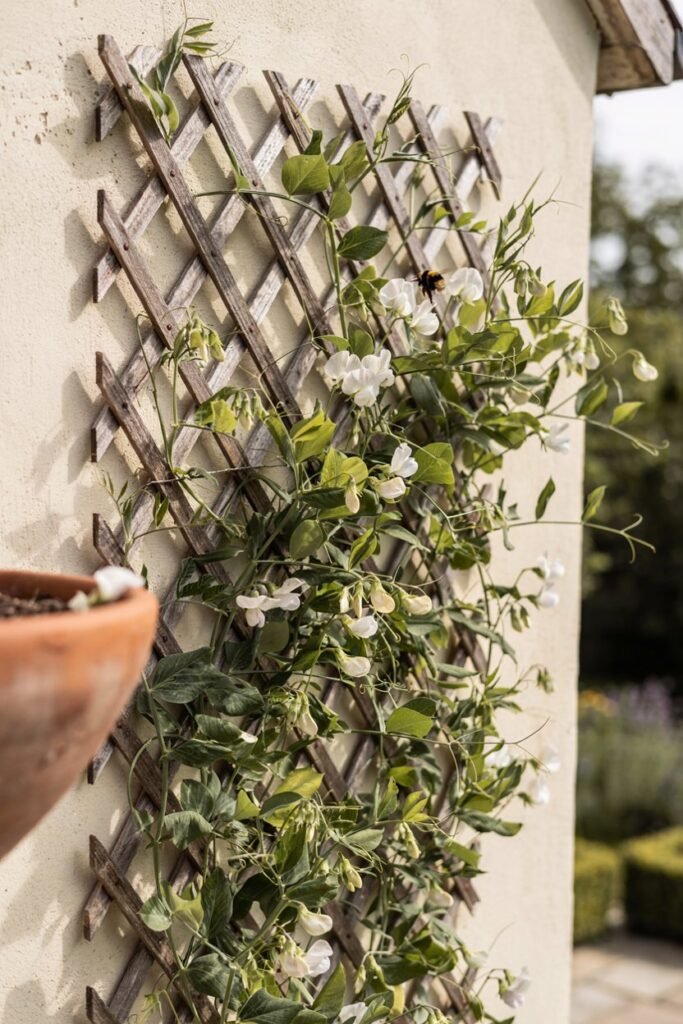
Sometimes the simplest solution is the best one. A trellis mounted against a sunny wall gives climbing plants a structure to grow on, turning flat vertical space into a green, living curtain.
Tools & materials needed:
- Wood, metal, or wire trellis
- Spacer brackets
- Power drill and wall anchors or screws
- Soft plant ties or garden twine
- Pruning shears
- Container or garden bed for planting
- Climbing plants or seeds of choice
How to build it:
- Choose a trellis material that suits your space wood for a rustic look, metal or wire for something more modern and long-lasting.
- Mount the trellis a few inches away from the wall using spacer brackets, which improves airflow and prevents moisture damage to your siding.
- Plant climbing vegetables like peas, pole beans, or cucumbers directly in a container or garden bed at the base.
- For flowering options, try clematis, morning glory, or climbing nasturtium.
- Gently guide young vines toward the trellis with soft plant ties as they grow, checking every few days until they take hold on their own.
- Prune regularly to keep growth directed where you want it rather than sprawling sideways.
A trellis is also one of the few vertical structures that genuinely gets better with age, since woody vines like clematis develop thicker, more established growth each year.
6. Stacked Pot Tower
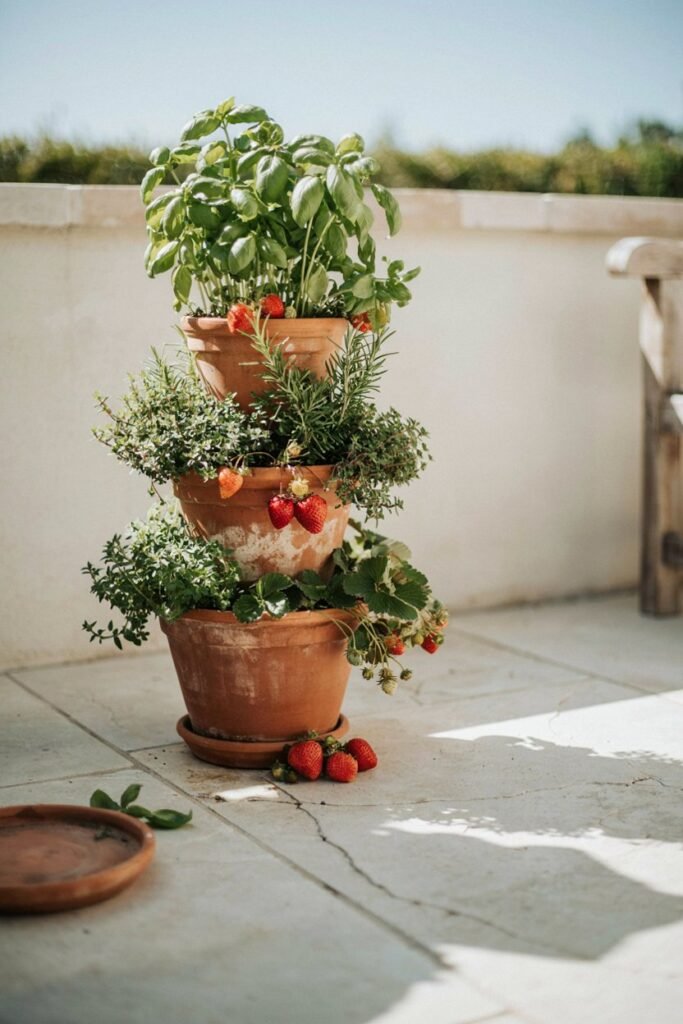
If you love the idea of a tiered herb garden but don’t have room for a full ladder or shelf, a stacked pot tower solves the problem beautifully using nothing but pots of decreasing size and a central support.
Tools & materials needed:
- Four or five terracotta or plastic pots in graduated sizes
- Wooden stake, rebar rod, or PVC pipe (central support)
- Mallet or hammer (to drive the stake in)
- Potting mix
- Herbs, strawberries, or small flowering plants
How to build it:
- Gather four or five terracotta or plastic pots in graduated sizes, from largest to smallest.
- Drive a sturdy wooden stake, rebar rod, or length of PVC pipe into the ground or a large base pot to act as your central support.
- Thread the largest pot onto the stake first and fill it with soil.
- Stack the next size pot on top, offsetting it slightly so the rim of the pot below remains visible and plantable.
- Continue stacking and filling until you reach the smallest pot at the top.
- Plant a mix of herbs, strawberries, or small flowers into the exposed soil rings of each tier.
This design works wonderfully on a patio corner or beside a doorway, and because each tier is independently plantable, it’s easy to swap out plants seasonally without disturbing the whole tower.
7. Living Wall Panel
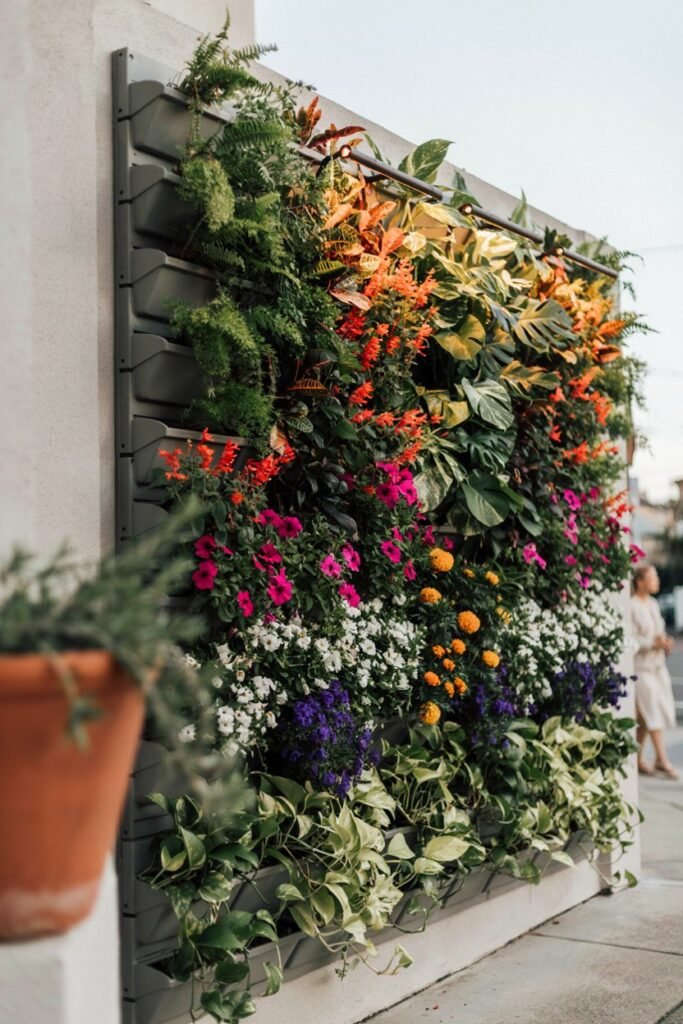
For gardeners ready for a slightly bigger project, a living wall panel creates the lush, densely packed look you often see in magazine gardens and it’s more achievable at home than you might think.
Tools & materials needed:
- Modular living wall panel system (felt or plastic pockets on a frame)
- Heavy-duty wall anchors rated for watered weight
- Power drill and level
- Well-draining potting mix
- Drip irrigation kit (optional, for automated watering)
- A variety of trailing, upright, and flowering plants
How to build it:
- Purchase or build a modular living wall panel system, which typically consists of individual felt or plastic pockets mounted on a rigid backing frame.
- Mount the frame securely to an exterior wall using anchors rated for the panel’s full watered weight.
- Fill each pocket with a well-draining potting mix designed for container gardening.
- Plant a mix of textures and colors trailing plants at the edges, upright varieties in the center pockets, and flowering annuals scattered throughout for seasonal color.
- Install a simple drip irrigation line along the top row if you want to automate watering, since living walls dry out faster than ground-level beds.
- Water from the top down on a regular schedule, allowing gravity to distribute moisture through the lower pockets.
Living walls take a bit more upfront investment, but the payoff is a dense, professional-looking garden that transforms an entire wall in a single weekend.
8. Tiered Plant Stand
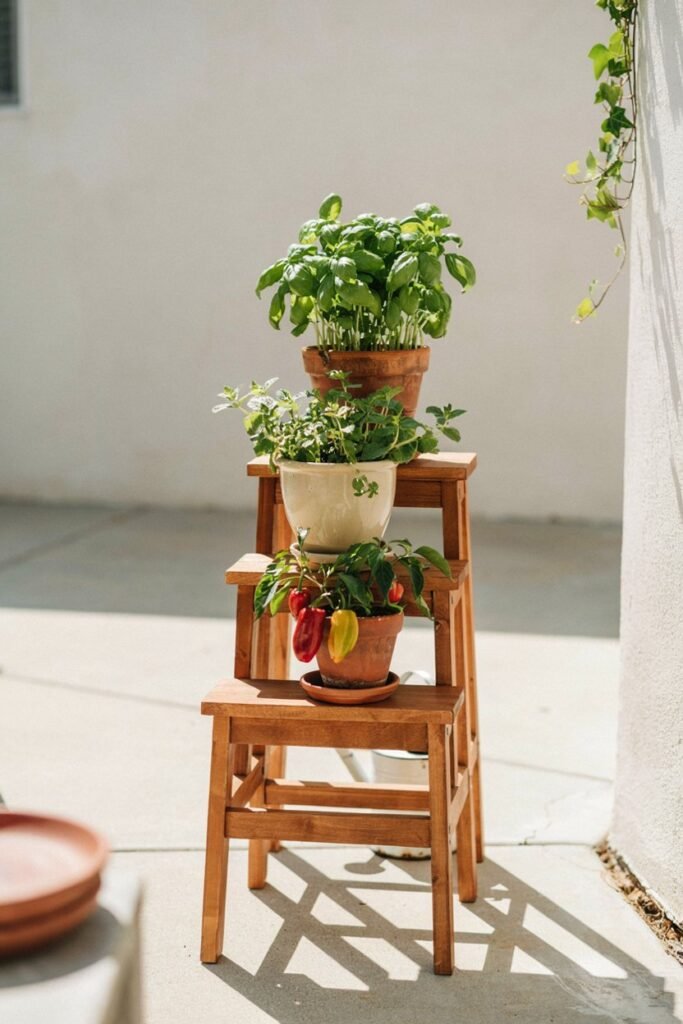
A tiered plant stand is one of the most flexible vertical solutions because it isn’t fixed to a wall you can rotate it toward the sun, move it indoors for winter, or shift it entirely if you rearrange your space.
Tools & materials needed:
- Metal or wooden tiered plant stand (store-bought or scrap lumber for a DIY version)
- Screws and brackets (if building your own)
- Screwdriver or power drill
- Pots and saucers
- Potting mix and plants of choice
How to build it:
- Choose a metal or wooden tiered stand with at least three levels, or build one yourself using scrap lumber and simple bracket joints.
- Place the stand in the sunniest spot available, ideally where it gets at least six hours of light.
- Arrange pots so taller, sun-loving plants sit on top and shade-tolerant varieties sit on lower tiers, since upper shelves often block light from reaching below.
- Group plants with similar watering needs together to make maintenance simpler.
- Rotate the entire stand every week or two so all sides receive even sunlight exposure.
- Bring the stand indoors near a bright window if a cold snap threatens tender plants.
I keep one of these on my own patio for potted basil, mint, and dwarf peppers, and the mobility has saved more than one plant from an unexpected frost.
9. Repurposed Bookshelf Garden
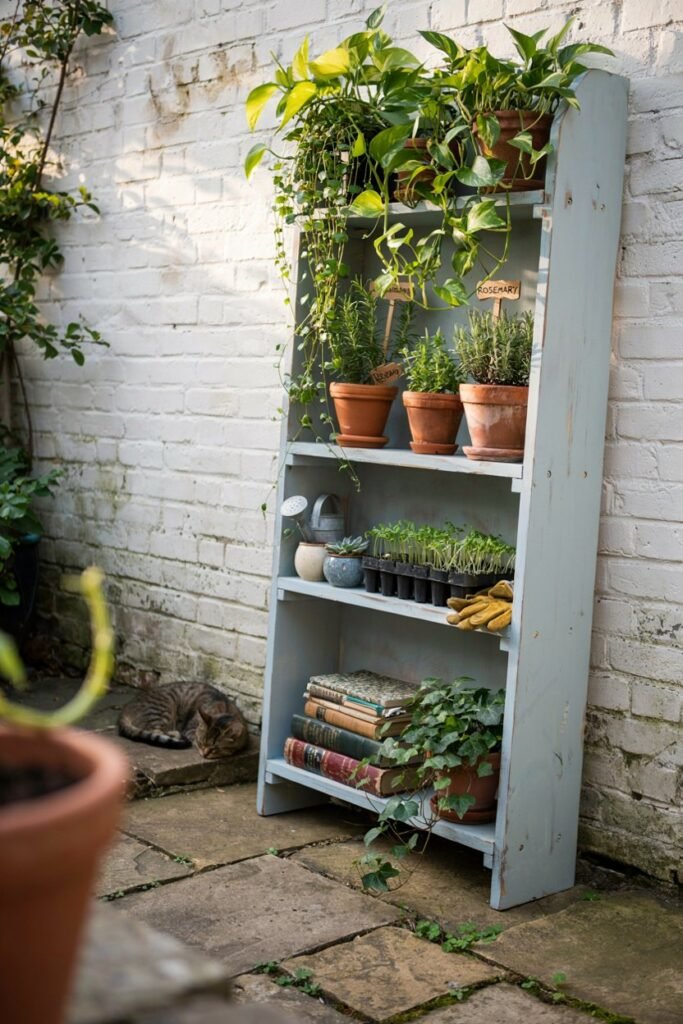
An old bookshelf, especially one that’s seen better days indoors, can find a second life as a striking vertical garden. The built-in shelving does all the structural work for you.
Tools & materials needed:
- An old wooden bookshelf
- Sandpaper
- Weatherproof sealant or exterior paint
- Paintbrush or roller
- Waterproof trays or mats (to line shelves)
- Pots and saucers
- Potting mix and plants of choice
How to build it:
- Choose a bookshelf that’s sturdy enough to handle the weight of wet soil and ceramic or plastic pots test each shelf by pressing down firmly before committing.
- Sand and apply a weatherproof sealant or exterior paint if the shelf will live outdoors, since untreated wood breaks down quickly when exposed to rain.
- Position the shelf against a wall or fence in a spot with appropriate light for the plants you intend to grow.
- Line each shelf with a waterproof tray or mat to protect the wood from moisture damage and soil spills.
- Arrange pots by height and light preference, keeping trailing plants on upper shelves so their vines can cascade downward.
- Check shelves periodically for water damage or rot, replacing boards as needed to extend the garden’s life.
This idea is especially satisfying if you’re the sentimental type, since giving an old piece of furniture new purpose feels a little like giving your garden its own history.
10. Vertical Window Box Stack
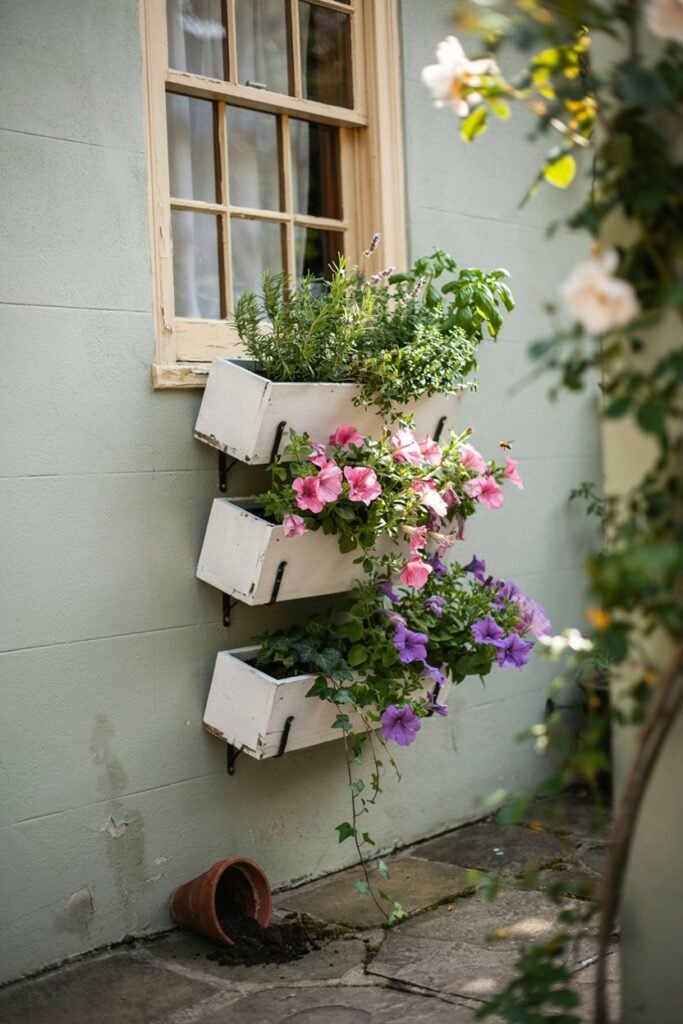
If your only outdoor space is a windowsill or a narrow strip beneath a window, stacked window boxes let you grow far more than a single box ever could.
Tools & materials needed:
- Three window boxes with drainage holes
- Matching drip saucers
- Window box mounting brackets
- Power drill and wall anchors or screws
- Level (to keep brackets even)
- Potting mix
- Herbs, lettuces, and trailing flowers of choice
How to build it:
- Mount a standard window box bracket at your existing windowsill height.
- Install a second and third bracket at evenly spaced intervals below the first, mounted directly to the exterior wall.
- Choose window boxes with built-in drainage holes and matching saucers to prevent water from streaking down your siding.
- Fill each box with potting mix suited to your chosen plants — herbs and lettuces for the top box near your kitchen window, and trailing flowers like petunias or lobelia for the boxes below.
- Water the top box first, allowing any overflow to be caught by the saucer rather than dripping onto the box beneath it.
- Trim trailing plants regularly so they cascade attractively over each box’s edge rather than tangling with the box below.
This setup turns a single window into a three-tiered garden feature, and it’s one of the few vertical ideas that genuinely improves your view from inside the house as well as outside.
A Few General Tips Before You Start
No matter which of these ideas you choose, a handful of principles will make your vertical garden thrive rather than just survive.
Watch your watering. Vertical gardens generally hold less soil than traditional beds, which means they dry out faster and need more frequent attention, especially in summer heat. Check soil moisture daily until you learn your garden’s particular rhythm.
Choose lightweight soil. A dense, heavy potting mix adds unnecessary strain to walls, brackets, and hanging hardware. Look for mixes labeled for container or hanging basket use, since they’re formulated to stay light while still holding moisture well.
Mind your weight limits. Wet soil is significantly heavier than dry soil, so always check that your wall anchors, brackets, or hooks are rated to handle the fully watered weight of your structure, not just the empty one.
Match plants to light conditions. Take a day to observe how sunlight actually moves across your space before planting. A wall that looks bright at noon might be fully shaded by mid-afternoon, and matching your plant choices to real conditions saves a lot of heartache.
Feed regularly. Because vertical gardens have less soil volume, nutrients get used up faster. A diluted liquid fertilizer every two to three weeks during the growing season keeps plants vigorous.
Final Thoughts From One Small-Space Gardener to Another
Every one of these projects started as an experiment for me, and more than a few didn’t work on the first try my very first gutter garden fell right off its brackets after a heavy rain because I hadn’t checked the mounting hardware properly.
That’s the nature of gardening in general, and vertical gardening especially: you learn by doing, you adjust, and eventually you find the combination of structure and plants that feels right for your particular patch of sunlight.
Whichever of these ten ideas calls to you first, start small, pay attention to what your space is telling you, and don’t be afraid to get a little dirt under your fingernails. Your walls, fences, and railings are waiting to become something green.
