
The Beauty of Growing Indoors
There’s a certain magic in growing your own food that quiet joy that comes from nurturing something small and watching it bloom into something beautiful and nourishing. For me, few plants capture that magic quite like sweet bell peppers.
Their glossy green leaves, cheerful flowers, and colorful fruits feel like nature’s confetti a celebration of growth and patience. And the best part? You can grow them indoors, all year long.
Whether you live in a cozy apartment or simply want to keep your gardening spirit alive through the winter, indoor bell pepper gardening is not only possible but incredibly rewarding.
Let’s dig into how to create your own little pepper haven right inside your home.
Shop my amazon essentials
- Hand Trowel
- Seed Starting Trays
- Grow Lights
- Watering Can with Narrow Spout
- Pruning Scissors
- Plant Pots with Drainage Holes
- Spray Bottle for Misting
- Soil Moisture Meter
- Small Garden Gloves
- Plant Support Stakes or Tomato Cages
Why Grow Bell Peppers Indoors?
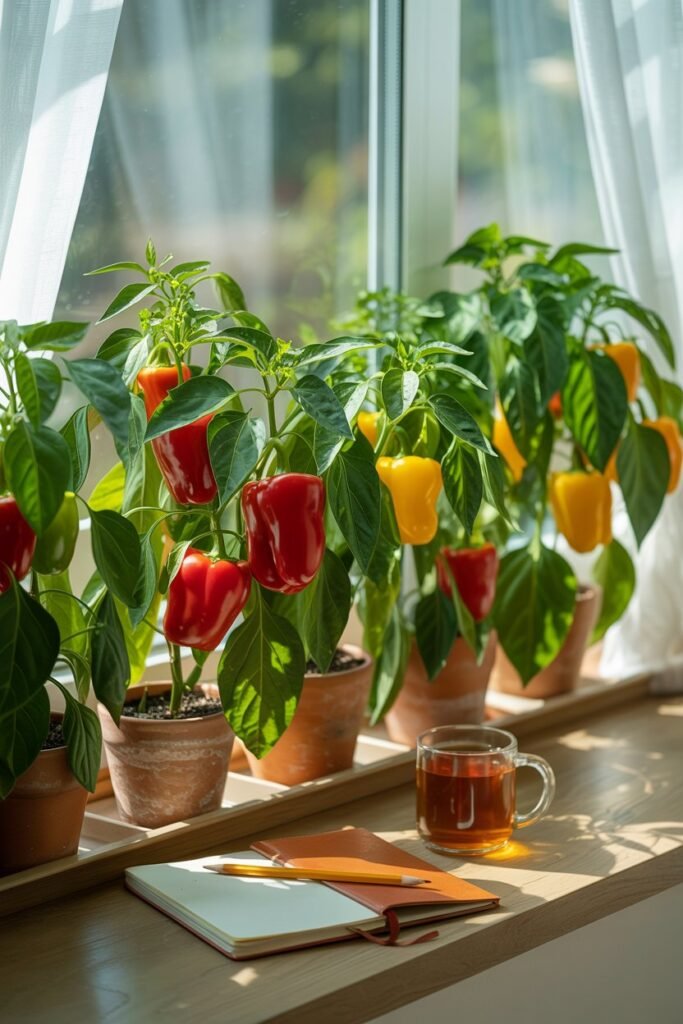
- Year-round harvests: No need to wait for warm weather. Indoors, you control the seasons.
- Pest protection: Fewer bugs, slugs, and soil diseases to worry about.
- Beautiful greenery: Bell peppers double as stunning decorative plants.
- Healthier food: Fresh, organic, and free from chemicals.
And perhaps most importantly it’s a deeply fulfilling experience. Watching your plants thrive under your care brings peace, purpose, and joy to your daily routine.
Step 1: Choose the Right Bell Pepper Variety
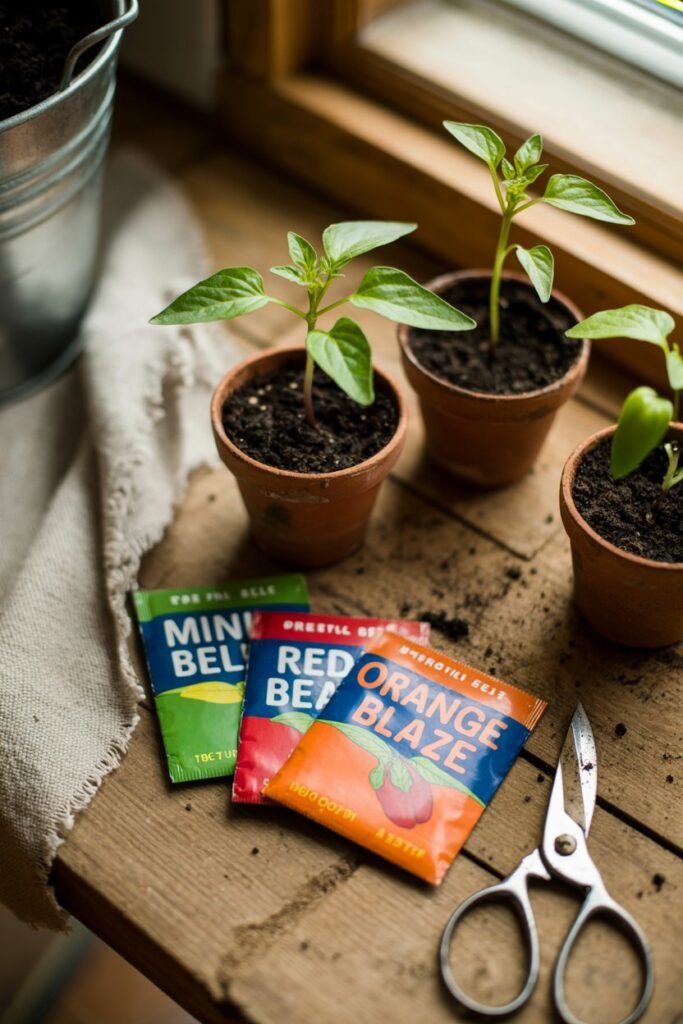
When growing indoors, variety matters. Some bell peppers grow tall and sprawling, while others stay compact perfect for containers and small spaces.
Best Bell Pepper Varieties for Indoor Growing
- Mini Belle: Small, vibrant, and fast-growing. Ideal for limited space.
- California Wonder: Classic large peppers with rich flavor.
- Red Beauty: Sweet, glossy fruits that ripen beautifully indoors.
- Candy Cane Red: Decorative green-and-white stripes that turn red as they mature.
- Orange Blaze: Compact plants producing sweet, citrusy peppers.
If you’re a beginner, start with Mini Belle or Orange Blaze they’re forgiving, fast, and adorable.
Step 2: Gather Your Gardening Essentials
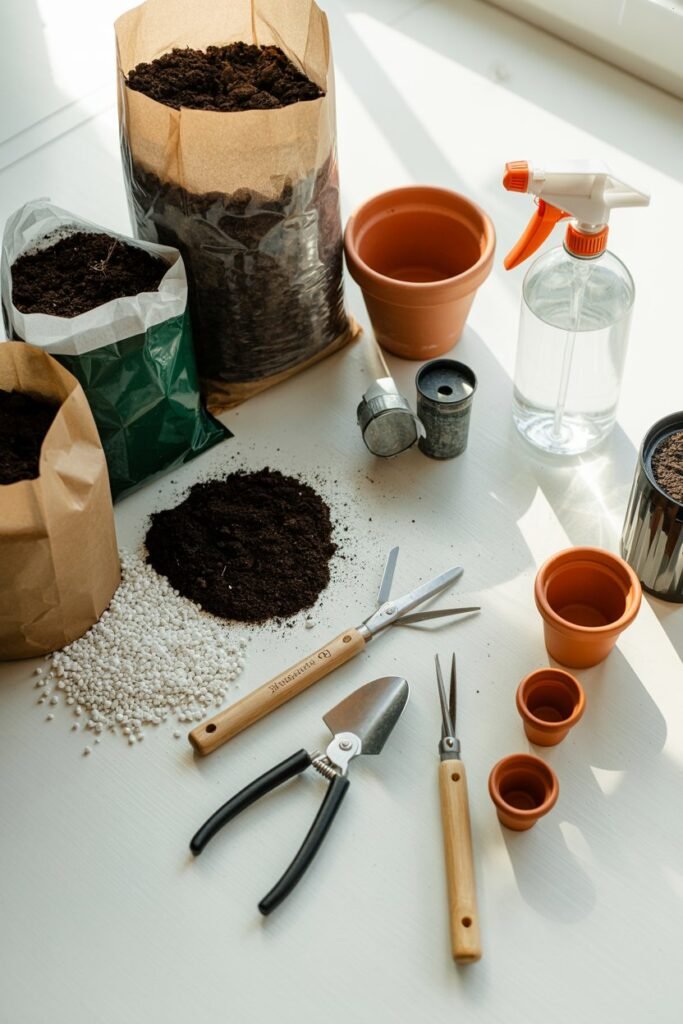
Before planting, make sure you have everything ready. Indoor peppers thrive when their needs are met right from the start.
Materials You’ll Need
- Bell pepper seeds (your chosen sweet variety)
- Seed-starting trays or small pots
- Quality potting mix (light, well-draining; a mix for vegetables is ideal)
- Compost or organic fertilizer
- Grow lights (full-spectrum LED preferred)
- Larger pots (2–3 gallons) for transplanting
- Spray bottle or gentle watering can
- Humidity tray (optional but helpful)
The Ideal Soil Mix
Bell peppers love loose, nutrient-rich soil that drains well. You can mix your own:
- 40% potting soil
- 40% compost
- 20% perlite or coco coir
This blend keeps the soil aerated and rich while preventing waterlogging the number one enemy of indoor peppers.
Read Easily Grow Broccoli at Home in a Container (Step-by-Step Guide)
Step 3: Planting Bell Pepper Seeds
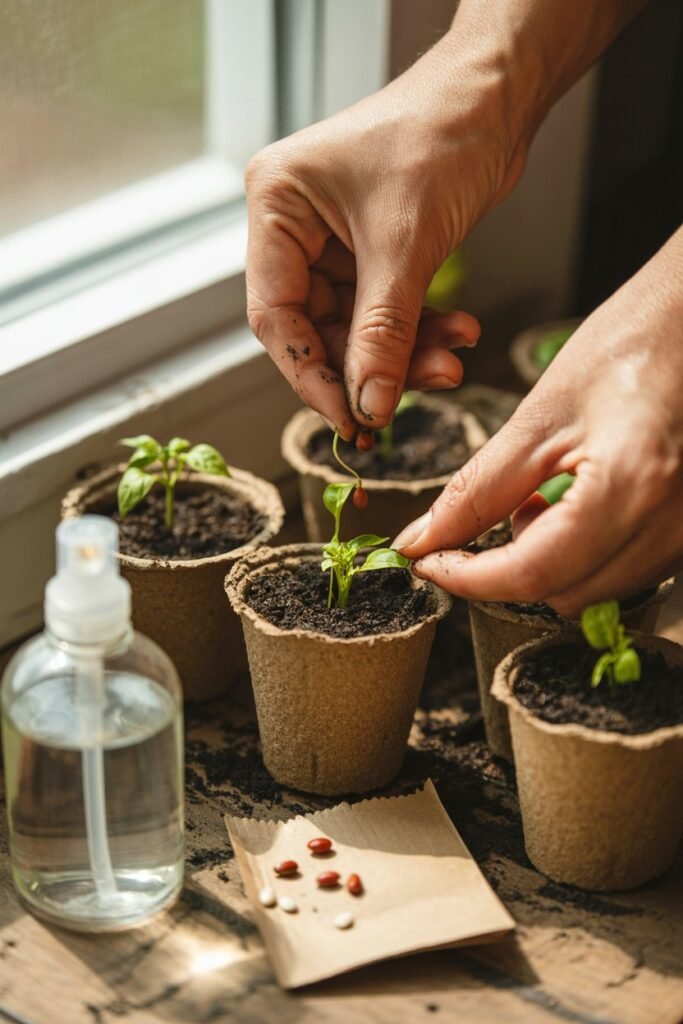
Now comes the exciting part planting!
How to Start Bell Peppers from Seeds
- Fill your seed trays or small pots with moist soil mix.
- Plant seeds ¼ inch deep two seeds per cell or pot.
- Mist gently with water and cover the tray with a humidity dome or plastic wrap to retain warmth.
- Place them in a warm spot (75–85°F / 24–29°C). Bell pepper seeds love heat.
- Wait for germination, which usually takes 10–14 days.
Once the seedlings appear, remove the cover and move them under grow lights. Keep lights about 2–3 inches above the plants so they get plenty of energy.
Step 4: Light The Heart of Indoor Growth
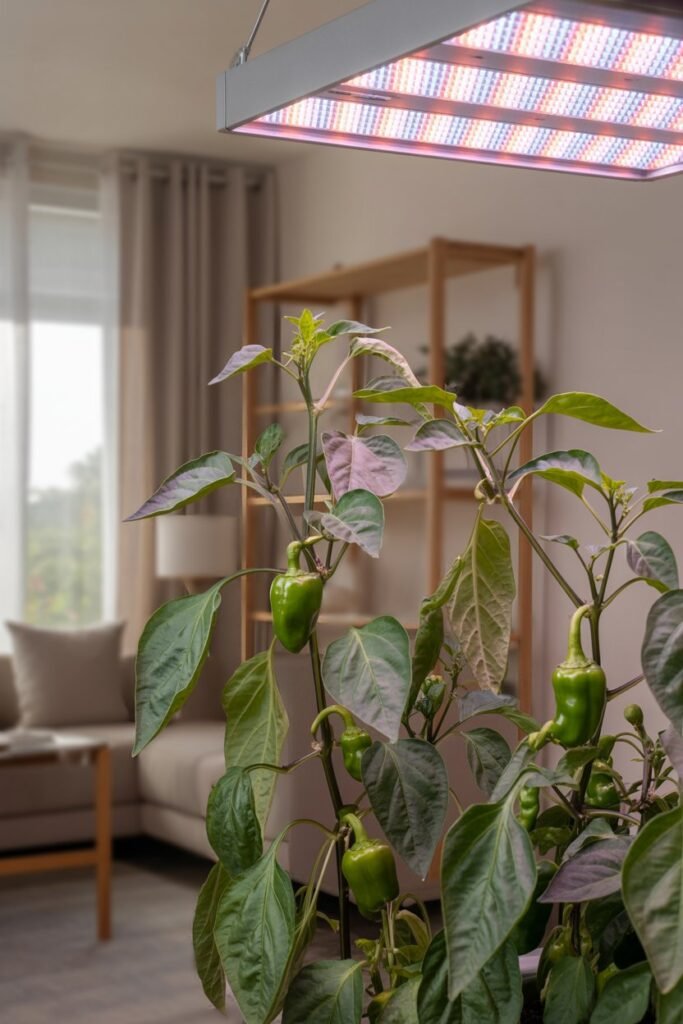
Bell peppers are sun lovers, and growing indoors means you’ll need to mimic that bright, summer sunlight.
Light Requirements
- 14–16 hours of light per day.
- Use full-spectrum LED grow lights to replicate natural sunlight.
- Keep lights 2–4 inches above plants and adjust as they grow.
If your peppers start to grow tall and leggy, it’s a sign they need more light.
Bonus Tip
Give your plants a gentle “nighttime” break of 8–10 hours just like real sunlight cycles. A timer plug makes this effortless.
Step 5: Transplanting to Larger Pots
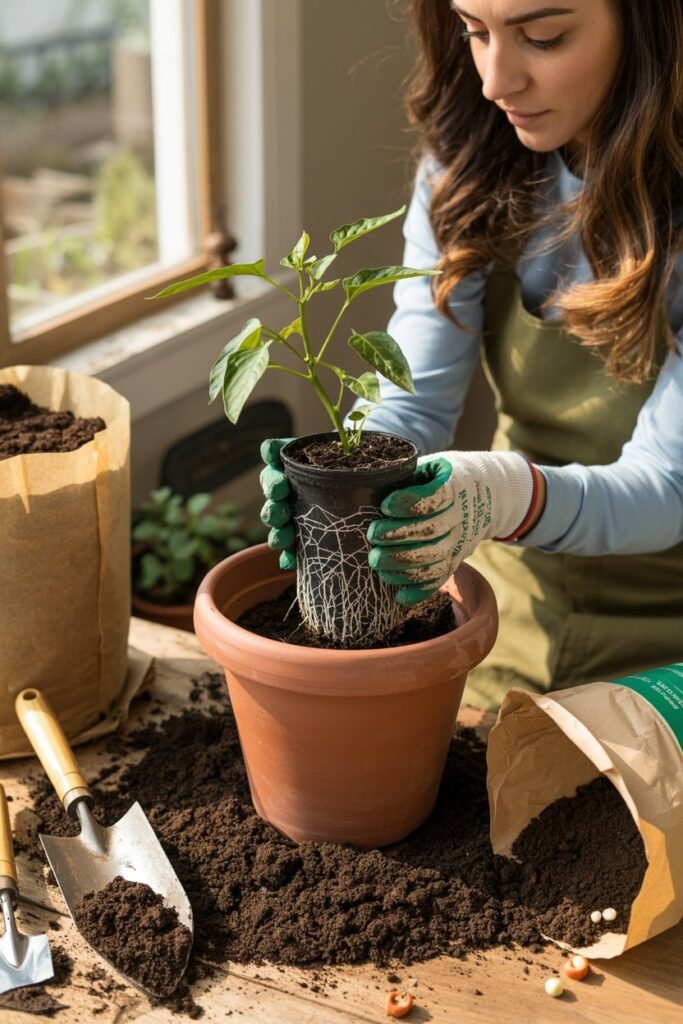
Once your seedlings have 4–6 true leaves, it’s time to move them into their forever homes larger containers where they can stretch their roots.
How to Transplant
- Choose a 2–3 gallon pot with good drainage holes.
- Fill with fresh potting mix up to halfway.
- Gently remove the seedling, keeping the root ball intact.
- Place it in the center and fill around it with soil.
- Press lightly and water thoroughly.
Give your peppers a few days of gentle care while they adjust avoid overwatering during this transition.
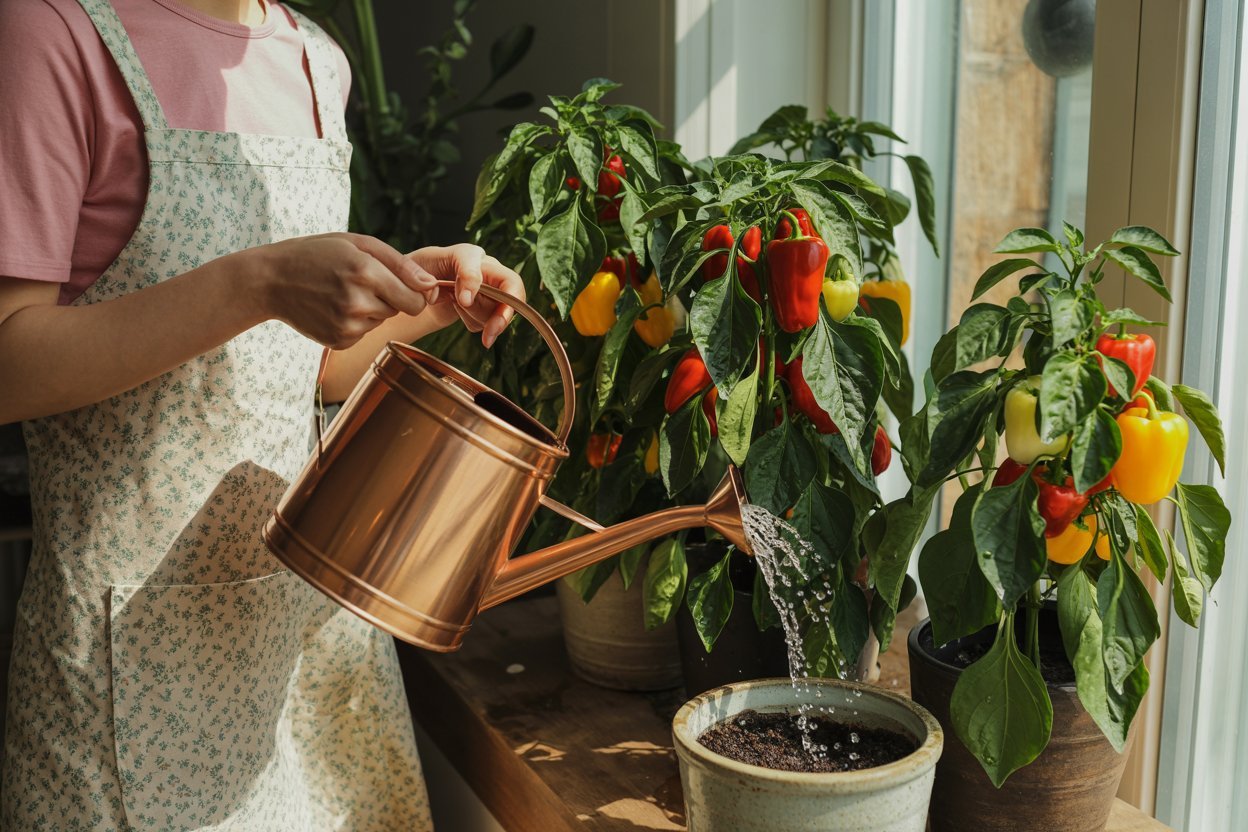
Step 6: Watering and Feeding Routine
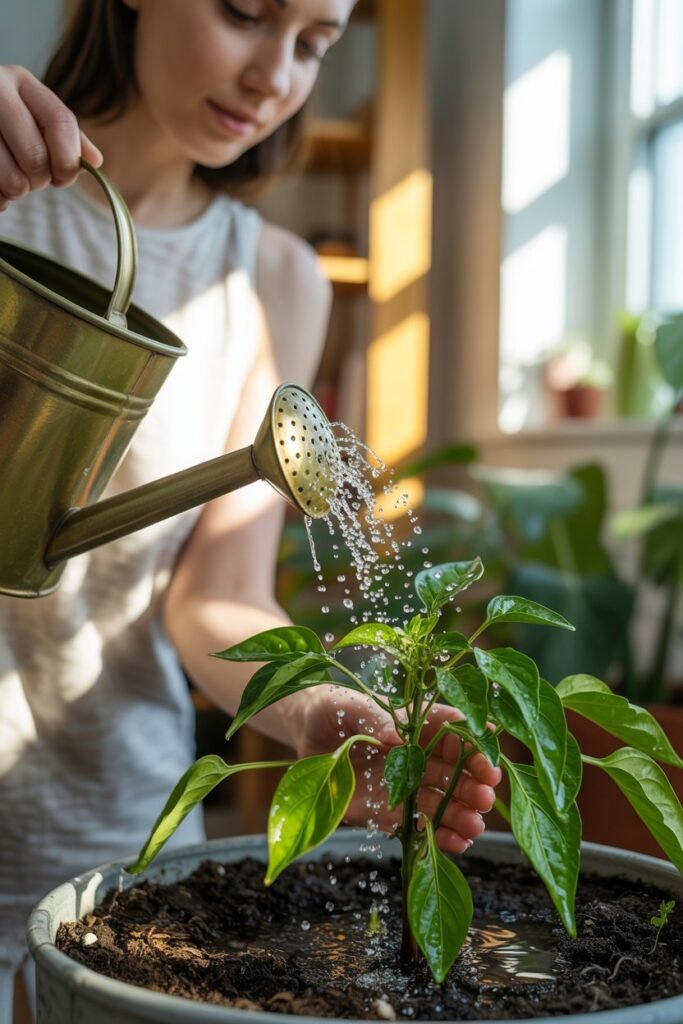
Bell peppers need consistent moisture, but never soggy soil. Their roots require oxygen, and waterlogged soil can suffocate them.
Watering Schedule
- Check soil moisture daily. Water only when the top inch feels dry.
- Use room-temperature water.
- Avoid wetting the leaves pour gently around the base.
Fertilizing Routine
Bell peppers are moderate feeders. Too much fertilizer will make them grow big and leafy, but delay fruiting.
Use a balanced fertilizer (5-5-5 or 10-10-10) every 2–3 weeks during the growing season. For organic options, use:
- Compost tea
- Fish emulsion
- Worm castings
Magnesium Boost (Optional but Helpful)
Once a month, you can feed your peppers with Epsom salt it helps with leaf color, fruit set, and root strength.
Mix 1 tablespoon of Epsom salt per gallon of water and use it as a soil drench or spray.
Read 9 Tactics to Grow Tomatoes in a Pot (Expert Guide for Big Harvests)
Step 7: Temperature and Humidity

Sweet bell peppers are tropical at heart. To thrive indoors, you’ll need to recreate that cozy warmth.
Ideal Conditions
- Daytime temperature: 70–80°F (21–27°C)
- Nighttime temperature: 60–70°F (16–21°C)
- Humidity: 50–70%
If your home is dry (especially in winter), use a humidity tray or humidifier near your plants.
Avoid placing them near drafts or vents they dislike sudden temperature changes.
Step 8: Pollination Indoors

Unlike outdoor plants, your indoor peppers won’t have bees to help pollinate their flowers. But don’t worry you can easily take their place!
How to Hand-Pollinate
- Wait for flowers to open fully.
- Use a small paintbrush or cotton swab to gently transfer pollen from one flower to another.
- Repeat every few days while flowers are blooming.
This small act ensures your peppers set fruit and grow those beautiful, glossy pods we love.
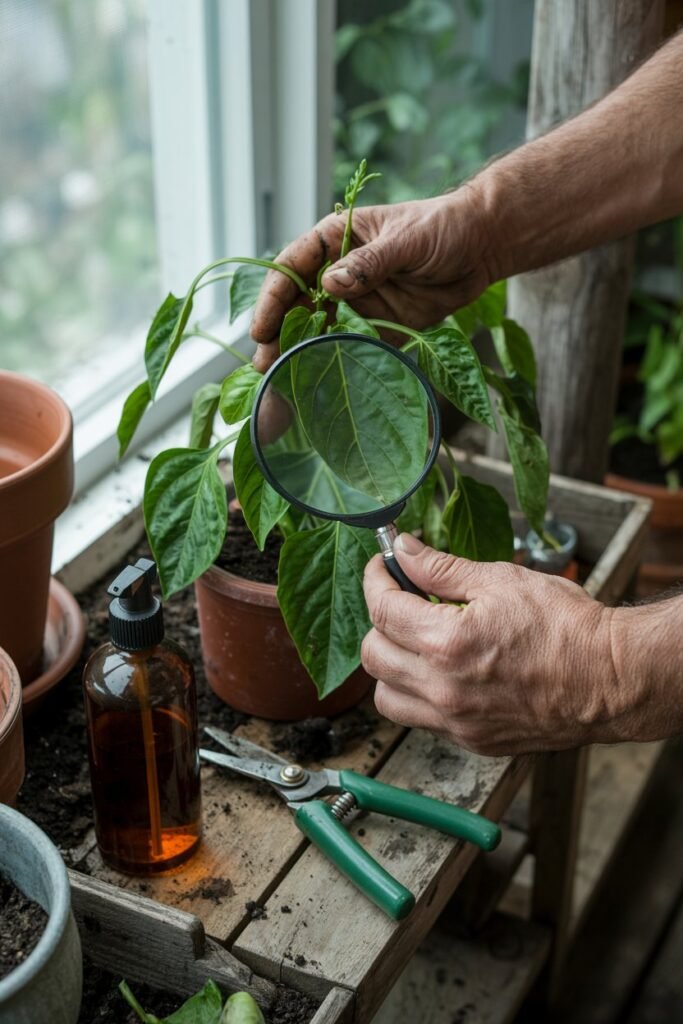
Step 9: Caring for Your Indoor Pepper Plants

Growing bell peppers indoors means giving them consistent attention they’re gentle souls that thrive on routine.
Pruning
Once your plants reach 12–15 inches, pinch off the growing tip to encourage bushier growth. Remove any small shoots near the base to direct energy toward fruiting.
Water and Feed Regularly
Stick to your watering schedule, and feed every few weeks. Peppers are happiest when they have balance not too dry, not too wet, not too hungry.
Rotate Your Plants
Turn the pots every few days so all sides receive even light. This prevents leaning and encourages symmetrical growth.
Cleaning the Leaves
Dust can block light. Wipe leaves gently with a damp cloth every two weeks. Your plants will breathe easier and look more vibrant.
Step 10: Harvesting Your Indoor Bell Peppers

After all that love and care, the reward is near!
Signs Your Peppers Are Ready
- Firm and glossy skin.
- Full size (usually 3–4 inches).
- Deep green color (or red, yellow, or orange depending on variety).
You can harvest green peppers earlier for a crisp taste, or wait for them to ripen fully for a sweeter flavor.
How to Harvest
Use scissors or pruning shears to cut peppers cleanly avoid pulling, as it can damage the stem.
Once harvested, they’ll keep fresh for about a week in the refrigerator or longer if you slice and freeze them.
Troubleshooting Common Indoor Pepper Problems
| Problem | Cause | Solution |
|---|---|---|
| Yellowing leaves | Overwatering or magnesium deficiency | Reduce watering; try Epsom salt feeding |
| No flowers or fruit | Too little light or excessive nitrogen | Increase light hours; balance fertilizer |
| Dropping flowers | Sudden temperature changes | Keep stable warmth |
| Small peppers | Crowded roots or low pollination | Transplant or hand-pollinate |
Seasonal Care Guide for Indoor Peppers

| Season | Care Tips |
|---|---|
| Spring | Start seeds early under grow lights; keep warm and moist. |
| Summer | Maintain consistent watering; pollinate often. |
| Autumn | Prune lightly; harvest mature peppers; reduce feeding. |
| Winter | Keep under lights; water sparingly; enjoy slow indoor growth. |
Final Thoughts: A Garden That Lives Within You
Growing sweet bell peppers indoors isn’t just about gardening it’s about creating life within your home.
Every seed you plant is a promise, every leaf a reminder of patience, and every harvest a quiet victory. The scent of damp soil, the sight of new buds, the pride in your first ripe pepper they connect you to something deeper than the plant itself.
So, tend your indoor peppers with love. Speak to them softly. Celebrate their small wins. Because when you grow something with care, you grow a part of yourself, too.
