
Most people think improving indoor air quality requires fancy machines or expensive purifiers. But as a woman who has lived with plants for years and leaned on them during stressful seasons, long workdays, and times when my home felt heavy I can tell you something simple and true:
The right houseplants can transform the way your home feels.
The air becomes softer.
Breathing feels easier.
Your rooms gain this quiet, refreshing clarity.
And the space feels alive again.
Plants don’t just sit in corners looking pretty. They work.
They absorb stale air.
They soften lingering odors.
They lift humidity levels naturally.
And they filter the tiny irritants our homes collect without us noticing cooking residue, dust from fabric, cleaning fumes, old paint, candles, even the “staleness” from keeping windows closed for too long.
But for plants to actually do this, they need to be planted right, placed right, watered right, and understood.
How to Plant Indoor Air-Purifying Plants Properly
A plant can only purify the air if it is rooted well, breathing freely, and growing comfortably. Poor planting leads to weak roots, slow growth, yellowing leaves, and reduced air-cleansing power.
Here is the complete planting method for long-term success:
1. Choose the Right Pot (Extremely Important)
Indoor air-purifying plants prefer:
• Pots with at least one drainage hole
• A size 1–2 inches bigger than the root ball
• Non-glazed clay or ceramic if you tend to overwater
• Plastic if you tend to underwater
Expert Note:
A pot that is too big holds too much moisture the roots drown.
A pot that is too small restricts growth and reduces the plant’s ability to refresh your air.
2. Use the Correct Soil Type
Most indoor plants thrive in light, airy, well-draining soil.
A suffocating mix equals suffocating roots.
For indoor air-purifying plants:
• 60% indoor potting mix
• 20% perlite (for air circulation)
• 20% coco coir or peat moss (for moisture balance)
Never use garden soil indoors it compacts and suffocates roots.
3. Prepare the Root Ball Properly
When you remove the plant from its nursery pot:
• Gently loosen the roots
• Untangle root circles
• Trim any mushy roots
• Do NOT break the roots aggressively it shocks the plant
This step alone can improve air-purifying performance because the plant grows faster and stronger.
4. Plant at the Correct Depth
The crown (where stem meets roots) should sit slightly above the soil, not buried.
Deep planting = rot.
High planting = unstable.
5. Water Immediately After Planting
The first watering settles soil pockets around the roots and eliminates air gaps.
Water until you see drainage then empty the saucer.
6. Give the Plant a Stable Environment for 2–3 Weeks
No moving.
No repotting again.
No fertilizers yet.
Indoor plants settle best when left alone at the beginning.
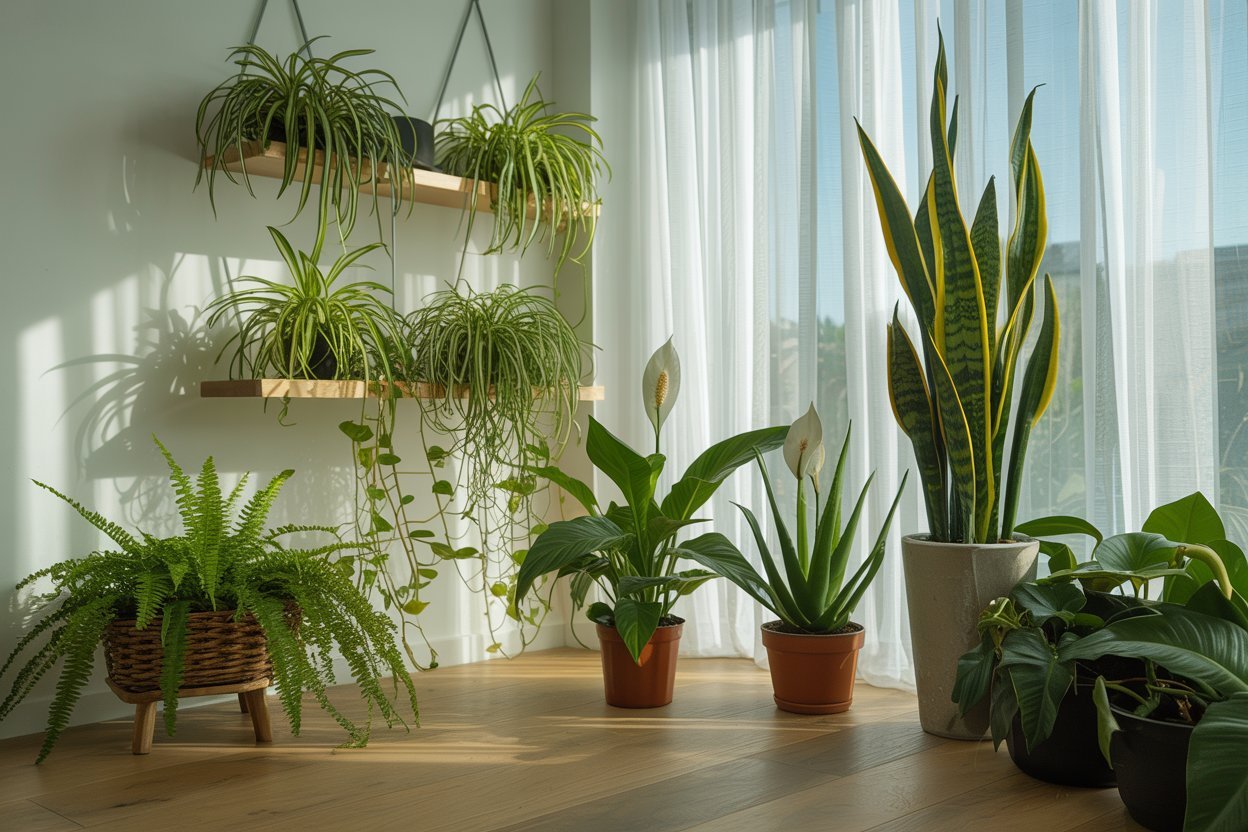
Now that the soil, pot, and planting method are set, let’s move into the first four powerful air-transforming plants, each written with rich detail, placement, care, and real home impact.
1. Spider Plant
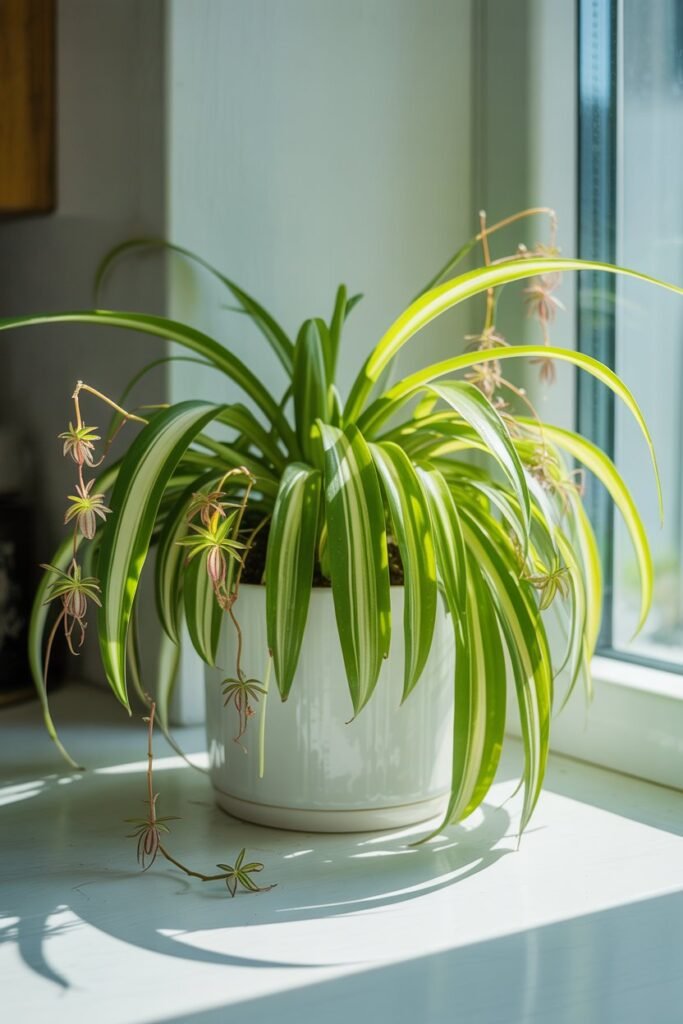
Why It Improves Your Home’s Air
Spider plants naturally refresh stuffy rooms, especially older apartments, homes with carpets, or rooms that often feel “closed-in.”
They work slowly but constantly, softening stale odors and releasing lighter, cleaner air.
Best Rooms for Air Quality
• Kitchens
• Bathrooms
• Living rooms with filtered light
• Bedrooms needing gentle freshness
How to Plant Your Spider Plant Properly
Pot: Medium-sized pot with drainage
Soil: Light, fluffy potting mix (avoid dense soil)
Planting Steps:
- Loosen the root ball gently spider plant roots grow thick and firm.
- Plant slightly high to prevent stem rot.
- Water deeply once after planting.
- Place in bright, indirect light.
Daily & Weekly Care
• Water when the topsoil feels dry.
• Mist if your home is dry.
• Trim brown tips it encourages fresh growth.
• Never place it in direct sunlight; it scorches easily.
What Beginners Get Wrong
Overwatering.
Spider plants prefer slightly moist soil, not wet soil.
Why This Plant Is Beloved
It produces little baby plants a gift that keeps giving.
A very nurturing plant for tending, propagating, and sharing with loved ones.
2. Peace Lily

Why It Improves Your Home’s Air
Peace lilies soften heavy air almost immediately.
They absorb stale room odors, refresh the atmosphere, and raise humidity which makes breathing easier, especially in bedrooms.
Best Rooms for Air Quality
• Bedrooms
• Living rooms
• Entryways
• Offices
• Low-light corners that need freshening
How to Plant Your Peace Lily Properly
Pot: Medium pot with drainage
Soil: Moisture-retaining mix with perlite for balance
Planting Steps:
- Loosen roots gently peace lilies dislike tight root balls.
- Plant with the crown slightly above the soil.
- Water slowly until the soil is evenly moist.
- Place in soft, filtered light never direct sun.
Daily & Weekly Care
• Water when the leaves start to droop slightly this plant communicates well.
• Wipe leaves once a week.
• Fertilize lightly during active growth.
• Avoid blasting A/C or heaters near it.
Beginner Mistake
Putting it in strong sunlight the leaves scorch and growth slows dramatically.
3. Snake Plant
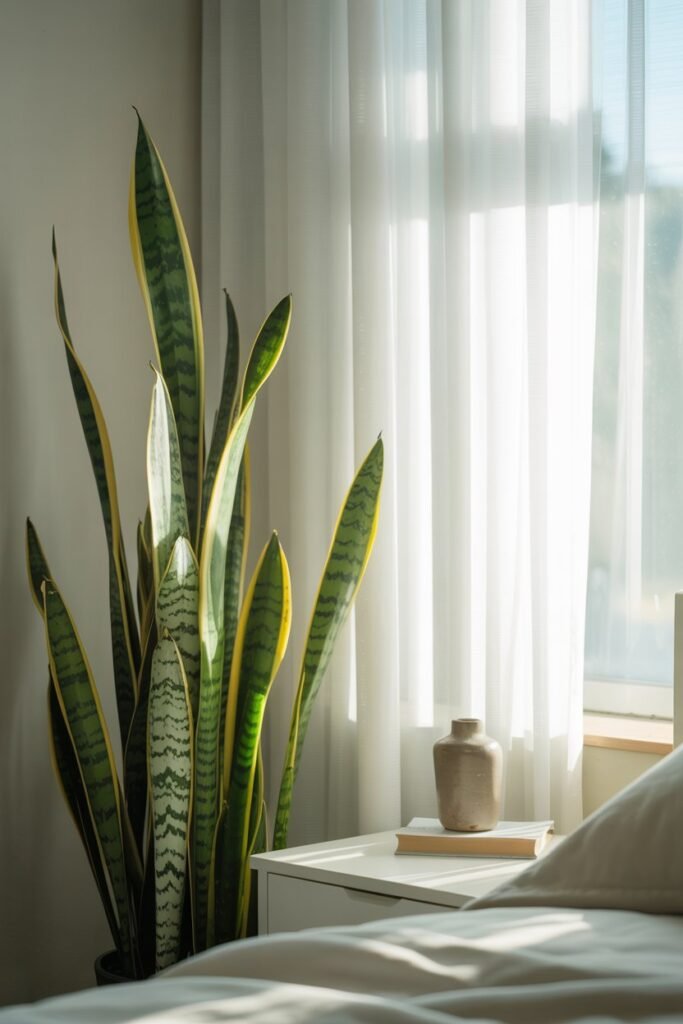
Why It Improves Your Home’s Air
Snake plants refresh air at night, making them exceptional for bedrooms.
They also help lighten stagnant corners and freshen rooms without needing bright light.
Best Rooms for Air Quality
• Bedrooms
• Hallways
• Bathrooms
• Home offices
• Entryways with little natural light
How to Plant Your Snake Plant Properly
Pot: Heavy-bottom pot that won’t tip
Soil: Cactus or succulent soil
Planting Steps:
- Remove plant gently snake plants bruise easily.
- Place root ball high deep planting leads to rot.
- Water lightly after planting.
- Keep in low to bright light, but never direct sun.
Daily & Weekly Care
• Allow soil to dry completely between waterings.
• Clean the tall leaves often dust blocks their ability to refresh air.
• Turn the pot monthly to keep growth even.
Beginners’ Mistake
Overwatering.
This is the number-one killer of snake plants.
Why It’s a Bedroom Favorite
It works even while you sleep, gently refreshing the air all night.
4. Boston Fern
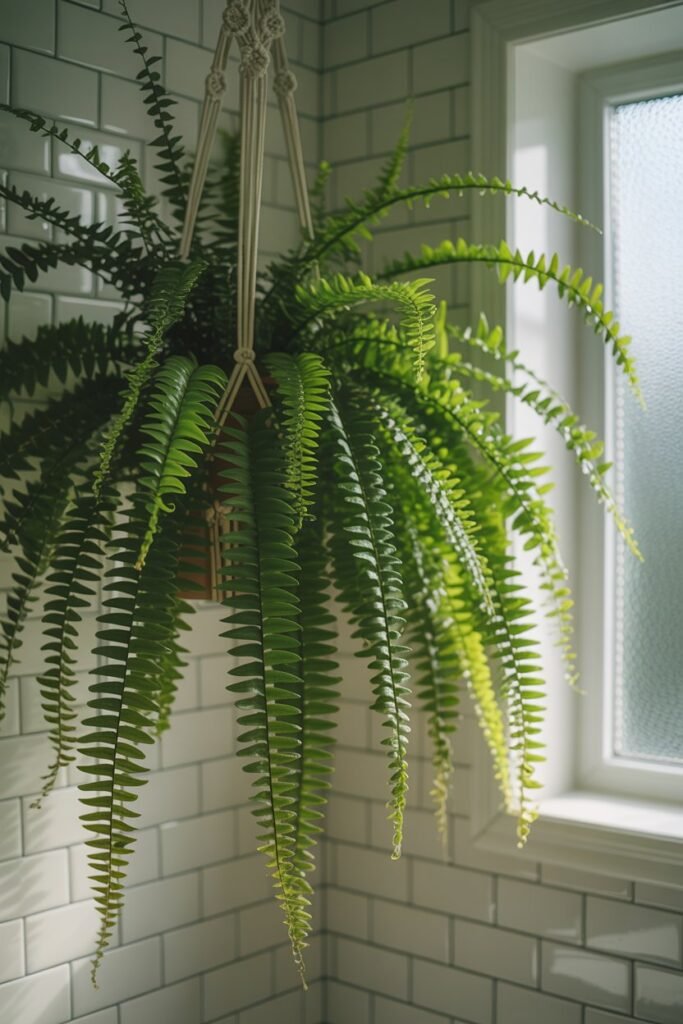
Why It Improves Your Home’s Air
Boston ferns add natural humidity, which softens dry indoor air.
This improves comfort, reduces dust movement, and helps rooms feel “alive” again especially in climates with dry seasons.
Best Rooms for Air Quality
• Bathrooms with natural light
• Kitchens
• Living rooms
• Near windows that provide soft morning light
How to Plant Your Boston Fern Properly
Pot: Wide pot ferns expand outward
Soil: Rich, airy, moisture-retentive mix
Planting Steps:
- Handle carefully fern roots are delicate.
- Fill the pot loosely never pack the soil.
- Plant at the center, leaving room for fronds to arch.
- Water deeply to settle soil around roots.
Daily & Weekly Care
• Keep soil consistently moist.
• Mist daily if your home feels dry.
• Trim old brown fronds to encourage new growth.
• Avoid blasting sunlight ferns burn easily.
Beginner Mistake
Letting ferns dry out completely they decline quickly when dehydrated.
Why It’s a Feminine Home Favorite
Its soft, cascading fronds add movement, warmth, and texture transforming a stale room into a gentle sanctuary.
5. Areca Palm
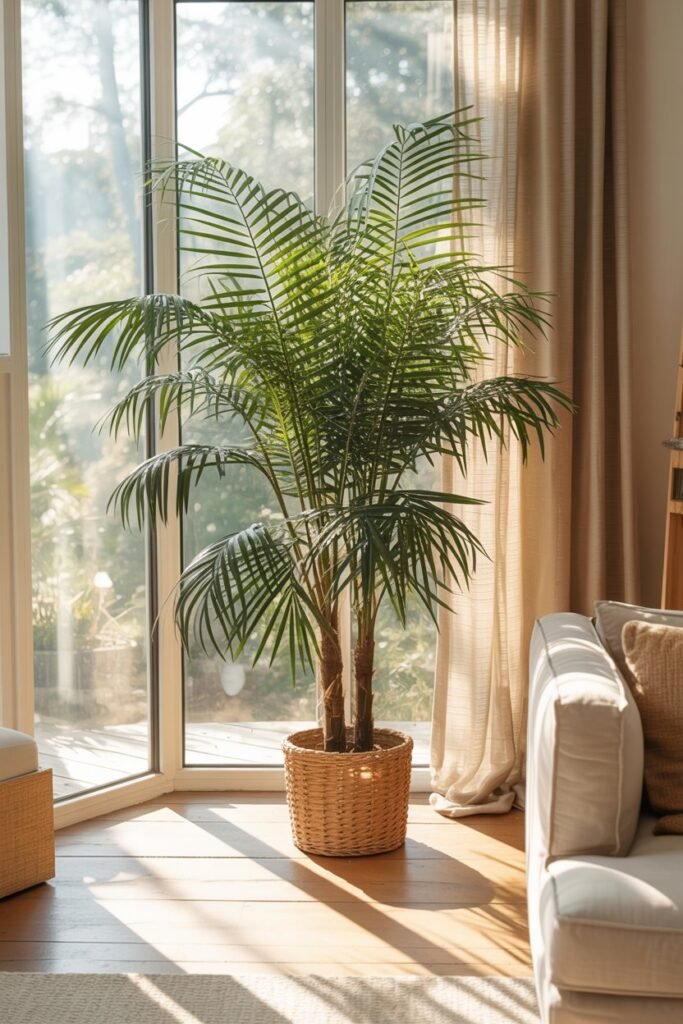
Why It Improves Your Home’s Air
The Areca Palm is one of the most effective natural humidifiers among indoor plants.
It continually releases gentle moisture into the air, which helps reduce dryness caused by fans, A/C units, and harmattan-type weather. This keeps your air soft, breathable, and comfortable especially in hot climates.
It also filters stale air in larger rooms, making the atmosphere feel lighter and more open.
Best Rooms for Air Quality
• Living rooms
• Bedrooms
• Large hallways
• Areas with bright filtered light
• Spaces feeling dry or dusty
How to Plant Your Areca Palm Properly
Pot: A tall, sturdy pot with drainage
Soil: Well-aerated, moisture-retaining mix (potting soil + perlite + coco coir)
Planting Steps:
- Choose a pot 2–3 inches wider than the root ball.
- Loosen the bottom roots only palms dislike deep disturbance.
- Plant at the same depth as nursery pot; never bury the stem.
- Water thoroughly and let it drain.
- Set in bright, indirect light.
Daily & Weekly Care
• Keep soil slightly moist but not soggy.
• Mist 3–4 times a week for humidity.
• Wipe each frond gently to remove dust palms refresh air better with clean leaves.
• Rotate monthly to prevent leaning.
Beginner Mistake
Allowing the soil to fully dry out palm fronds turn brown quickly and lose their air-cleaning strength.
Why It’s Loved
Its tall, feathery fronds create a soft, tropical elegance that instantly warms and brightens any room.
6. Rubber Plant
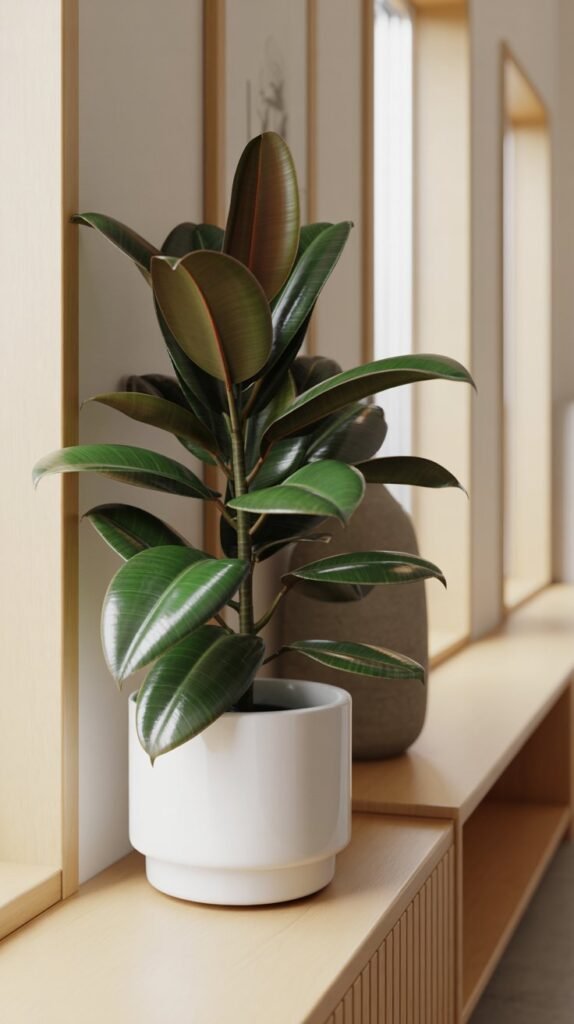
Why It Improves Your Home’s Air
Rubber plants have thick, glossy leaves that absorb stale indoor air quickly and efficiently.
Their large leaf surfaces act like natural filters, making them especially helpful in homes where dust, old paint smell, or mild indoor pollution tends to linger.
Best Rooms for Air Quality
• Living rooms
• Bedrooms
• Hallways
• Home offices
• Any space needing a fresh, clean smell
How to Plant Your Rubber Plant Properly
Pot: A stable, heavy-bottom pot (rubber plants become tall)
Soil: Well-draining indoor mix with perlite
Planting Steps:
- Gently loosen roots rubber plants adapt quickly.
- Set the plant upright, making sure it stands stable.
- Fill soil lightly; avoid pressing too hard.
- Water deeply once, then allow to settle.
- Place in bright, indirect light.
Daily & Weekly Care
• Water when top 2 inches of soil are dry.
• Wipe leaves weekly dusty leaves purify less effectively.
• Provide support as it grows taller (bamboo stake if needed).
• Avoid cold draft rubber plants dislike temperature shocks.
Beginner Mistake
Placing it in low light this causes leggy growth and weak leaves.
Why It’s Popular
It gives a bold, confident statement in any space. Its deep green leaves add richness and calm to home interiors.
7. ZZ Plant
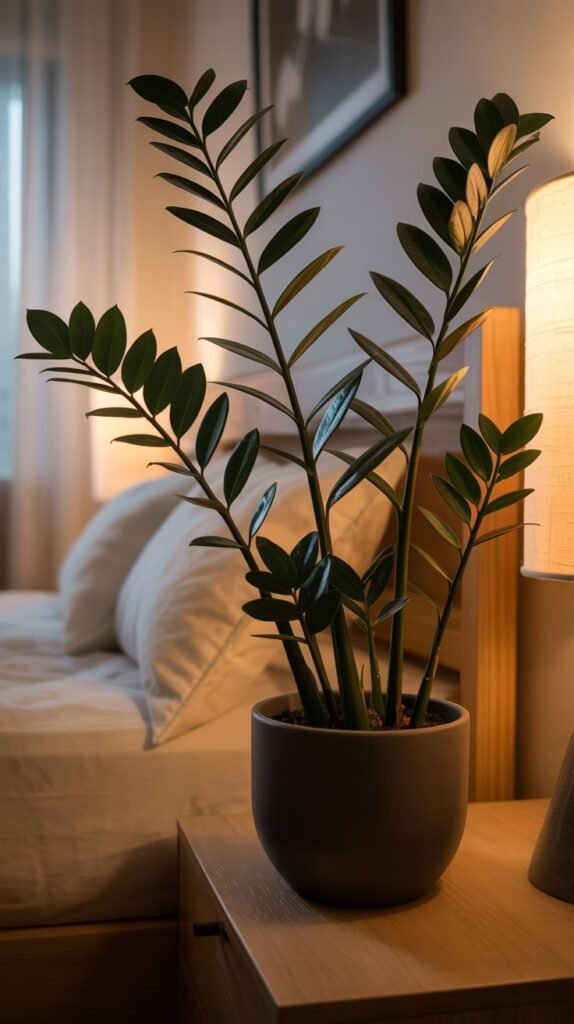
Why It Improves Your Home’s Air
The ZZ plant is a slow, steady air purifier that excels in dim or neglected rooms.
It quietly clears stale, heavy air, especially in areas with poor ventilation or limited windows.
It’s extremely easy to maintain, making it perfect for busy or beginner plant owners.
Best Rooms for Air Quality
• Bedrooms
• Bathrooms
• Offices
• Dark corners
• Homes with irregular light patterns
How to Plant Your ZZ Plant Properly
Pot: Medium pot — avoid oversized containers
Soil: Fast-draining mix (potting soil + sand or perlite)
Planting Steps:
- Remove plant gently — stems break easily.
- Plant high, keeping the root crown exposed.
- Fill around the sides, not tightly.
- Water lightly.
- Place in low to bright indirect light (never sun).
Daily & Weekly CareContact
• Water once soil is completely dry — often every 2–3 weeks.
• Dust leaves lightly to maintain shine and effectiveness.
• Avoid over-misting; ZZ plants prefer dry air.
Beginner Mistake
Overwatering — the thick tubers rot easily if soil stays wet.
Why People Love It
It looks expensive, grows effortlessly, and stays stunning with very little attention.
8. Chinese Evergreen (Aglaonema)
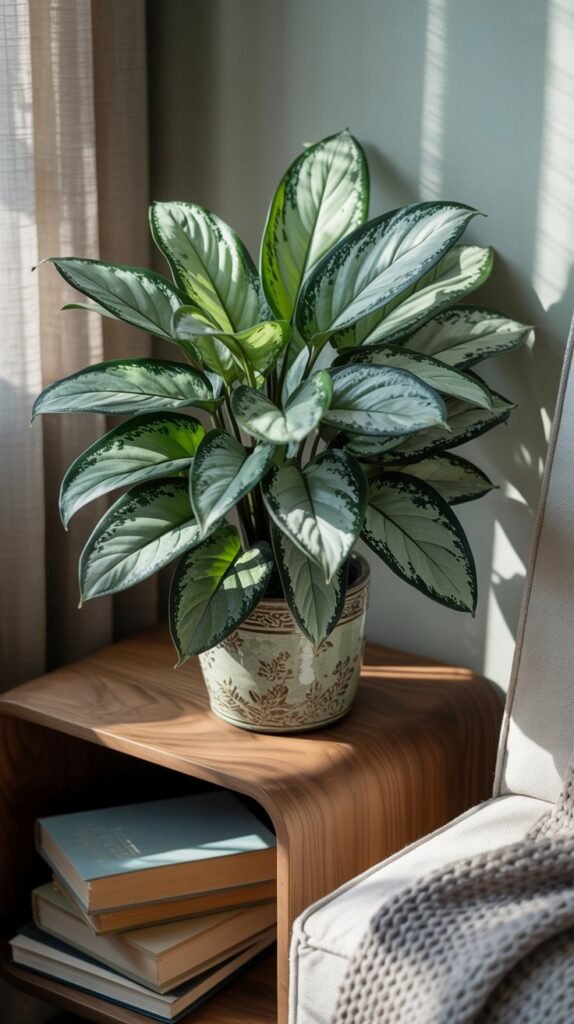
Why It Improves Your Home’s Air
Chinese Evergreens are excellent at refreshing stagnant indoor air while adding a beautiful splash of soft color.
Their leaves continuously filter impurities and help balance humidity, making them especially effective in enclosed spaces.
Best Rooms for Air Quality
• Bedrooms
• Dining rooms
• Home offices
• Living rooms with soft lighting
• Spaces with mild dryness
How to Plant Your Chinese Evergreen Properly
Pot: Medium pot with drainage
Soil: Rich, airy mix that holds moisture without staying wet
Planting Steps:
- Loosen roots lightly aglaonemas adapt easily.
- Plant at the same depth as nursery pot.
- Water evenly to settle roots.
- Place in medium to low light bright light washes out leaf color.
Daily & Weekly Care
• Water when the topsoil begins to dry.
• Mist lightly in dry seasons.
• Wipe leaves gently — clean leaves = better air cleaning.
• Keep away from cold drafts or A/C vents.
Beginner Mistake
Placing it in harsh sunlight — the leaves fade and burn.
Why It’s a Favorite
It is one of the most forgiving plants for anyone who wants beauty, low maintenance, and natural air-refreshing power all in one.
9. English Ivy
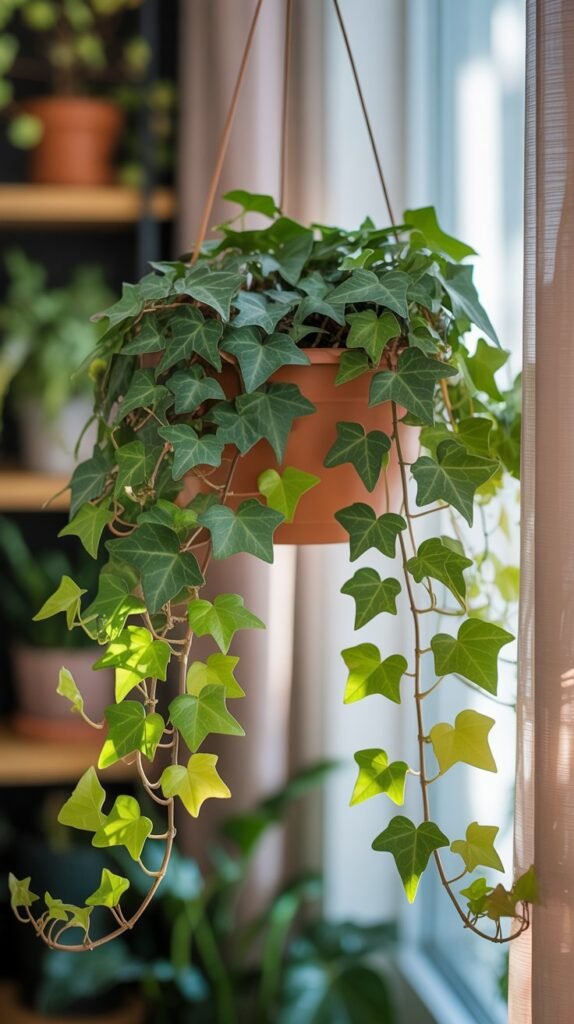
Why It Improves Your Home’s Air
English Ivy is exceptionally good at filtering stale indoor air.
It thrives where air tends to become heavy — corners, high shelves, areas with low airflow, and rooms that feel “closed.”
Its cascading vines create movement, which encourages better air circulation and freshness.
It’s especially helpful in homes prone to dust buildup or mild humidity issues.
Best Rooms for Air Quality
• Bedrooms
• Living rooms
• Bathrooms
• Home libraries
• Staircase walls or high shelves
How to Plant English Ivy Properly
Pot: Wide, shallow pot or hanging basket
Soil: Light, airy potting mix with perlite
Planting Steps:
- Gently remove ivy from its container — avoid breaking vines.
- Lay the roots into the soil naturally rather than forcing them downward.
- Cover lightly with fresh mix without pressing too hard.
- Water evenly and allow to drain fully.
- Place in bright, indirect light for best growth.
Daily & Weekly Care
• Keep soil lightly moist — never soggy.
• Trim regularly to encourage fresh, air-cleansing foliage.
• Mist lightly in dry seasons; English Ivy loves gentle humidity.
• Avoid hot, direct sun — it stresses the vines.
Beginner Mistake
Letting soil dry out completely — ivy becomes crispy and loses its filtering strength.
Why People Love It
The long green vines soften hard edges in your home, bringing an elegant, romantic feel that instantly improves your sense of calm.
10. Calathea (Prayer Plant)
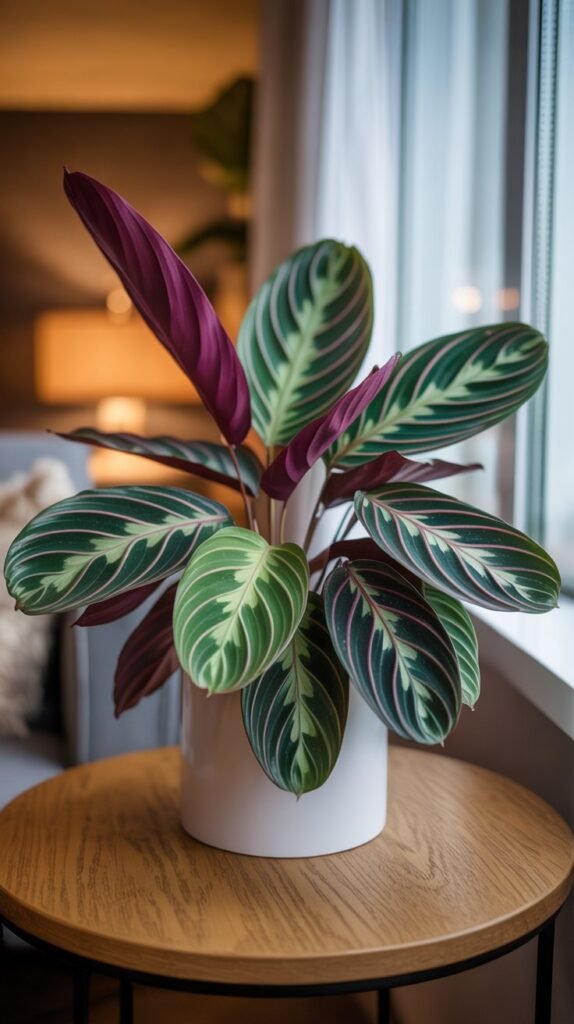
Why It Improves Your Home’s Air
Calatheas are natural humidifiers and gentle air purifiers.
Their broad, textured leaves trap dust, soften dry indoor air, and quietly filter toxins like stale indoor fumes.
Because they open during the day and curl at night, they stay actively engaged with their environment, making your space feel more vibrant and alive.
Best Rooms for Air Quality
• Bedrooms
• Living rooms
• Bathrooms
• Low-light corners
• Spaces that need extra humidity
How to Plant Calathea Properly
Pot: Plastic or ceramic pot (helps maintain moisture)
Soil: Rich, moisture-retentive mix
→ indoor potting soil + peat + perlite
Planting Steps:
• Carefully loosen the roots—Calatheas dislike being compacted.
• Set the root ball so the crown sits level with the soil surface.
• Fill around the sides, pressing lightly so the plant stands firm.
• Water until the soil is evenly moist but not soggy.
• Place in bright, indirect light—no direct sun.
Daily & Weekly Care
• Keep soil slightly moist; never let it fully dry.
• Mist lightly 2–3 times a week or use a humidifier.
• Clean leaves gently to help them breathe.
• Rotate weekly for even leaf movement.
Beginner Mistake
Direct sunlight. It scorches the leaves and fades their patterns.
Why It’s Loved
Its striking leaf designs and nightly “prayer” movement give your home a calm, organic rhythm that’s hard to ignore.
11. Golden Pothos

Why It Improves Your Home’s Air
Golden Pothos is one of the strongest air refreshers for everyday indoor living.
It thrives even in neglected corners and continuously filters stale air, making rooms feel more open and breathable.
Because it grows quickly, it produces a steady flow of new foliage that naturally cleanses the air.
Best Rooms for Air Quality
• Bedrooms
• Kitchens
• Living rooms
• Home offices
• Hallways
How to Plant Golden Pothos Properly
Pot: Regular pot or hanging basket
Soil: Standard indoor potting mix with good drainage
Planting Steps:
- Loosen the root ball carefully.
- Set plant slightly off-center if you want trailing vines.
- Fill soil lightly; pothos roots love oxygen.
- Water until evenly moist.
- Place in medium to bright indirect light.
Daily & Weekly Care
• Water when the top inch dries.
• Trim vines to shape and encourage fuller growth.
• Clean leaves often — clean pothos leaves perform stronger air-filtering.
• Rotate occasionally to avoid lopsided vines.
Beginner Mistake
Placing in harsh sunlight — pothos leaves scorch easily.
Why It’s a Favorite
It grows gracefully, requires almost no effort, and adds warm, lush greenery to any space.
12. Dracaena (Corn Plant / Dragon Tree)
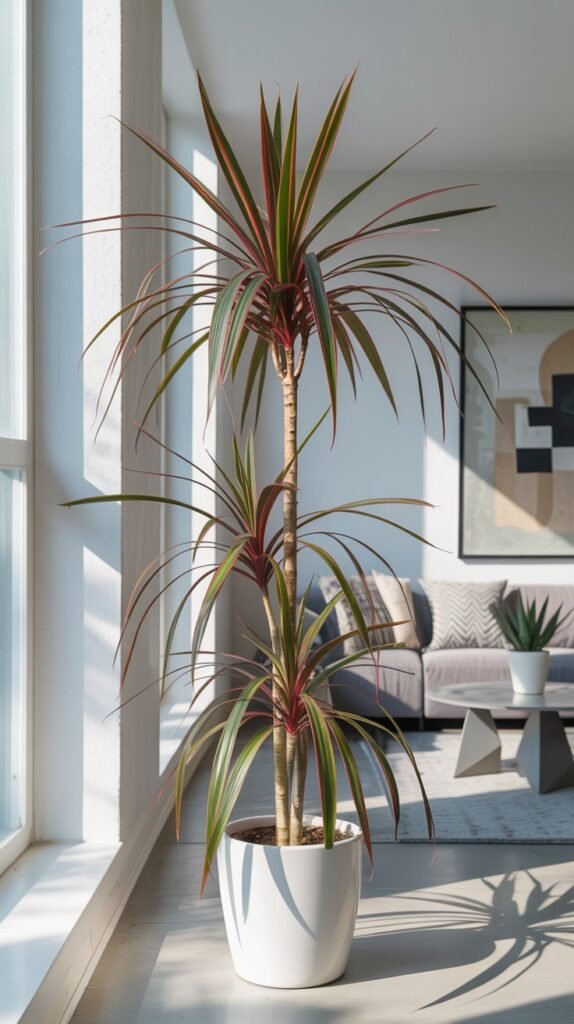
Why It Improves Your Home’s Air
Dracaena plants are excellent for improving indoor air in larger spaces or rooms where odors linger.
Their tall, upright stems help circulate air vertically — something few houseplants do.
They also maintain steady moisture levels in the room, balancing dryness.
Best Rooms for Air Quality
• Large living rooms
• Dining rooms
• Entryways
• Home offices
• Bedrooms
How to Plant Dracaena Properly
Pot: Tall pot with strong drainage
Soil: Loose, well-draining mix (potting soil + perlite)
Planting Steps:
- Gently loosen roots — dracaenas dislike compact soil.
- Place upright and stable; these plants grow tall.
- Add soil around the base carefully.
- Water and allow full drainage.
- Keep in bright, indirect light.
Daily & Weekly Care
• Water when the top layer of soil dries.
• Wipe long leaves weekly — dust dulls their filtering ability.
• Rotate monthly for even growth.
• Mist lightly if indoor air is very dry.
Beginner Mistake
Overwatering — dracaenas are prone to root issues if kept too wet.
Why It’s Loved
Its tall, tree-like shape gives homes a serene, grounded feel while continuously refreshing the air.
13. Kentia Palm
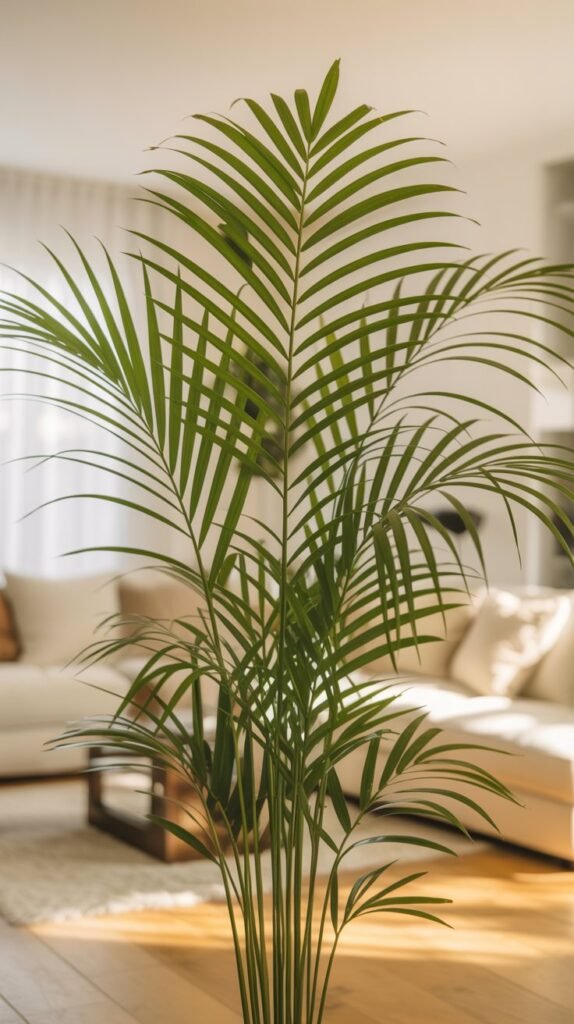
Why It Improves Your Home’s Air
The Kentia Palm is one of the best beginner-friendly indoor palms for fresh, clean air.
Its tall, sweeping fronds increase oxygen levels, trap floating dust, and help soften dry indoor environments.
Because it grows slowly and steadily, it refreshes your space without needing constant maintenance.
Best Rooms for Air Quality
• Living rooms
• Offices
• Entryways
• Bedrooms
• Large open spaces
How to Plant Kentia Palm Properly
Pot: Large, deep container (for long roots)
Soil: Light, airy mix
→ potting soil + sand + perlite
Planting Steps:
• Gently place the palm in the pot without breaking the long roots.
• Keep the root crown slightly above soil level.
• Fill with soil loosely—palms breathe better with airflow.
• Water thoroughly until it drains well.
• Place in bright, indirect light.
Daily & Weekly Care
• Water when the top inch of soil feels dry.
• Mist once or twice a week.
• Wipe fronds to remove dust buildup.
• Turn the pot every month so it grows straight.
Beginner Mistake
Overpotting. Kentias prefer to grow slightly root-bound.
Why It’s Loved
It gives your home a soft, tropical feel and instantly makes any room look more refined and peaceful.
14. Philodendron Brasil
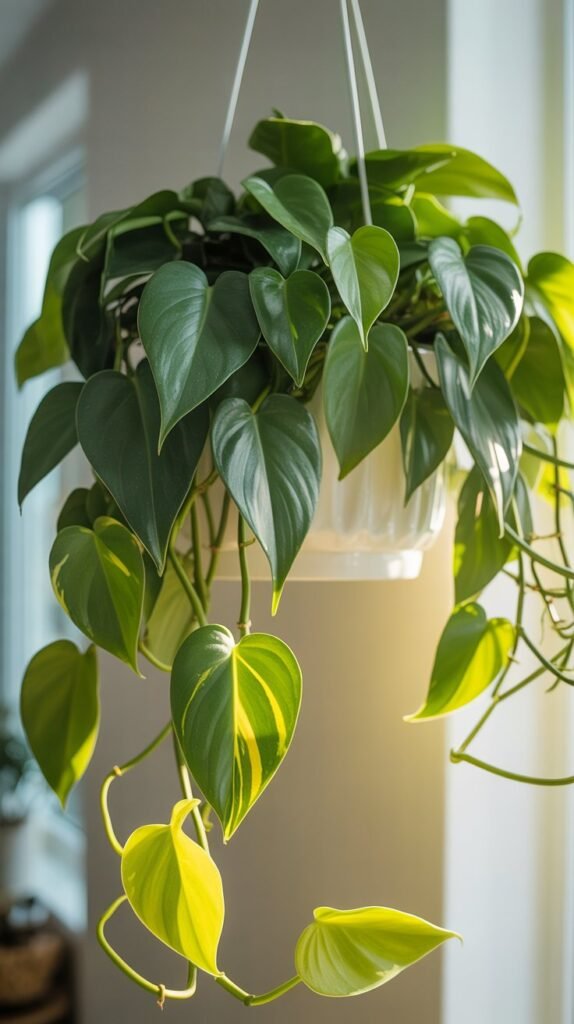
Why It Improves Your Home’s Air
Philodendron Brasil is a powerful, low-maintenance air purifier.
Its heart-shaped variegated leaves absorb excess indoor toxins while improving humidity and refreshing stuffy rooms.
Because it trails or climbs, it actively expands its leaf surface, cleaning the air more efficiently as it grows.
Best Rooms for Air Quality
• Bedrooms
• Home offices
• Living rooms
• Shelves and hanging baskets
• Any low-to-medium light space
How to Plant Philodendron Brasil Properly
Pot: Standard pot with drainage holes
Soil: Light, quick-draining mix
→ potting soil + perlite + orchid bark
Planting Steps:
• Loosen the roots gently and set the plant at the same depth.
• Add soil around the sides without packing too tightly.
• Water lightly to settle the mix.
• Place in bright, filtered light or medium shade.
Daily & Weekly Care
• Water when the top 1–2 inches of soil dry out.
• Trim vines to encourage fuller, bushier growth.
• Wipe leaves so they stay glossy and efficient.
• Fertilize lightly once a month during growing season.
Beginner Mistake
Too much sun — it bleaches the beautiful yellow variegation.
Why It’s Loved
It’s one of the easiest, most forgiving indoor plants, instantly giving any space a lush, modern, cheerful look.
15. Wax Plant (Hoya Carnosa)
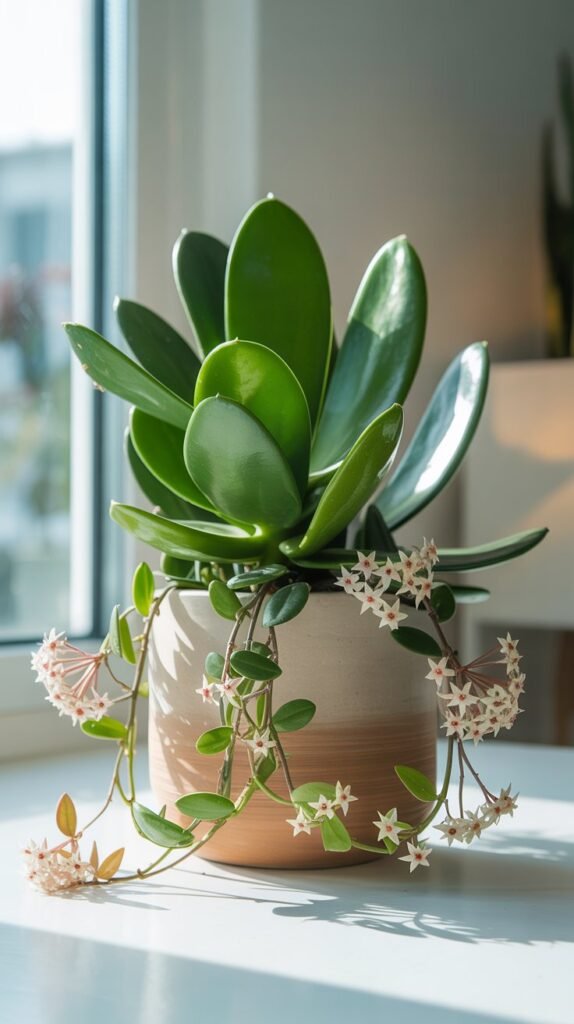
Why It Improves Your Home’s Air
The Wax Plant is a resilient, long-lived air purifier with thick, waxy leaves that store moisture and absorb airborne impurities.
It releases moisture slowly, helping regulate humidity in dry homes.
As it grows, it vines beautifully, adding both greenery and cleaner air.
Best Rooms for Air Quality
• Bedrooms
• Hallways
• Bright kitchens
• Living rooms
• Near windows that get filtered sunlight
How to Plant Hoya Carnosa Properly
Pot: Small-to-medium pot (Hoyas prefer snug roots)
Soil: Fast-draining mix
→ cactus soil + orchid bark + perlite
Planting Steps:
• Keep the root ball mostly intact—Hoyas dislike disturbance.
• Plant at the same soil level.
• Water lightly after planting.
• Place in bright, indirect light.
Daily & Weekly Care
• Water only when the soil is fully dry.
• Provide support if you want it to climb.
• Clean leaves occasionally so they shine.
• Avoid moving it too much—Hoyas like stability.
Beginner Mistake
Overwatering. Hoyas store water and rot easily if kept too wet.
Why It’s Loved
It’s easy, elegant, and long-lasting — plus mature plants reward you with sweet-scented flowers that make your home feel fresh and inviting.
16. Fiddle Leaf Fig
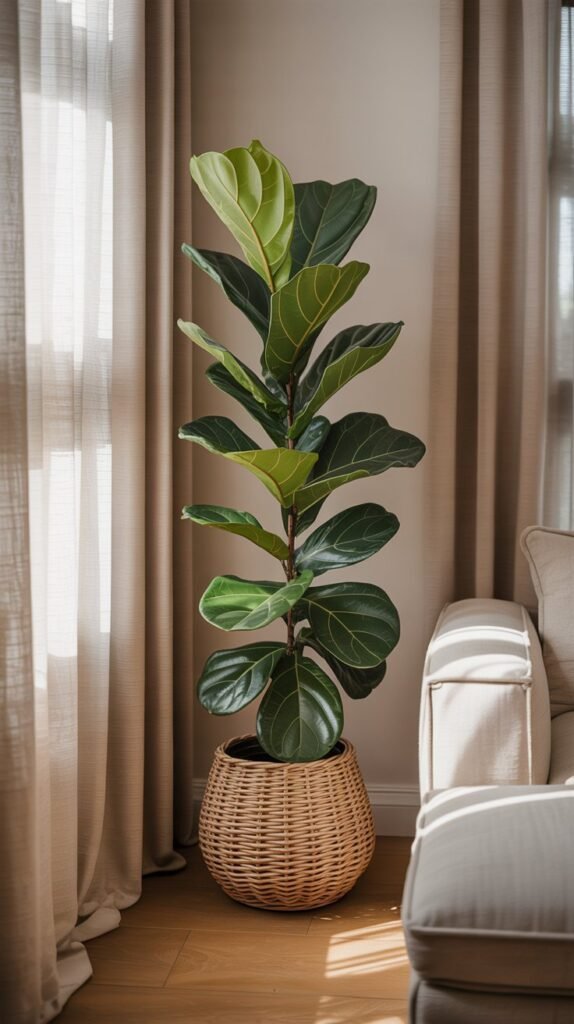
Why It Improves Your Home’s Air
Fiddle Leaf Figs have large, bold leaves that act like powerful indoor air sweepers.
The bigger the leaf, the larger the surface area available to filter impurities from your home.
A single mature Fiddle Leaf can noticeably improve the feel of a living room or bedroom.
Best Rooms for Air Quality
• Living rooms
• Bedrooms
• Entryways
• Home offices
• Rooms with tall ceilings or large windows
How to Plant Your Fiddle Leaf Fig Properly
Pot: Tall pot with sturdy structure
Soil: Fast-draining indoor mix (potting soil + bark + perlite)
Planting Steps:
- Remove gently—fiddles dislike rough handling.
- Keep the root ball intact; fiddles get shocked easily.
- Plant with the root crown slightly above soil level.
- Water deeply once.
- Place in bright, indirect light (they love brightness but not harsh sun).
Daily & Weekly Care
• Water when the top few inches of soil dry out.
• Rotate weekly for even leaf development.
• Clean each leaf with a damp cloth—dust blocks light absorption.
• Avoid sudden temperature changes.
Beginner Mistake
Moving the plant too often. Fiddle Leaf Figs need consistency and stable light direction.
Why It’s Loved
It makes a statement—beautiful, tall, graceful, and elegant. A stunning plant that instantly elevates any room.
17. Aloe Vera
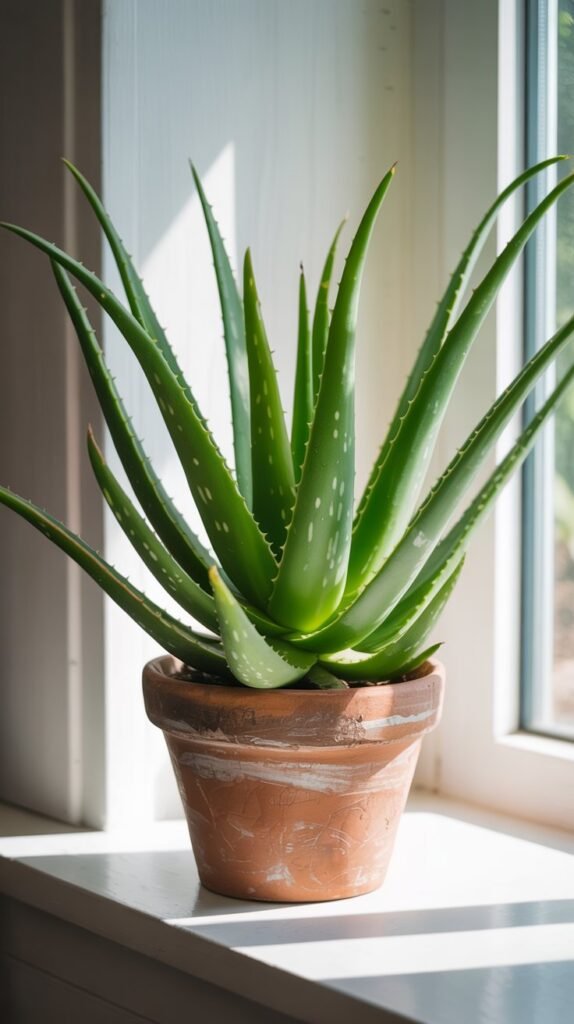
Why It Improves Your Home’s Air
Aloe Vera is one of the simplest and most reliable plants for refreshing indoor air.
Its thick, water-filled leaves hold moisture and help balance dryness in your home while quietly filtering stale air.
Because Aloe releases oxygen both day and night, it keeps your rooms feeling fresh around the clock.
Best Rooms for Air Quality
• Bedrooms
• Kitchens
• Home offices
• Sunny windowsills
• Rooms that feel dry or stuffy
How to Plant Aloe Vera Properly
Pot: Terracotta or clay pot (prevents excess moisture)
Soil: Sandy, quick-draining mix (cactus soil + perlite)
Planting Steps:
- Remove the aloe gently—leaves can bruise easily.
- Keep the root crown above the soil line.
- Fill with soil loosely; aloe roots like airflow.
- Water lightly once after planting.
- Place in bright light, ideally near a sunny window.
Daily & Weekly Care
• Water only when the soil is completely dry—usually every 2–3 weeks.
• Avoid misting; aloe prefers dry air.
• Clean leaves occasionally to help them absorb light better.
• Rotate monthly for even growth.
Beginner Mistake
Overwatering. Aloe thrives on neglect and stores water naturally.
Why It’s Loved
It brings a clean, natural feel into any room while offering soothing gel for small skin irritations—perfect for practical, natural-living homes.
18. Bamboo Palm
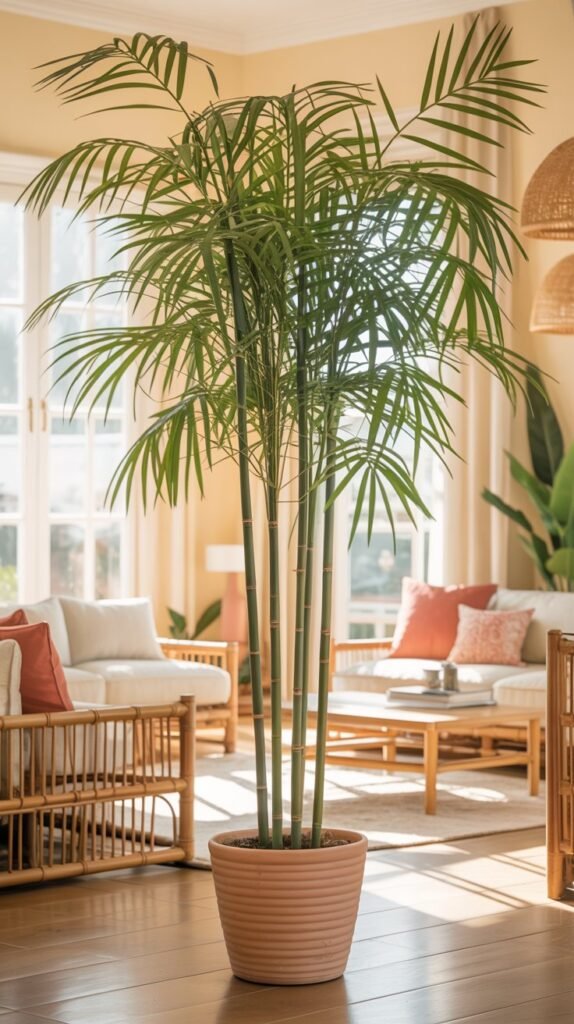
Why It Improves Your Home’s Air
The Bamboo Palm is a gentle, tropical-style plant that sends moisture into the air while filtering out stale, heavy air.
It turns dry rooms into balanced, breathable spaces without any fuss.
Its tall stems and soft fronds also help circulate air vertically, which improves the feel of larger rooms.
Best Rooms for Air Quality
• Living rooms
• Bedrooms
• Hallways
• Workspaces
• Rooms with warm, dry air
How to Plant Your Bamboo Palm Properly
Pot: Deep pot with drainage
Soil: Moisture-holding potting mix (soil + coco coir)
Planting Steps:
- Handle gently—palm roots are soft and stringy.
- Keep the plant at the same depth as the nursery container.
- Pack soil only lightly.
- Water thoroughly.
- Place in bright, indirect light.
Daily & Weekly Care
• Keep soil slightly moist; avoid complete dryness.
• Mist lightly if the air is dry.
• Remove yellowing fronds to encourage new growth.
• Wipe leaves to maintain air-refreshing power.
Beginner Mistake
Placing the plant in direct sun—it can scorch the delicate fronds.
Why It’s Loved
It gives your home an instant tropical warmth. Soft, elegant, and calming—perfect for creating a relaxed sanctuary.
19. Schefflera (Umbrella Plant)
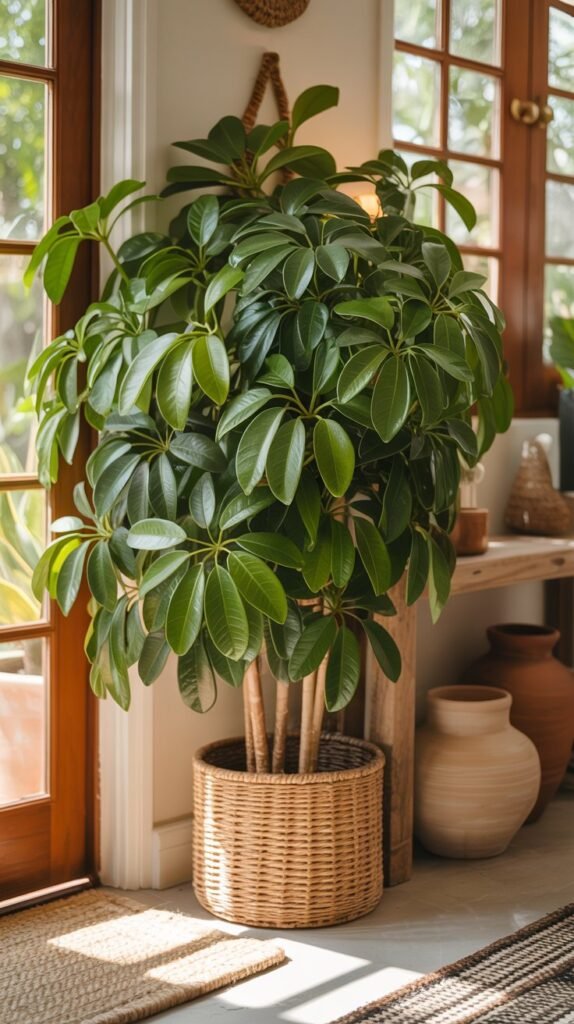
Why It Improves Your Home’s Air
Schefflera has glossy, umbrella-shaped leaves that work like natural indoor filters.
As it grows, it continuously pulls heavy, stale air from the room and replaces it with fresh, light, revitalized air.
It’s particularly helpful in homes with poor airflow or rooms that consistently feel warm.
Best Rooms for Air Quality
• Living rooms
• Dining rooms
• Entryways
• Bedrooms
• Home offices
How to Plant Your Schefflera Properly
Pot: Medium or large pot depending on plant height
Soil: Well-draining indoor soil with bark or perlite
Planting Steps:
- Remove gently—branches can tangle.
- Keep root ball intact.
- Plant upright with the trunk centered.
- Water evenly once planted.
- Place in bright, indirect to medium light.
Daily & Weekly Care
• Water when the topsoil dries slightly.
• Prune lightly to maintain shape.
• Wipe leaves regularly for best air filtering.
• Rotate monthly to keep the plant balanced.
Beginner Mistake
Placing it in low light—this causes leggy, weak growth.
Why It’s Loved
It grows beautifully and brings life, fullness, and a bright, clean feeling to any room.
20. Parlor Palm
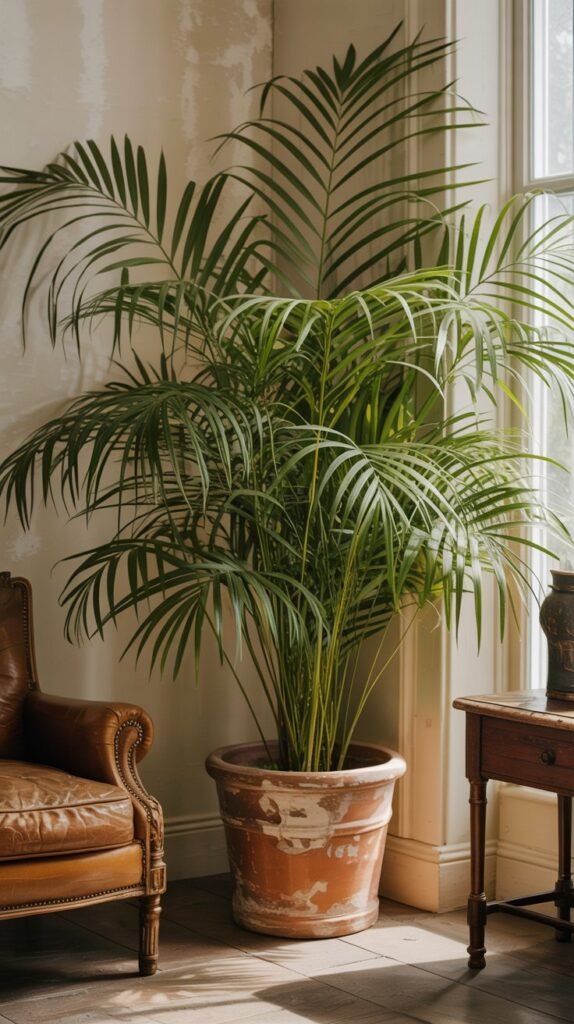
Why It Improves Your Home’s Air
The Parlor Palm is a quiet, gentle purifier perfect for homes that need steady, long-term air improvement.
It releases slow, consistent moisture into the air and thrives even in rooms with lower light.
It’s an excellent choice for apartments or window-limited homes.
Best Rooms for Air Quality
• Bedrooms
• Living rooms
• Reading corners
• Home offices
• Small enclosed rooms
How to Plant Your Parlor Palm Properly
Pot: Medium pot with drainage
Soil: Rich, moisture-holding potting mix with perlite
Planting Steps:
- Gently remove the plant—roots are delicate.
- Keep soil level close to the original nursery position.
- Water thoroughly after planting.
- Place in gentle, indirect light.
Daily & Weekly Care
• Keep soil slightly moist.
• Mist regularly in dry weather.
• Remove brown tips to keep the plant fresh.
• Wipe leaves to help them breathe.
Beginner Mistake
Placing near cold drafts—its fronds react quickly to temperature changes.
Why It’s Loved
It gives your home a calm, inviting, old-world charm while improving your air quietly and consistently.
