
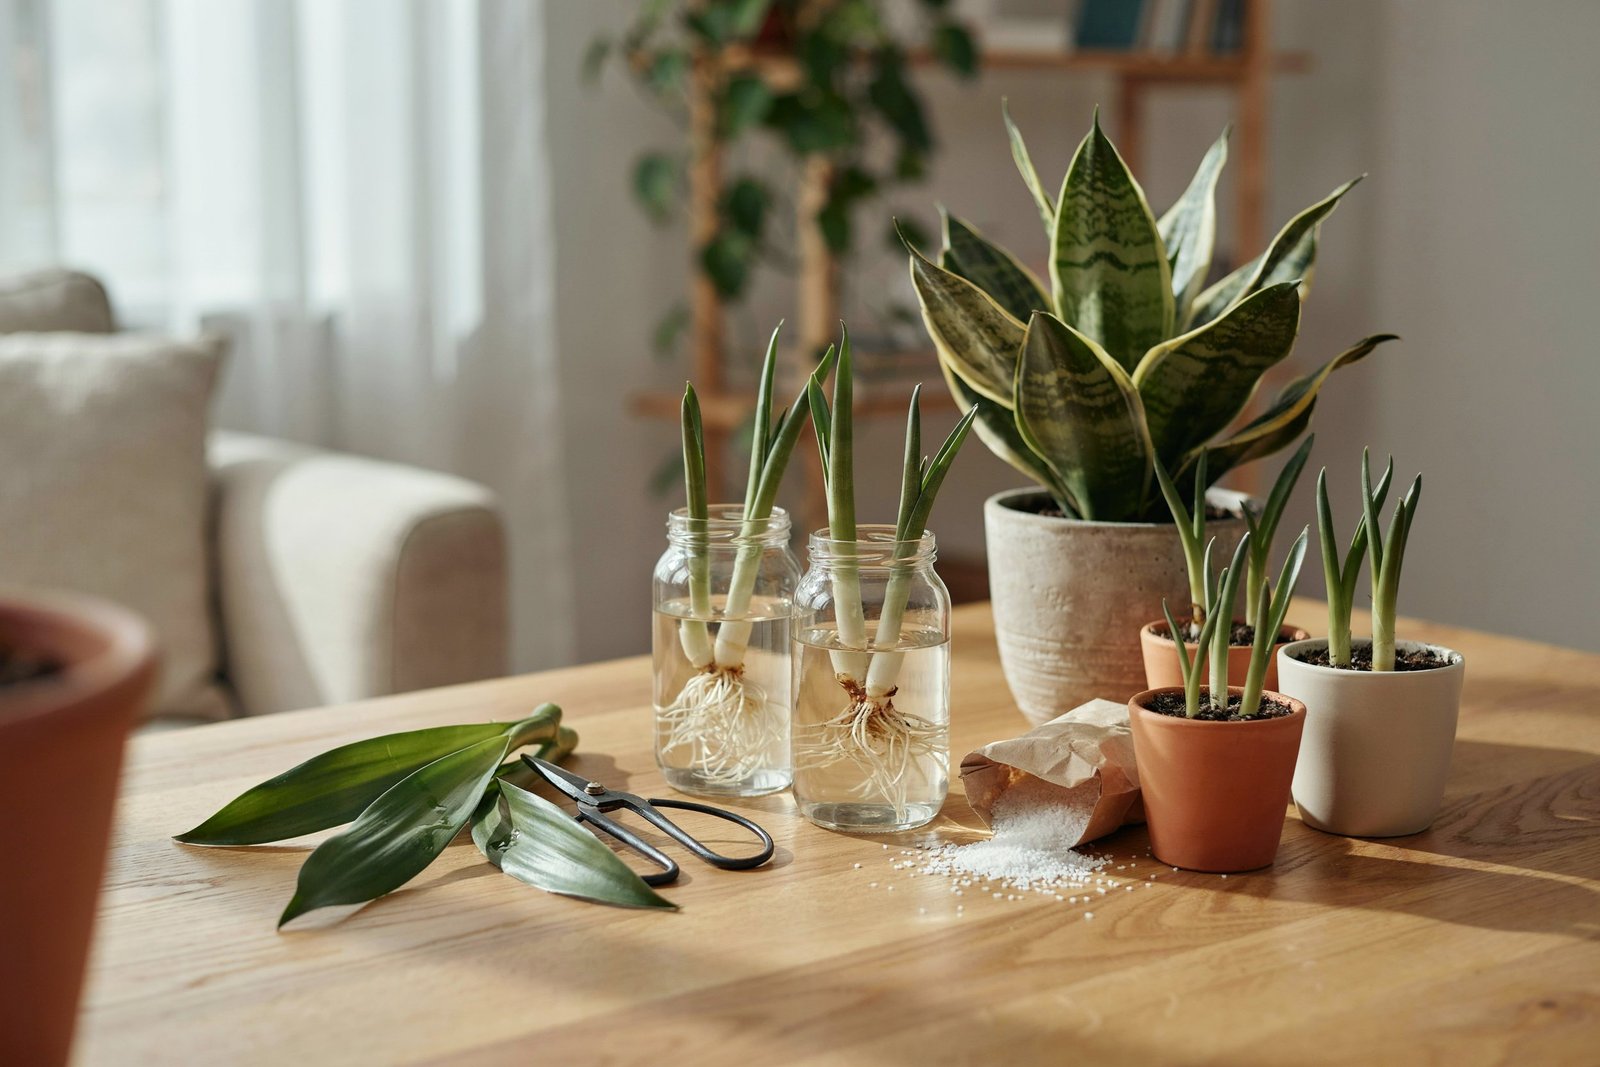

I’ve always loved how a healthy snake plant can make a room feel greener without demanding constant attention.
What I love even more is how easily one established plant can become several new plants with a little patience.
If your snake plant has grown into a full, crowded pot, or you simply want to create a few new plants for your home, propagation is a wonderful place to start.
The best part is that you don’t need complicated equipment or advanced gardening skills.
From simple leaf cuttings to dividing established plants, these seven snake plant propagation ideas give you several practical ways to multiply your favorite houseplant.
Why Propagate a Snake Plant?

Snake plants, commonly known today as Dracaena trifasciata and formerly classified as Sansevieria trifasciata, are particularly rewarding plants to propagate.
Instead of buying several new plants, you can use healthy growth from a plant you already have. Depending on the variety and method, you can create new plants from individual leaves, sections of leaves, or established clumps.
Propagation is also useful when your snake plant has become overcrowded.
A mature plant may produce new shoots from underground rhizomes, gradually filling the pot. Dividing those growths can give each section more room while providing you with additional plants.
Before choosing a method, though, it helps to understand one important difference: not every propagation method produces an exact genetic copy of a variegated snake plant.
For example, many variegated forms such as ‘Laurentii’ can lose their yellow-edged pattern when propagated from leaf sections. Iowa State University Extension specifically recommends division when you want to preserve the variegation of these plants.
With that in mind, here are seven practical ways to propagate snake plants.
1. Propagate Snake Plant From Leaf Cuttings in Soil
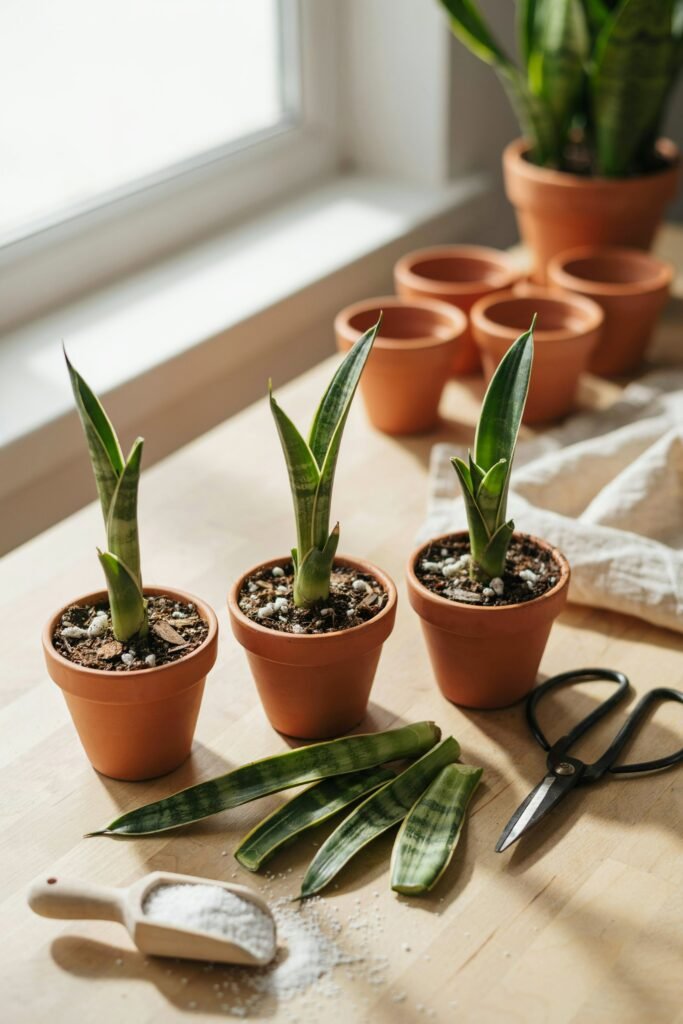
Soil propagation is one of my favorite methods because you can start several cuttings at once and avoid having to move water-rooted cuttings into soil later.
Snake plant leaves are thick and capable of storing water, so they don’t need to be kept constantly wet while they develop roots. In fact, excessive moisture is one of the easiest ways to cause cuttings to rot.
RHS guidance specifically lists Sansevieria as suitable for part-leaf cuttings and recommends cutting the leaves into sections before inserting them into a free-draining growing medium.
What You’ll Need
- A healthy snake plant leaf
- Clean, sharp scissors or pruning shears
- A small pot or propagation tray
- Well-draining potting mix
- Perlite, pumice, or coarse grit
- Clean water
- A bright location away from harsh direct sunlight
How to Do It
Start by choosing a healthy, mature leaf. Avoid leaves with soft spots, severe damage, pests, or signs of disease.
Cut the leaf close to its base.
Next, divide the leaf into sections approximately 2–4 inches long. The exact size can vary, but the most important detail is orientation.
You need to know which end was originally closest to the roots.
If you accidentally plant the cutting upside down, it may fail to produce a new plant. Iowa State Extension and Illinois Extension both emphasize the importance of keeping snake plant leaf sections correctly oriented.
A simple trick is to make a small notch in the bottom of each section.
Allow the freshly cut sections to dry for a short period so the cut surfaces can dry before planting.
Then insert each section into lightly moist, well-draining growing medium with the original bottom edge facing downward.
Only bury the lower portion.
Aftercare
Place the container somewhere warm with bright, indirect light.
Don’t keep the soil saturated.
Snake plants are naturally adapted to periods of dryness, and their thick leaves hold moisture. A constantly wet propagation medium can encourage rot rather than rooting.
Once roots and new growth develop, the young plant can gradually be treated more like an established snake plant.
Why I Like This Method
The biggest advantage is quantity.
One long leaf can potentially be divided into several sections, allowing you to experiment with multiple cuttings at once.
2. Propagate Snake Plant Leaf Cuttings in Water
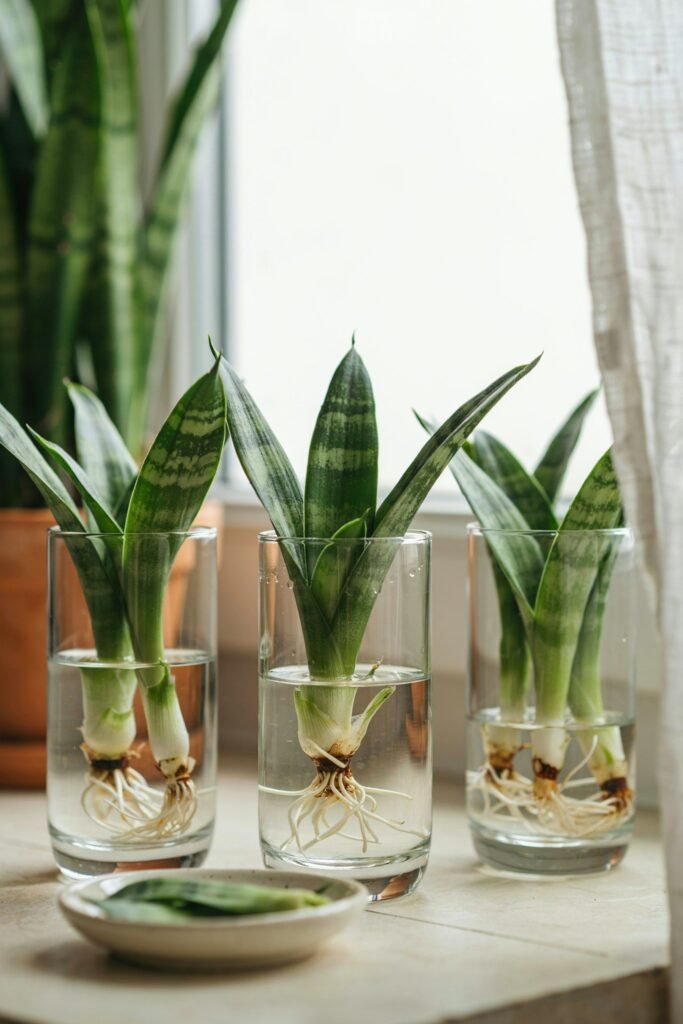
If you enjoy watching roots develop, water propagation can be especially satisfying.
You can place a suitable leaf section into water and monitor its progress without disturbing the cutting to check whether roots have appeared.
However, I recommend being especially careful with water because snake plant leaves can rot when they remain too wet for too long.
What You’ll Need
- A healthy snake plant leaf
- Clean scissors
- A clean glass or jar
- Fresh water
- Bright, indirect light
Step-by-Step Method
Choose a healthy leaf and cut it from the mother plant.
You can use a whole leaf or prepare sections, depending on the method you’re following.
If using sections, remember to mark the bottom of each piece.
Place the bottom portion into the water.
Only the lower end should be submerged. Avoid placing the entire cutting underwater.
Position the container somewhere bright but away from strong direct sunlight.
Change the water regularly if it becomes cloudy or dirty.
What Should You Watch For?
The cutting may eventually develop roots from the submerged end.
Don’t panic if this seems slow.
Snake plants are not fast-growing plants, and propagation requires patience.
Once the cutting has developed a useful root system and begins producing new growth, you can transfer it carefully into a small container filled with a well-draining potting mix.
RHS guidance for houseplant cuttings similarly recommends keeping water below the leaves and moving rooted cuttings into small pots once roots have developed.
A Common Mistake
Don’t assume that more water means faster rooting.
It doesn’t.
For snake plants, too much moisture can create the opposite result.
If the cutting becomes soft, mushy, discolored, or unpleasantly slimy, it may be experiencing rot.
3. Propagate a Snake Plant by Dividing the Plant
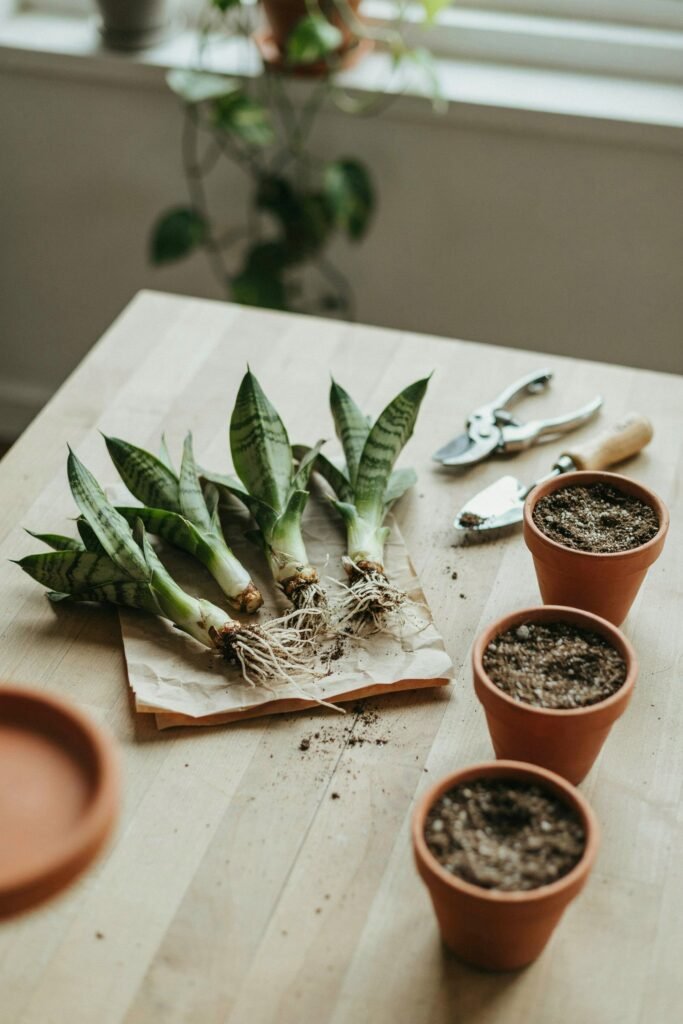
If you want the fastest way to create established-looking plants, division is one of the best choices.
Instead of asking a leaf to produce an entirely new root system, you’re separating an existing plant into sections that already have roots and rhizomes.
Snake plants naturally produce underground rhizomes. These structures allow new shoots to develop and spread within the container.
When Division Makes the Most Sense
I would choose division when:
- The plant has become crowded
- Several clusters are growing in the same pot
- You can see separate shoots around the mother plant
- You want larger new plants immediately
- You want to preserve the characteristics of a variegated cultivar
How to Divide a Snake Plant
First, gently remove the plant from its container.
Brush or shake away some of the potting mix so you can see the root system.
Look carefully at the base of the plant.
You’re looking for natural sections where leaf clusters connect through rhizomes and roots.
Separate these sections carefully.
Depending on how tightly connected the plant is, you may be able to pull sections apart with your hands. For tougher sections, use a clean, sharp knife.
Each division should ideally have healthy roots and a portion of rhizome attached.
Place each new section into its own container with a well-draining potting mix.
Water lightly after planting, allowing excess water to drain away.
Why Division Is So Valuable
Division gives you a head start.
A leaf cutting has to develop roots and eventually produce new shoots. A division already has a functioning root system.
This is also the method to choose if preserving variegation is important.
Iowa State Extension notes that many variegated Sansevieria forms do not remain true to type when propagated from leaf sections because of how their variegation is formed. Division is recommended for maintaining that coloration.
4. Propagate Snake Plant From Natural Pups
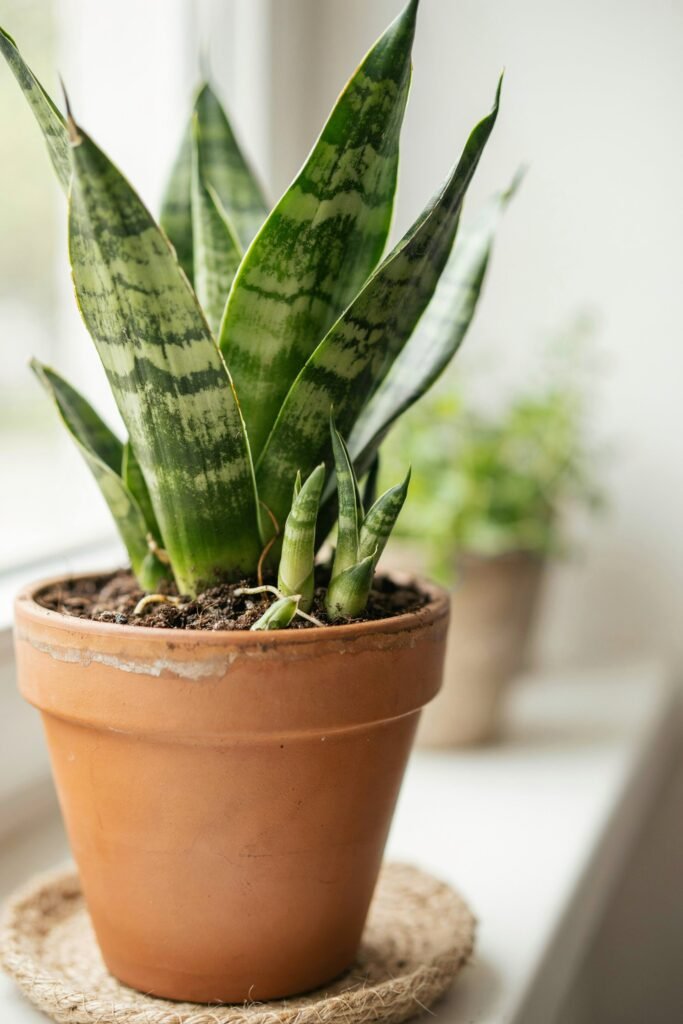
One of the easiest propagation opportunities may already be happening inside your pot.
Snake plants can produce young shoots, often called pups, from their underground rhizomes.
These little shoots start small but can eventually develop into independent plants.
Instead of cutting a healthy mature leaf, you can wait for a pup to become sufficiently established and then separate it from the mother plant.
How to Identify a Good Pup
A good candidate should have:
- Several healthy leaves
- A strong connection to the rhizome
- Some roots of its own, when possible
- Firm, healthy growth
Avoid separating tiny shoots simply because you are excited to make another plant.
A little patience can make the process much easier.
How to Separate a Pup
Remove the plant from its container.
Expose the soil around the pup and follow its connection back to the rhizome.
If the pup has developed its own roots, carefully separate it from the mother plant.
Use a clean knife if the rhizome needs to be cut.
Plant the pup into a small pot with well-draining soil.
Don’t choose an enormous container.
A pot that is only slightly larger than the young root system is usually easier to manage because excess soil can remain wet for longer than the plant needs.
Why Pups Are a Great Choice
Pups are especially useful for beginners because you’re working with naturally produced growth rather than trying to create a plant from a single piece of leaf.
They can also provide a more substantial new plant from the beginning.
5. Propagate by Dividing a Large Snake Plant Clump
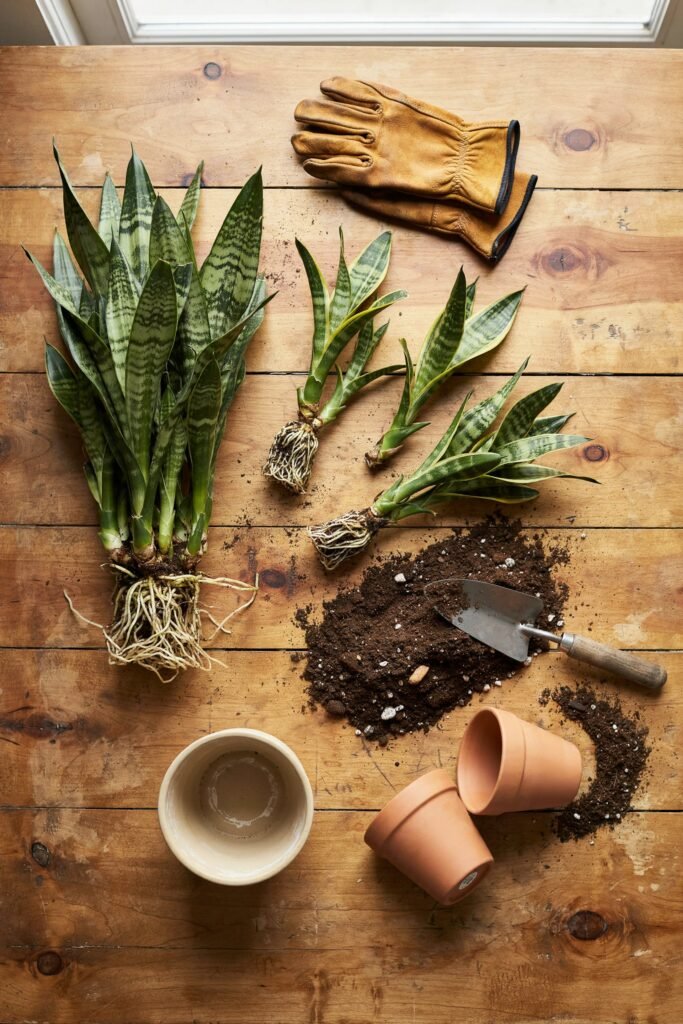
Dividing a clump is related to ordinary plant division, but it’s particularly useful when your snake plant has completely filled its container.
Instead of separating only one pup, you can divide a large, crowded plant into several manageable sections.
This is a wonderful option when you have a mature snake plant that has been growing for years.
Signs Your Plant May Be Ready
Look for:
- Multiple leaf clusters
- Several distinct growth points
- Rhizomes spreading around the pot
- Roots filling much of the container
- New shoots appearing around the edges
The Process
Remove the entire plant from its container.
Inspect the rhizomes and determine where natural divisions occur.
Rather than randomly cutting through the root mass, look for logical separation points.
Each section should ideally have leaves, roots, and rhizome tissue.
Separate the sections carefully.
Pot them individually using a fast-draining growing medium.
After planting, give them time to settle.
Avoid constantly disturbing newly divided plants.
The Biggest Advantage
You can turn one large, overcrowded specimen into several independent plants without relying on leaf cuttings.
And if your original plant is beautifully variegated, division is the safer choice for maintaining that appearance.
6. Propagate Snake Plant Using Leaf Sections in a Propagation Tray
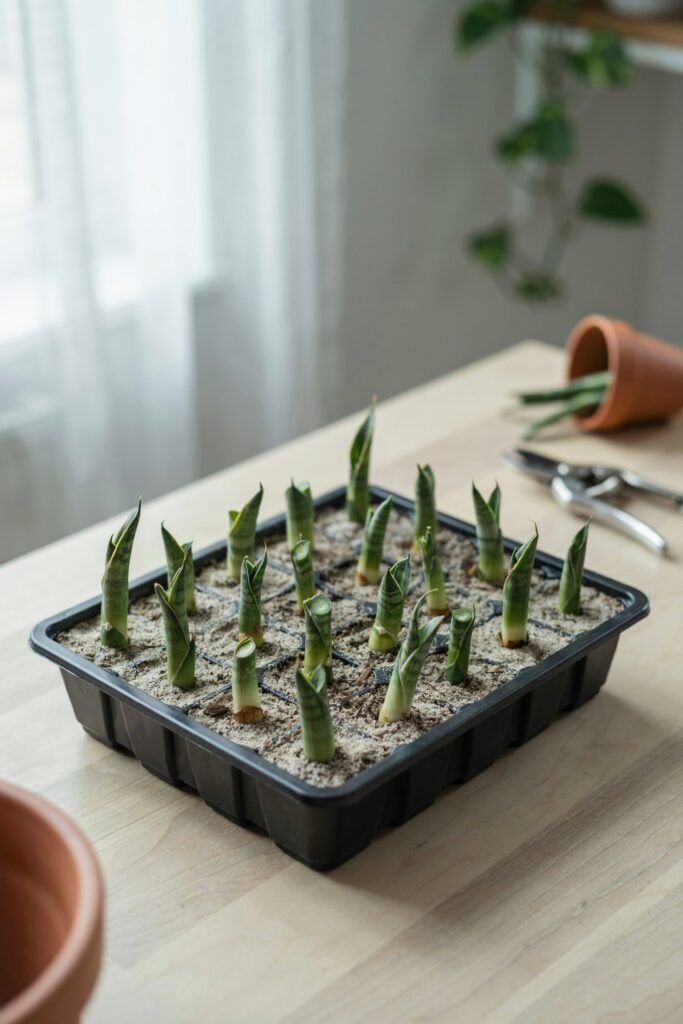
If you want to propagate several cuttings at once, a shallow propagation tray can make the process much more organized.
This method is essentially a scaled-up version of soil propagation.
Instead of placing one or two cuttings into a small pot, you can prepare multiple leaf sections in a tray filled with a suitable, well-draining rooting medium.
How to Set It Up
Start with a clean propagation tray that has drainage holes.
Fill it with a loose rooting medium.
A mixture that drains freely is important because snake plant cuttings are susceptible to rot when kept excessively wet.
Cut healthy snake plant leaves into sections.
Make sure you can distinguish the top from the bottom.
Insert each section vertically into the medium with the correct end down.
Leave enough space between the cuttings so they don’t crowd one another.
Water carefully.
The medium should be lightly moist rather than saturated.
Where to Put the Tray
Choose a warm, bright area with indirect light.
Avoid placing the tray in intense sunlight, especially behind hot glass.
The goal is to provide enough light to support development without overheating or drying the cuttings excessively.
What Happens Next?
Roots develop at the base of the leaf sections.
Eventually, new shoots can emerge.
Iowa State Extension explains that leaf-section cuttings of snake plants produce new roots and leaves from the base of the cutting.
Once the young plants are sufficiently established, they can be separated and moved into individual pots.
Why This Method Is Useful
It’s excellent when you want several plants from one parent leaf.
It also makes it easier to keep multiple cuttings together while you’re waiting for them to establish.
7. Propagate Snake Plant in Perlite or Another Airy Rooting Medium
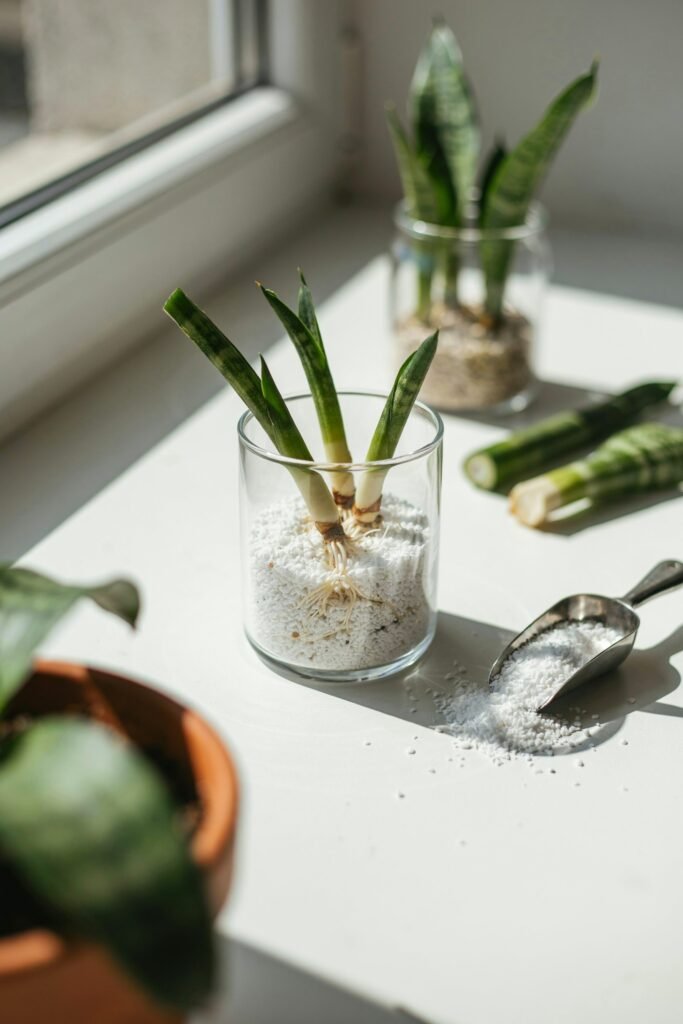
If you struggle with keeping regular potting soil at the right moisture level, an airy propagation medium such as perlite can be another option.
Perlite provides plenty of air space around developing roots while allowing moisture to drain away.
Iowa State Extension specifically documents snake plant leaf sections being rooted in perlite.
How to Propagate in Perlite
Choose a clean container with drainage holes.
Fill it with lightly moistened perlite.
Prepare your snake plant leaf sections as you would for normal soil propagation.
Again, make sure the original bottom end goes downward.
Insert the cutting into the perlite.
Keep the medium lightly moist, but avoid turning the container into a constantly wet environment.
Place it in bright, indirect light.
Why Airflow Matters
Developing roots need access to oxygen.
A compact, waterlogged medium can reduce air around the cutting and create conditions that encourage rot.
That’s why a light, well-draining rooting environment can be helpful.
When Should You Move the Cutting?
Once the cutting has developed a healthy root system and new growth begins, it can be transitioned into a regular well-draining houseplant mix.
Handle the young roots gently during the move.
The Most Important Snake Plant Propagation Tip: Don’t Overwater
If I could give just one piece of advice about snake plant propagation, it would be this:
Don’t love your cuttings to death with water.
It’s easy to assume that a cutting needs plenty of moisture to grow roots.
But snake plants are different from many moisture-loving houseplants.
Their thick leaves store water, and their cuttings can be vulnerable to rot if the propagation medium stays excessively wet.
RHS guidance warns that leaf cuttings can rot when compost is too wet and recommends careful watering and good drainage.
Instead of watering on a rigid schedule, pay attention to the condition of the medium.
If it is still wet, give it more time.
If it has dried substantially, water appropriately and allow excess moisture to drain.
How Long Does Snake Plant Propagation Take?
One of the hardest parts of propagation is waiting.
Snake plants are not famous for rushing.
Root development can take several weeks, and the exact timeline depends on the propagation method, temperature, light, variety, and overall health of the cutting.
Some propagation references report roughly four to six weeks for rooting under suitable conditions, but your own plant may take longer.
Don’t dig up your cutting every few days to check for roots.
That can disturb developing roots.
Instead, look for signs such as:
- Firm leaves
- New shoots
- Gradual resistance when a cutting is gently checked
- Healthy-looking tissue
- Continued growth
Patience is part of the process.
What Kind of Soil Should You Use?
Snake plant propagation needs a medium that drains well.
A heavy soil that stays wet for a long time is not ideal.
You can use a quality houseplant mix amended with a drainage material such as perlite.
A cactus or succulent-style growing mix can also be useful because it is generally designed to drain efficiently.
The important thing isn’t finding one magical recipe.
The important principles are:
Good drainage + adequate air space + controlled moisture.
What Light Do Snake Plant Cuttings Need?
Bright, indirect light is a good starting point.
Avoid placing fresh cuttings in intense direct sunlight.
A newly propagated cutting has limited roots and may not be able to handle the same conditions as a mature plant.
At the same time, don’t hide the cutting in a dark corner.
Poor light can slow development.
A bright location near a window with filtered light is often a comfortable choice.
Can You Propagate a Variegated Snake Plant From a Leaf?
Yes, you can attempt leaf propagation, but there’s an important catch.
The new plant may not retain the variegation.
This is particularly important with cultivars whose attractive coloration comes from a genetic chimera.
Iowa State Extension explains that variegated forms such as ‘Laurentii’ can produce non-variegated shoots from leaf sections.
So, if you have a beautiful yellow-edged snake plant and your goal is to create another plant with the same appearance, don’t automatically reach for the scissors.
Use division instead.
Division keeps the original plant tissue together and is the better choice for preserving the characteristics of the parent plant.
This is one of those little propagation details that can save you from being disappointed several weeks later.
7 Snake Plant Propagation Methods at a Glance
| Method | Best For | Difficulty | Main Advantage |
|---|---|---|---|
| Leaf cuttings in soil | Beginners | Easy | Simple and inexpensive |
| Leaf cuttings in water | Watching roots develop | Easy | Easy to monitor |
| Plant division | Mature plants | Easy–Moderate | Produces established plants |
| Natural pups | Beginner propagation | Easy | Uses natural new growth |
| Large clump division | Crowded plants | Moderate | Creates several larger plants |
| Propagation tray | Multiple cuttings | Easy | Efficient for many sections |
| Perlite propagation | Airy rooting | Easy–Moderate | Excellent drainage and airflow |
Common Snake Plant Propagation Mistakes
Planting Leaf Cuttings Upside Down
This is one of the easiest mistakes to make.
Always mark the original bottom of each leaf section before planting.
Illinois Extension recommends marking the correct orientation because snake plant cuttings need to be inserted properly.
Keeping the Soil Constantly Wet
More moisture doesn’t automatically mean faster rooting.
Overwatering can cause cuttings to rot.
Using Damaged Leaves
Start with healthy material.
RHS recommends selecting healthy foliage and avoiding damaged or diseased material when taking leaf cuttings.
Giving Cuttings Harsh Sunlight
Fresh cuttings don’t need intense direct sunlight.
Bright, indirect light is a safer starting point.
Using a Huge Pot
A large pot holds more growing medium, which can stay wet longer.
Use an appropriately sized container with good drainage.
Expecting Instant Results
Snake plants are patient plants.
Don’t assume something has failed simply because you don’t see roots immediately.
Propagating Variegated Plants Without Understanding Variegation
If keeping the original coloration matters, use division rather than relying on leaf cuttings.
How to Care for Newly Propagated Snake Plants
Once your cutting has developed roots and new growth, gradually treat it like a young snake plant rather than a propagation experiment.
Give it bright, indirect light.
Water only when the growing medium has had time to dry appropriately.
Make sure the container has drainage holes.
Don’t immediately move a tiny plant into an enormous pot.
As the root system develops, you can gradually move the plant into a more permanent container.
Once the plant is established and actively growing, normal houseplant feeding can be introduced according to the fertilizer’s directions.
Which Snake Plant Propagation Method Should You Choose?
If you’re completely new to propagation, I would start with leaf cuttings in soil.
They’re inexpensive, simple, and allow you to make multiple cuttings from one healthy leaf.
If you’re someone who loves watching roots develop, try water propagation.
If your snake plant has become crowded and you’re looking for larger new plants, choose division.
If your plant is producing pups, let those natural shoots develop and then separate them once they’re sufficiently established.
And if you’re propagating a variegated snake plant and want to preserve its distinctive pattern, division should be your first choice.
Final Thoughts
Snake plant propagation is one of those gardening projects that rewards patience more than perfection. Y
ou don’t need a greenhouse, expensive equipment, or years of experience to get started. A healthy leaf, a clean cutting tool, suitable growing medium, and a little attention to moisture can be enough to begin.
My favorite part is seeing that first tiny new shoot appear after weeks of waiting. It feels almost magical knowing that a small piece of the original plant is becoming something completely independent.
Whether you choose soil propagation, water propagation, division, pups, a propagation tray, or an airy medium such as perlite, give your new cuttings time to establish themselves.
And remember the golden rule: keep the growing environment well-drained, don’t overwater, and be patient.
If you’re working with a variegated variety, take one extra moment before cutting. When preserving those beautiful markings matters, division is generally the better route.
With the right method, that one snake plant sitting quietly in your home can eventually become a whole collection of new plants.
