
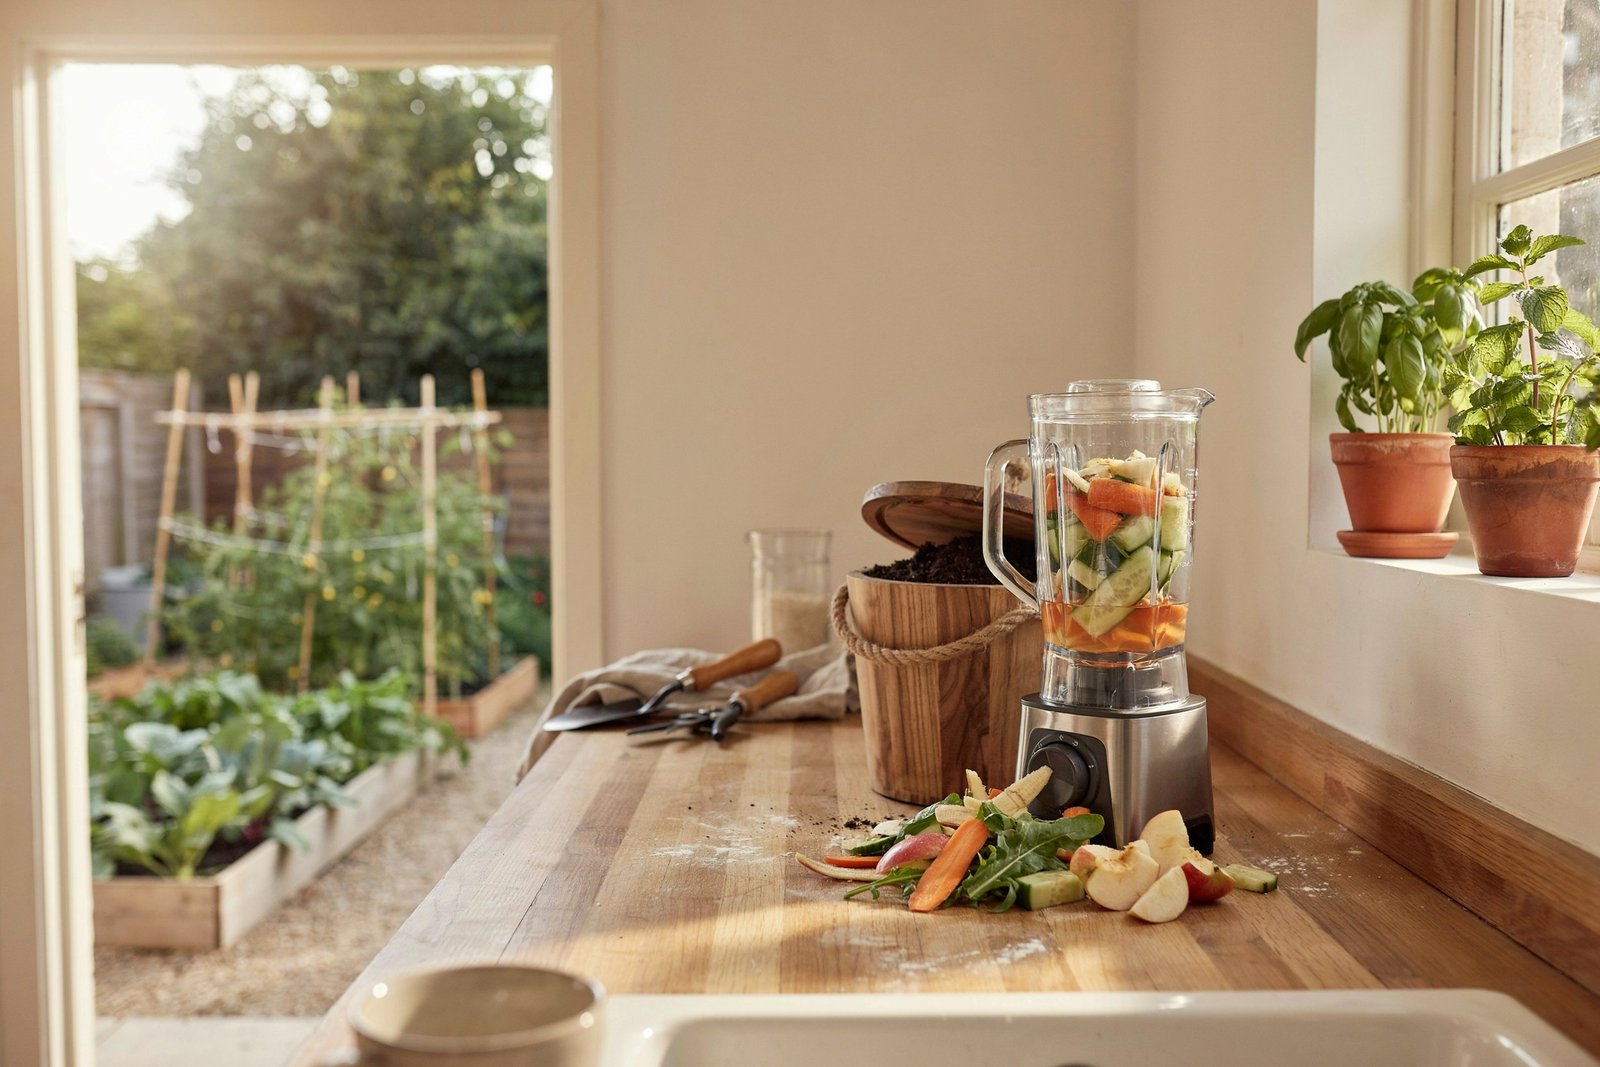

I’ve always loved finding simple ways to turn everyday kitchen waste into something useful for the garden.
Instead of tossing fruit peels, vegetable trimmings, and other suitable scraps into the trash, you can blend them with water and create a nutrient-rich organic mixture that can be added to your compost pile or used appropriately around the garden.
Blender composting is quick, inexpensive, and especially handy when you don’t have much outdoor space.
In this guide, I’ll show you exactly how it works, which scraps to use, how to blend them safely, how to apply the mixture, and the common mistakes I’d avoid.
What Is Blender Composting?
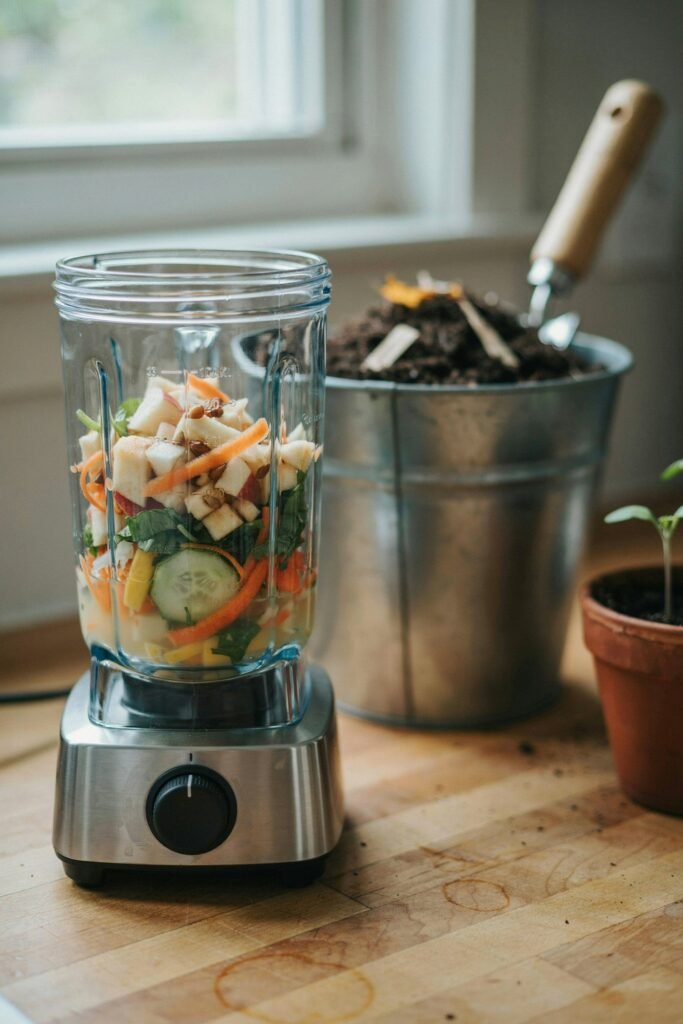
Blender composting is a simple method of processing certain kitchen scraps into a finely chopped organic mixture using a household blender and water.
Instead of waiting for large pieces of food waste to break down naturally, blending dramatically reduces the size of the scraps.
Smaller pieces have more surface area exposed to microorganisms, which can help them break down more readily when added to a compost pile or incorporated into an appropriate composting system.
You may also hear this method called:
- Kitchen-scrap slurry
- Food-scrap compost slurry
- Blended compost material
- Compost tea-style kitchen scrap mixture
- Liquid food-waste composting
However, there is an important distinction I want to make right from the beginning:
Blended kitchen scraps are not the same thing as finished compost.
Finished compost is a stable, decomposed organic material that has gone through a longer biological process. A blender simply prepares food scraps for faster decomposition.
Think of blending as pre-processing your compost ingredients, rather than magically turning kitchen waste into finished compost in a few seconds.
That distinction matters because putting a thick layer of freshly blended food scraps directly around plants can create problems such as unpleasant odors, fruit flies, mold, or nutrient imbalance.
Used correctly, though, blender composting can be a useful little trick for gardeners who want to make their kitchen waste easier to compost.
Why Try Blender Composting?
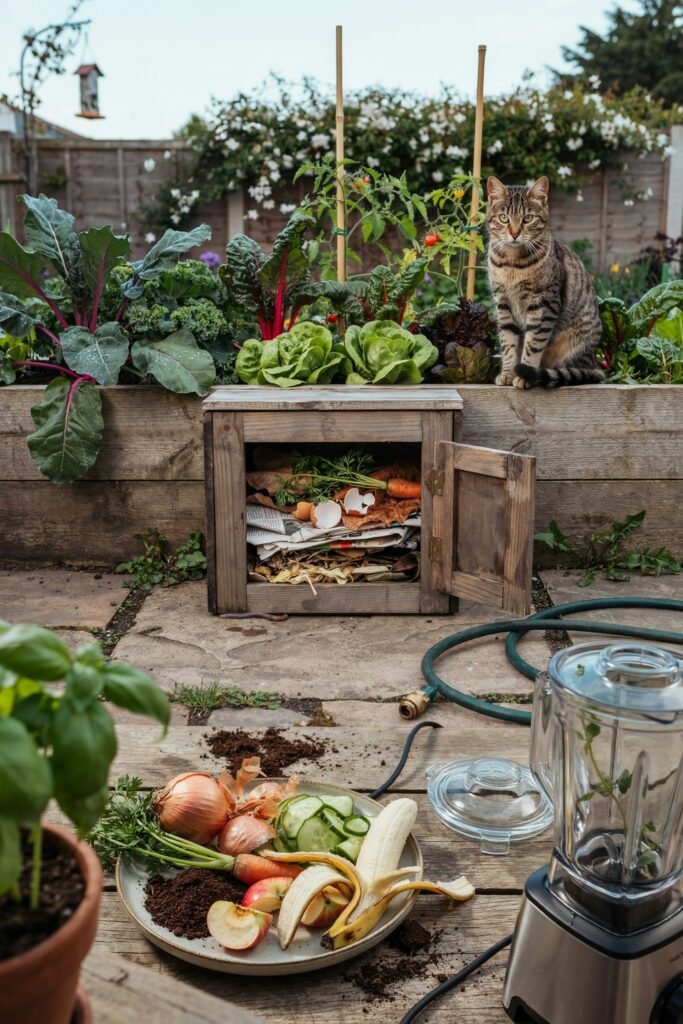
The biggest attraction is speed.
Traditional composting depends on microorganisms, moisture, oxygen, temperature, carbon-to-nitrogen balance, and time.
Large pieces of vegetable waste can take longer to break down simply because microorganisms have less surface area to work on.
Blending changes the physical structure of the scraps.
For example, a whole vegetable stem takes much longer to decompose than the same stem chopped into tiny pieces. Blending takes that idea even further.
Here are some of the reasons gardeners may find the method useful.
1. It Reduces the Size of Food Scraps
Smaller particles are generally easier for decomposers to work on.
This is especially useful for tougher scraps that you might otherwise chop repeatedly before putting them into your compost.
2. It Can Help a Compost Pile Break Down Ingredients Faster
When blended scraps are mixed properly with dry carbon-rich materials, microorganisms have easier access to the organic material.
The important part is mixed properly.
Simply dumping a bucket of wet food slurry into a compost pile isn’t the goal. The mixture should be incorporated into the pile with enough dry material to maintain good airflow and balance.
3. It Can Be Helpful for Small Gardens
If you garden on a patio, balcony, or in a small backyard, you may not generate enough material for a huge compost pile.
Blending small amounts of suitable kitchen scraps can make them easier to manage.
4. It Keeps Useful Organic Matter Out of the Trash
Vegetable and fruit scraps contain organic matter and nutrients that can eventually return to the soil through proper composting.
Rather than treating every kitchen scrap as garbage, you can think of suitable scraps as potential compost ingredients.
5. It Requires Very Little Equipment
You don’t need an expensive composting machine.
For a basic setup, you’ll generally need:
- A blender reserved for garden use
- Water
- Suitable kitchen scraps
- A compost pile, compost bin, or appropriate composting system
- A bucket or container
- A garden fork or hand trowel
If you’re serious about gardening, I recommend keeping a separate inexpensive blender for this purpose rather than using the blender you prepare food in.
How Does Blender Composting Actually Work?
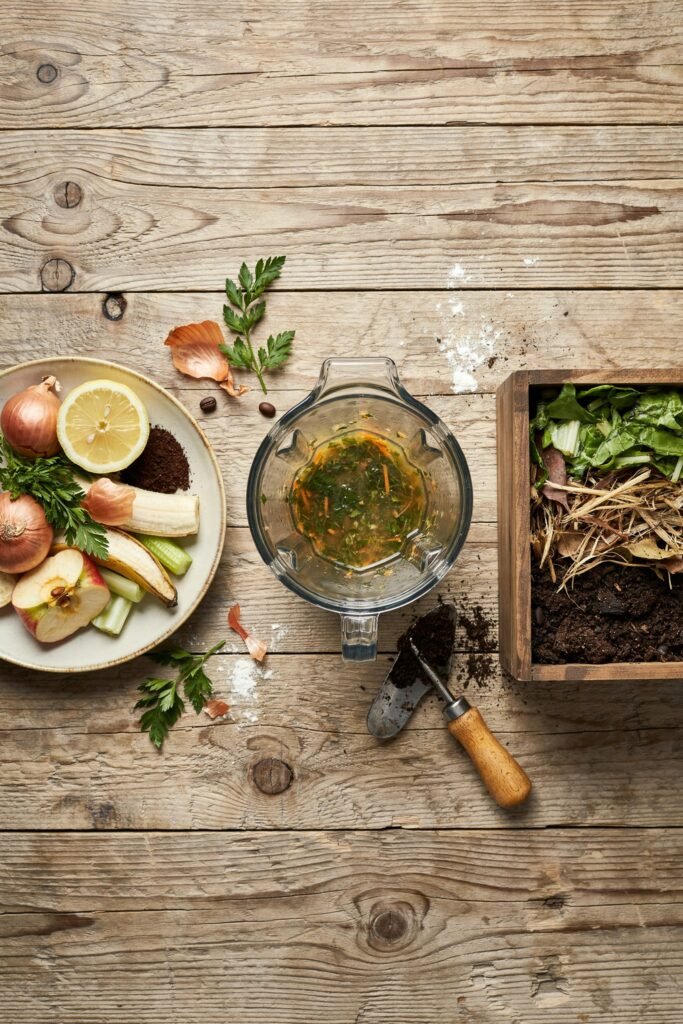
The process is easier to understand when you think about what happens biologically.
Kitchen scraps contain organic compounds that microorganisms can break down. Bacteria, fungi, insects, and other decomposers gradually transform organic material into simpler substances.
When you blend scraps, you aren’t creating new nutrients.
Instead, you’re changing the physical form of the material.
A blended mixture:
- Has much smaller particles.
- Has more surface area.
- Usually contains more available moisture.
- Can mix more easily with other compost materials.
- Can be incorporated into a composting system more evenly.
But blending alone doesn’t provide everything microorganisms need.
A successful composting system also needs appropriate amounts of moisture, oxygen, carbon-rich material, nitrogen-rich material, and time.
That’s why I don’t recommend thinking of blender composting as a replacement for composting.
It’s better to think of it as a shortcut for preparing certain food scraps for composting.
What Kitchen Scraps Can You Blend?
Not every kitchen scrap belongs in your blender.
For a simple backyard composting approach, focus primarily on plant-based kitchen waste.
Good options include:
Fruit Scraps
You can blend many fruit scraps, including:
- Apple cores
- Pear cores
- Banana peels
- Melon rinds
- Berry leftovers
- Grape stems
- Peach scraps
- Plum scraps
- Mango scraps
- Citrus peels in moderation
Fruit scraps are generally rich in moisture and relatively easy to break down.
Vegetable Scraps
Vegetable scraps are some of my favorite materials for this method.
You can use:
- Carrot peels
- Cucumber ends
- Lettuce leaves
- Spinach stems
- Celery ends
- Broccoli stems
- Cauliflower leaves
- Squash scraps
- Potato peels
- Sweet potato peels
- Bell pepper scraps
- Bean trimmings
Chopping or blending these materials can make them much easier to incorporate into compost.
Herb and Plant Trimmings
Small amounts of fresh herb stems and vegetable plant trimmings can also work.
Examples include:
- Basil stems
- Parsley stems
- Cilantro stems
- Kale stems
- Herb leaves
- Small amounts of garden plant trimmings
Make sure plant material is healthy and free from obvious disease before adding it to your composting system.
What Should You NOT Blend?
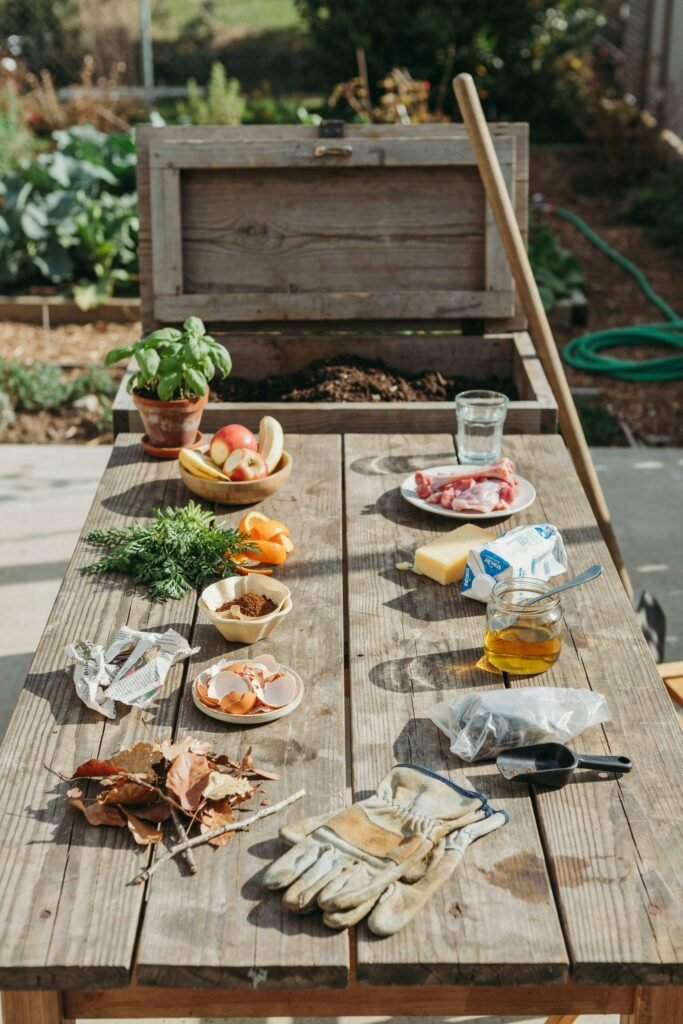
This is one of the most important sections of the entire guide.
A blender isn’t a miniature composting machine, and some materials can create problems.
Avoid Meat and Fish
I recommend keeping meat and fish out of a simple backyard kitchen-scrap blender mixture.
These materials can attract unwanted animals and create strong odors if they’re handled improperly.
Avoid Dairy Products
Milk, cheese, yogurt, cream, and similar products aren’t ideal for this basic method.
They can become unpleasant quickly and may attract pests.
Avoid Oils and Grease
Cooking oil, grease, butter, and oily leftovers can interfere with proper composting and create unpleasant conditions.
Avoid Pet Waste
Dog and cat waste should not be added to a basic garden compost mixture.
Pet waste can contain pathogens and requires specialized handling if it is composted at all.
Avoid Diseased Plant Material
If a plant has a serious disease, I wouldn’t automatically throw the infected material into your home compost system.
Some pathogens can survive composting if the pile doesn’t reach appropriate temperatures for adequate periods.
Avoid Large Amounts of Onion and Garlic
Small amounts are generally not a major issue in many composting systems, but I wouldn’t make them the primary ingredient of a blender mixture.
Avoid Weeds With Mature Seeds
Blending does not guarantee that weed seeds have been destroyed.
If you want to compost weeds, use an appropriate method that reliably handles seeds and other problematic plant material.
A Simple Blender Composting Recipe
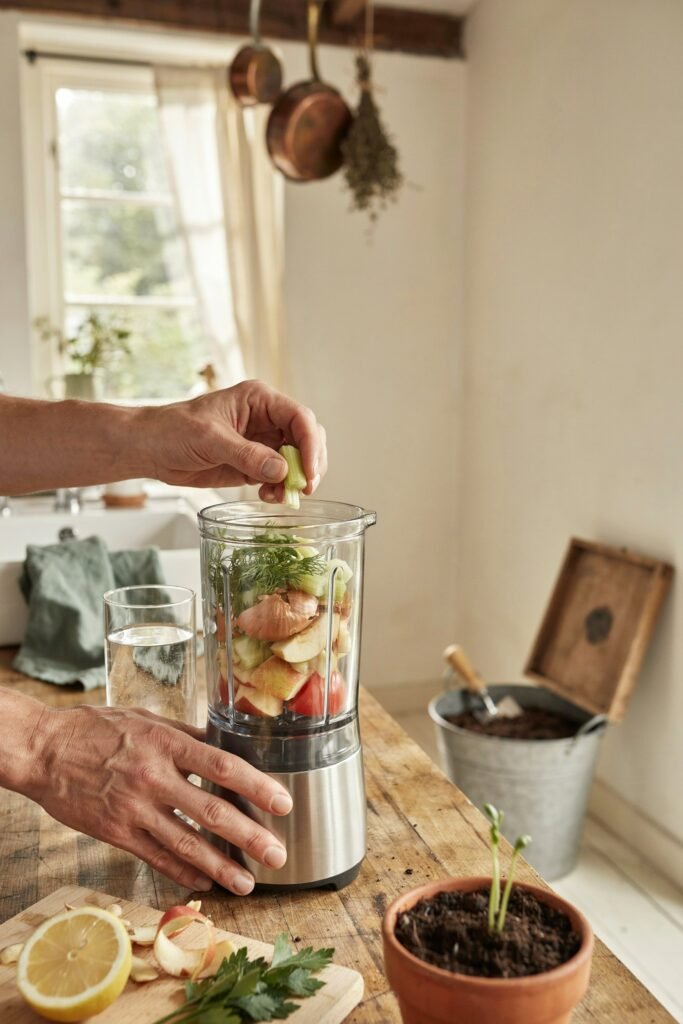
Here’s the basic method I would use.
What You’ll Need
- 2–4 cups of suitable fruit and vegetable scraps
- 1–2 cups of water
- A garden-use blender
- A bucket
- Finished compost or a compost pile
You don’t need an exact measurement every time.
The goal is simply to create a mixture that your compost system can absorb without becoming excessively wet.
Step 1: Collect Your Scraps
Save suitable fruit and vegetable scraps throughout the day.
You don’t need to wait until you have a huge amount.
A small batch is often easier to manage.
Step 2: Cut Large Pieces Down
Before adding the scraps to the blender, cut very large pieces into smaller chunks.
This helps protect the blender and makes blending easier.
Step 3: Add Water
Add enough water to help the blender move the scraps.
Start with less water rather than more.
You want a thick, pourable mixture rather than a completely watery liquid.
Step 4: Blend
Pulse the mixture rather than immediately running the blender continuously.
Blend until the scraps are finely chopped.
You don’t necessarily need a perfectly smooth puree.
A coarse, oatmeal-like or finely chopped consistency is perfectly useful for composting.
Step 5: Add It to Your Compost
Pour the blended material into your compost pile or bin.
Spread it rather than creating one thick pocket.
Step 6: Add Dry Carbon Material
This is the step many beginners skip.
Because blended kitchen scraps are wet and nitrogen-rich, add carbon-rich material such as:
- Dry leaves
- Shredded cardboard
- Untreated paper
- Straw
- Dry plant material
The exact amount depends on how wet your mixture and compost pile are.
If your pile suddenly looks like wet mud, you need more dry, bulky material.
Step 7: Mix Everything Together
Use a garden fork or compost aerator to mix the food material with surrounding compost ingredients.
This helps distribute moisture and improve airflow.
The Right Texture for Blender Compost
Texture matters more than many people realize.
If your mixture is extremely watery, it can create compact, oxygen-poor areas in a compost pile.
If it’s extremely thick and sticky, it can also form dense pockets.
I generally aim for a consistency similar to a thick smoothie or loose porridge.
You should be able to pour it, but it shouldn’t behave like plain water.
Remember:
The blender mixture is an ingredient, not the finished product.
Your compost pile still needs structure.
How to Add Blender Scraps to a Compost Pile
This is where you can really make the method work.
Don’t simply dump all of your blended scraps into one location.
Instead, make a small opening in the compost pile and pour the mixture into it.
Then cover it with dry carbon material.
For example:
Blended scraps → dry leaves → compost → more dry material
This helps reduce odors and gives the wet food material something dry and fibrous to mix with.
If you’re getting fruit flies, exposed food material is often part of the problem.
Covering fresh scraps can help.
Can You Pour Blender Compost Directly Around Plants?
This is where I recommend being cautious.
Freshly blended kitchen scraps are not finished compost.
I wouldn’t treat a concentrated kitchen-scrap slurry like a finished fertilizer and pour large amounts directly onto plant roots.
Fresh organic material can decompose rapidly and may temporarily change conditions in the soil.
It can also attract insects and create odors.
Instead, I prefer using blender scraps as a compost ingredient and allowing them to decompose properly before using the resulting compost around plants.
If you want to use food-derived liquid fertilizers, use a product or composting method specifically designed and tested for that purpose rather than assuming every kitchen-scrap slurry is safe as a plant fertilizer.
How Long Does Blender Compost Take?
Blending itself takes only a few minutes.
But actual decomposition still takes time.
That’s an important distinction.
You can blend kitchen scraps in five minutes, but you haven’t created finished compost in five minutes.
A properly managed compost pile can produce usable compost over a period of weeks to months, depending on:
- Temperature
- Moisture
- Particle size
- Carbon-to-nitrogen balance
- Oxygen
- Materials used
- Size of the compost pile
- How often it is turned
- Local weather conditions
A hot, well-managed compost pile can break down suitable materials relatively quickly.
A cool backyard pile may take considerably longer.
Don’t rush the final stage.
Good compost should look and smell like dark, earthy organic material rather than recognizable kitchen waste.
Blender Composting vs. Traditional Composting
You don’t have to choose one or the other.
I actually think they work best together.
| Method | Main Purpose | Speed of Preparation | Finished Compost? |
|---|---|---|---|
| Traditional composting | Decompose organic materials | Slow | Yes, with proper management |
| Blender composting | Break food scraps into smaller pieces | Very fast | No |
| Vermicomposting | Worm-based decomposition | Moderate | Yes, worm castings |
| Bokashi | Ferment food waste | Fast processing stage | Requires further decomposition |
| Food-scrap collection | Store scraps for later processing | Very easy | No |
Blender composting is best viewed as a preparation technique.
It can make your food scraps easier to incorporate into traditional composting.
How to Balance Wet Kitchen Scraps
Kitchen scraps contain a lot of water.
That means blender composting can make your compost pile wetter than usual.
If the pile becomes too wet, microorganisms may have less oxygen available.
The result can be:
- Bad smells
- Slow decomposition
- Dense clumps
- Slime
- Poor airflow
If your pile smells sour or rotten, don’t immediately add more food.
Instead, add dry, bulky carbon materials.
Try:
- Dry leaves
- Shredded cardboard
- Straw
- Dry plant stems
- Plain shredded paper
Then turn the pile to introduce air.
A healthy compost pile generally has a pleasant earthy smell.
How to Prevent Fruit Flies
Fruit flies can become a nuisance when food scraps are exposed.
Blended fruit scraps can be particularly attractive because they’re soft and moist.
The easiest approach is to cover fresh food material.
Every time you add blended scraps, cover them with a layer of dry material or partially finished compost.
Don’t leave a bucket of food slurry sitting uncovered outdoors for days.
If you aren’t ready to compost the mixture, it’s better to process a smaller batch when you can actually add it to the compost system.
Can Blender Composting Work for Apartment Gardeners?
Yes, but you need to adjust the system.
If you live in an apartment or have a balcony garden, you may not have enough room for a traditional outdoor compost pile.
In that case, consider using a suitable compact composting system.
Possible options include:
- Vermicomposting
- Bokashi-style fermentation
- Small enclosed composters
- Community composting programs
Blended kitchen scraps can be useful as part of some of these systems, but the rules differ between methods.
For example, worms need a suitable bedding environment, while fermentation systems operate differently from aerobic compost piles.
Don’t assume that because something can go into one composting system, it belongs in all of them.
Can You Blend Coffee Grounds?
Coffee grounds can be composted, but I don’t recommend making them the primary ingredient in a blender mixture.
Used coffee grounds are relatively fine already.
There’s usually little reason to pulverize them further.
You can simply add them to your compost pile along with other green and brown materials.
Also remember that compost should contain a variety of materials rather than relying heavily on one ingredient.
What About Eggshells?
Eggshells can be added to compost, but blending them is optional.
If you want them to break down more quickly, crushing them into smaller pieces can help.
However, eggshells are primarily a source of calcium carbonate rather than a complete fertilizer.
They shouldn’t be viewed as a magical solution for calcium problems in garden soil.
If you blend eggshells, rinse and dry them first, then crush or blend them carefully.
Can Citrus Peels Be Blended?
Yes, citrus scraps can be composted.
Orange, lemon, lime, and grapefruit peels are biodegradable.
However, large quantities of any single material aren’t ideal.
Citrus peels contain natural oils and compounds that can affect some composting organisms, particularly when present in large amounts.
For a healthy compost system, use citrus scraps as one component of a diverse mixture rather than filling the blender with nothing but citrus peel.
A Better Way to Think About “Plant Food”
The phrase “plant food” can be confusing.
Plants obtain nutrients from their growing environment, particularly elements such as nitrogen, phosphorus, potassium, calcium, magnesium, and sulfur.
Organic materials don’t automatically become plant-available nutrients the instant you put them into soil.
Microorganisms must break organic matter down.
That’s why properly finished compost is valuable.
As organic material decomposes, nutrients become part of the cycling process in the soil.
So when you blend kitchen scraps, you’re preparing organic matter for the decomposition process.
You’re not creating a complete liquid fertilizer in your blender.
That distinction will help you avoid one of the most common mistakes with this gardening trick.
Can Blender Compost Improve Garden Soil?
The finished compost produced from your kitchen scraps can contribute organic matter to soil.
Compost can help improve several physical properties of soil, including:
- Soil structure
- Moisture retention
- Drainage in some soil types
- Biological activity
- Organic matter content
The exact effect depends on your existing soil.
Clay soil, sandy soil, raised-bed soil, and container mixes all behave differently.
Compost is best thought of as part of a broader soil-management strategy rather than a cure-all.
Blender Composting for Vegetable Gardens
Vegetable gardens can benefit from compost as part of a healthy soil-management program.
Before planting, incorporate mature compost into the soil according to the needs of your garden and the recommendations for your soil type.
You can also add compost as a surface mulch around established plants.
Avoid piling fresh kitchen scraps directly against stems.
Instead, allow the material to decompose fully before using it as a garden amendment.
For edible crops, this extra caution is worthwhile because you’re growing food that you and your family may eventually eat.
Blender Composting for Flower Gardens
Flower gardens can benefit from compost too.
Finished compost can help maintain organic matter and support soil organisms.
For established flower beds, a layer of mature compost applied around plants can be useful.
Again, I would not use fresh blended kitchen scraps as a substitute for finished compost.
Your flowers may appreciate the nutrients eventually, but the decomposition process needs to happen first.
Blender Composting for Container Plants
This is one area where I would be especially careful.
Containers have limited soil volume.
That means mistakes can have a much greater effect than they would in a large garden bed.
Don’t pour fresh kitchen-scrap slurry into your houseplant or container soil.
It can create:
- Odors
- Mold
- Fungus gnats
- Poor drainage
- Decomposition pockets
- Unpleasant soil conditions
Instead, use a properly finished compost that is appropriate for container gardening and mix it into your potting medium according to the plant’s needs.
Common Blender Composting Mistakes
Mistake 1: Thinking Blending Equals Composting
This is the biggest misconception.
Blending only chops the material.
Decomposition still needs to happen.
Mistake 2: Adding Too Much Water
A watery slurry can make your compost pile excessively wet.
Start with the minimum amount of water needed for blending.
Mistake 3: Adding Only Food Scraps
A pile made almost entirely from kitchen scraps can become wet and poorly aerated.
Balance food scraps with dry carbon-rich materials.
Mistake 4: Leaving Scraps Exposed
Exposed food attracts flies and other pests.
Cover fresh material.
Mistake 5: Using Meat and Dairy
Keep these materials out of a basic backyard blender composting routine.
Mistake 6: Pouring Fresh Slurry Onto Plants
Fresh blended scraps aren’t finished compost.
Let them decompose properly first.
Mistake 7: Forgetting Oxygen
Aerobic composting requires oxygen.
Turn the pile when appropriate and maintain a loose, structured mixture.
Mistake 8: Using a Kitchen Blender for Garden Waste
I strongly recommend keeping garden equipment separate from food-preparation equipment.
A cheap dedicated blender is a much better choice.
How to Make Blender Composting Even More Effective
If you want this method to work well, focus less on the blender itself and more on what happens afterward.
1. Use a Variety of Scraps
Don’t rely on one type of food waste.
A mixture of vegetable scraps, fruit scraps, and other suitable organic materials creates greater diversity.
2. Keep the Particle Size Small
You don’t need to turn everything into liquid.
Fine pieces are enough.
3. Add Dry Material Immediately
If your mixture is wet, balance it with dry leaves, shredded cardboard, or another appropriate carbon source.
4. Maintain Airflow
Don’t compress the pile.
A loose structure helps air move through it.
5. Monitor Moisture
Your compost shouldn’t be bone dry, but it shouldn’t be waterlogged either.
6. Turn the Pile
Turning can redistribute moisture and oxygen.
7. Give It Time
Fast preparation doesn’t mean instant decomposition.
Patience still matters.
A Simple Weekly Blender Composting Routine
If you want to make this a regular habit, here’s a routine that I find easy to follow.
Monday–Friday
Collect suitable fruit and vegetable scraps.
Store them in a covered container if you’re not blending immediately.
Saturday
Blend the accumulated scraps with a small amount of water.
Don’t make more than your compost system can handle.
Add to Compost
Pour the mixture into the compost pile.
Cover
Add a layer of dry leaves, shredded cardboard, or other appropriate carbon-rich material.
Mix
Turn the surrounding material lightly with a garden fork.
Check
Look at the pile a few days later.
If it smells fresh and earthy and isn’t excessively wet, you’re on the right track.
If it’s soggy or smells unpleasant, add more dry material and improve airflow.
How to Know Your Compost Is Ready
The final goal is not a bucket of blended food.
The goal is finished compost.
Mature compost usually has several recognizable characteristics.
It should:
- Look dark and crumbly
- Have an earthy smell
- Contain little recognizable food material
- No longer resemble fresh kitchen scraps
- Be relatively stable rather than actively heating
A few recognizable woody pieces may remain, depending on your materials and how long the compost has aged.
Don’t worry if your finished compost doesn’t look exactly like the compost you see in a garden center.
The appearance can vary.
How to Use Finished Compost in the Garden
Once your compost has properly matured, you have several options.
Garden Beds
Spread mature compost over the soil surface and incorporate it appropriately before planting.
Vegetable Gardens
Use finished compost as part of your soil-building routine.
Flower Beds
Apply a layer around established plants while keeping it away from direct contact with plant stems.
Trees and Shrubs
Finished compost can be used as part of a broader soil-care program around trees and shrubs.
Avoid creating thick piles of organic material against trunks.
Raised Beds
Compost can be incorporated into raised-bed soil as one component of the growing medium.
Is Blender Composting Worth It?
For me, the biggest benefit isn’t that it magically makes compost overnight.
It doesn’t.
The real advantage is convenience.
If you already have a compost pile, blending can turn bulky kitchen scraps into a smaller, easier-to-mix material.
It’s particularly useful when you have:
- A small amount of food waste
- Tough vegetable scraps
- Limited composting space
- A desire to reduce kitchen waste
- A compost pile that benefits from smaller organic particles
But if you already chop your scraps into small pieces, you may not see a dramatic difference.
You don’t need a blender to make good compost.
A knife, garden scissors, or simply adding scraps whole can work perfectly well.
Blender composting is a convenience technique, not a requirement for successful composting.
Frequently Asked Questions
Can I blend kitchen scraps and put them directly into my garden?
I wouldn’t recommend treating fresh blended kitchen scraps as finished fertilizer. Add the mixture to an appropriate composting system and allow it to decompose properly first.
Does blending make compost faster?
It can help by reducing particle size and increasing surface area, but it doesn’t eliminate the biological decomposition process.
Can I use banana peels?
Yes. Banana peels are suitable for composting and can be blended with other fruit and vegetable scraps.
Can I blend eggshells?
Yes, after rinsing and drying them. Crushing them into small pieces is generally sufficient.
Can I blend coffee grounds?
Yes, but they don’t need to be blended because they’re already relatively fine.
Can I use meat?
For a simple backyard blender-composting system, I recommend leaving meat out.
Can I use cooked vegetables?
Plain cooked vegetables without meat, dairy, excessive oil, or sauces can generally be composted, but fresh plant scraps are simpler and less likely to introduce problematic ingredients.
Can I use moldy fruit?
Small amounts of ordinary moldy fruit can generally go into a suitable compost system, but don’t use diseased plant material or anything contaminated with substances inappropriate for composting.
How much water should I add?
Use only enough water to help your blender process the scraps. A thick, pourable mixture is preferable to a watery liquid.
Does blender composting produce fertilizer?
Blending doesn’t create fertilizer. It prepares organic material for decomposition. Properly finished compost can contribute nutrients and organic matter to soil.
Can I use the mixture on houseplants?
I wouldn’t use fresh kitchen-scrap slurry on houseplants. Container environments are small and sensitive to excess moisture and decomposing organic matter. Use finished compost or a suitable fertilizer instead.
Final Thoughts
I love gardening methods that make good use of things we might otherwise throw away, and blender composting is a clever way to give kitchen scraps another purpose.
The key is understanding what the blender can and can’t do. It can chop organic scraps into tiny pieces, but it doesn’t turn them into finished compost or instant fertilizer.
The real magic happens afterward.
Once those blended scraps enter a properly managed composting system, microorganisms can break them down and transform them into a stable organic material you can eventually return to your garden.
