


Growing shallots is one of those little garden projects that feels surprisingly rewarding.
I love the idea of planting a few small bulbs and watching them quietly develop into clusters of fresh shallots that I can use in the kitchen.
They don’t need a huge garden, either. With sunshine, loose soil, regular watering, and a little patience, even a beginner can grow a lovely crop.
In this guide, I’ll walk you through exactly how to grow shallots, including planting, care, harvesting, curing, and storing them successfully.
What Are Shallots?

Shallots are members of the onion family, but instead of producing one large bulb like a typical onion, one planted shallot can develop into a cluster of several bulbs.
They have a mild, slightly sweet flavor that makes them useful in everything from sauces and soups to roasted vegetables, salads, and homemade dressings.
Shallots can be grown from sets (small bulbs) or from seed. For beginners, I recommend starting with sets because they are much simpler and usually give you a more straightforward growing experience.
Shallots grown from sets can be planted in the garden, raised beds, or suitable containers.
Once you understand how they grow, shallots are a wonderfully useful crop to keep in your garden.
Why Grow Your Own Shallots?

If you’ve never grown shallots before, you might wonder whether they’re worth giving garden space to.
I think they are, especially if you enjoy cooking with fresh ingredients.
Here are a few reasons to try them:
- They’re relatively easy for beginners.
- They can be grown in small gardens.
- They grow well in raised beds and containers.
- You can harvest the green leaves while the plants are growing.
- Mature bulbs can be cured and stored for later use.
- A single planted bulb can produce a cluster of bulbs.
- They don’t require complicated equipment or gardening techniques.
Shallots also make a great crop for gardeners who want to grow more of their own food without dedicating an enormous amount of space to vegetables.
When Should You Plant Shallots?

The best planting time depends on your climate and the variety you’re growing.
Shallots are cool-season vegetables and can generally be planted in early spring. In climates where winters are mild, some varieties can also be planted in fall or winter for a harvest the following season.
If you’re unsure about your local planting window, check the instructions that came with your shallot sets. Your local growing conditions matter because shallots respond to temperature and day length when forming bulbs.
For beginners, the easiest rule is:
Plant when the weather is cool enough for steady leafy growth, but avoid planting into waterlogged soil.
If you live somewhere with mild winters, fall planting may work beautifully. In colder areas, spring planting is usually the safer option.
Choose the Right Shallot Sets
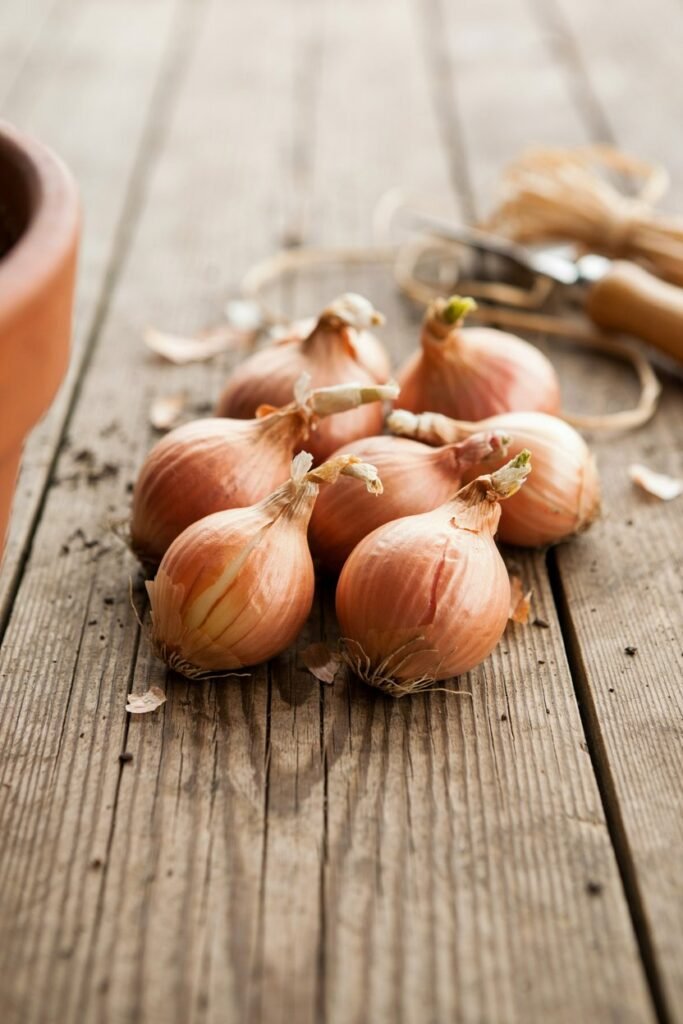
Good planting material gives you a much better start.
When buying shallot sets, look for bulbs that are:
- Firm
- Healthy-looking
- Free from soft spots
- Free from mold or obvious rot
- Free from serious bruising or damage
Avoid planting bulbs that already look unhealthy. Starting with damaged planting material can introduce problems before your plants even have a chance to establish.
There are several shallot varieties available, including French Red, Gray Griselle, and Dutch Yellow. Varieties can differ in color, size, flavor, storage ability, and growing requirements.
If you’re completely new to growing shallots, choose a variety that is recommended for your local climate.
Read Best Vegetables for Hanging Baskets (From My Own Small-Space Garden)
Pick the Best Location

Shallots love sunshine.
Choose a location that receives full sun for most of the day. A sunny position helps the plants produce strong foliage and develop good-sized bulbs.
Your planting area should also have good air circulation and drainage.
Avoid areas where rainwater regularly sits after a storm. Shallot bulbs can rot when they remain in overly wet soil for too long.
A raised bed can be particularly helpful if your garden soil drains poorly.
You can also grow shallots in containers if you don’t have a traditional vegetable garden.
Prepare the Soil Before Planting

Good soil preparation is one of the most important steps if you want healthy shallots.
Shallots prefer soil that is:
- Loose
- Fertile
- Rich in organic matter
- Moist but not soggy
- Well drained
Work some well-rotted compost or other mature organic matter into the soil before planting. This improves the soil structure while supplying nutrients for growing plants.
If your soil is heavy clay or tends to stay wet, consider growing your shallots in a raised bed or container instead.
The ideal soil pH can vary slightly by source, but shallots generally tolerate mildly acidic through neutral soil. Utah State University Extension gives a preferred range of approximately 5.5 to 7.5.
You don’t need to make gardening complicated, though. If your soil grows other vegetables successfully and drains well, it can often work well for shallots too.
How to Plant Shallot Sets

Planting shallots is surprisingly simple.
Step 1: Separate the Bulbs
If your shallot sets are sold in a cluster, gently separate them into individual bulbs.
Don’t plant the entire cluster as one large bulb.
Each individual set should have its own space to develop into a new cluster.
Step 2: Find the Top and Bottom
Look closely at each bulb.
The pointed end is the growing tip, while the flatter end is where the roots develop.
Plant the root end downward and pointed end upward.
Step 3: Plant at the Right Depth
Make a small hole and place the shallot into the soil.
The exact planting depth varies somewhat by growing guide, but a common recommendation is around 1–2 inches deep, with the top of the bulb at or just slightly below the soil surface.
Don’t bury the bulbs deeply.
One common beginner mistake is covering the entire shallot with a thick layer of soil. Shallot bulbs need room to develop, and keeping the upper portion close to the soil surface makes this easier.
Step 4: Give Them Enough Space
Spacing is important because each planted shallot needs room to form its cluster.
A practical beginner spacing is approximately 4–6 inches between individual bulbs, with around 10–12 inches between rows. Some growing guides recommend wider spacing, particularly when the goal is larger clusters.
If you have plenty of space, giving your plants a little extra room can make maintenance easier.
Read Best Crops for a 5 Gallon Bucket: Grow Big Harvests in Small Spaces
Watering Shallots

After planting, water the soil thoroughly.
The goal is to keep the soil reasonably moist while avoiding soggy conditions.
Shallots have relatively shallow roots, so they can struggle if the soil becomes extremely dry for long periods. At the same time, constantly wet soil can encourage bulb rot and other problems.
Rather than watering on an automatic schedule, check the soil.
If the surface is becoming dry and the plants haven’t received enough rain, give them a good watering.
During hot or dry weather, container-grown shallots may need more frequent attention because containers lose moisture faster than garden beds.
As the bulbs approach maturity, gradually reduce watering. Some growing guides recommend reducing irrigation during the final weeks before harvest.
How to Fertilize Shallots
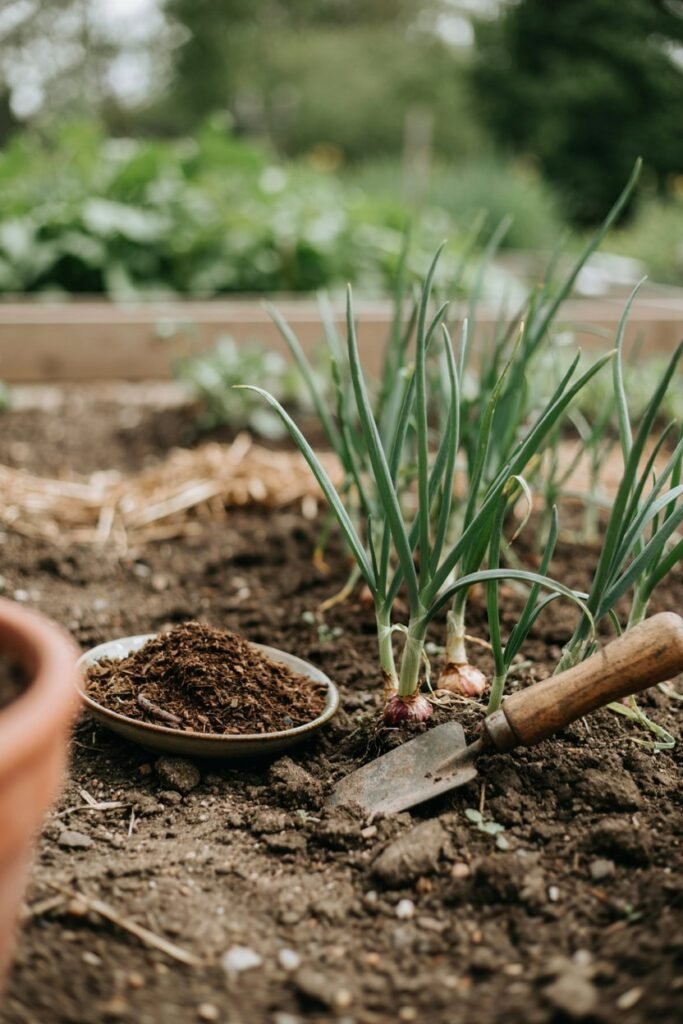
Shallots need fertile soil to produce strong growth and healthy bulbs.
Starting with compost-rich soil is an excellent first step.
If your soil is poor, you can use a suitable balanced fertilizer according to the product’s directions or a soil-test recommendation.
Extension guidance emphasizes providing adequate fertility, but excessive nitrogen isn’t helpful because you want the plant to put energy into developing bulbs rather than producing lots of leaves.
A simple approach for beginners is:
- Prepare the soil with mature compost before planting.
- Monitor plant growth.
- If additional feeding is needed, use a balanced fertilizer according to the label.
- Avoid repeatedly applying heavy amounts of nitrogen.
Healthy green leaves are important because the plant uses them to build energy for the developing bulbs.
Keep the Garden Bed Weed-Free

This is one task I wouldn’t skip.
Shallots don’t produce enormous leaves that shade the ground, so weeds can quickly grow around them.
Weeds compete with shallots for:
- Water
- Nutrients
- Light
- Growing space
Regularly remove weeds while they’re still small.
Be careful when hoeing or cultivating around shallots because their bulbs and roots are close to the surface.
I find shallow hand-weeding around small vegetable plants much easier than waiting until the weeds become large and difficult to remove.
Should You Mulch Around Shallots?

Yes, but use mulch thoughtfully.
A light layer of suitable organic mulch can help conserve moisture and suppress weeds.
Mulching can also help protect the soil from drying out too quickly.
However, avoid piling thick, wet mulch directly against the bulbs.
Good drainage is particularly important for shallots, so you don’t want to create a constantly damp environment around them.
How to Encourage Bigger Shallots
If your goal is to harvest larger bulbs, several simple growing habits can help.
Give Them Plenty of Sun
A sunny growing location gives shallots the light they need for healthy growth.
Don’t Crowd Them
Overcrowding means more competition for water, nutrients, and space.
Give individual bulbs enough room to form their clusters.
Keep Them Growing
Avoid allowing the plants to become severely stressed from drought.
Consistent moisture during active growth helps support healthy development.
Don’t Overfeed With Nitrogen
Lots of green leaves can look impressive, but excessive nitrogen can encourage leafy growth instead of the bulb development you’re hoping for.
Keep Weeds Under Control
Weeds can quietly steal resources from your shallots and reduce their growth.
Don’t Keep the Soil Soggy
Good drainage is just as important as fertility.
Wet conditions can cause bulbs to rot.
What About Flowering?
Occasionally, a shallot may produce a flower stalk.
If you notice one beginning to develop, remove it.
Flowering uses some of the plant’s energy, and removing the flower stalk encourages the plant to focus on bulb development. The RHS also recommends removing flower stems as soon as they appear.
You don’t need to worry about this constantly, though. Simply keep an eye on your plants as they grow.
Growing Shallots in Containers
Don’t have a vegetable garden?
You can still grow shallots.
Choose a container that is roughly 12 inches wide and deep or larger, with drainage holes at the bottom. The RHS recommends a container at least 30 cm wide and deep.
Fill it with a good-quality growing medium that drains well.
Plant the shallots using the same general depth and spacing principles you would use in the ground.
The biggest difference is watering.
Containers dry out more quickly, especially during warm weather, so check the moisture regularly.
A container can be a great option for a balcony, patio, small backyard, or other limited growing space.
Common Shallot Growing Problems
Shallots are generally uncomplicated plants, but a few problems can appear.
Bulbs Are Rotting
The most common thing to check is drainage.
If your soil stays wet for long periods, the bulbs may begin to rot.
What to do: Improve drainage, use raised beds, reduce unnecessary watering, and avoid planting in areas where water collects.
Leaves Are Turning Yellow Too Early
Yellowing can happen naturally as the plant approaches maturity.
But if it happens much earlier than expected, check for watering problems, poor soil, pests, or disease.
Don’t immediately assume that every yellow leaf means something is seriously wrong.
Bulbs Are Small
Small bulbs can result from several factors.
Possible causes include:
- Insufficient sunlight
- Crowded plants
- Poor fertility
- Competition from weeds
- Inconsistent watering
- Planting at the wrong time for your climate
Focus on improving the growing conditions rather than simply adding more fertilizer.
Shallots Are Being Pulled Out of the Soil
Birds and other garden visitors can sometimes disturb newly planted sets.
If you notice bulbs being pushed or pulled out, gently replant them and consider using temporary garden netting or another suitable protective covering until they’re established.
When Are Shallots Ready to Harvest?
Knowing when to harvest is one of the most exciting parts.
Your shallots are generally ready when the leaves begin to:
- Turn yellow
- Weaken
- Fall over
- Dry down
This is a natural sign that the plant is finishing its growth and directing its energy into the bulbs.
Depending on the variety and planting time, harvest can occur in late spring, summer, or another season suited to your climate.
Don’t rely only on a calendar.
Look at the plants themselves.
When a large portion of the foliage has fallen over and begun drying, carefully loosen the soil around a bulb and check its size.
How to Harvest Shallots
Choose a dry day if possible.
Gently loosen the soil around the bulbs with a garden fork or hand tool, taking care not to pierce them.
Lift the clusters from the soil and brush away loose dirt.
Try not to knock or bruise the bulbs.
Damaged bulbs don’t store as well, so handle them gently.
You can use freshly harvested shallots in cooking, or you can cure them first if you want to store them.
How to Cure Shallots for Storage
Curing is an important step if you want your shallots to last.
After harvesting, place the bulbs somewhere dry, well ventilated, and protected from rain.
Spread them out in a single layer so air can circulate around them.
The RHS recommends allowing shallots to dry thoroughly, often for around two weeks depending on conditions, while another UC gardening guide recommends several weeks for curing. The exact time depends on temperature, humidity, airflow, and the condition of the bulbs.
You’ll know they’re properly cured when the outer skin becomes dry and papery and the foliage has completely dried.
Don’t rush this step.
Proper curing helps prepare the bulbs for storage.
How to Store Homegrown Shallots
Once the shallots are fully cured, remove loose soil and trim away dried foliage if appropriate.
Only store bulbs that are:
- Firm
- Dry
- Undamaged
- Free from obvious rot
Place them somewhere cool, dry, and well ventilated.
Mesh bags, open trays, or other breathable storage methods can work well.
Avoid trapping moisture around the bulbs because moisture encourages mold and rot.
Stored correctly, cured shallots can remain useful for months.
Can You Save Shallots for Next Year’s Garden?
Absolutely.
One of my favorite things about growing shallots is that you can save some of your healthiest bulbs as planting material for the next growing season.
Choose firm, healthy bulbs from your harvest.
Store them properly and use them as sets when the next planting season arrives.
This can gradually turn your shallot crop into a repeating part of your vegetable garden.
A Simple Shallot Growing Schedule
Here’s an easy version to save for later:
Before planting:
Choose healthy shallot sets and prepare a sunny, well-drained bed.
Planting time:
Separate the bulbs and plant them root-end down, with the pointed tip at or just above the soil surface.
Early growth:
Water when needed and keep weeds away.
During active growth:
Maintain consistent moisture and provide nutrients if your soil needs them.
As bulbs develop:
Continue caring for the plants but avoid waterlogging the soil.
Near harvest:
Watch for yellowing, drying, and falling foliage. Gradually reduce watering.
Harvest:
Lift the bulbs carefully on a dry day.
Curing:
Dry the shallots thoroughly in a well-ventilated location.
Storage:
Keep only healthy, fully cured bulbs in a cool, dry, well-ventilated place.
Final Thoughts
Growing shallots doesn’t have to be complicated. Once you give them a sunny spot, fertile soil, good drainage, enough space, and consistent care, they can be one of the more rewarding crops to grow at home.
I especially love that you don’t need a huge garden to get started a raised bed or large container can work too.
Start with healthy shallot sets, don’t bury them too deeply, keep weeds under control, and be patient as the bulbs develop.
With a little practice, you’ll soon have your own homegrown shallots ready for the kitchen and some healthy bulbs saved for your next crop.
