
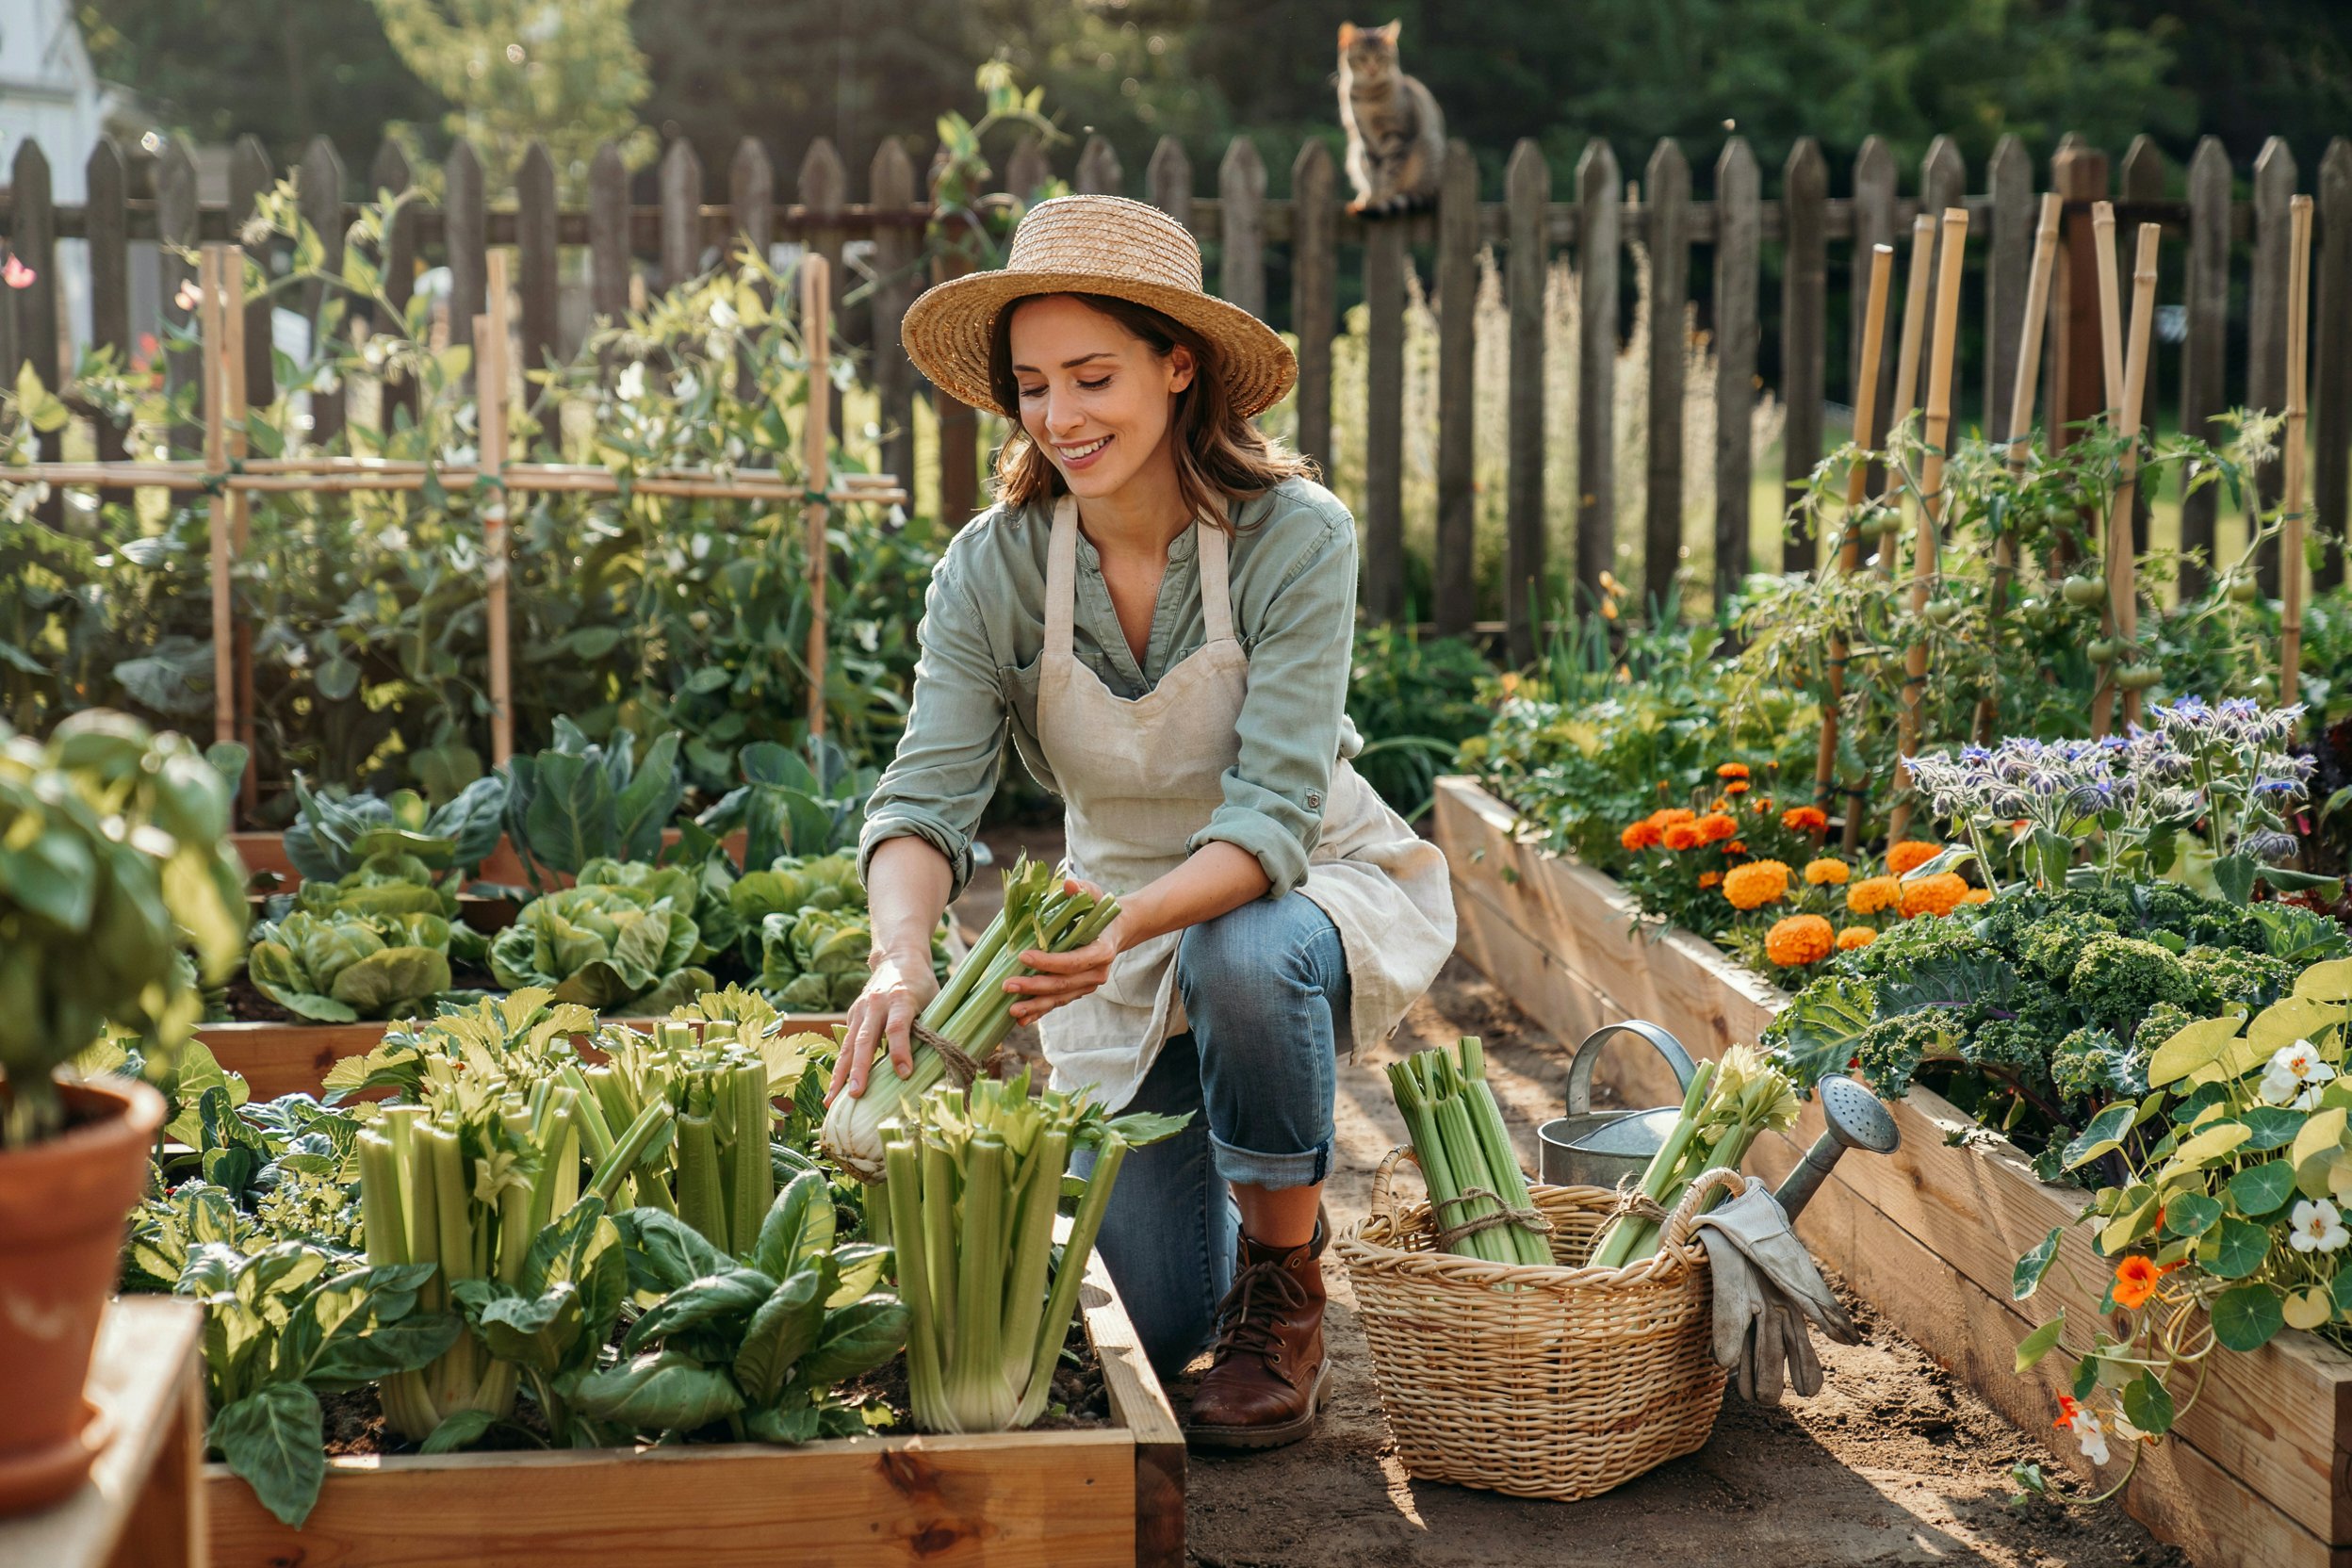

Every time I harvest fresh celery from my own garden, I’m reminded that it’s one of those vegetables that’s absolutely worth the extra patience.
Homegrown celery has a richer flavor, a satisfying crunch, and a freshness you simply can’t find in grocery stores. While many gardeners think celery is difficult to grow, it’s actually very rewarding once you understand what it needs.
With consistent moisture, nutrient-rich soil, and a little planning, you can grow tall, tender stalks right in your backyard or even in containers.
In this guide, I’ll walk you through every step from choosing the right variety and planting seeds to caring for your plants and harvesting crisp stalks you’ll be proud to serve at your table.
Why Grow Your Own Celery?
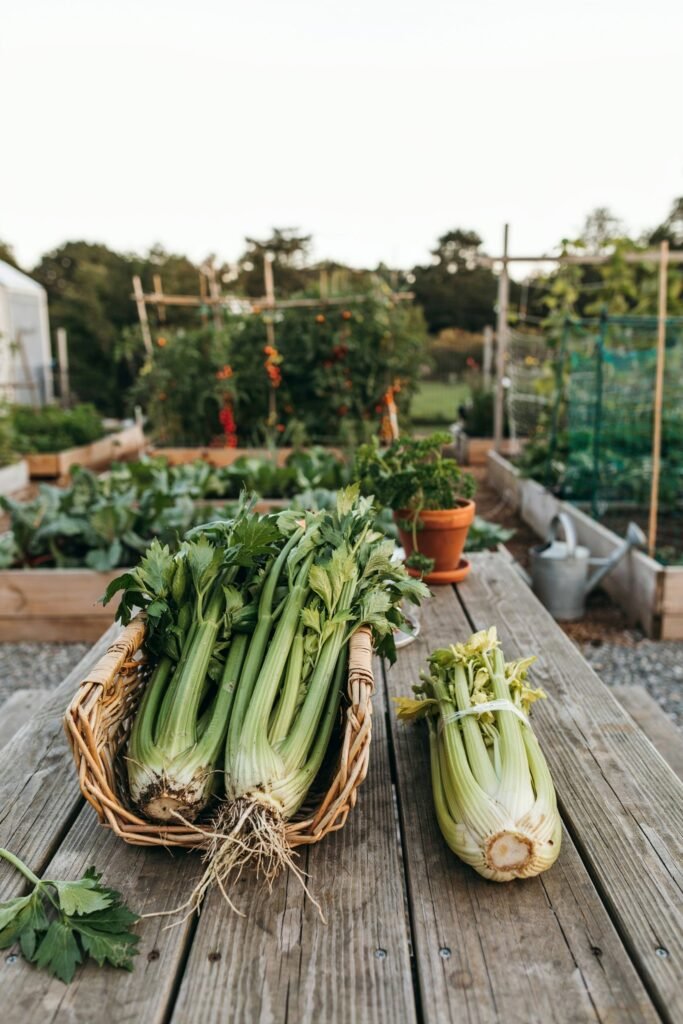
Celery isn’t usually the first vegetable people think of planting, but once you’ve grown it yourself, you’ll understand why so many experienced gardeners make room for it every year.
Unlike store-bought celery, which may have traveled hundreds of miles before reaching your kitchen, homegrown celery is harvested at peak freshness. The stalks are often sweeter, juicier, and much more flavorful.
Growing celery yourself also gives you complete control over how it’s raised. You can avoid unnecessary pesticides, improve your soil naturally with compost, and enjoy knowing exactly where your food comes from.
Some of the biggest benefits include:
- Fresh, crisp stalks whenever you need them
- Excellent for soups, salads, stir-fries, and juicing
- Packed with vitamins A, C, and K
- Rich in potassium and antioxidants
- Can be grown in garden beds, raised beds, or containers
- A rewarding cool-season crop for spring and fall gardens
Although celery takes longer to mature than many vegetables, the harvest is well worth the wait.
Types of Celery to Grow
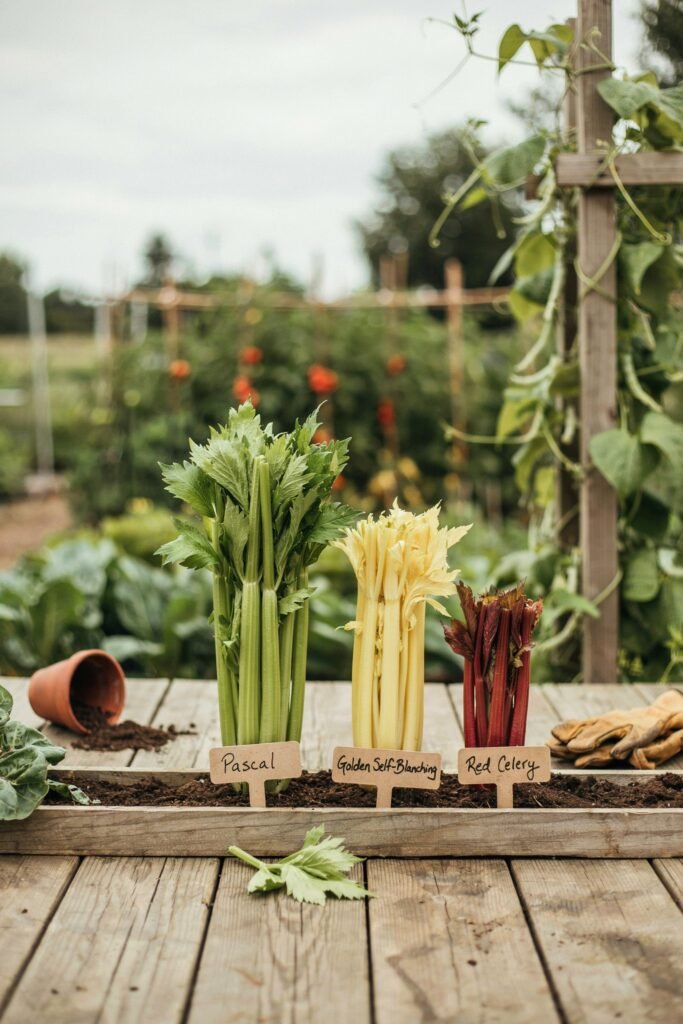
Before planting, it’s important to choose a variety that’s well suited to your garden and your cooking needs.
Pascal Celery
Pascal celery is the classic variety most gardeners grow. It produces thick, crunchy green stalks that are ideal for fresh eating, soups, and cooking.
This variety is dependable, productive, and easy for beginners to grow.
Best for:
- Fresh snacking
- Cooking
- Juicing
- Large gardens
Golden Self-Blanching Celery
This heirloom variety naturally develops pale golden stalks without requiring much blanching.
The flavor is milder and sweeter than standard green celery.
Best for:
- Salads
- Gourmet cooking
- Small gardens
Tango Celery
Tango is one of the easiest celery varieties for beginners.
It grows vigorously, tolerates temperature changes well, and produces tender stalks with very little stringiness.
Best for:
- Beginner gardeners
- Cooler climates
- Raised beds
Red Venture Celery
If you enjoy growing unusual vegetables, Red Venture produces beautiful reddish stalks that become even deeper in color during cool weather.
Its rich flavor makes it popular in soups and roasted dishes.
Best for:
- Decorative gardens
- Unique harvests
- Fall planting
Best Time to Plant Celery
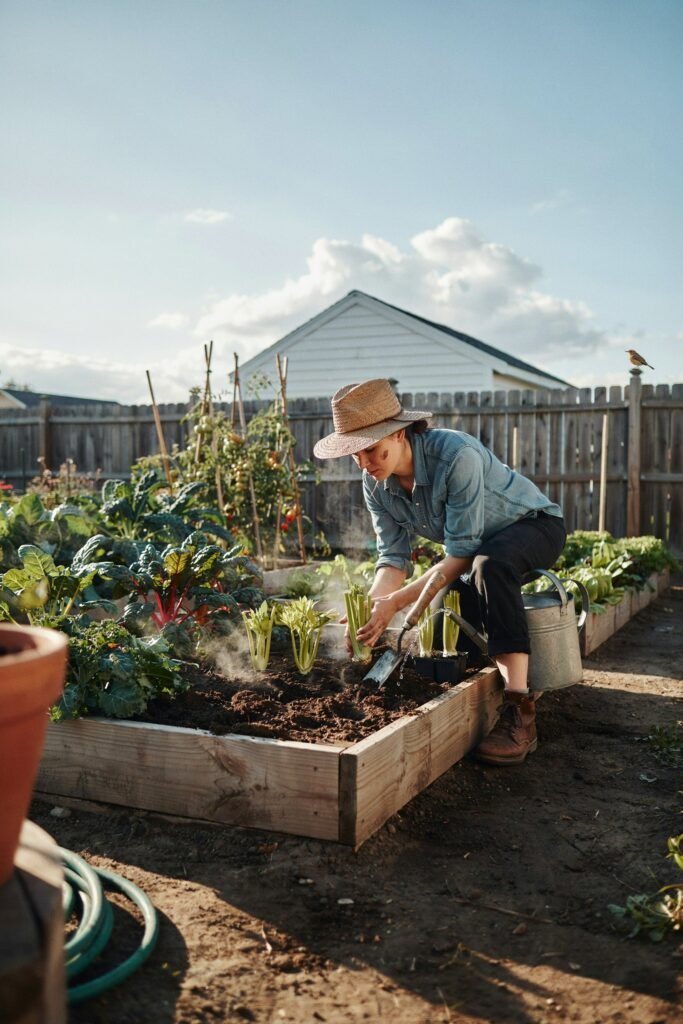
Celery is a cool-season vegetable that dislikes extreme heat.
Timing your planting correctly is one of the most important steps toward growing healthy, tender stalks.
Spring Planting
Start seeds indoors about 10–12 weeks before your last expected frost date. Once seedlings are sturdy and outdoor temperatures remain above about 50°F (10°C), transplant them into the garden.
Fall Planting
In regions with mild winters, celery can also be grown as a fall crop. Sow seeds indoors during midsummer and transplant them outside when the hottest part of summer has passed.
Avoid Summer Heat
Hot weather causes celery to become tough, bitter, and sometimes bolt (produce flowers instead of edible stalks). If you live in a warm climate, providing afternoon shade during hot spells can help keep plants productive.
What Celery Needs to Grow Successfully
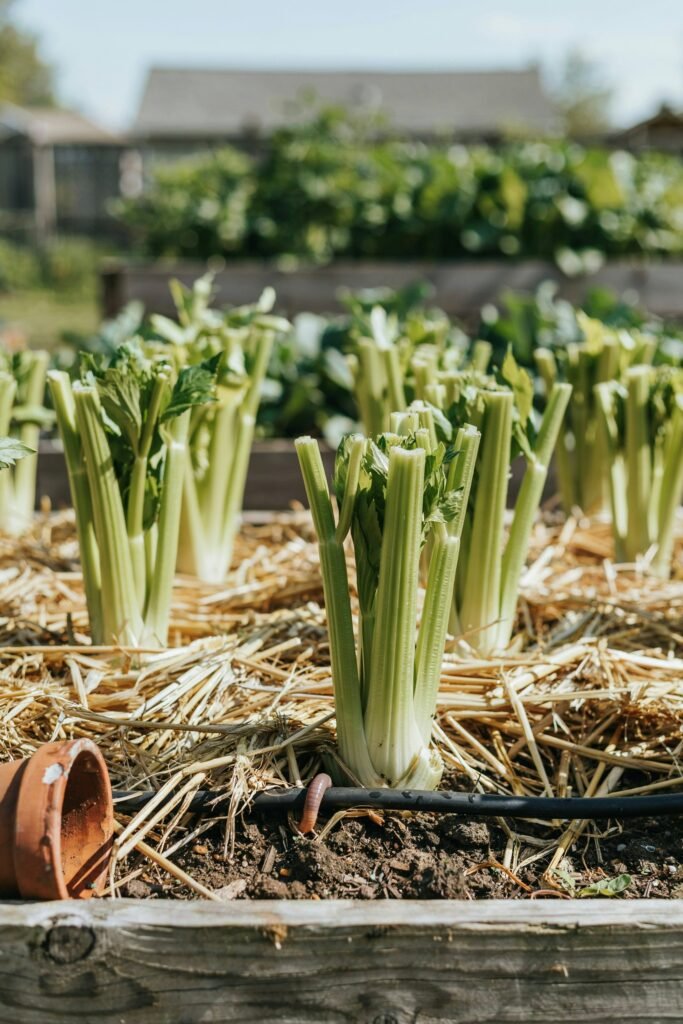
Celery has a reputation for being fussy because it performs best when its growing conditions stay consistent. Giving it the right environment from the start makes the entire season much easier.
Rich, Fertile Soil
Celery is a heavy feeder and thrives in soil rich in organic matter.
Before planting, mix several inches of compost or well-rotted manure into the bed. Healthy soil holds moisture while providing a steady supply of nutrients.
Aim for a soil pH between 6.0 and 7.0.
Plenty of Sunlight
Celery grows best with 6 to 8 hours of direct sunlight each day.
In areas where summers become very hot, light afternoon shade can help prevent heat stress and keep the stalks tender.
Consistent Moisture
This is the secret to growing excellent celery.
Unlike drought-tolerant vegetables, celery has shallow roots that dry out quickly. If the soil dries repeatedly, the stalks can become fibrous, stringy, or bitter.
Keep the soil evenly moist not soggy throughout the growing season.
Cool Temperatures
Celery performs best in temperatures between 60°F and 70°F (16–21°C).
Extended periods of extreme heat or sudden cold can reduce growth and affect the quality of the harvest.
Good Air Circulation
Proper spacing allows air to move freely around the plants, helping reduce fungal diseases and keeping foliage healthy.
Space plants about 8–10 inches apart, with rows 24 inches apart, so each plant has enough room to develop thick, healthy stalks.
How to Start Celery from Seed
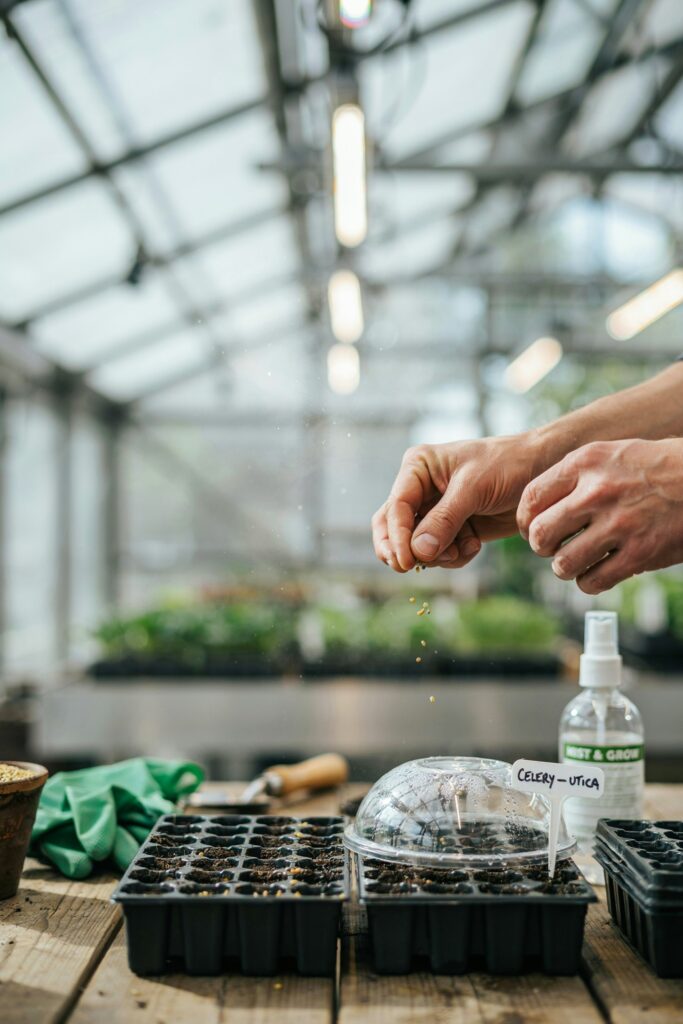
Growing celery from seed requires a little patience, but it’s one of the most rewarding ways to raise healthy, productive plants.
Celery seeds are tiny and slow to germinate, often taking two to three weeks before you see the first sprouts.
Don’t let that discourage you. With the right conditions and a little consistency, you’ll have strong seedlings ready for the garden.
Starting your own seeds also gives you access to a wider selection of celery varieties than you’ll typically find at a local garden center.
What You’ll Need
Before you begin, gather everything you’ll need so the planting process goes smoothly.
- Celery seeds
- Seed-starting trays or small pots
- Seed-starting mix
- Spray bottle or watering can with a fine rose
- Plastic humidity dome or clear plastic wrap
- Grow lights or a bright sunny window
- Heat mat (optional but helpful)
- Plant labels
Using a high-quality seed-starting mix is important because it’s light, drains well, and allows tiny celery roots to develop easily.
Step 1: Start Seeds at the Right Time
Celery has one of the longest growing seasons among common garden vegetables.
Start seeds indoors about 10 to 12 weeks before your area’s last spring frost. If you’re planting a fall crop, start seeds indoors about 10 to 12 weeks before your planned transplant date.
Giving seedlings plenty of time indoors allows them to become sturdy before facing outdoor conditions.
Step 2: Fill Your Seed Trays
Fill each seed tray or pot with moist seed-starting mix.
The soil should feel damp like a wrung-out sponge not soaking wet.
Lightly press the soil surface so it’s level but avoid compacting it.
Step 3: Sow the Tiny Seeds
Celery seeds are incredibly small.
Sprinkle two or three seeds into each cell.
One mistake many beginners make is burying the seeds too deeply.
Celery seeds actually need light to germinate.
Instead of covering them with soil, simply press the seeds gently onto the surface so they make good contact with the moist mix. If desired, dust them with the thinnest layer of fine vermiculite.
Step 4: Keep the Soil Moist
Since the seeds are on the surface, watering from above with a heavy stream can wash them away.
Instead:
- Mist the soil gently with a spray bottle.
- Keep the seed mix consistently moist.
- Never allow the surface to dry completely.
Covering the tray with a humidity dome or clear plastic helps lock in moisture during germination.
Check daily to make sure condensation isn’t excessive and that the soil remains evenly damp.
Step 5: Provide Warmth
Celery germinates best when temperatures stay between 70–75°F (21–24°C).
A seedling heat mat can significantly improve germination speed, especially if your home is cool.
Most seeds begin sprouting within 14 to 21 days, though some may take slightly longer.
Patience is key.
Step 6: Give Seedlings Plenty of Light
As soon as seedlings appear, remove the humidity cover.
Place them under grow lights for 14 to 16 hours each day, positioning the lights just a few inches above the plants.
If you’re using a sunny window, choose the brightest south-facing window available and rotate the tray every few days so seedlings grow straight instead of leaning toward the light.
Strong lighting prevents weak, leggy growth.
Step 7: Thin the Seedlings
When seedlings develop their first true leaves, it’s time to thin them.
Keep the healthiest plant in each cell and snip the extras at soil level using small scissors.
Avoid pulling unwanted seedlings out, as this can disturb the roots of the one you want to keep.
Step 8: Feed Young Plants
After the seedlings have two to three sets of true leaves, begin feeding them with a diluted liquid fertilizer every two weeks.
Choose a balanced fertilizer and mix it at half the recommended strength.
This gentle feeding encourages steady, healthy growth without overwhelming the young plants.
Step 9: Harden Off Before Planting Outside
Indoor-grown seedlings need time to adjust before being transplanted into the garden.
About 7 to 10 days before planting, begin hardening them off.
Here’s how:
- Place seedlings outdoors in a sheltered, shady location for 2–3 hours.
- Bring them back indoors.
- Increase their outdoor time each day.
- Gradually introduce them to more sunlight and gentle wind.
- By the end of the week, they should be able to stay outside all day and overnight if temperatures remain suitable.
Hardening off reduces transplant shock and helps seedlings adapt to outdoor conditions.
How to Transplant Celery Seedlings
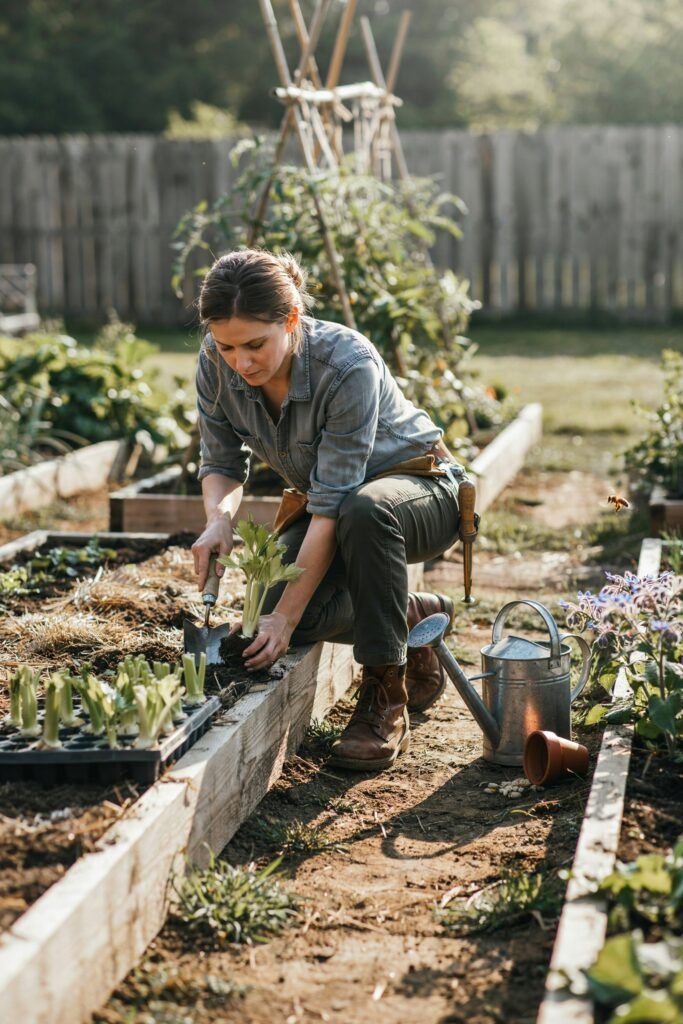
Once your seedlings are about 4 to 6 inches tall and have several sets of healthy leaves, they’re ready to move into the garden.
Choose an overcast day or plant in the early morning or evening to reduce stress on the young plants.
Step 1: Prepare the Garden Bed
Choose a location that receives at least six hours of sunlight each day.
Work 2 to 4 inches of compost or well-rotted manure into the soil before planting.
If your soil is heavy clay, add compost to improve drainage while helping it retain moisture.
Rake the surface smooth and remove any rocks or weeds.
Step 2: Dig the Planting Holes
Dig holes slightly larger than each seedling’s root ball.
Space plants:
- 8–10 inches apart
- 24 inches between rows
Proper spacing allows air to circulate, reduces disease problems, and gives each plant room to develop thick stalks.
Step 3: Remove Seedlings Carefully
Water seedlings before removing them from their trays.
Gently squeeze the container or push from the bottom to release the root ball.
Try to disturb the roots as little as possible.
Healthy roots help celery establish more quickly.
Step 4: Plant at the Same Depth
Set each seedling into its hole at the same depth it was growing in its container.
Avoid planting too deeply, as burying the crown can slow growth and increase the risk of rot.
Backfill the soil gently and press lightly around the base to remove large air pockets.
Step 5: Water Thoroughly
Immediately after planting, water deeply.
The goal is to settle the soil around the roots and provide the moisture young plants need to recover from transplanting.
Continue watering regularly during the first couple of weeks while plants establish themselves.
Step 6: Apply Mulch
Spread 2 to 3 inches of organic mulch around the plants.
Good mulch choices include:
- Straw
- Shredded leaves
- Untreated grass clippings
- Pine needles
- Fine bark mulch
Keep mulch an inch or two away from the base of each plant to prevent excess moisture around the crown.
Mulch helps:
- Retain soil moisture
- Reduce weeds
- Keep soil temperatures cooler
- Prevent rapid drying during warm weather
Growing Celery in Containers
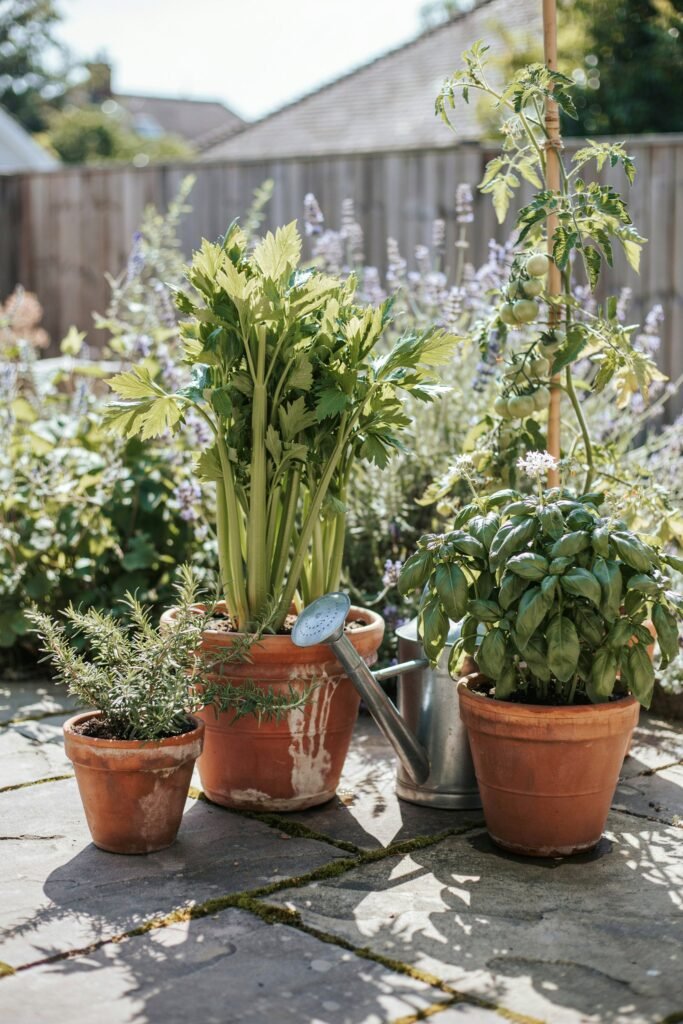
Don’t have a large garden? Celery grows surprisingly well in containers, provided it receives enough water, nutrients, and sunlight.
Container gardening also makes it easier to monitor soil moisture, which is one of the most important factors in growing healthy celery.
Choose the Right Container
Select a container that is:
- At least 12 inches deep
- 12 to 18 inches wide
- Equipped with several drainage holes
Larger containers hold moisture longer, reducing how often you’ll need to water.
Avoid small pots, as they dry out too quickly for celery’s shallow root system.
Use High-Quality Potting Mix
Never use ordinary garden soil in containers.
Instead, fill the pot with a premium potting mix enriched with compost.
A good mix should:
- Drain well
- Hold moisture evenly
- Stay loose for healthy root growth
- Provide good airflow around roots
Mixing in a little compost before planting gives celery a nutrient-rich start.
Plant Correctly
Plant celery at the same depth it was growing in its nursery pot or seed tray.
If your container is large enough, you can grow several plants together.
Space them 8 inches apart so each plant has room to mature.
Place the Container in the Right Spot
Position the container where it receives:
- 6 to 8 hours of sunlight
- Protection from intense afternoon heat in hot climates
- Good airflow
Containers can be moved if temperatures become extreme, making it easier to protect your plants during heat waves.
Water More Frequently
Container-grown celery dries out much faster than plants in the ground.
Check the soil every day by inserting your finger about an inch deep.
If it feels dry, water thoroughly until moisture drains from the bottom.
Never allow container-grown celery to wilt repeatedly, as this can lead to tough, stringy stalks.
Feed Regularly
Since nutrients wash out of containers more quickly, fertilize every 2 to 3 weeks with a balanced liquid fertilizer or apply a slow-release fertilizer according to the label directions.
Consistent feeding supports steady growth and encourages thick, crisp stalks.
Step-by-Step Planting Guide
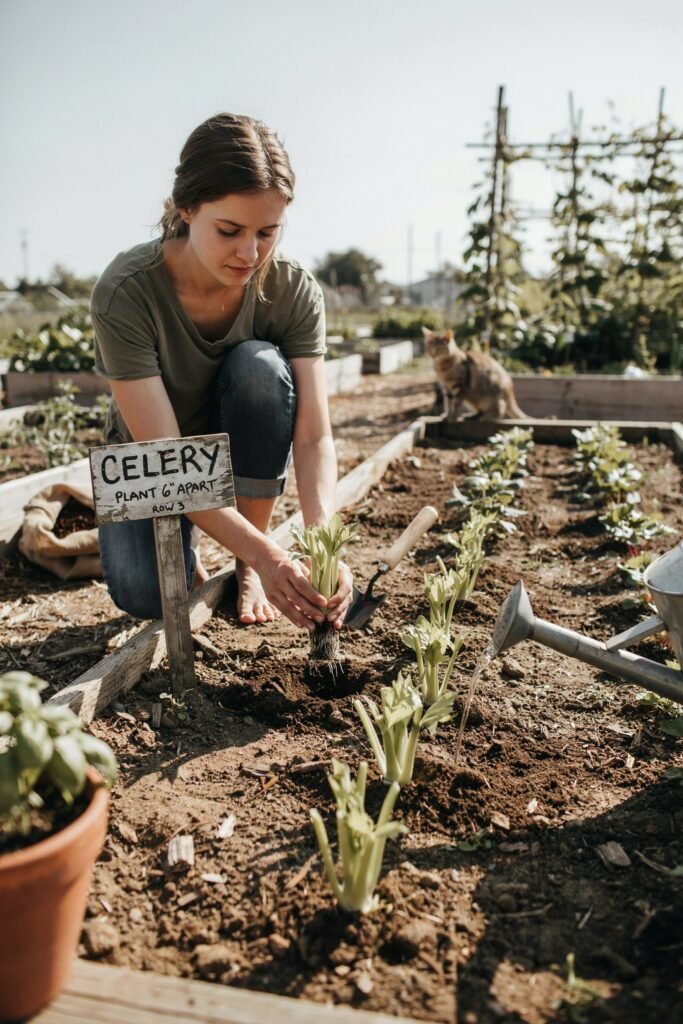
Whether you’re planting in a garden bed, raised bed, or container, following these steps will give your celery the best possible start.
Step 1: Choose a Sunny Location
Pick a spot that receives 6–8 hours of sunlight each day. In warmer climates, a location with afternoon shade can help prevent heat stress.
Step 2: Prepare the Soil
Work plenty of compost or well-rotted manure into the soil until it’s rich, loose, and moisture-retentive. Remove weeds and large stones before planting.
Step 3: Check Soil Temperature
Wait until the danger of hard frost has passed and soil temperatures are consistently above 50°F (10°C) before transplanting seedlings outdoors.
Step 4: Mark Plant Spacing
Space celery plants 8–10 inches apart in rows 24 inches apart. Proper spacing improves airflow and gives each plant enough room to develop full-sized stalks.
Step 5: Plant Carefully
Place each seedling into its planting hole at the same depth it was growing previously. Backfill gently and firm the soil around the roots.
Step 6: Water Immediately
Give each plant a deep watering after planting to settle the soil and reduce transplant shock.
Step 7: Mulch Around the Plants
Apply a 2–3 inch layer of organic mulch to conserve moisture, suppress weeds, and keep the soil cool. Leave a small gap around the base of each plant.
Step 8: Monitor Daily
For the first few weeks, check soil moisture every day. Keep the soil evenly moist and watch for signs of stress, pests, or disease so you can address problems early.
Helpful Tips for Success
- Start seeds indoors for the strongest plants and the longest growing season.
- Label your seed trays so you don’t mix up varieties.
- Keep celery consistently watered uneven moisture is the most common cause of tough, bitter stalks.
- Add compost before planting to provide a steady supply of nutrients.
- Use mulch to help the soil stay cool and moist.
- Harden off seedlings gradually before transplanting to reduce shock.
- Avoid overcrowding plants, as good airflow helps prevent fungal diseases.
- Feed regularly throughout the season because celery is a heavy feeder.
- Remove weeds promptly so they don’t compete for water and nutrients.
- Be patient slow, steady growth produces the best-tasting celery.
How to Care for Celery
Once your celery is planted, the real secret to growing thick, crisp, and flavorful stalks is consistent care.
Unlike some vegetables that can tolerate a little neglect, celery performs best when its growing conditions stay as even as possible.
Regular watering, feeding, and a little attention throughout the season will reward you with a healthy harvest.
Let’s look at each part of celery care in detail.
Watering Celery
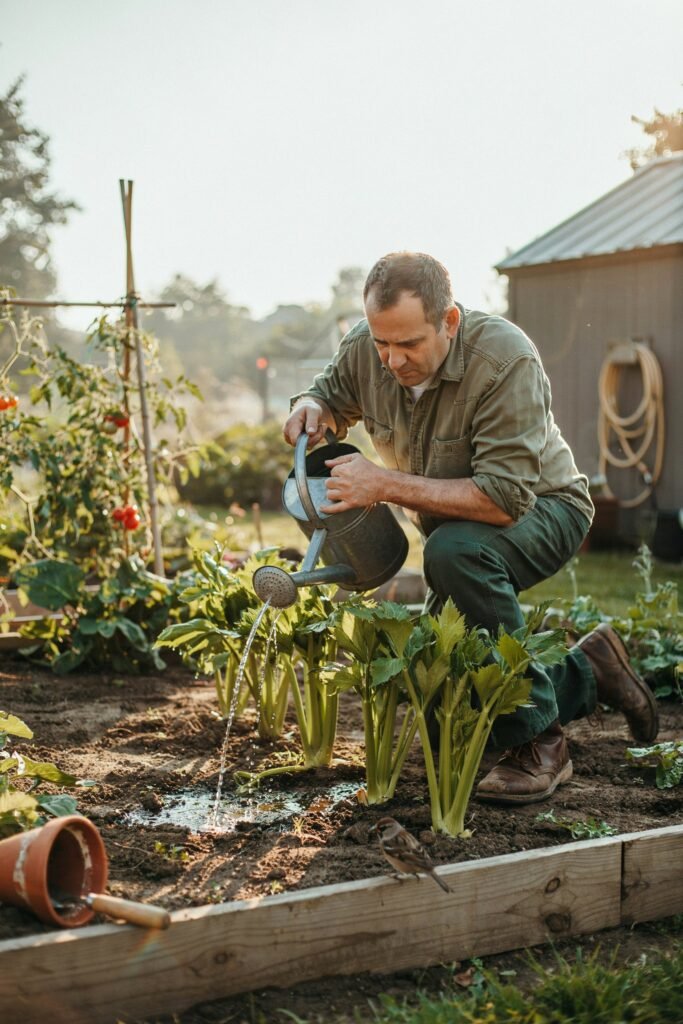
If there’s one thing to remember about growing celery, it’s this: never let it dry out.
Celery is made up of about 95% water, so it needs a constant supply of moisture to produce tender stalks. Inconsistent watering is one of the main reasons gardeners end up with tough, stringy, or bitter celery.
Rather than watering lightly every day, give your plants a deep soak once or twice a week, adjusting based on rainfall and temperatures. Deep watering encourages stronger root growth and helps moisture reach farther into the soil.
Aim to provide about 1 to 2 inches of water per week, either from rainfall or irrigation. During hot, dry weather, you may need to water more often.
The best time to water is early in the morning. This allows the foliage to dry during the day, reducing the risk of fungal diseases.
Signs Your Celery Needs More Water
Watch your plants closely for these common signs:
- Wilting leaves during the cooler parts of the day
- Thin or narrow stalks
- Stringy texture
- Bitter flavor
- Cracked stalks
- Dry soil several inches below the surface
If you notice any of these symptoms, increase watering before the plant becomes stressed.
Watering Tips
- Water deeply instead of giving frequent shallow watering.
- Keep the soil consistently moist but never waterlogged.
- Use a soaker hose or drip irrigation whenever possible.
- Avoid wetting the leaves late in the evening.
- Check container-grown celery daily, as pots dry out much faster than garden beds.
Fertilizing Celery
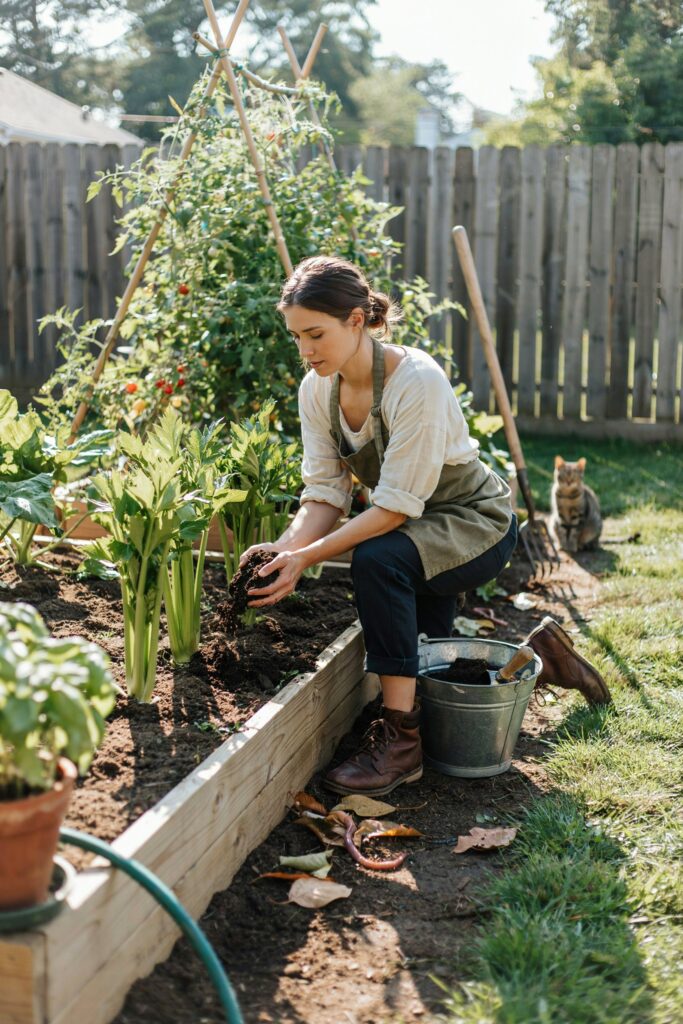
Celery is considered a heavy feeder, meaning it uses a lot of nutrients throughout its long growing season. Rich soil gives it a good start, but regular feeding is essential if you want thick, healthy stalks.
Begin by mixing plenty of compost or well-rotted manure into the soil before planting. Once the plants are established, continue feeding them every 3 to 4 weeks with a balanced vegetable fertilizer.
Liquid fertilizers provide a quick nutrient boost, while slow-release fertilizers offer a steady supply over time.
Nutrients Celery Needs
- Nitrogen encourages lush leafy growth and strong stalk development.
- Phosphorus supports healthy root systems.
- Potassium improves plant vigor and helps celery cope with stress.
Avoid applying too much nitrogen late in the season, as excessive leafy growth can produce softer, weaker stalks.
Natural Fertilizer Options
If you prefer organic gardening, consider using:
- Finished compost
- Worm castings
- Fish emulsion
- Seaweed fertilizer
- Compost tea
- Well-rotted manure
These options feed the soil while supplying nutrients gradually throughout the season.
Mulching Around Celery
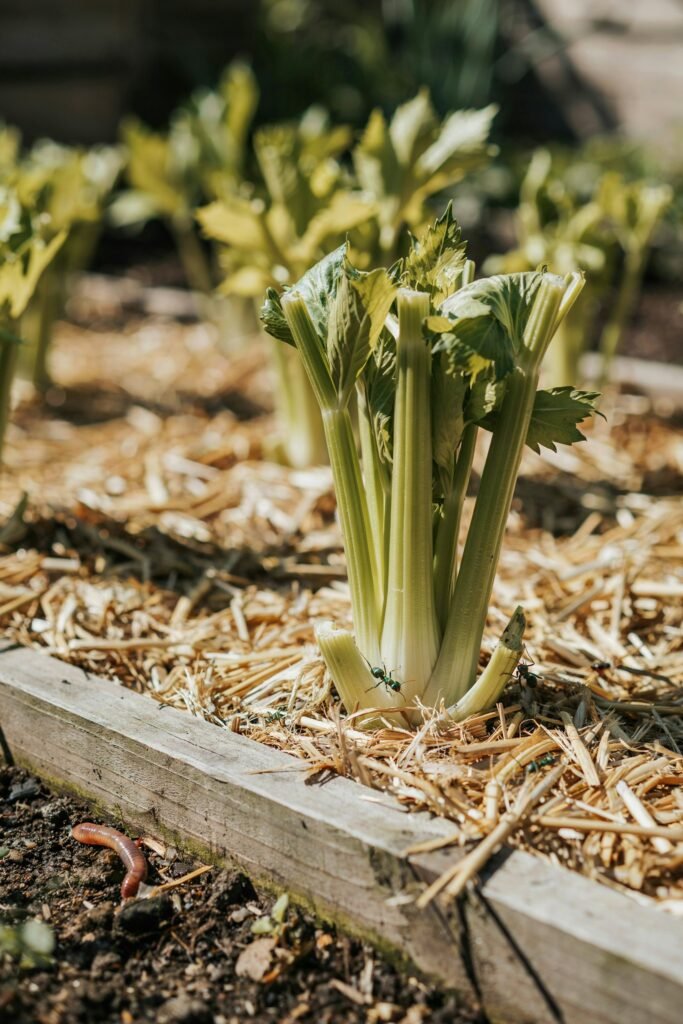
Mulch is one of the easiest ways to improve celery growth.
A layer of organic mulch helps maintain even soil moisture, keeps the roots cool during warm weather, and greatly reduces weed competition.
Apply 2 to 3 inches of mulch after transplanting once the soil has warmed slightly.
Good mulch materials include:
- Straw
- Shredded leaves
- Pine needles
- Fine bark mulch
- Untreated grass clippings
Leave a small gap around the base of each plant to improve air circulation and prevent crown rot.
Benefits of Mulching
- Keeps soil evenly moist
- Reduces watering frequency
- Prevents weeds
- Keeps roots cool
- Adds organic matter as it breaks down
- Reduces soil splashing that can spread disease
Sunlight Requirements
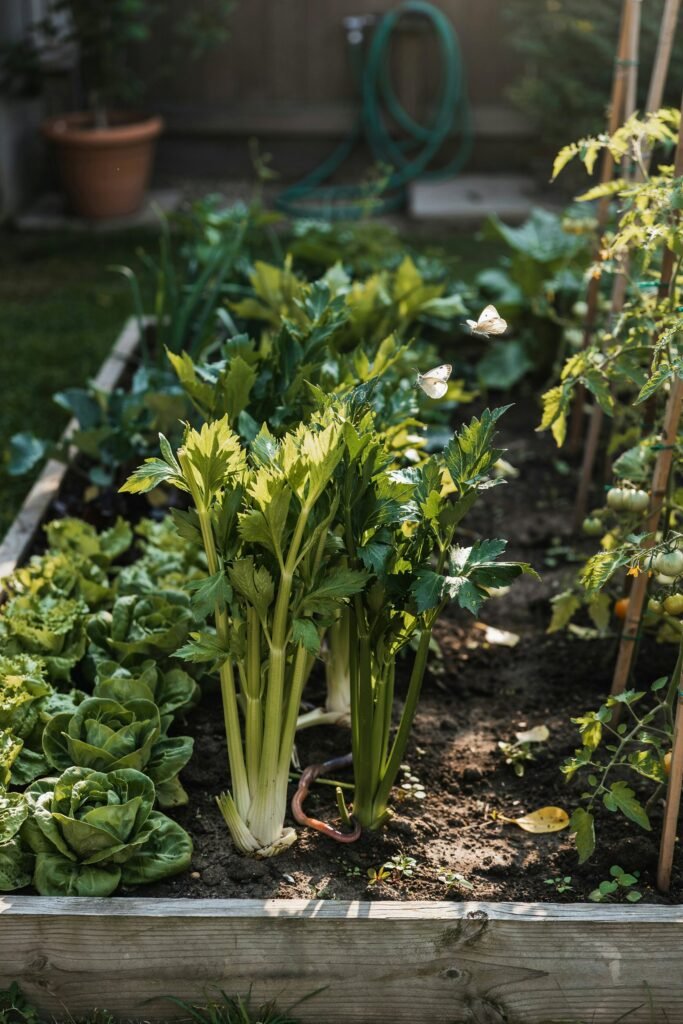
Celery grows best in full sun, receiving at least 6 to 8 hours of direct sunlight each day.
However, if you garden in an area with very hot summers, providing light afternoon shade can help prevent heat stress.
Too much shade often leads to:
- Thin stalks
- Slow growth
- Smaller plants
- Lower yields
On the other hand, intense heat combined with dry soil may cause celery to become bitter or bolt prematurely.
Finding the right balance between sunlight and moisture is the key to success.
Ideal Temperature for Growing Celery
Celery is a cool-season vegetable.
It grows best when daytime temperatures remain between 60°F and 70°F (16°C to 21°C).
Nighttime temperatures around 50°F to 60°F (10°C to 16°C) are ideal.
Extreme heat can cause:
- Bitter stalks
- Slow growth
- Wilting
- Premature flowering (bolting)
Unexpected cold snaps may also stress young plants, so protect seedlings if frost is forecast after transplanting.
Blanching Celery for Sweeter Stalks
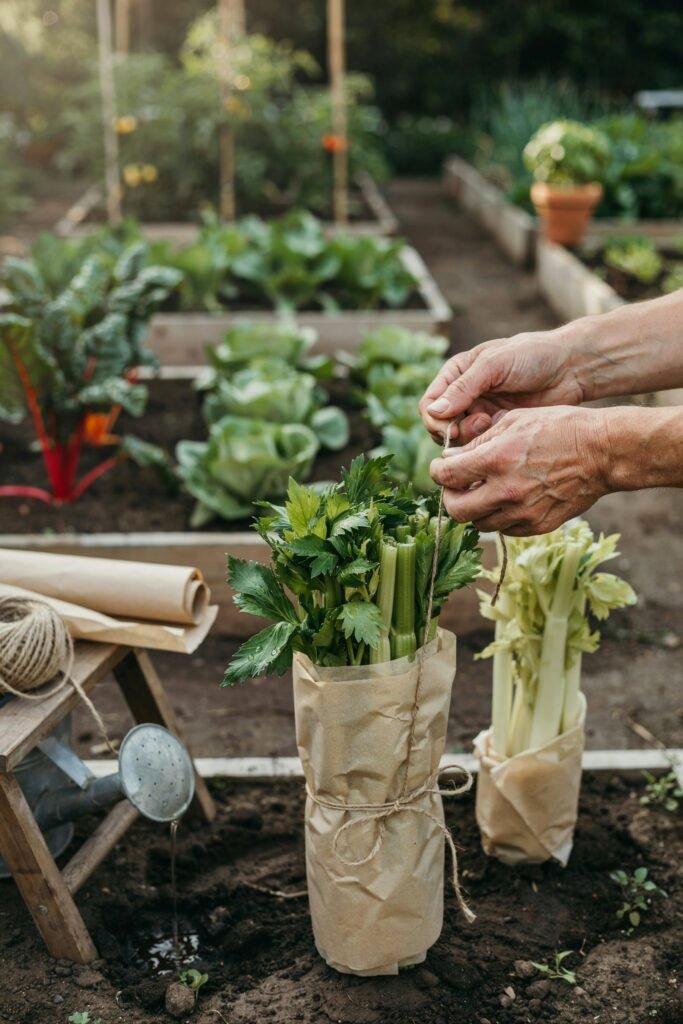
Some gardeners choose to blanch celery to produce lighter-colored, milder-tasting stalks.
Blanching blocks sunlight from reaching the stalks, reducing bitterness and creating a more tender texture.
How to Blanch Celery
About 2 to 3 weeks before harvest:
- Gather the outer stalks gently together.
- Tie them loosely with soft garden twine.
- Wrap the stalks with cardboard, heavy paper, burlap, or another breathable material.
- Leave the leafy tops uncovered so they can continue receiving sunlight.
- Remove the wrapping at harvest time.
Many modern celery varieties are naturally less bitter, so blanching is optional rather than essential.
Pruning and General Maintenance
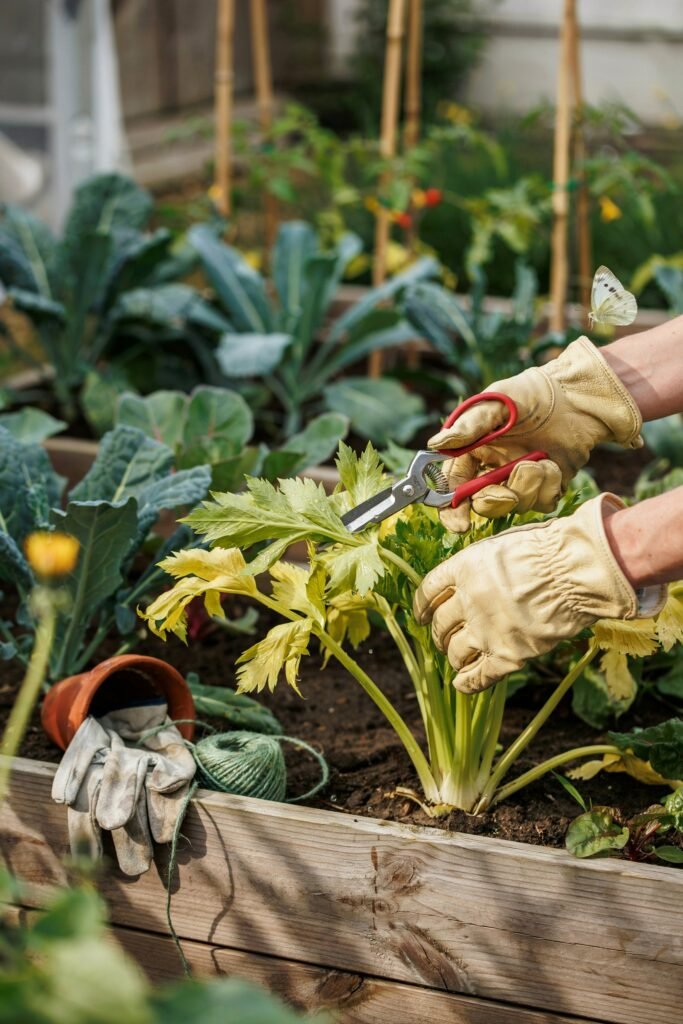
Celery doesn’t require heavy pruning, but a little maintenance goes a long way.
Regularly inspect your plants and remove:
- Yellow leaves
- Broken stalks
- Diseased foliage
- Damaged outer stems
Keeping plants clean improves airflow and reduces the chance of fungal diseases.
Avoid removing too many healthy leaves, as they provide the energy needed to produce thick stalks.
Common Celery Problems and How to Fix Them
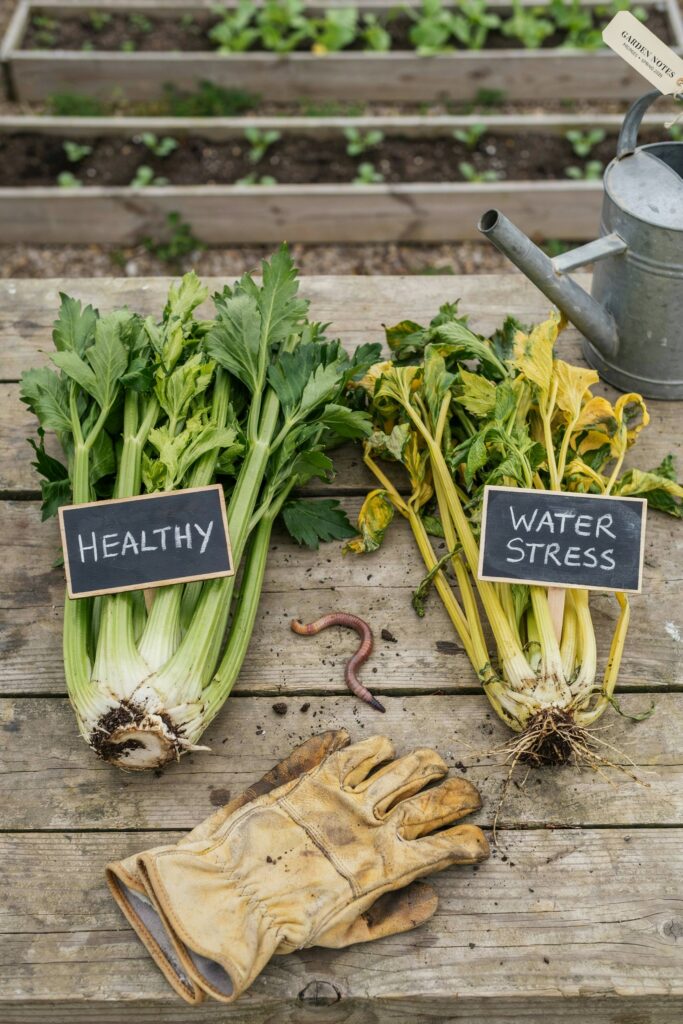
Even with good care, celery can occasionally run into problems. Fortunately, most issues are easy to correct once you know what to look for.
Thin, Skinny Stalks
Possible causes:
- Poor soil fertility
- Crowded plants
- Too little sunlight
- Inconsistent watering
How to Fix It
Feed your plants regularly, maintain even moisture, and make sure they have enough space to grow.
Bitter Celery
Bitterness usually develops when plants become stressed.
Common causes include:
- Hot weather
- Dry soil
- Irregular watering
- Delayed harvesting
Solution
Water consistently, mulch around plants, and harvest once stalks reach full size.
Stringy Stalks
Stringy celery is usually the result of moisture stress.
Increase watering frequency during warm weather and keep mulch around the base of the plants.
Slow Growth
If celery seems to stop growing, check for:
- Lack of nutrients
- Poor soil
- Cool temperatures
- Root competition from weeds
Adding compost and feeding with a balanced fertilizer often restores healthy growth.
Yellow Leaves
Yellowing leaves may indicate:
- Overwatering
- Poor drainage
- Nutrient deficiencies
- Aging outer foliage
Allow soggy soil to dry slightly and improve drainage if necessary. Remove older yellow leaves as needed.
Common Pests That Attack Celery
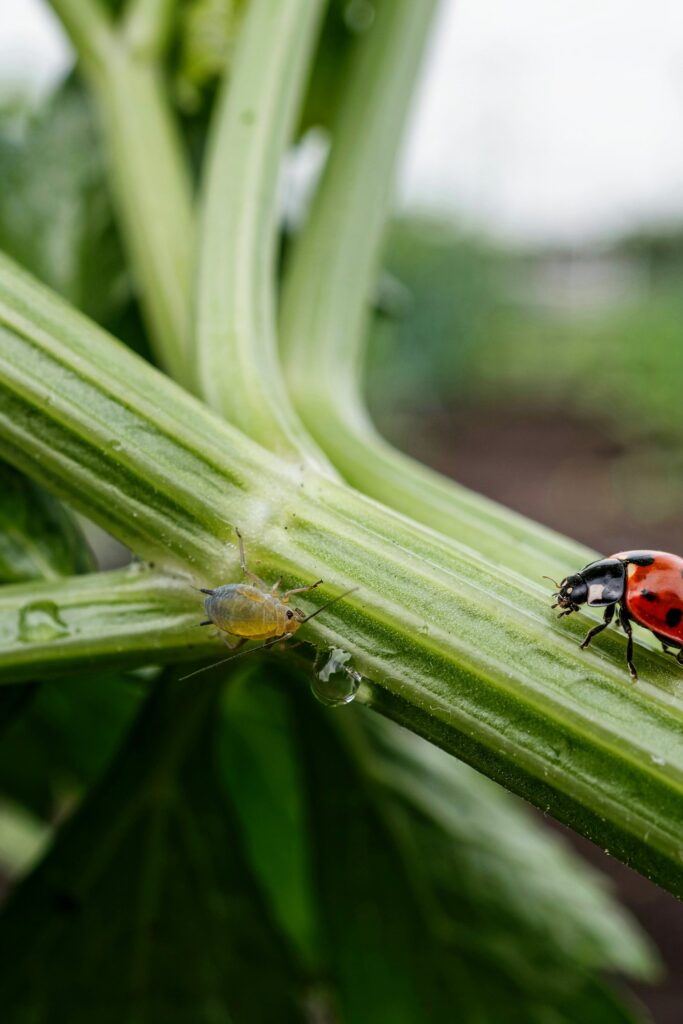
Although celery isn’t usually overwhelmed by pests, several insects may occasionally feed on the plants.
Aphids
Aphids gather on new growth and suck plant sap, causing curled leaves and weakened plants.
Control Methods
- Spray plants with a strong stream of water.
- Encourage ladybugs and lacewings.
- Use insecticidal soap if infestations become severe.
Slugs and Snails
These pests chew irregular holes in leaves, especially during cool, damp weather.
Control Methods
- Hand-pick at dusk.
- Remove hiding places.
- Use iron phosphate slug bait if necessary.
Leaf Miners
Leaf miner larvae tunnel through celery leaves, creating winding white trails.
Remove affected leaves promptly to reduce the spread.
Cutworms
Cutworms may chew through young seedlings near the soil line.
Protect new transplants with cardboard collars placed around the stems during the first few weeks after planting.
Common Celery Diseases
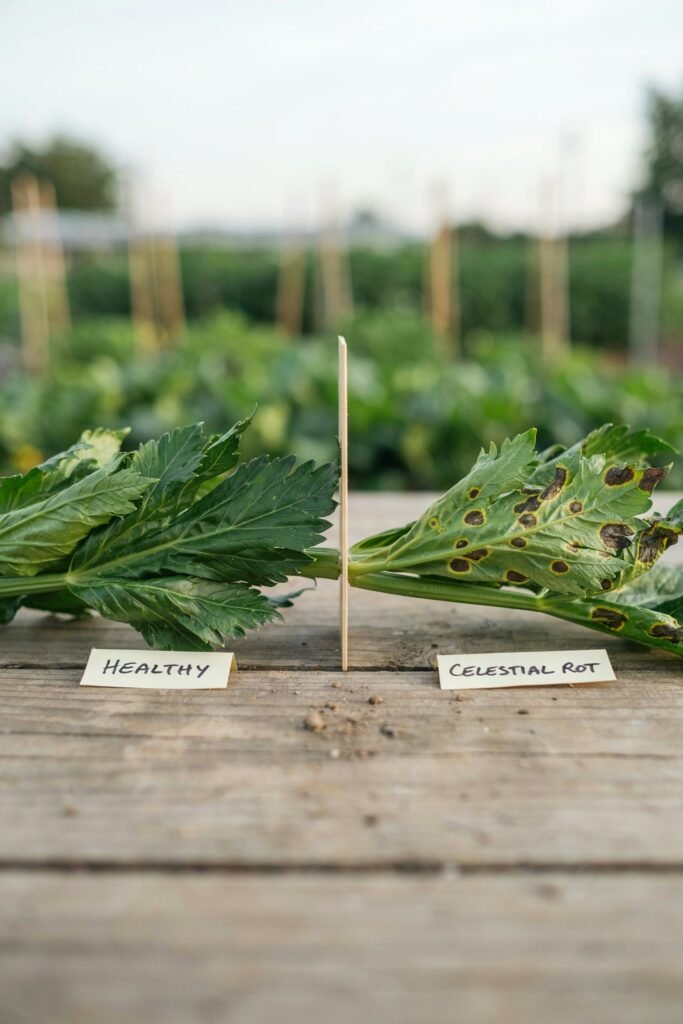
Good garden hygiene helps prevent most celery diseases before they become serious.
Early Blight
Symptoms include brown spots on leaves that gradually enlarge.
Improve airflow, avoid overhead watering, and remove infected foliage.
Late Blight
This disease spreads rapidly during cool, wet weather.
Remove affected plants immediately and avoid watering leaves whenever possible.
Fusarium Wilt
This soil-borne disease causes yellowing and wilting.
Unfortunately, infected plants should be removed. Rotate crops and avoid planting celery in the same location for several years.
Root Rot
Usually caused by poorly drained soil.
Improve drainage and avoid overwatering to prevent root problems.
When to Harvest Celery
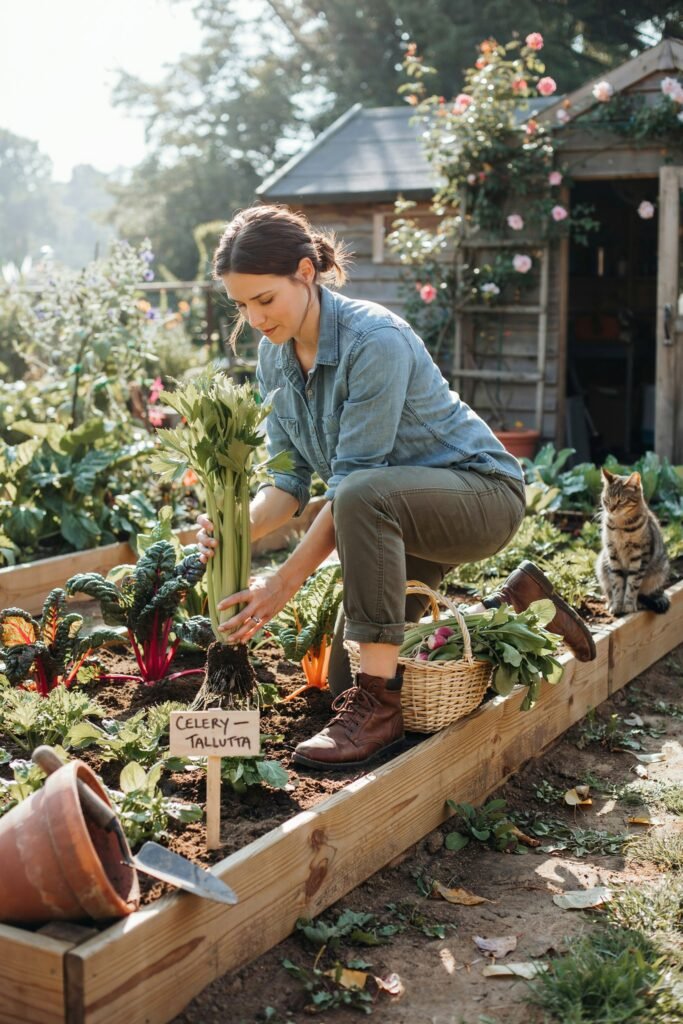
Patience pays off when growing celery.
Most varieties are ready to harvest 85 to 120 days after transplanting, depending on the variety and growing conditions.
You’ll know your celery is ready when:
- Stalks are thick and firm.
- Plants stand about 12 to 18 inches tall.
- The stalks feel crisp when gently squeezed.
- The outer stems have reached a usable size.
You don’t always have to harvest the entire plant at once.
Many gardeners harvest the outer stalks first while allowing the inner stalks to continue growing.
This method extends the harvest over several weeks.
How to Harvest Celery
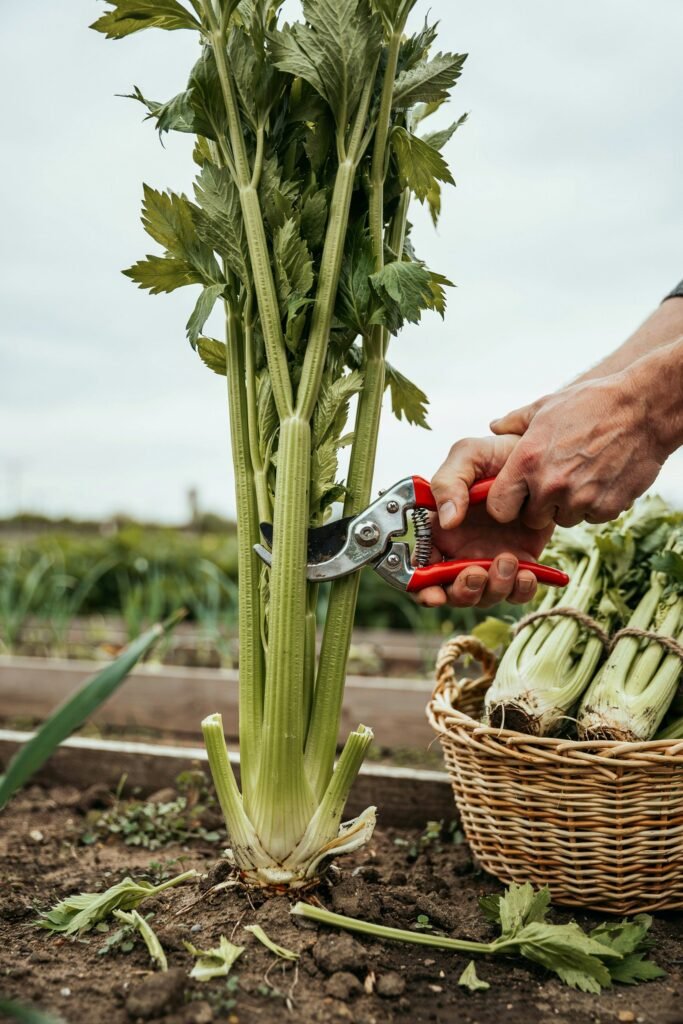
Harvesting celery correctly helps preserve its freshness and allows you to enjoy the best texture.
Harvest Individual Stalks
Using a clean, sharp knife, cut the outer stalks near the base of the plant.
Leave the center stalks untouched so they can continue producing new growth.
This is ideal if you only need a few stalks for cooking.
Harvest the Whole Plant
When you’re ready to harvest everything, cut the entire plant at soil level or carefully lift it with a garden fork, keeping the root ball intact if desired.
Shake off excess soil and trim away damaged outer leaves.
How to Store Fresh Celery
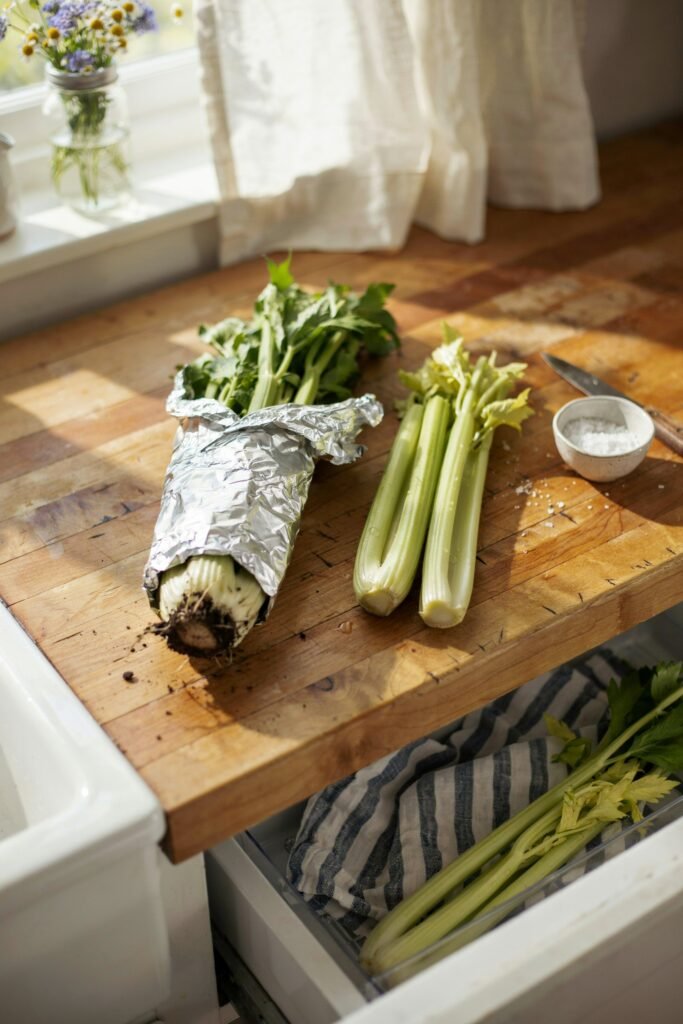
Freshly harvested celery stores well if handled properly.
In the Refrigerator
Wrap the celery loosely in aluminum foil and place it in the vegetable crisper drawer. This method helps retain moisture while allowing excess ethylene gas to escape, keeping the stalks crisp for 2 to 4 weeks.
Freeze for Long-Term Storage
Wash the stalks, slice them into pieces, blanch for about 3 minutes, cool them quickly in ice water, drain well, and freeze in airtight bags or containers. Frozen celery is best used in soups, stews, casseroles, and stocks.
Preserve Extra Harvest
If you have more celery than you can use fresh, try:
- Dehydrating slices for soup mixes
- Making homemade vegetable stock
- Chopping and freezing with onions and carrots for quick cooking bases
Frequently Asked Questions
How long does celery take to grow?
Most celery varieties take 85 to 120 days after transplanting to reach maturity, making it one of the longer-season vegetables in the garden.
Can I grow celery from the base of a store-bought bunch?
Yes. Place the trimmed base in shallow water until new growth appears, then transplant it into soil.
This method is fun and can produce fresh leaves and some stalks, though it usually won’t be as productive as plants grown from seed.
Why are my celery stalks hollow?
Hollow stalks are often caused by inconsistent watering, nutrient deficiencies especially boron or temperature stress. Keeping the soil evenly moist and feeding plants regularly helps prevent this issue.
Does celery need full sun?
Celery grows best with 6–8 hours of sunlight each day. In very hot climates, a little afternoon shade can help protect the plants from heat stress.
Can celery survive frost?
Established celery can tolerate light frosts, but prolonged freezing temperatures can damage the stalks. Cover plants with frost cloth if a hard frost is expected.
Final Thoughts
Growing celery may take more time than many other vegetables, but the reward is well worth the effort.
By providing rich soil, steady moisture, regular feeding, and the right growing conditions, you can enjoy crisp, flavorful stalks that far surpass anything from the grocery store.
Whether you’re growing it in a garden bed, a raised bed, or a container on your patio, a little consistency goes a long way.
With patience and the tips in this guide, you’ll be harvesting healthy, homegrown celery that’s perfect for soups, salads, snacks, and countless home-cooked meals. Happy gardening!
