


I’ve always thought peonies were worth making room for in the garden.
Their beautiful blooms return year after year, but sometimes a plant simply ends up in the wrong spot.
If your peony needs more sunlight, better drainage, or extra space, moving it can be worthwhile.
With the right timing and a gentle touch, transplanting peonies is easier than you might expect.
Can You Transplant Peonies?
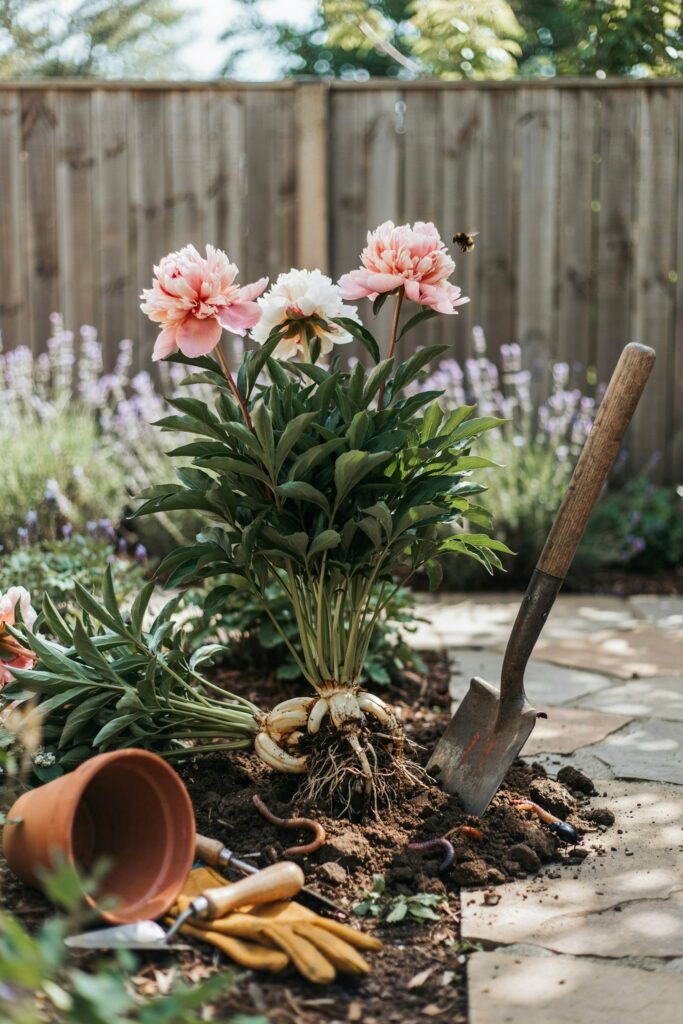
Yes, you can transplant peonies.
Peonies are known for being long-lived plants, and a healthy plant can remain in the same garden spot for many years. Because they don’t love having their roots disturbed, though, it’s best to move them only when necessary.
You might need to transplant a peony because:
- It was planted in too much shade.
- The soil doesn’t drain well.
- The plant has become crowded.
- Nearby trees or shrubs are taking its water and nutrients.
- You are redesigning your garden.
- The plant was originally planted too deeply.
- You want to move a favorite peony to a better location.
- You want to divide a mature plant into several healthy sections.
The good news is that peonies can recover from transplanting when they are moved at the right time and replanted correctly.
When Is the Best Time to Transplant Peonies?
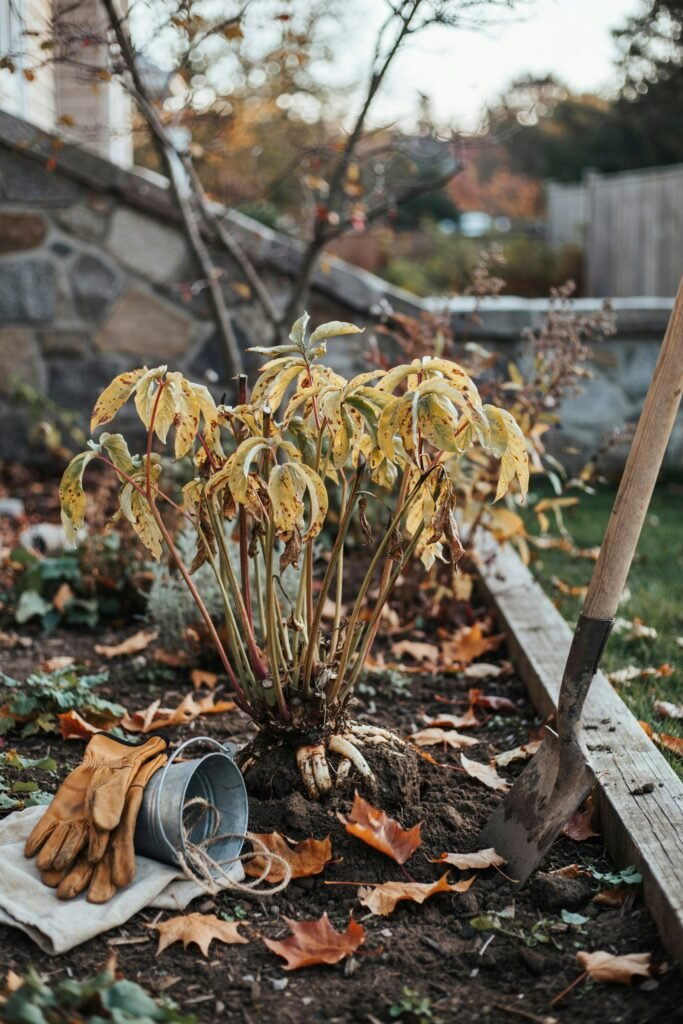
Fall is usually the best time to transplant peonies.
Wait until the foliage has naturally turned yellow or brown and the plant has started going dormant. In many areas, this means transplanting several weeks before the ground freezes.
Fall is helpful because the plant is finished producing flowers and most of its energy is no longer going toward above-ground growth. The roots can settle into their new location while the plant is dormant.
Can You Transplant Peonies in Spring?
You can, but spring isn’t usually the ideal time.
A peony moved during active spring growth has to deal with the stress of being dug up while it is also trying to produce new stems and foliage. It may survive, but flowering can be reduced.
If your peony absolutely must be moved in spring, handle the roots as gently as possible and give the plant consistent care afterward.
If you have the option, wait until fall.
Choose the Right Location
Before you dig up your peony, decide exactly where it will go.
Peonies generally grow best in a location that receives at least 6 hours of sunlight each day. A sunny spot can help encourage strong growth and flowering.
The new location should also have:
- Well-draining soil
- Good air circulation
- Plenty of growing room
- Reasonably fertile soil
- Enough sunlight
- No standing water after rain
Avoid planting your peony directly beside large trees or shrubs. Their roots can compete with the peony for water and nutrients.
If the original location stays wet after rainfall, moving the plant to better-draining soil may make a noticeable difference.
Prepare the New Planting Hole First
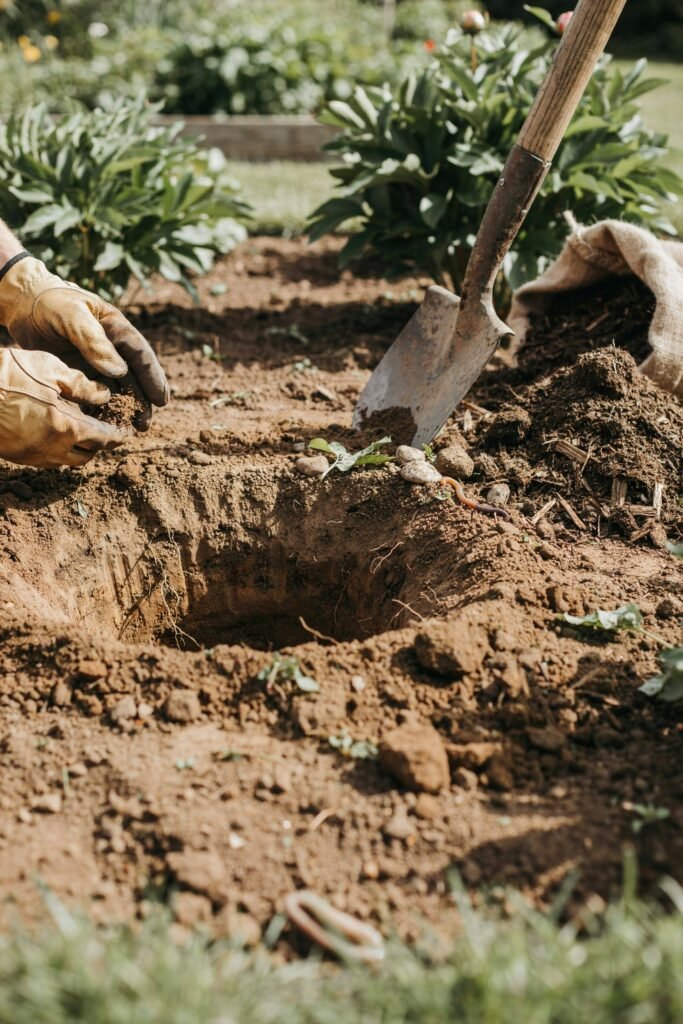
One of my favorite little tricks when transplanting plants is to prepare the new location before digging up the old plant.
This means your peony doesn’t have to sit out of the ground while you’re still deciding where to put it.
Dig a hole that is wide enough to comfortably hold the roots without forcing them into a tight space.
Loosen the surrounding soil and remove large rocks, weeds and roots.
If the soil is poor, mix in some finished compost. Don’t go overboard with fertilizer, especially when planting a freshly disturbed root system.
The goal is to create a healthy, well-draining environment rather than an extremely rich planting hole.
Tools You’ll Need
Gather your supplies before starting.
You may need:
- Garden shovel or spade
- Garden fork
- Clean hand pruners
- Sharp knife for dividing
- Garden gloves
- Compost
- Water
- Tarp, cardboard or a bucket
A tarp is especially useful for large plants because you can place the root ball on it and move the plant without dragging the roots across the ground.
Step 1: Wait Until the Foliage Dies Back
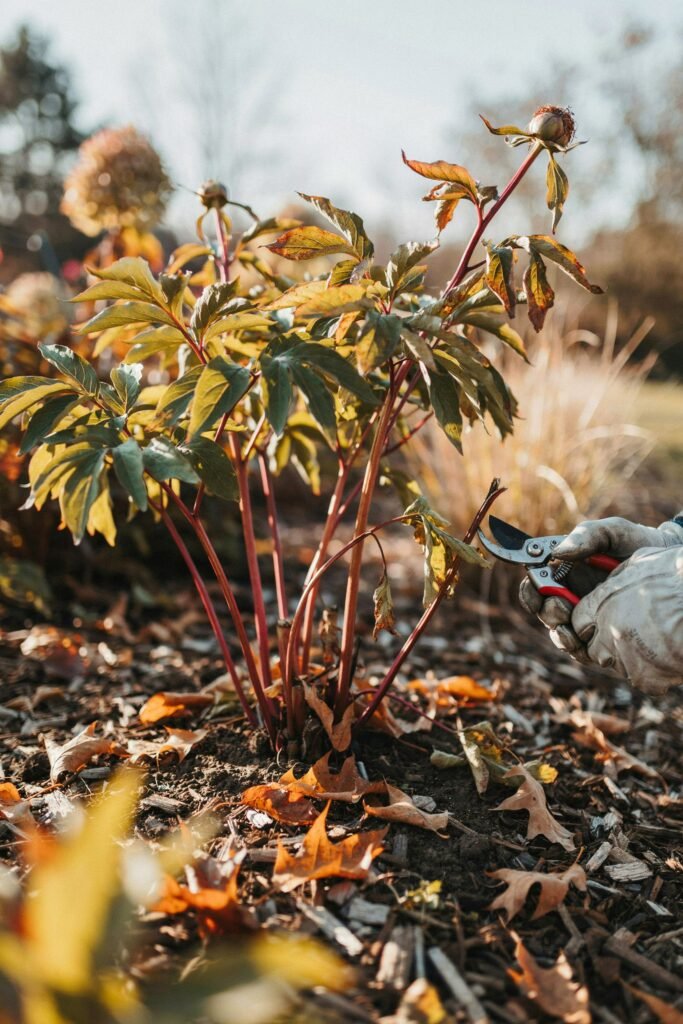
Don’t rush to cut your peony down simply because you’re ready to move it.
Wait until the foliage has naturally started to die back in fall.
Once the leaves have yellowed or browned and the plant is entering dormancy, cut the stems back close to ground level with clean pruners.
Remove the old foliage from around the plant.
This gives you a clearer working area and removes old plant material that may harbor disease.
Step 2: Dig Around the Peony
This is probably the part where patience matters most.
Peonies can develop a substantial root system, and the thick roots can be brittle.
Don’t place your shovel directly against the crown and try to lift the plant immediately.
Instead, begin digging several inches away from the crown.
Work your way around the entire plant, gradually loosening the soil.
Dig down deeply enough to get underneath the root system.
A garden fork can help loosen soil without cutting through as many roots as a shovel might.
Don’t Pull Too Hard
If the plant doesn’t lift easily, don’t force it.
Dig a little farther around and underneath it.
The more root system you can keep intact, the less unnecessary stress you put on the plant.
Some root damage is unavoidable, especially with a large established peony, but careful digging can reduce it.
Step 3: Lift the Plant
Once the soil has been loosened all around the plant, gently work your shovel or garden fork underneath the root mass.
Lift the plant gradually.
For a large, mature peony, having someone help you can make the job much easier.
Try to lift the plant rather than pulling it by the stems.
Once it’s out of the ground, place it on a tarp or in a shaded location while you prepare the roots.
Don’t leave exposed roots sitting in direct sunlight or drying wind for a long time.
Step 4: Check the Roots
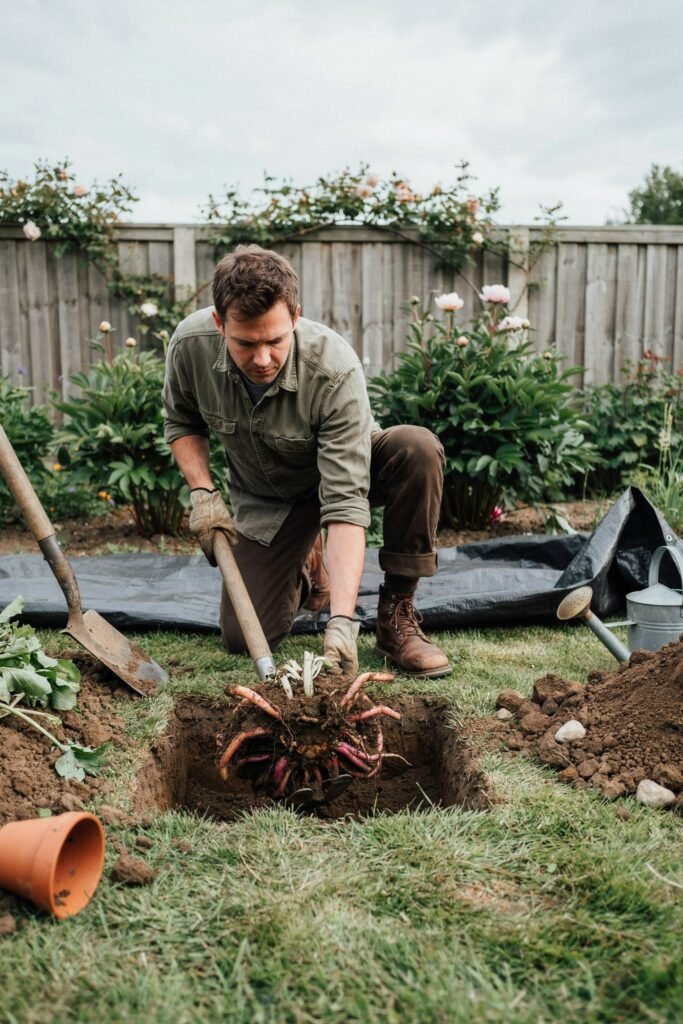
Take a moment to inspect the plant.
Remove loose soil gently so you can see the crown and buds.
You may notice small reddish or pinkish buds on the crown. These are commonly called eyes, and they are the growing points that will produce new shoots.
If the root system looks healthy, you can transplant the whole plant.
If the plant is very large, you can also consider dividing it.
Step 5: Divide the Peony if Necessary
Dividing isn’t required every time you transplant a peony.
If you simply want to move your plant, keeping the root system intact is perfectly fine.
However, an oversized mature clump can be divided into smaller sections.
Use a clean, sharp knife to separate the crown into sections. Try to make each division large and healthy rather than creating lots of tiny pieces.
Each section should have healthy roots and several viable eyes.
Very small divisions can take longer to become established and may take more time before producing impressive flowers.
If you’re nervous about dividing your favorite peony, simply transplant the whole plant instead.
Step 6: Place the Peony in Its New Hole
Now comes one of the most important parts: planting depth.
Place the roots in the prepared hole with the eyes facing upward.
The eyes should generally sit only about 1–2 inches below the soil surface.
Avoid burying the crown deeply.
This is a common mistake with peonies. A plant that is buried too deeply may grow plenty of green foliage but produce few flowers.
Spread the roots naturally rather than bending or forcing them into an awkward position.
Once everything is positioned correctly, begin filling the hole with soil.
Step 7: Firm the Soil Gently
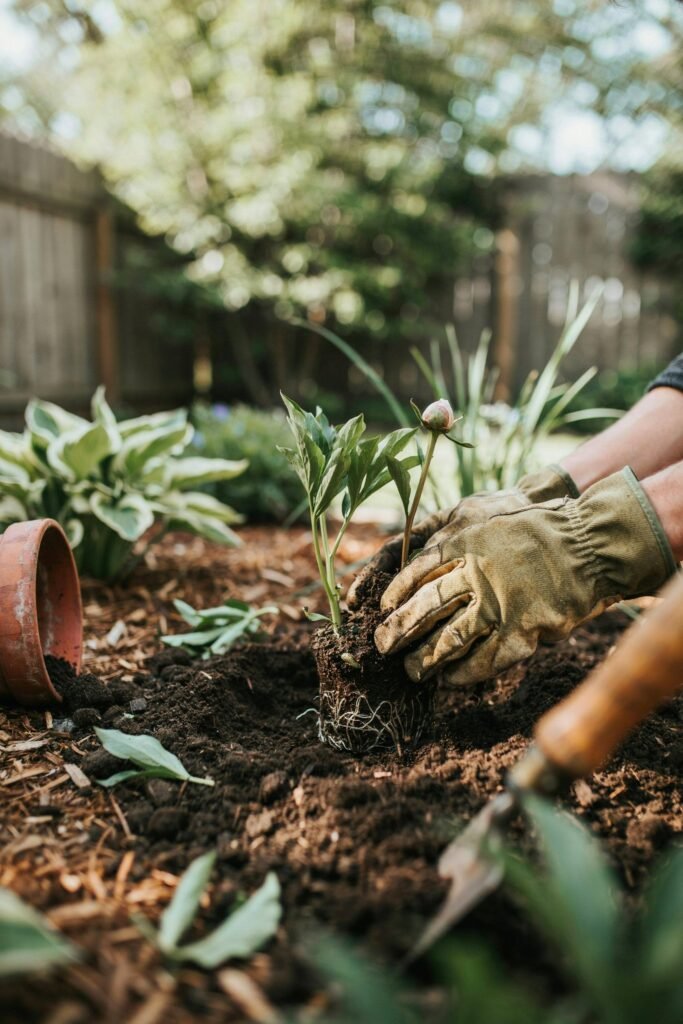
As you refill the hole, gently firm the soil around the roots.
You don’t need to stomp on it or pack it down hard.
The soil should make good contact with the roots while still allowing water and air to move through it.
Check the planting depth one more time before finishing.
It’s much easier to correct the depth now than after the soil has settled.
Step 8: Water Your Transplanted Peony
Give the newly transplanted peony a thorough watering.
Water slowly so moisture can move down into the root zone.
The purpose of this first watering is to settle the soil around the roots and remove large air pockets.
After that, keep an eye on the soil.
You want it reasonably moist while the roots establish, but don’t keep it constantly wet.
Peonies don’t appreciate soggy conditions.
Step 9: Add a Little Mulch
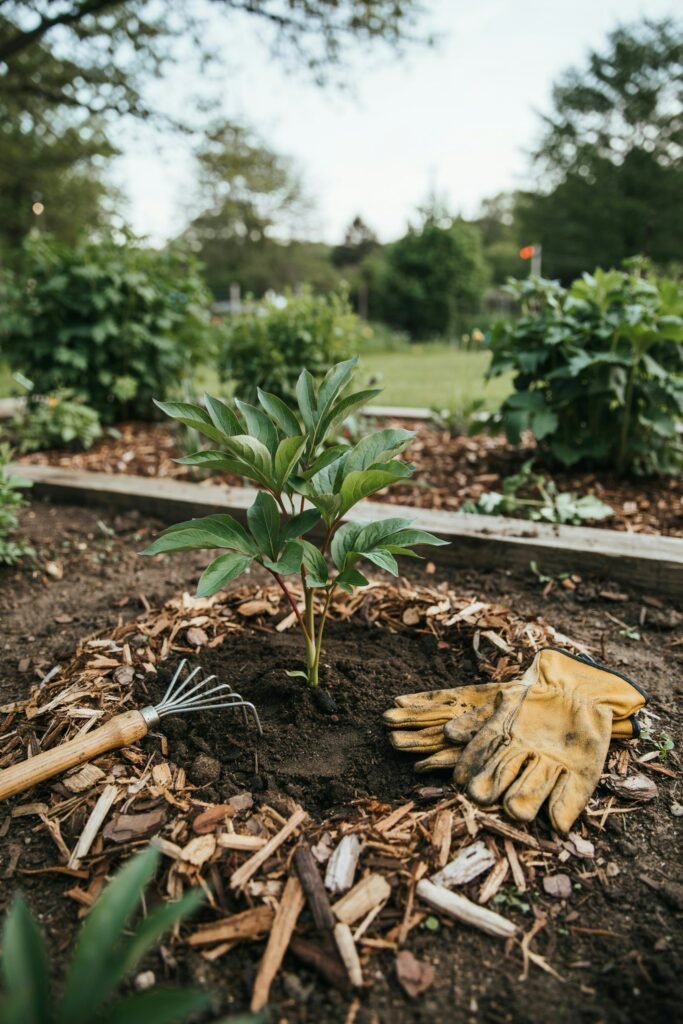
A light layer of mulch can help maintain more even soil moisture and protect the soil from temperature changes.
You can use:
- Shredded leaves
- Compost
- Straw
- Fine bark mulch
Keep the mulch a little away from the crown.
Don’t pile a thick layer directly over the plant because you don’t want to accidentally bury the eyes deeper.
How Often Should You Water a Transplanted Peony?
Your watering schedule will depend on your weather and soil.
During dry periods, check the soil regularly. If the soil feels dry several inches below the surface, give the plant a deep watering.
If you’ve had plenty of rain, you may not need to water at all.
The main thing is to avoid extremes.
A newly transplanted peony needs enough moisture for its roots to establish, but constantly saturated soil can cause problems.
Will a Transplanted Peony Bloom the Following Year?
It might, but don’t be disappointed if it doesn’t.
Moving a peony can temporarily affect its flowering, especially if the plant was divided or suffered considerable root disturbance.
Some transplanted peonies bloom the following season, while others need more time to settle.
Focus on establishing a healthy plant rather than expecting a huge display immediately.
Once the roots have settled into their new location, flowering should improve under the right growing conditions.
Common Peony Transplanting Mistakes
1. Planting Too Deep
This is one of the biggest mistakes to avoid.
Keep the eyes close to the soil surface.
2. Transplanting at the Wrong Time
Fall is generally the easiest time because the plant is dormant.
3. Choosing Too Much Shade
Peonies need plenty of sunlight for good growth and flowering.
4. Damaging the Roots Unnecessarily
Dig slowly and loosen the soil around the plant instead of forcing it out.
5. Overwatering
Moist soil is helpful, but constantly wet soil isn’t.
6. Using Too Much Fertilizer
Freshly transplanted roots don’t need excessive fertilizer. Focus first on good soil, moisture and the right planting depth.
7. Expecting Immediate Results
A transplanted peony may need time to recover. Give it patience rather than moving it again because it doesn’t bloom right away.
How Long Does a Transplanted Peony Take to Establish?
Peonies are naturally slow-growing compared with some garden plants, and transplanting can temporarily slow them down even further.
The plant may spend its first season concentrating on root establishment rather than producing lots of flowers.
Good sunlight, proper drainage and correct planting depth can help it settle into its new location.
Try to leave the plant alone once it has been transplanted. Repeatedly moving or disturbing it can delay establishment even further.
Frequently Asked Questions
Can I transplant a peony while it is blooming?
It’s better to wait until fall when the plant has gone dormant. Moving a flowering peony puts unnecessary stress on the plant.
Can I transplant a very old peony?
Yes. Even an old peony can be moved, although its root system may be large and require more care during digging.
Should I fertilize after transplanting?
You generally don’t need heavy fertilizer immediately after transplanting. Good soil and proper watering are more important while the plant establishes.
How deep should I plant peony roots?
In most garden situations, position the eyes about 1–2 inches below the soil surface. Avoid deep planting.
Should I divide my peony when transplanting?
Not necessarily. Divide it if you want additional plants or the clump has become very large. Otherwise, you can transplant the entire plant.
Final Thoughts
Moving a peony doesn’t have to be intimidating. The secret is to work with the plant instead of rushing it. Choose fall, prepare the new location first, dig carefully around the roots, and pay close attention to planting depth. Once your peony is settled, give it time and resist the urge to fuss over it. With patience and proper care, your transplanted peony can grow happily in its new home for many years.
