
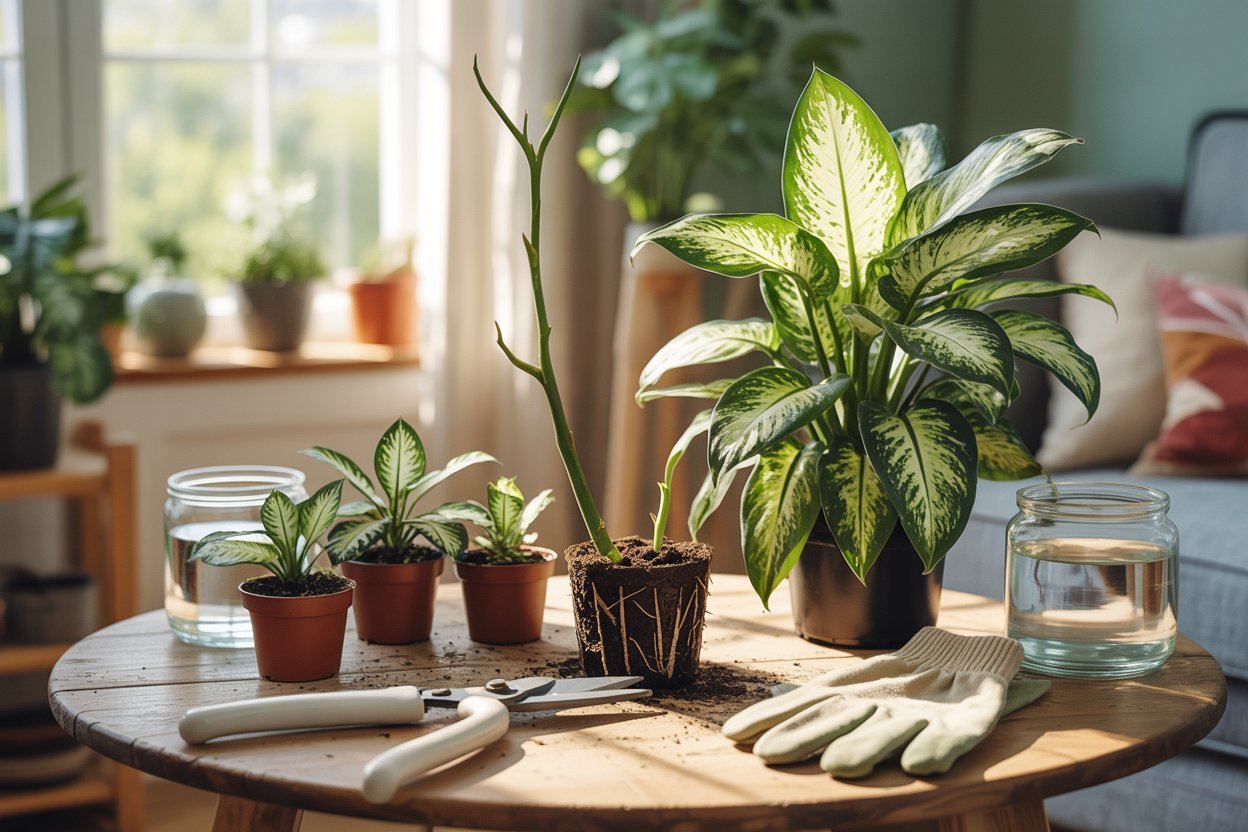

Watching a once-full Dieffenbachia become tall, thin, and bare can feel disappointing, especially when you remember how lush it looked when you first brought it home.
I’ve had plants go from vibrant and bushy to leaning awkwardly with only a handful of leaves at the top, and it can make you wonder if it’s time to throw them away.
Fortunately, that’s rarely necessary. A leggy Dieffenbachia can become the starting point for several healthy new plants with the right care and a few careful cuts.
This guide will show you exactly how to revive an overgrown Dieffenbachia, propagate it into baby plants, and care for both the original plant and the new ones so they grow strong, full, and beautiful again.
What Is a Leggy Dieffenbachia?
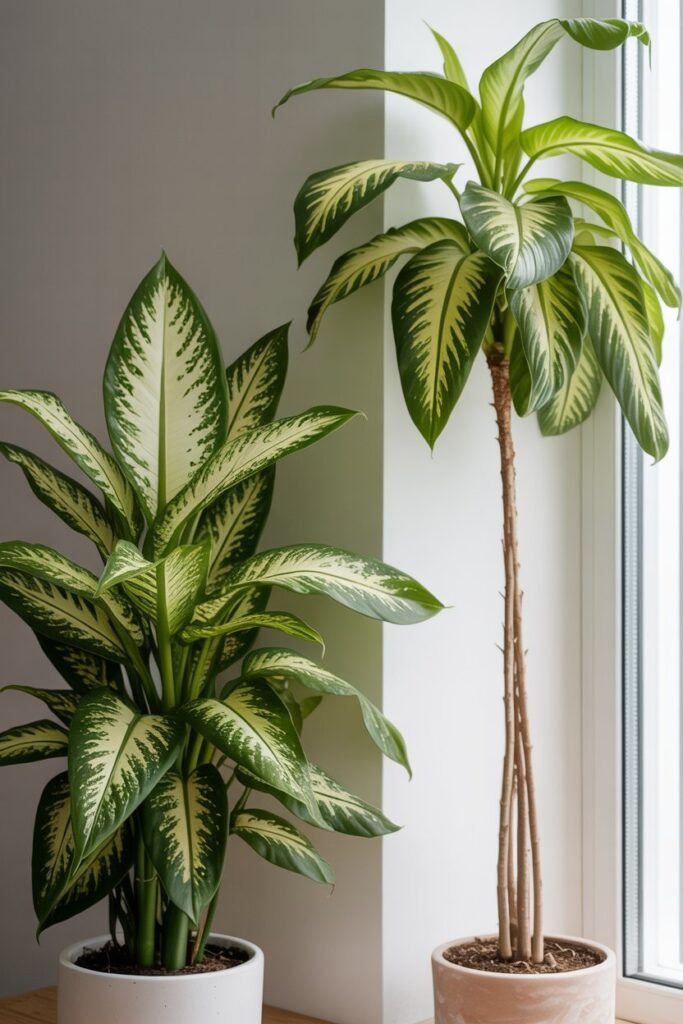
A leggy Dieffenbachia is simply a plant that has grown long stems with few leaves.
Instead of having lush foliage from the base to the top, the stem becomes exposed, and the leaves cluster near the upper portion of the plant. The result is a plant that looks stretched, uneven, or top-heavy.
Legginess develops gradually, so you may not notice it at first. One day your Dieffenbachia appears full and balanced, and a few months later it seems taller than ever with a long bare trunk supporting only a handful of leaves.
The good news is that this isn’t a disease or a sign that your plant is beyond saving. In fact, healthy leggy stems are excellent candidates for propagation. Each section of the stem contains dormant growth nodes that can produce entirely new plants.
Instead of seeing a leggy Dieffenbachia as a problem, think of it as an opportunity to multiply your favorite houseplant.
Some common signs of a leggy Dieffenbachia include:
- Long bare stems
- Leaves growing only near the top
- A leaning or unstable plant
- Wide spaces between leaves
- Slow production of new foliage near the base
- Thin, stretched stems
If your plant shows several of these signs, it’s time to refresh it with pruning and propagation.
Why Does a Dieffenbachia Become Leggy?
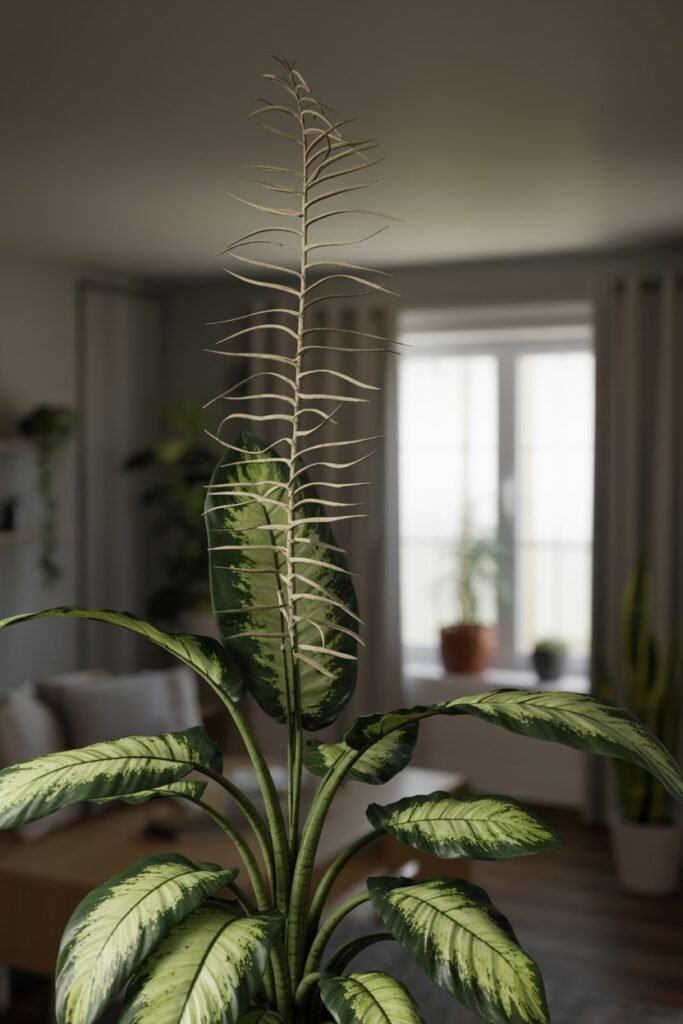
Before reaching for your pruning shears, it’s worth understanding why your Dieffenbachia became leggy in the first place. Fixing the underlying cause will help your new baby plants stay compact and healthy.
Not Enough Light
This is the most common reason.
Dieffenbachias thrive in bright, indirect light. When they don’t receive enough light, they naturally stretch toward the nearest light source. Instead of producing dense foliage, the plant invests its energy in growing taller.
Over time, the spaces between leaves become larger, creating the classic leggy appearance.
A north-facing room or a dark corner may keep the plant alive, but it usually won’t provide enough light for bushy growth.
Moving your Dieffenbachia closer to an east-facing window or a bright room can make a dramatic difference.
Natural Aging
Even under excellent care, mature Dieffenbachias eventually shed their oldest leaves.
The lower leaves naturally yellow and fall off as the plant directs its energy toward new growth at the top.
This process exposes more of the stem over time.
Although this is completely normal, pruning every few years helps keep the plant looking full and attractive.
Inconsistent Watering
Water stress can also contribute to legginess.
If the soil stays dry for extended periods or becomes waterlogged repeatedly, the plant experiences stress that slows healthy leaf production.
Instead of producing lush new foliage, growth becomes weaker and less compact.
Aim to water when the top 1 to 2 inches of soil feel dry rather than following a rigid schedule.
Lack of Pruning
Many people hesitate to prune houseplants because they’re afraid of damaging them.
Ironically, avoiding pruning often causes the plant to become even leggier.
Regular trimming encourages branching and stimulates fresh growth closer to the base, creating a fuller appearance.
Poor Growing Conditions
Other environmental factors can also contribute to sparse growth, including:
- Low humidity
- Cold drafts
- Sudden temperature changes
- Root-bound pots
- Poor-quality soil
- Lack of nutrients during the growing season
While none of these factors alone usually causes severe legginess, they can weaken the plant over time and slow healthy growth.
Can You Save a Leggy Dieffenbachia?
Absolutely.
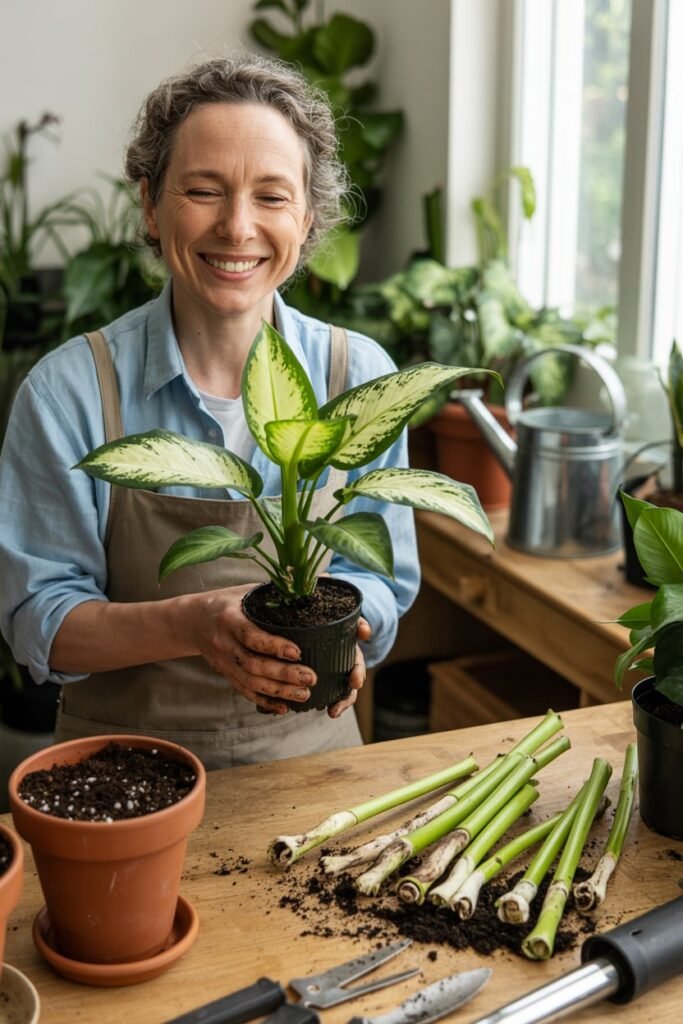
One of the best qualities of Dieffenbachia is its ability to recover after pruning. Even a plant that looks like a tall bare cane with leaves only at the top can often be transformed into several thriving plants.
When you prune the main stem, three wonderful things happen:
- The original plant begins producing fresh shoots.
- The leafy top can become a new plant.
- The remaining stem sections can grow into multiple baby plants.
It’s not unusual to turn one overgrown Dieffenbachia into four, five, or even six healthy plants.
This makes propagation both economical and rewarding.
As long as the stem is healthy, firm, and free from rot, there’s an excellent chance of success.
Best Time to Prune and Propagate
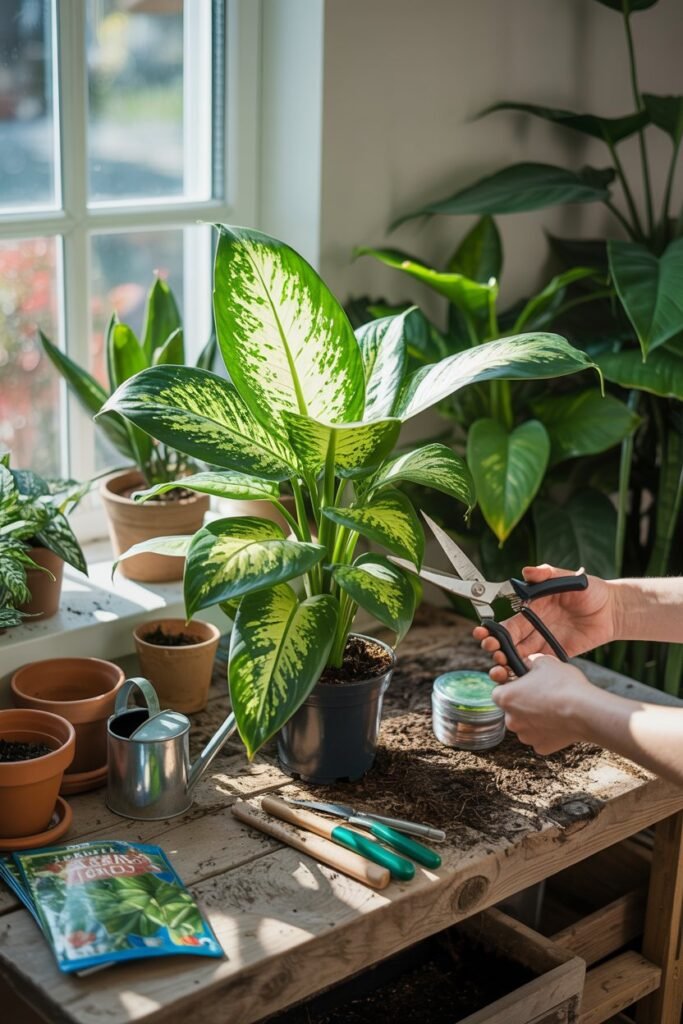
Timing plays a big role in successful propagation.
The ideal time to prune and propagate a Dieffenbachia is during its active growing season.
This usually falls between:
- Spring
- Early summer
During these months, the plant naturally produces new roots and leaves much faster.
Warmer temperatures and longer daylight hours encourage rapid recovery.
Although propagation can be done at other times of the year, success is often slower during autumn and winter because growth naturally slows.
If your plant is severely leggy, however, don’t feel like you have to wait months before taking action. Just be prepared for rooting to take a little longer if you’re working during the cooler seasons.
Tools and Supplies You’ll Need
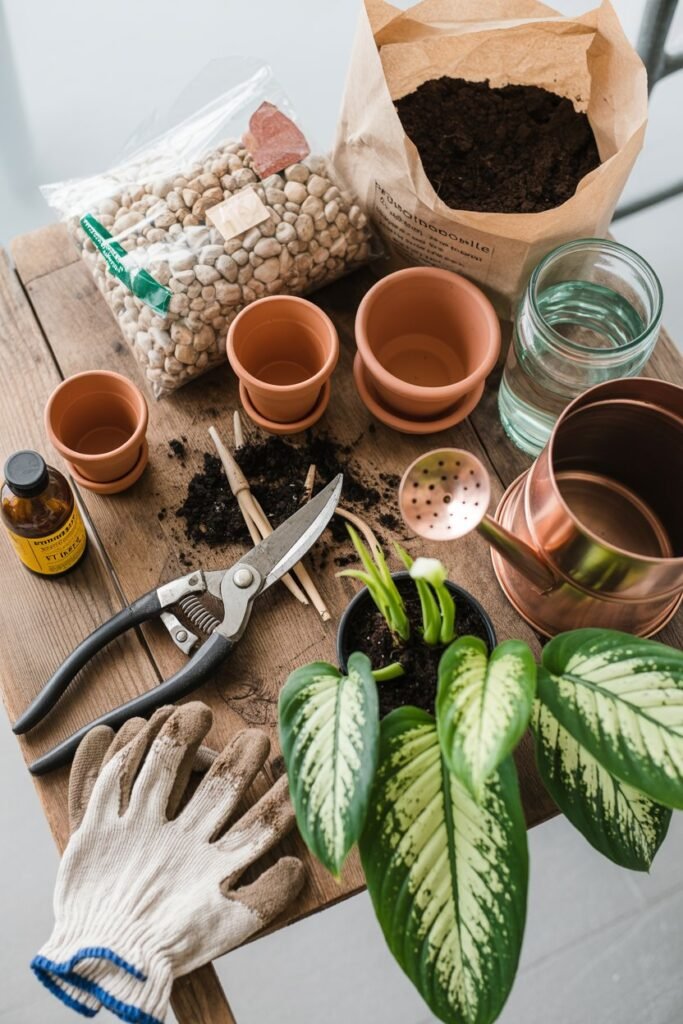
Preparing everything before you begin makes the process much smoother.
Gather these supplies first:
Sharp Pruning Shears
Clean, sharp pruning shears create smooth cuts that heal faster and reduce damage to the plant.
Disinfect the blades with rubbing alcohol before making any cuts.
Gloves
Dieffenbachia contains calcium oxalate crystals in its sap, which can irritate the skin and cause discomfort if it comes into contact with your eyes or mouth.
Wearing gardening gloves is highly recommended whenever you’re pruning or propagating this plant.
After you’re finished, wash your hands thoroughly even if you wore gloves.
Small Pots
Prepare several small nursery pots with drainage holes for your new baby plants.
Using pots that are only slightly larger than the root system helps prevent overwatering while the cuttings establish themselves.
Fresh Potting Mix
Choose a light, well-draining indoor plant mix.
A blend containing peat moss or coco coir, perlite, and pine bark works especially well because it holds enough moisture without becoming soggy.
Avoid using heavy garden soil, which compacts easily and can lead to root rot.
Clean Water
If you plan to root your cuttings in water, have a clean glass jar or vase ready.
Use room-temperature water and refresh it regularly to keep it clear and oxygenated.
Optional Rooting Hormone
Rooting hormone isn’t required, but it can encourage faster root development, especially if you’re planting the stem cuttings directly into soil.
Simply dip the cut end into the powder or gel before planting, following the product directions.
By gathering your supplies ahead of time, you’ll be able to move quickly once you begin cutting, giving both the parent plant and the cuttings the best chance to thrive.
Step 1: Examine Your Plant Before Cutting
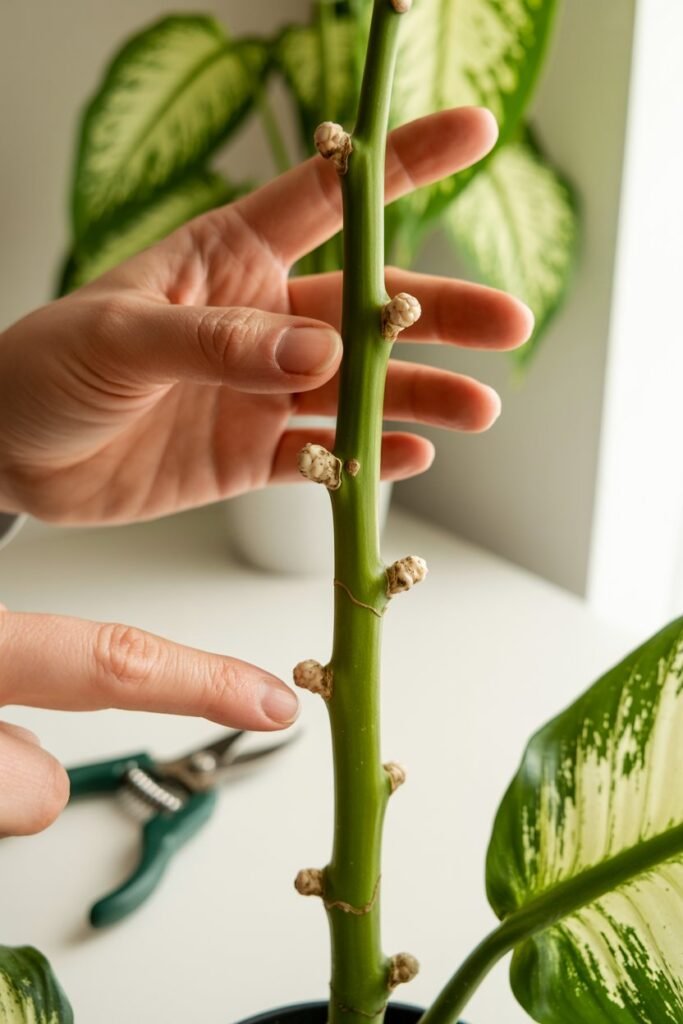
Before making the first cut, take a few minutes to carefully inspect your Dieffenbachia. A little planning goes a long way and helps you decide where to prune for the healthiest regrowth and the greatest number of baby plants.
Start by looking at the overall shape of the plant. Notice where the leaves are growing, how long the bare stem is, and whether the stem feels firm or soft.
A healthy stem should feel solid and have a green or light brown appearance. If you find any sections that are mushy, black, or have an unpleasant smell, those areas may be rotting and should not be used for propagation.
Next, locate the nodes along the stem. Nodes are the slightly raised rings or bumps where leaves once grew. These are incredibly important because they contain dormant buds that can develop into roots and new shoots.
Every cutting you make should include at least one healthy node, though two or more nodes often improve the chances of successful propagation.
Take note of any yellow, brown, or damaged leaves. These can be removed before pruning to give you a better view of the stem. Removing unhealthy foliage also helps the plant focus its energy on producing fresh growth instead of supporting leaves that are already dying.
Now decide how many new plants you’d like to create. A tall Dieffenbachia can often be divided into several sections:
- The leafy top becomes one new plant.
- The middle stem can be cut into multiple sections.
- The rooted base remains in the original pot to produce fresh shoots.
Planning your cuts before you start prevents unnecessary mistakes and helps ensure every piece has the best chance of growing.
Pro Tip: Don’t rush this step. Spending five extra minutes studying your plant can make propagation much more successful.
Step 2: Cut Back the Main Stem
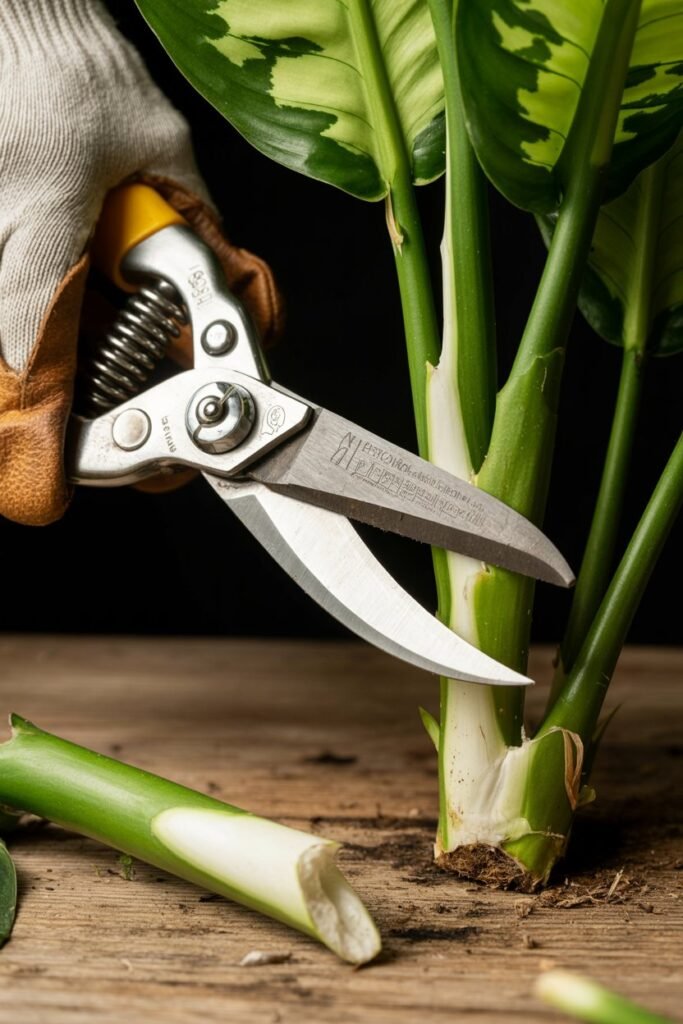
Now comes the exciting part pruning your Dieffenbachia. While it may seem intimidating to cut such a large portion of your plant, don’t worry. Dieffenbachias are surprisingly resilient and usually recover very well when pruned correctly.
Begin by identifying where you’d like the original plant to produce new growth. A good rule is to leave about 4 to 8 inches (10–20 cm) of healthy stem above the soil. This remaining stump contains dormant buds that will eventually sprout fresh stems and leaves.
Using clean, sharp pruning shears, make one smooth cut across the stem. Avoid crushing or sawing through the stem, as rough cuts take longer to heal and may invite disease.
After removing the top portion, set it aside. This leafy section is your first propagation cutting and often roots the fastest because it already has mature leaves to support growth.
Next, examine the remaining length of the removed stem. If it’s long enough, divide it into additional sections. Each cutting should be about 3 to 6 inches long and include at least one or two visible nodes.
It’s helpful to keep track of which end was originally facing upward, as stem cuttings root more easily when planted in the correct orientation.
If you’re unsure, you can lay the stem pieces horizontally on moist soil instead of planting them upright. This allows new shoots to emerge naturally from the nodes.
Once you’ve finished cutting, you may notice a white sap oozing from the stems. This is normal.
Allow the cut surfaces to dry for an hour or two before placing them in water or soil. Letting the ends callus slightly can reduce the risk of rot during propagation.
Step 3: Turn Stem Cuttings Into Baby Plants
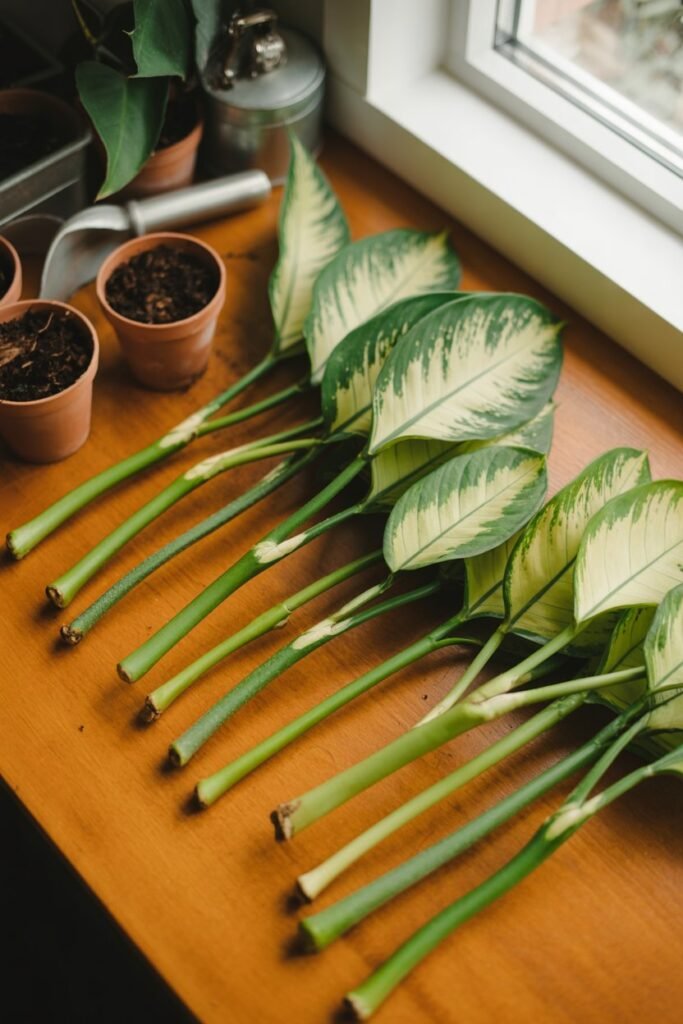
One of the most rewarding things about growing Dieffenbachias is that almost every healthy section of the stem has the potential to become a brand-new plant.
Instead of throwing away those bare stem pieces, you can use them to grow several baby Dieffenbachias.
Start with the leafy top cutting. Remove one or two of the lowest leaves if they would sit below the waterline or beneath the soil. Leaving submerged leaves in place often leads to rot, which can spread to the cutting.
Next, prepare your stem sections. Each cutting should have at least one healthy node, though two or three nodes are even better. The nodes are where roots and new shoots will emerge, so they should always be in contact with water or moist potting mix.
You have two planting options:
Vertical Method
Plant the cutting upright with the bottom node buried beneath the soil while leaving the upper portion above the surface.
This method closely mimics the plant’s natural growth habit and makes transplanting easy later on.
Horizontal Method
Lay the stem cutting on top of moist potting mix and gently press it halfway into the soil.
Keep the nodes facing upward whenever possible. Over time, roots will develop underneath while new shoots emerge from the top.
This technique works especially well for thicker cane sections and often produces multiple shoots from a single cutting.
Whichever method you choose, place the cuttings in a warm, bright location with indirect sunlight. Avoid direct afternoon sun, which can dry the cuttings before roots have a chance to form.
Keep the potting mix lightly moist but never soaking wet. Excess water is one of the biggest reasons propagation fails.
With proper care, the nodes will begin developing roots first, followed by fresh leaves and stems.
Step 4: Rooting in Water vs. Soil
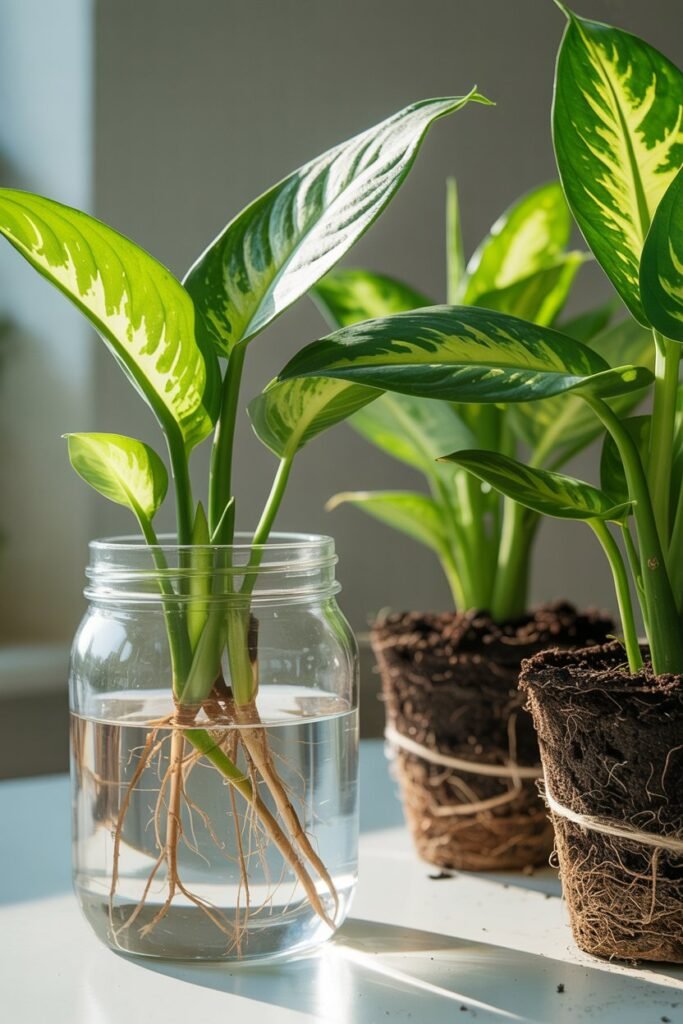
One of the most common questions gardeners ask is whether Dieffenbachia cuttings should be rooted in water or directly in soil. The truth is that both methods work well, and each has its own advantages.
Rooting in Water
Water propagation is popular because it’s simple and lets you watch the roots develop.
Place the cut end of your cutting into a clean jar filled with room-temperature water. Make sure at least one node is submerged, but keep the leaves above the waterline.
Replace the water every few days to keep it fresh and reduce the risk of bacteria or algae growth.
Within a few weeks, you’ll usually notice small white roots beginning to emerge. Wait until the roots are about 2 to 3 inches long before transferring the cutting into potting soil.
Pros of Water Propagation
- Easy for beginners.
- You can monitor root growth.
- It’s satisfying to watch the rooting process.
- Less guesswork about whether the cutting is alive.
Cons
- Roots formed in water need time to adjust when moved to soil.
- Water must be changed regularly.
- Cuttings may rot if the water isn’t kept clean.
Rooting Directly in Soil
Planting cuttings directly into soil skips the transplanting step and allows roots to develop naturally in their permanent growing medium.
Use a light, airy potting mix and insert the cutting so at least one node is buried beneath the surface.
Water lightly after planting, then place the pot somewhere warm with bright, indirect light.
The soil should stay slightly moist but never soggy. Too much moisture can quickly lead to stem rot.
Although you can’t see the roots forming, gentle resistance when you lightly tug the cutting after several weeks usually means roots have developed successfully.
Pros of Soil Propagation
- No transplant shock.
- Roots adapt immediately to soil.
- Less maintenance than changing water.
Cons
- You can’t monitor root development.
- Overwatering can cause rot.
- Beginners sometimes mistake slow rooting for failure.
Which Method Is Better?
If you’re new to propagation, water rooting is an excellent way to build confidence because you can see your progress.
If you’ve propagated houseplants before and prefer a simpler long-term approach, rooting directly in soil is equally effective and often produces stronger root systems.
Whichever method you choose, patience is key. Healthy roots take time to develop, and rushing the process rarely leads to better results.
Step 5: Caring for Newly Rooted Baby Plants
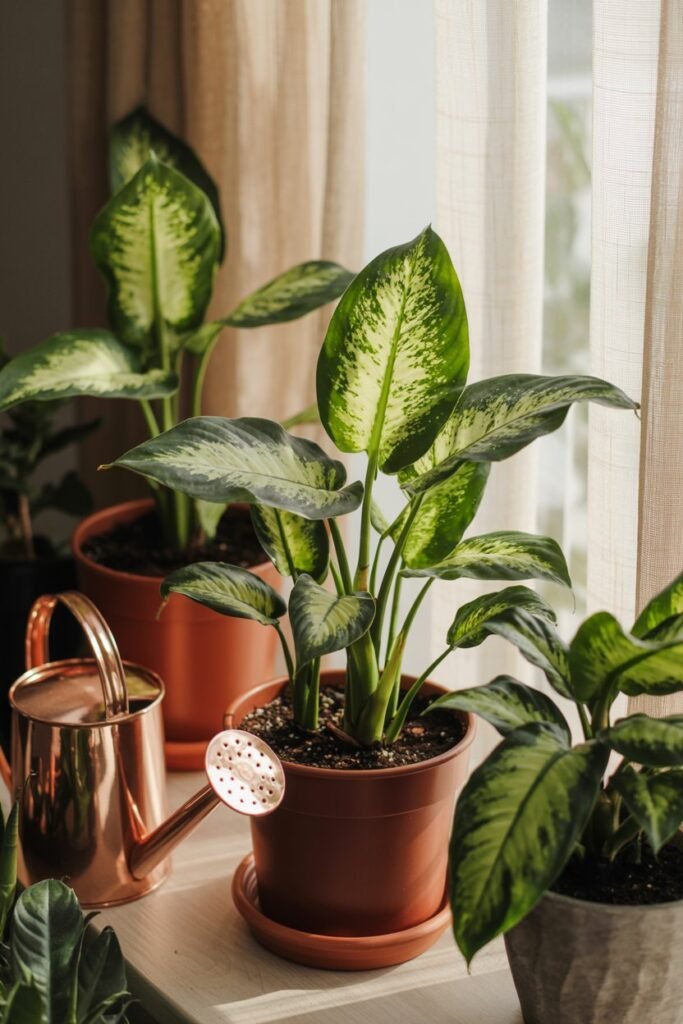
Once your Dieffenbachia cuttings have developed a healthy root system, your focus shifts from propagation to encouraging strong, steady growth. This stage is exciting because you’ll begin to see new leaves unfurl, signaling that your baby plants are settling into their new homes.
Although young Dieffenbachias are relatively easy to care for, they still need consistent conditions while they establish themselves.
Provide Bright, Indirect Light
Light plays one of the biggest roles in helping your baby plants grow into full, bushy houseplants.
Place them near a bright window where they receive plenty of indirect sunlight throughout the day. An east-facing window is often ideal because it provides gentle morning sun without exposing the leaves to harsh afternoon rays.
If the only available location receives strong direct sunlight, use a sheer curtain to filter the light. Intense sun can scorch the tender new leaves before the plants are fully established.
On the other hand, avoid placing your new plants in dim corners. Too little light can quickly cause them to stretch, repeating the same leggy growth you’re trying to correct.
Water Carefully
Newly rooted cuttings don’t need as much water as mature plants.
Check the soil regularly and water only when the top inch feels dry to the touch. Water thoroughly until excess moisture drains from the bottom of the pot, then empty the saucer so the roots aren’t left sitting in water.
It’s always better to let the soil dry slightly between waterings than to keep it constantly wet. Overwatering is one of the fastest ways to damage young roots.
As your plants grow larger and produce more leaves, they’ll naturally use more water.
Keep Humidity Moderate
Dieffenbachias appreciate moderate to high humidity, especially while they’re producing new roots and foliage.
If your home has dry indoor air, especially during winter, you can increase humidity by:
- Grouping houseplants together.
- Placing the pot on a pebble tray filled with water.
- Running a small humidifier nearby.
Avoid misting the leaves excessively, as constantly wet foliage may encourage fungal problems.
Maintain Warm Temperatures
Warm, stable temperatures encourage faster growth.
Aim to keep your baby plants in temperatures between 65°F and 80°F (18°C to 27°C).
Avoid placing them near:
- Air conditioners
- Heating vents
- Drafty windows
- Frequently opened exterior doors
Sudden temperature swings can slow growth and stress young plants.
Wait Before Fertilizing
It’s tempting to feed your new plants right away, but patience pays off.
Wait until you see healthy new leaves forming before applying fertilizer. This usually takes about four to eight weeks after successful rooting.
Once active growth begins, feed with a balanced liquid houseplant fertilizer diluted to half strength every four to six weeks during spring and summer.
Avoid fertilizing during winter when growth naturally slows.
Repot Only When Necessary
Baby Dieffenbachias prefer slightly snug pots.
Resist the urge to move them into oversized containers too soon. A pot that’s much larger than the root system holds excess moisture, increasing the risk of root rot.
Repot only when you notice:
- Roots growing through the drainage holes.
- Water draining unusually quickly.
- The plant drying out much faster than before.
- Slowed growth despite proper care.
When it’s time, move up only one pot size.
How to Care for the Original Plant After Pruning
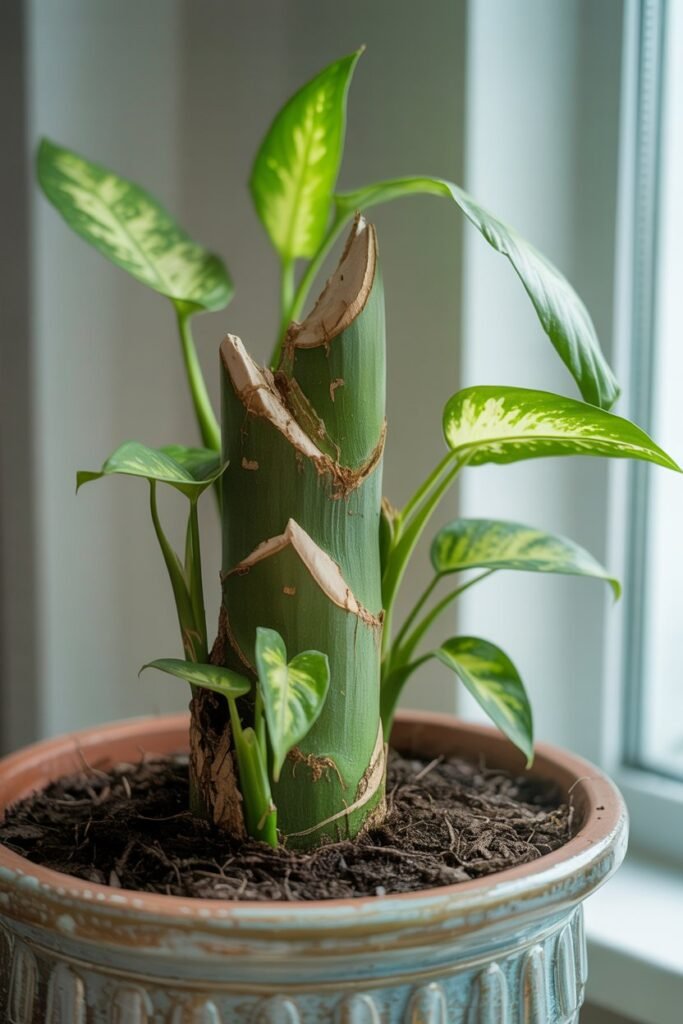
Many people assume the original plant is finished after removing the top, but that’s far from the truth. In many cases, the original Dieffenbachia becomes even fuller than before.
The remaining stump still contains healthy roots and dormant buds waiting to grow.
With proper care, you’ll often see fresh shoots emerging from the stem within several weeks.
Continue Normal Watering
Although the plant has fewer leaves after pruning, it still needs moisture to support new growth.
Water when the top inch or two of soil becomes dry, but avoid keeping the soil constantly wet.
Since the plant has less foliage, it will usually require less frequent watering until new leaves develop.
Keep It in Bright Indirect Light
Don’t move the plant into a dark corner after pruning.
Bright, indirect light provides the energy needed for dormant buds to wake up and produce fresh stems.
The healthier the lighting conditions, the quicker you’ll usually see new shoots appear.
Avoid Heavy Fertilizing Immediately
Give the plant a little time to recover before feeding it.
Wait until new growth appears, then resume your normal fertilizing routine using a balanced houseplant fertilizer during the growing season.
Applying fertilizer too early won’t force new growth and may actually stress the recovering plant.
Be Patient
One of the hardest parts of propagation is waiting.
The stump may look inactive for several weeks before tiny green buds begin appearing.
Don’t assume the plant has failed simply because nothing happens immediately.
As long as the stem remains firm and healthy, new growth is often just around the corner.
Many gardeners are surprised to see multiple shoots emerge from one stump, creating a much bushier plant than the original.
Common Propagation Mistakes to Avoid
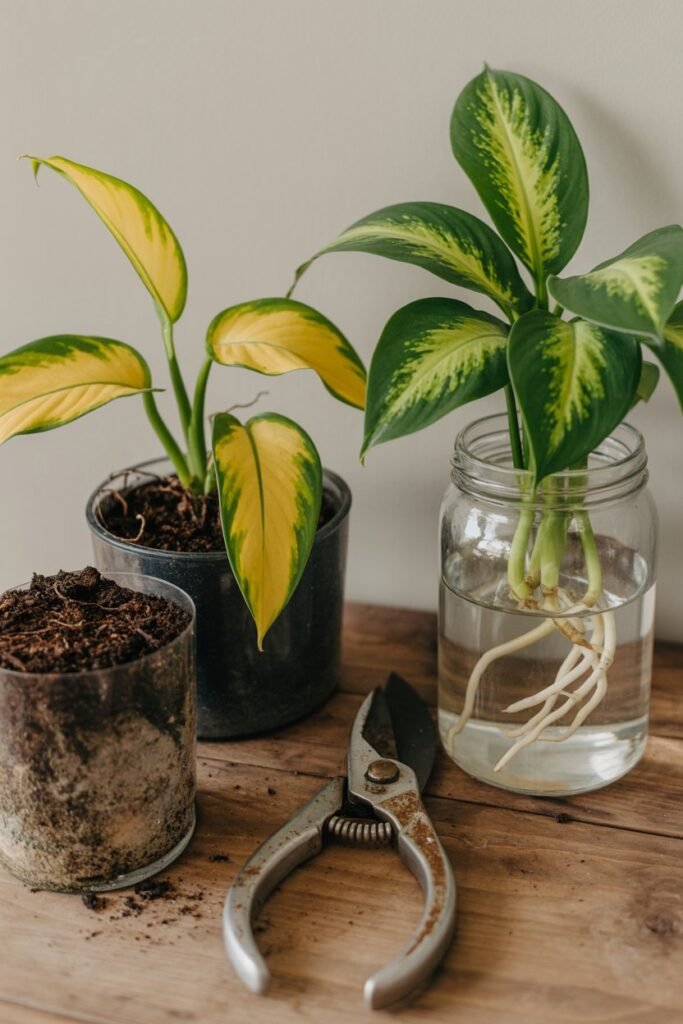
Even though Dieffenbachia is considered one of the easier houseplants to propagate, a few common mistakes can reduce your success rate.
Fortunately, they’re easy to avoid once you know what to watch for.
Cutting Without Nodes
A stem section without a node cannot produce new roots or shoots.
Always inspect each cutting before planting to ensure it contains at least one visible node.
Using Dull or Dirty Tools
Dirty pruning shears can spread bacteria and fungal diseases from one plant to another.
Always disinfect your tools before and after pruning.
Sharp blades also make cleaner cuts that heal more quickly.
Overwatering
Too much water is one of the biggest reasons propagation fails.
Soggy soil deprives developing roots of oxygen and encourages stem rot.
Keep the potting mix lightly moist, not soaking wet.
Giving Too Much Direct Sun
New cuttings are more sensitive than mature plants.
Strong afternoon sunlight can scorch leaves and dry out cuttings before roots have developed.
Bright, filtered light is the safest choice.
Becoming Impatient
Propagation takes time.
Some cuttings root in just a few weeks, while others need a month or longer.
Avoid pulling cuttings out of the soil repeatedly to check for roots, as this can damage delicate new growth.
Instead, allow nature to work at its own pace.
Planting in Heavy Soil
Dense garden soil holds too much moisture and limits airflow around developing roots.
Always use a light, well-draining indoor potting mix designed for houseplants.
How Long Does Propagation Take?
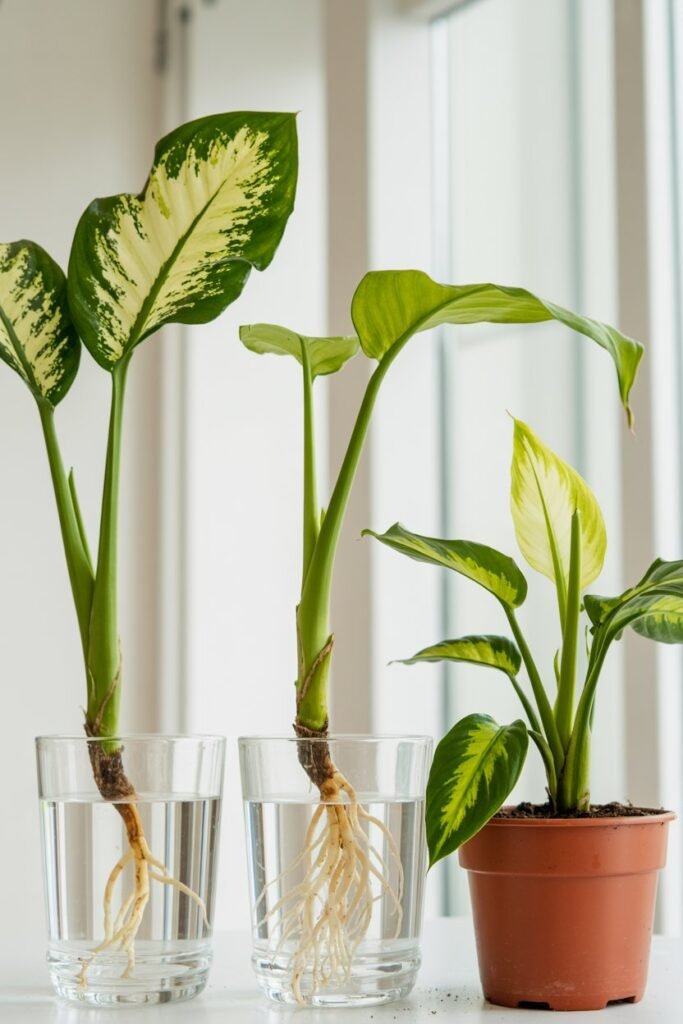
One of the most common questions new plant owners ask is how long they’ll have to wait before seeing results.
The answer depends on several factors, including temperature, light, humidity, and the overall health of the parent plant.
Here’s a general timeline:
- Day 1: Take cuttings and allow the cut ends to dry briefly before planting.
- Week 2–4: Small roots usually begin forming.
- Week 4–8: Root systems become stronger, and new shoots may appear.
- Month 2–3: New leaves continue developing, and the cuttings become established young plants.
- Month 6+: With proper care, your baby Dieffenbachias begin looking like mature houseplants.
Remember that every plant grows at its own pace. Warm temperatures, bright indirect light, and consistent care will usually speed up the process.
The original plant often begins producing new shoots during this same period, meaning you’ll have both a rejuvenated parent plant and several thriving baby plants growing at the same time.
Frequently Asked Questions
Can I propagate a Dieffenbachia with just a stem?
Yes. A healthy stem section with at least one node can grow into a new plant, even if it doesn’t have leaves attached. The node contains dormant growth points that can produce both roots and fresh shoots when given the right conditions.
Leafy top cuttings often grow a little faster because they can continue photosynthesis while developing roots. However, bare cane sections are also highly successful and are an excellent way to create multiple baby plants from one leggy Dieffenbachia.
Why isn’t my cutting growing?
It’s normal for a cutting to appear inactive during the first few weeks. Before producing new leaves, the plant focuses its energy on developing roots beneath the soil or in water.
If several weeks have passed with no visible growth, check these possible causes:
- The cutting isn’t receiving enough bright, indirect light.
- Temperatures are too cool.
- The soil is staying too wet.
- The cutting doesn’t contain a healthy node.
- The stem has started to rot.
As long as the cutting remains firm and healthy, continue caring for it. New growth often appears when you least expect it.
Can I leave my Dieffenbachia in water permanently?
While Dieffenbachias can survive in water for extended periods, they generally grow better in soil over the long term.
Soil provides better support, improved access to nutrients, and allows the roots to develop more naturally. If you’ve rooted your cutting in water, transplant it into potting mix once the roots are about 2 to 3 inches long for the best long-term results.
How many plants can I get from one leggy Dieffenbachia?
The answer depends on the height of the plant.
A tall, healthy Dieffenbachia can often produce:
- One top cutting
- Several stem cuttings
- One rejuvenated parent plant
In many cases, gardeners end up with four to six healthy plants from a single overgrown specimen. Larger plants may produce even more.
Will the original stem grow leaves again?
Yes. If you leave part of the stem attached to the roots, the remaining stump can produce entirely new shoots.
Instead of growing leaves along the old bare stem, fresh stems usually emerge from dormant buds near the top of the stump or around the base of the plant.
With proper care, the original plant often becomes fuller than it was before pruning.
Why are my new leaves smaller?
Smaller leaves are common during the early stages of regrowth.
Your plant is using much of its energy to establish roots before producing large foliage. As the root system becomes stronger, the new leaves usually increase in size.
Providing bright indirect light, proper watering, and occasional feeding during the growing season will encourage larger, healthier leaves over time.
Is Dieffenbachia toxic?
Yes. Dieffenbachia contains calcium oxalate crystals, which can irritate the mouth, throat, and skin if the plant is chewed or if the sap comes into contact with sensitive skin.
For safety:
- Wear gloves when pruning or propagating.
- Wash your hands after handling the plant.
- Keep it out of reach of curious children and pets.
- Clean pruning tools after use.
With these simple precautions, Dieffenbachia remains a safe and rewarding houseplant to grow.
Final Thoughts
A leggy Dieffenbachia may not look like the lush houseplant you originally fell in love with, but it still has plenty of life left in it.
Rather than replacing it, a little pruning and propagation can completely transform the plant while giving you several beautiful baby Dieffenbachias to enjoy.
The key is understanding that those bare stems aren’t wasted. Each healthy node has the potential to produce fresh roots, vibrant new shoots, and eventually another thriving plant.
With bright indirect light, careful watering, and a bit of patience, both the original plant and its new cuttings can grow into full, leafy specimens that brighten your home.
Don’t be afraid to make that first cut. It might seem drastic at first, but it’s often the best thing you can do for an overgrown Dieffenbachia.
Before long, you’ll have a healthier parent plant, a collection of thriving baby plants, and the satisfaction of knowing you brought new life to a plant that many people would have given up on.
Whether you’re propagating to expand your indoor garden, share plants with friends, or simply revive an old favorite, this project is one of the most rewarding ways to enjoy growing Dieffenbachias. Happy gardening!
