


I love little garden projects that make an ordinary space feel more special, and this DIY pebble pot is one of my favorites.
It is simple, inexpensive, and gives a plain plant pot a beautiful natural texture without needing complicated tools or crafting skills.
I especially like how the finished planter looks both outdoors and indoors.
With a basic pot, some smooth pebbles, and a little patience, you can create a charming planter that looks far more expensive than it really is. Let me show you exactly how I make mine, step by step.
What Is a DIY Pebble Pot?

A DIY pebble pot is a plain plant container decorated with small stones or pebbles attached around its outside surface.
The pebbles give the planter a natural, earthy appearance and can make a simple plastic, terracotta, or cement pot look completely different.
This project is especially lovely if you enjoy natural garden décor. The finished pot works beautifully with leafy houseplants, succulents, herbs, flowers, and small outdoor plants.
You can keep the design simple with one type of pebble or create a more decorative look by mixing different shapes, colors, and sizes.
The best part is that you can customize it to match your garden or home.
Why Make a Pebble Pot?
Before we get started, here are a few reasons I think this project is worth trying.
- It is beginner-friendly: You don’t need advanced crafting skills.
- It can be inexpensive: Plain pots and basic pebbles are usually easy to find.
- It gives old pots a new look: A tired-looking planter can become a beautiful garden accent.
- You can customize it: Choose pebbles that match your personal style.
- It works indoors and outdoors: Just choose suitable materials for where you plan to use it.
- It makes a lovely handmade gift: A pebble pot planted with a small plant can make a thoughtful present.
- It adds natural texture: The stones give your plant display a rustic, earthy appearance.
Materials You Will Need

You don’t need a long shopping list for this project. Gather everything before starting so the process feels easier.
1. Plant Pot
Start with a clean pot. You can use terracotta, cement, plastic, or another sturdy container.
For your first project, I recommend using a small or medium-sized pot. A very large pot can take quite a while to cover with individual pebbles.
Make sure the pot has drainage holes if you plan to use it for a living plant.
2. Small Smooth Pebbles
Choose relatively flat or slightly rounded pebbles that can sit against the surface of the pot.
Smooth river stones are especially pretty because they have a natural, polished appearance.
Try to choose stones that are reasonably similar in thickness. Very bulky stones can make the finished pot heavy and difficult to work with.
3. Strong Outdoor Adhesive
Choose an adhesive that is specifically suitable for the materials you are joining and, if the planter will stay outside, one that is rated for outdoor use.
Always follow the manufacturer’s instructions for application, ventilation, curing time, and safety.
4. Small Brush
A small stiff brush is useful for cleaning dirt and dust from your pebbles and pot.
5. Water and Mild Soap
You’ll need these for cleaning the pebbles and preparing the pot.
6. Gloves
Gloves can make handling rough stones and adhesive more comfortable.
7. Newspaper or Cardboard
Protect your work surface before beginning. Glue can be surprisingly messy, especially when you’re working with lots of little stones.
8. Optional: Grout
If you want a more finished, mosaic-like appearance, you can use suitable outdoor grout to fill some of the spaces between the pebbles.
This is optional. I actually like the simple look of pebbles placed close together with the pot surface still slightly visible between them.
Read Garden Raised Bed Planter Boxes with Trellis: My Complete Guide to Growing Up, Not Just Out
How to Make a DIY Pebble Pot
Step 1: Choose the Right Pot
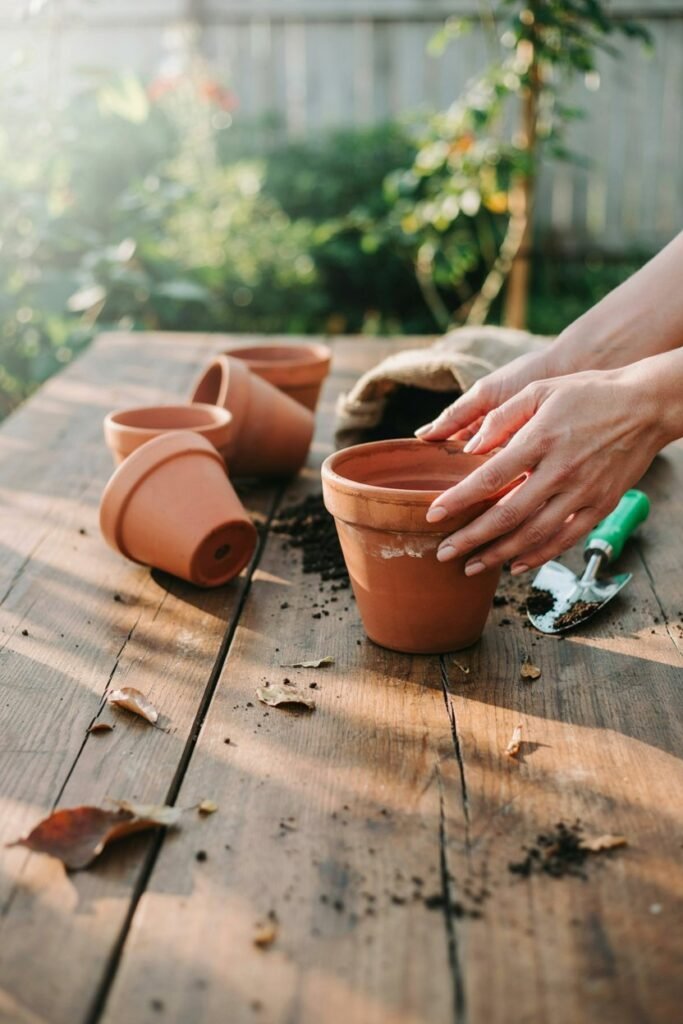
Start with a pot that is strong enough to support the additional weight of the stones.
I prefer using a simple pot with relatively straight sides because it makes attaching the pebbles much easier.
Avoid pots with lots of deep grooves or complicated shapes when you’re starting out. The smoother the surface, the easier it will be to create an even finish.
Also check the drainage hole before decorating. You don’t want to accidentally cover it with adhesive or stones.
Step 2: Clean the Pot Thoroughly
Cleaning is one of the easiest steps to overlook, but it can make a big difference.
Wash away dirt, dust, old soil, and grease from the outside of the pot. If you’re reusing an old planter, give it a particularly good scrub.
Allow the pot to dry completely before applying anything.
A clean, dry surface gives your adhesive a better chance of bonding properly.
Read Rain Garden Pod
Step 3: Wash Your Pebbles

Your stones may look clean, but they often have dust or fine particles on them.
Place the pebbles in a container and wash them with water. A little mild soap can help remove stubborn dirt.
Rinse them thoroughly and spread them out on a towel to dry.
I like doing this step ahead of time because completely dry pebbles are much easier to work with.
Step 4: Sort Your Pebbles
This is where you can start getting creative.
Spread your dry pebbles across a table or tray and sort them by size.
Make one pile for small stones, another for medium stones, and another for larger stones.
You can also separate them by color if you’re using several shades.
This makes the actual decorating process much easier because you won’t constantly have to search through a pile for the right stone.
Read DIY Cement Pots: A Complete Guide to Creating Stunning Handmade Planters
Step 5: Plan Your Design

Before applying adhesive, arrange a few pebbles against the pot to see how they look.
You don’t have to plan every single stone, but having a general idea will help.
Here are a few designs you could try:
Simple Natural Design
Use similar-sized stones in natural shades and place them close together.
This gives the pot a calm, earthy appearance.
Mixed Pebble Design
Combine different sizes and shades for a more relaxed garden look.
Horizontal Rows
Arrange relatively similar-sized stones in rows around the pot.
This creates a cleaner and more structured appearance.
Random Natural Pattern
Use different shapes and sizes and let the design develop naturally.
This is probably the easiest option if you don’t want your pot to look perfectly symmetrical.
Step 6: Start Applying the Pebbles

Now comes the fun part.
Work on a small section of the pot at a time.
Apply your adhesive according to the product instructions, then carefully place the pebbles onto the surface.
Press each stone gently into place.
Don’t cover the entire pot with adhesive at once. If you do, the adhesive may begin setting before you have time to attach the stones.
Working in small sections gives you much more control.
Step 7: Keep the Pebbles Close Together
As you place the stones, try to keep the spaces between them relatively small.
You don’t have to make everything perfectly even. In fact, I think a little variation makes a pebble pot look more handmade and natural.
However, leaving very large gaps can make the finished planter look unfinished.
Use smaller pebbles to fill awkward spaces between larger ones.
Step 8: Work Your Way Around the Pot
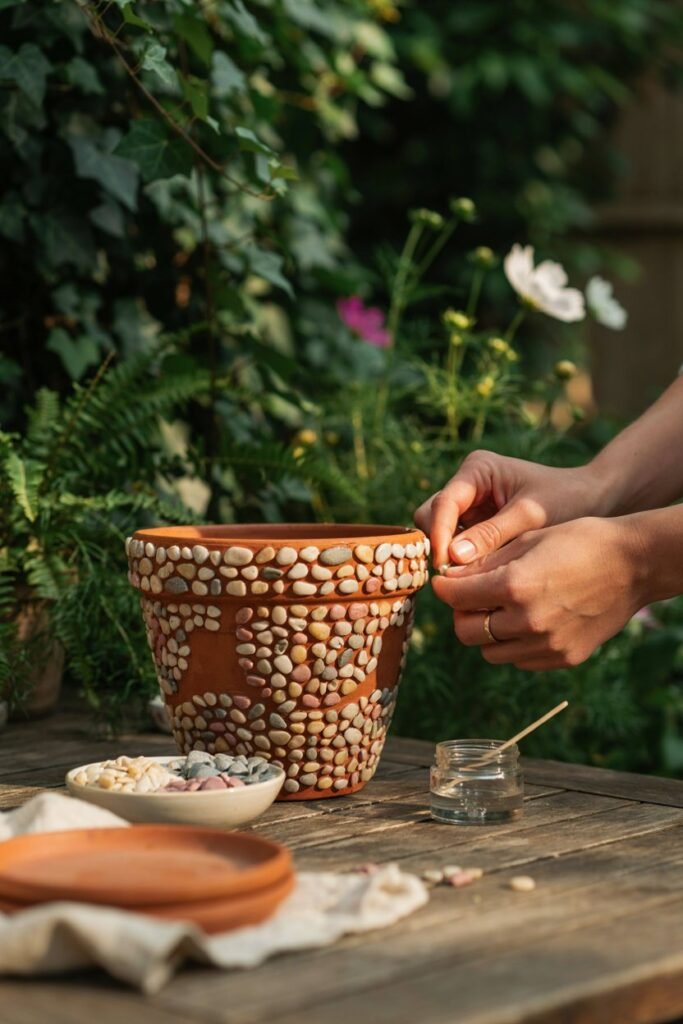
Continue decorating the pot section by section.
Take your time and occasionally step back to look at the overall pattern.
This is especially helpful if you’re mixing colors or stone sizes.
If one section looks too crowded or too empty, you can adjust the arrangement while the adhesive is still workable, following the adhesive manufacturer’s instructions.
Step 9: Leave the Pot Alone to Cure
This is the part where patience really matters.
Once all the pebbles are attached, place the pot somewhere safe where it won’t be bumped or moved.
Allow the adhesive to cure for the full time recommended by the manufacturer.
Don’t rush this step simply because the stones feel secure.
The adhesive needs time to develop its intended bond.
Step 10: Check Every Pebble
Once the adhesive has fully cured, gently inspect the planter.
Look for loose stones and check the entire surface.
If you find a pebble that isn’t firmly attached, fix it according to the adhesive instructions and allow it to cure again.
This little inspection can save you from having stones fall off later.
Should You Use Grout?
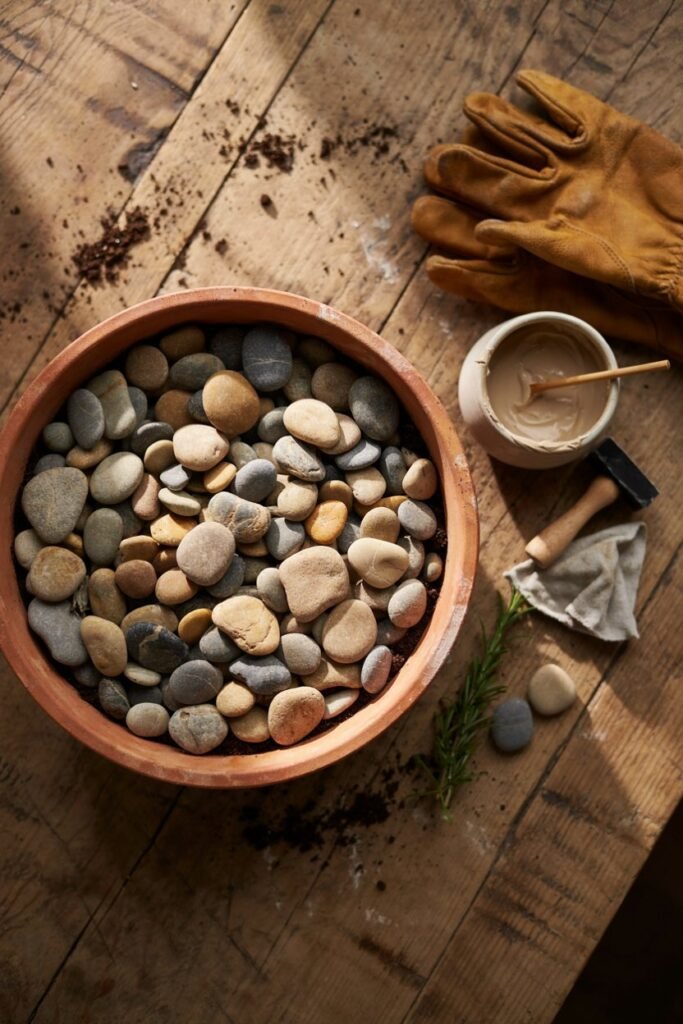
Grout is completely optional.
If you want your planter to resemble a stone mosaic, you can use an appropriate grout between the pebbles.
Grouting can make the design look more finished, but it also adds another step to the project.
If you like a simple rustic appearance, you can skip it.
I personally love the natural look of visible spaces between individual stones because it keeps the planter feeling handmade.
If you do use grout, select a product appropriate for your pot’s material and intended location, and follow its mixing, application, cleaning, and curing instructions carefully.
How to Choose the Best Pebbles
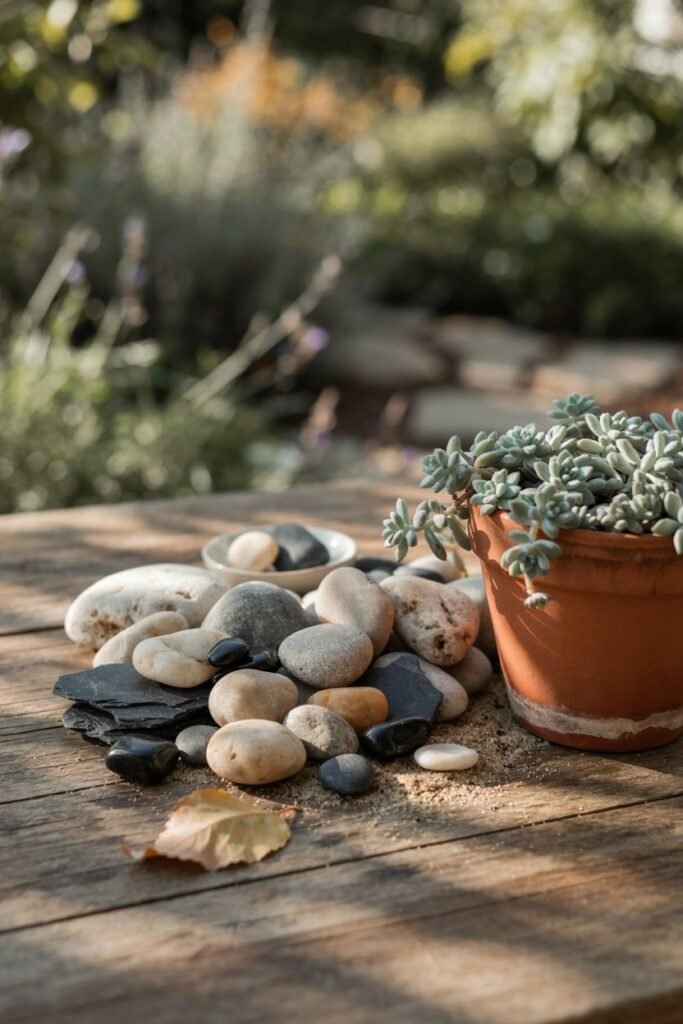
The type of pebble you choose can completely change the appearance of your planter.
Light-Colored Pebbles
White, cream, beige, and pale gray stones create a soft and clean appearance.
These look especially pretty with green foliage.
Dark Pebbles
Black, charcoal, and deep gray stones give the pot a more modern appearance.
Mixed Natural Stones
A combination of browns, grays, creams, and muted colors gives you a relaxed rustic look.
Flat Pebbles
Flat stones are often easier to attach because they sit more naturally against the pot.
Rounded Pebbles
Rounded stones can create a softer appearance, but they may require more care when positioning them.
Which Plants Look Good in Pebble Pots?

Once your pot is finished, choosing the right plant is the next fun part.
Succulents
Succulents and pebble pots are a natural combination.
The stones complement their earthy appearance, and small succulents work particularly well in compact containers.
Herbs
Try growing herbs such as thyme, rosemary, or basil in a suitable pebble-decorated container.
Just make sure the pot has adequate drainage and the plant receives the conditions it needs.
Small Flowering Plants
A flowering plant can provide a lovely contrast against neutral-colored stones.
Plants with colorful blooms can make the pebble texture stand out even more.
Houseplants
A pebble pot can also become a beautiful indoor accent.
Small foliage plants can look particularly attractive against gray, cream, or natural-colored stones.
Important Drainage Tips

One thing I never recommend ignoring when decorating a plant pot is drainage.
Your plant’s roots need access to air as well as water, and excess water needs somewhere to escape.
If your pot already has a drainage hole, keep it completely clear.
Don’t attach stones over the drainage opening, and don’t allow adhesive or grout to block it.
If you’re using a decorative pebble-covered container as a cachepot rather than planting directly into it, you can place a suitable nursery pot inside.
This can make watering and plant maintenance much easier.
Common DIY Pebble Pot Mistakes to Avoid
Using Dirty Pebbles
Dust and dirt can interfere with the adhesive bond.
Fix: Wash and dry your stones before beginning.
Covering Too Much of the Pot at Once
Working too quickly can make the adhesive difficult to manage.
Fix: Work in small sections.
Choosing Very Heavy Stones
Large stones can make the planter unnecessarily heavy.
Fix: Use smaller, relatively lightweight pebbles, especially for indoor pots.
Making the Pattern Too Perfect
A perfectly uniform pattern can sometimes make the pot look less natural.
Fix: Mix shapes and sizes if you’re aiming for a rustic appearance.
Forgetting About Drainage
A beautiful planter won’t help your plant if water cannot escape.
Fix: Keep drainage holes open.
Moving the Pot Too Soon
The stones may look secure before the adhesive has completely cured.
Fix: Follow the adhesive manufacturer’s full curing time.
Easy Ways to Make Your Pebble Pot More Beautiful
You don’t have to cover every inch of the pot.
Here are a few other ideas you can try.
Create a Pebble Band
Instead of covering the entire container, attach a decorative band of pebbles around the middle or upper portion.
Make a Stone Border
Create a narrow border around the top or bottom edge.
Combine Pebbles With Painted Areas
Paint part of the pot in a neutral shade and decorate another section with stones.
Use One Statement Stone
Place one larger decorative stone among smaller pebbles for a focal point.
Create a Pattern
Try a simple heart, wave, stripe, or geometric design if you have pebbles in different colors.
How to Care for Your Finished Pebble Pot
Your new planter doesn’t need much special care.
If it gets dusty, gently wipe the stones with a damp cloth.
For outdoor pots, inspect the stones occasionally, especially after periods of extreme weather.
If you notice a loose pebble, repair it promptly using a suitable adhesive and allow it to cure fully.
Try not to repeatedly drag a pebble-covered pot across hard surfaces because the extra weight and friction can put stress on the decorative stones.
For indoor planters, using a saucer underneath the pot can help protect furniture and flooring from water.
Can You Use a Pebble Pot Outdoors?
Yes, but your materials matter.
If you plan to keep the planter outdoors, choose an adhesive and any grout or finishing products that are appropriate for outdoor exposure.
Consider where the pot will sit, too.
A covered patio is very different from an area exposed to heavy rain, strong sunlight, and temperature changes.
For outdoor use, I would also avoid making the finished planter unnecessarily heavy if you may need to move it later.
My Favorite Way to Style a DIY Pebble Pot
I love keeping the plant itself fairly simple when the pot has lots of texture.
A green leafy plant in a neutral pebble pot creates a beautiful natural combination.
For a patio, place one pebble planter beside a doorway or on a small garden table.
For indoors, a small pebble pot can look lovely on a bright shelf, windowsill, or plant stand.
You can also make several pots in different sizes and group them together. The different heights create a more interesting display without making the space feel overly decorated.
DIY Pebble Pot Quick Checklist
Before you start, make sure you have:
- A sturdy plant pot
- Small pebbles or smooth stones
- Suitable adhesive
- A small brush
- Mild soap and water
- Gloves
- Newspaper or cardboard
- Optional grout
- A plant for the finished pot
Quick Steps
- Choose a suitable pot.
- Clean and dry the pot.
- Wash and dry the pebbles.
- Sort stones by size and color.
- Plan your design.
- Apply adhesive to a small section.
- Attach the pebbles.
- Continue around the pot.
- Allow everything to cure fully.
- Check for loose stones.
- Add your plant.
- Enjoy your finished planter.
Final Thoughts
Making a pebble pot is one of those simple gardening projects that can completely change the personality of an ordinary container.
I love that you don’t need to be especially crafty to make one, and you can easily adjust the colors, pattern, and size to suit your own space.
Take your time with the preparation and let the adhesive cure properly, and you’ll have a beautiful little planter with plenty of natural character.
Whether you make one for your own plant collection or create a few as handmade gifts, this is a project I’d happily make again.
