
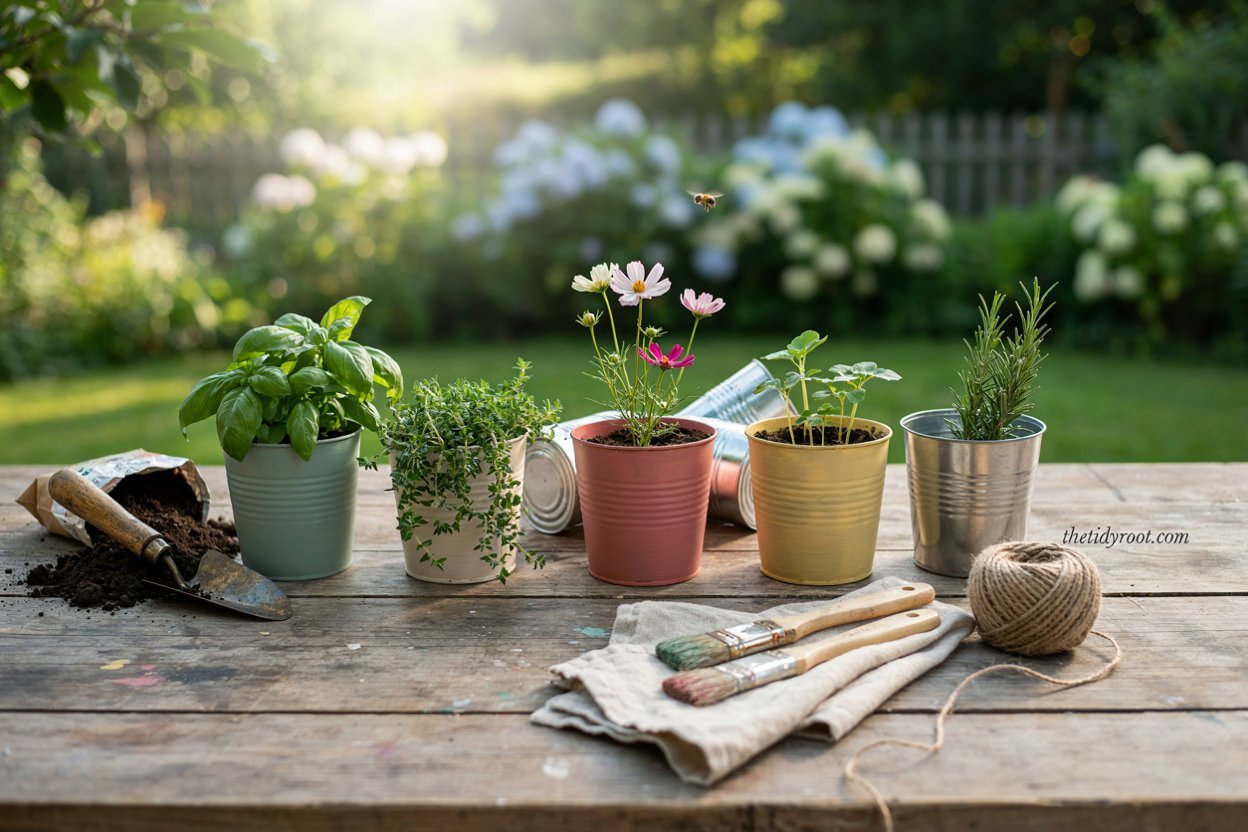

I love finding simple ways to turn everyday things into something useful for my garden.
One of my favorite little projects is making planters from empty cans. They cost almost nothing, are easy to customize, and can add so much personality to a windowsill, balcony, patio, or garden corner.
Whenever I have an empty food can that would otherwise go into the recycling bin, I like to imagine what I could grow in it instead.
With a few basic supplies and a little creativity, you can turn ordinary cans into charming little planters that make your plants feel special.
Why Make Planters From Cans?
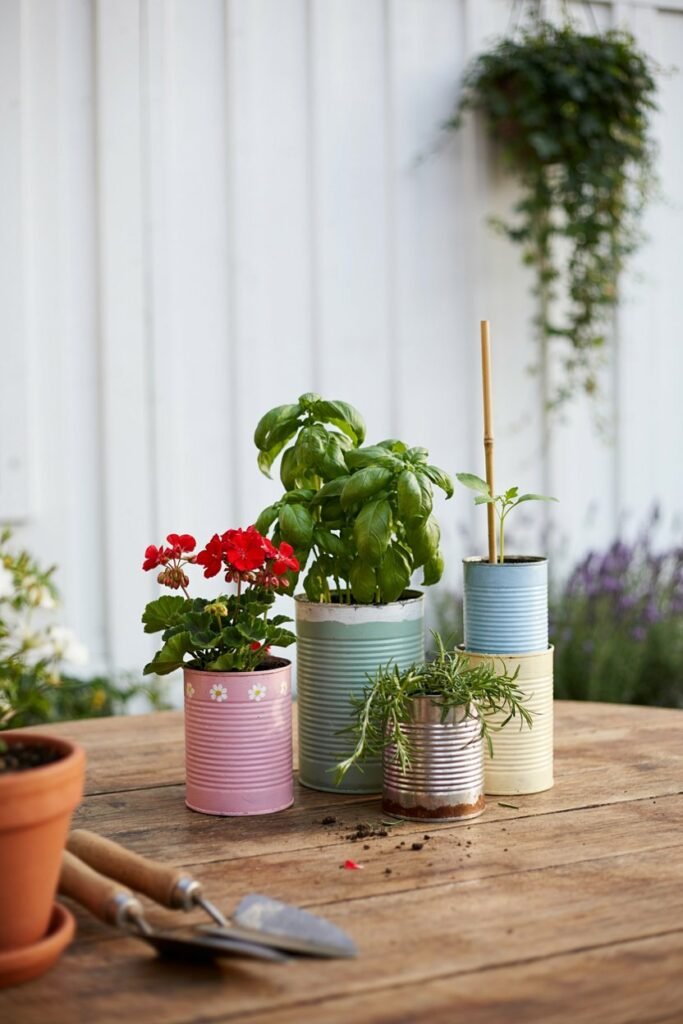
Can planters are one of those DIY garden projects that look much more complicated than they actually are. You don’t need expensive materials or advanced crafting skills to make them.
The biggest benefit is that you can reuse cans you already have at home. Food cans, coffee cans, and other sturdy metal containers can all become useful planting containers when prepared properly.
I also love how easy it is to personalize them. You can paint them to match your home, add simple patterns, wrap them with twine, or leave the metal exposed for a more rustic look.
Can planters are especially useful if you have limited gardening space. They work beautifully on:
- Kitchen windowsills
- Apartment balconies
- Small patios
- Porch steps
- Garden shelves
- Outdoor tables
- Window boxes
- Indoor plant displays
They are also a fun way to grow small herbs, flowers, and compact plants without needing a large garden.
What You Will Need

You don’t need a long shopping list for this project. Most of the supplies are inexpensive and may already be sitting around your home.
Basic Supplies
- Empty metal cans
- Soap and warm water
- Nail or small drill
- Hammer
- Sandpaper or metal file
- Potting soil
- Small plants or seeds
- Paint and paintbrush
- Outdoor-safe sealant
- Decorative materials such as twine or ribbon
If you plan to grow edible plants, choose clean food cans and make sure they are thoroughly washed before using them.
For outdoor planters, I recommend using paint and finishes that are suitable for the type of surface and weather conditions you expect.
Read Best Crops for a 5 Gallon Bucket: Grow Big Harvests in Small Spaces
Step 1: Choose the Right Cans
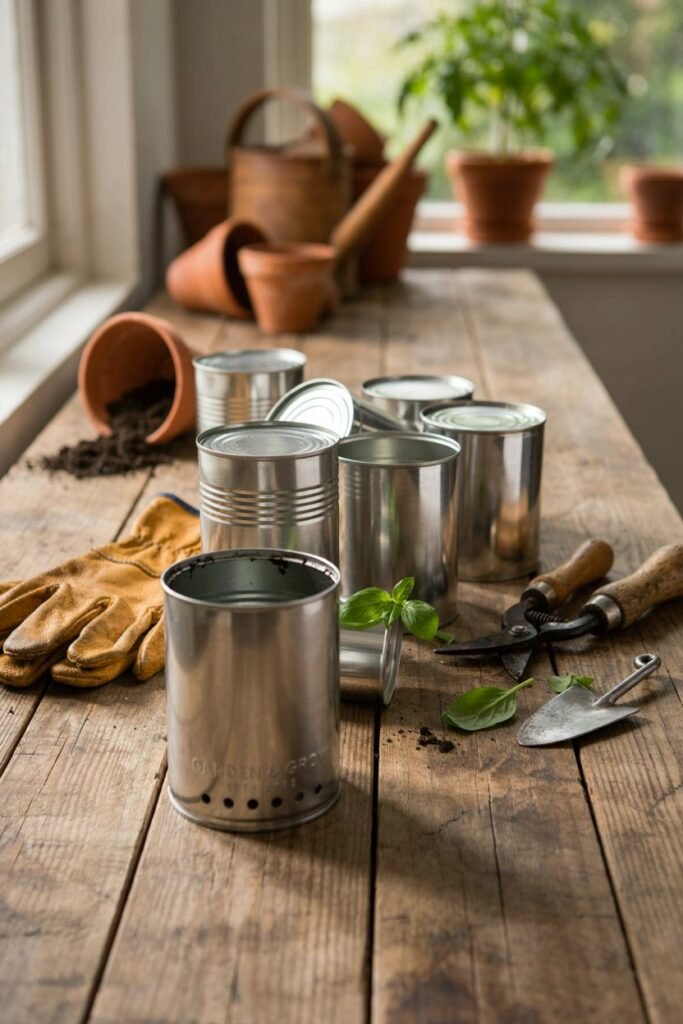
Start by collecting a few empty cans in different sizes.
Small cans are lovely for herbs, seedlings, succulents, and smaller flowers. Larger cans give roots more room and can be used for plants that need a little extra space.
Look for cans that are sturdy and haven’t developed rust or serious dents.
I also prefer cans with smooth edges whenever possible. Some cans can have surprisingly sharp edges after the lid is removed, so take your time when handling them.
If the can has a paper label, don’t worry if it looks messy at first. The label can usually be removed before decorating.
Step 2: Clean the Cans Thoroughly

Before turning your cans into planters, wash them well with warm, soapy water.
Remove any leftover food, oil, or sticky residue. Give the inside and outside a good rinse and allow the can to dry completely.
If you’re having trouble removing a paper label, soak the can in warm water for a little while. The label should become much easier to peel away.
For stubborn glue, gently work at the residue rather than aggressively scraping the metal.
A clean surface will also make painting much easier later.
Step 3: Make Drainage Holes

This is one of the most important steps.
Plants need good drainage, and a can without drainage holes can hold too much water around the roots. That can lead to unhealthy roots and other growing problems.
Turn the can upside down and make several small drainage holes in the bottom.
You can use a small drill or carefully make holes with a nail and hammer.
I usually prefer several small holes rather than one large opening. The goal is simply to give excess water somewhere to escape.
Be Careful With Sharp Metal
Please take care when making drainage holes because the metal can become sharp.
Wear protective gloves if needed, and use a metal file or sandpaper to smooth any rough edges you can safely reach.
Never rush this part. A few extra minutes spent preparing the container can make the finished planter much safer to handle.
Step 4: Smooth Any Sharp Edges

After cutting, opening, or drilling the can, inspect it carefully.
Run your fingers near but not directly over any exposed edges to check whether they need smoothing.
Use sandpaper or a metal file to carefully soften rough areas.
If an edge remains particularly sharp, consider choosing another container rather than trying to force it into use.
This is especially important if you have children or pets around your garden.
Step 5: Decide How You Want to Decorate Your Can Planters

This is my favorite part because you can make the planters fit almost any garden style.
Painted Can Planters
A simple coat of paint can completely change the appearance of an ordinary can.
You could use soft neutral colors for a cottage garden, cheerful colors for a playful balcony display, or earthy tones for a rustic garden.
For a cleaner finish, apply thin coats rather than one thick coat. Allow each coat to dry before adding another.
Rustic Metal Look
You don’t have to paint your cans at all.
If you like a simple farmhouse or rustic garden style, leave the metal exposed and decorate it with twine, a small plant label, or a simple ribbon.
This can look especially pretty when several different-sized cans are grouped together.
Wrapped Can Planters
Another easy option is wrapping the outside of the can with materials such as twine or suitable fabric.
Start at the bottom and carefully work your way upward, keeping the material tight as you go.
This gives the planter a softer, handmade appearance.
Just make sure decorative materials don’t block the drainage holes or stay constantly wet.
Step 6: Add a Protective Finish

If your can planters will live outdoors, consider adding a suitable protective finish over painted surfaces.
This can help protect your decoration from moisture and everyday weather exposure.
Always follow the directions on the product you choose and allow the planter to dry completely before adding soil.
For indoor planters, this step may be less important depending on the paint and where you plan to use the container.
Step 7: Choose the Right Plants

The best plants for can planters are generally smaller plants that don’t need a huge amount of root space.
Some lovely choices include:
Herbs
Can planters are perfect for a small kitchen herb garden.
Try:
- Basil
- Chives
- Parsley
- Thyme
- Oregano
- Mint
Mint can spread aggressively, so growing it in its own container is actually helpful.
Flowers
Small flowers can turn a simple can into a cheerful little display.
Consider:
- Marigolds
- Pansies
- Violas
- Alyssum
- Small petunias
- Dwarf flowers
Choose varieties that match the amount of sunlight available where you plan to place the cans.
Small Houseplants
Some compact houseplants can also work in decorative cans indoors, provided the container has proper drainage and you protect your furniture from escaping water.
Small succulents and other compact plants can be particularly attractive in these handmade containers.
Step 8: Fill the Can With Potting Mix
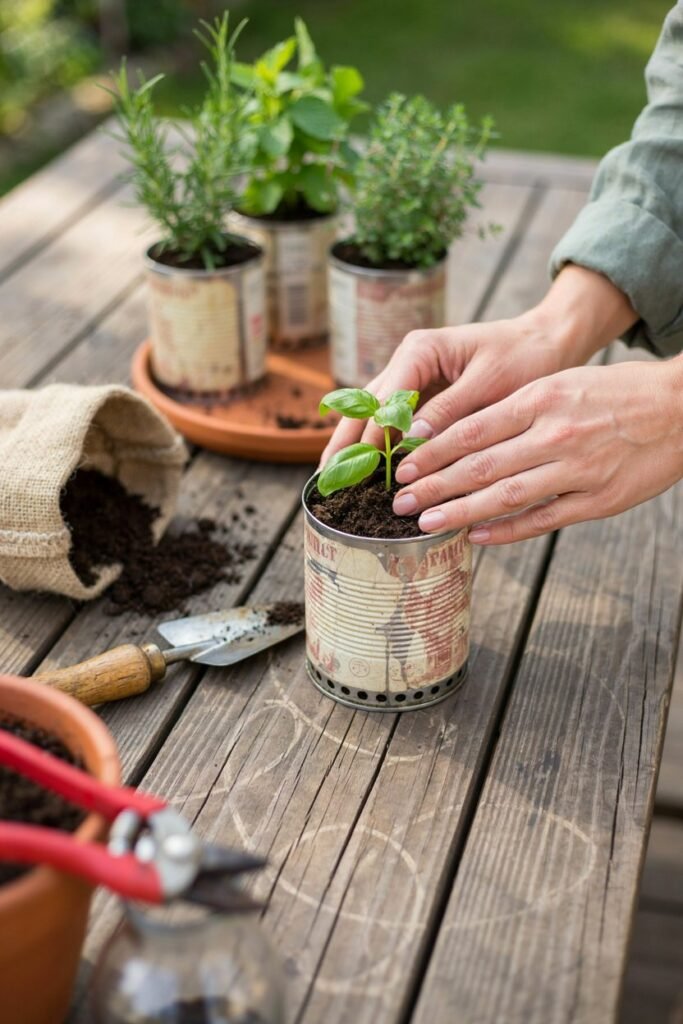
Don’t simply fill the can with ordinary garden soil.
A good-quality potting mix is generally a better choice for container gardening because it provides the structure and drainage that container-grown plants need.
Fill the can while leaving a little space between the soil surface and the top of the container.
This gives you room to water without immediately washing soil over the sides.
If you’re planting a small seedling, make a hole in the center of the potting mix, gently place the plant inside, and cover the roots.
Avoid packing the soil down too tightly.
Step 9: Water Your New Can Planter

After planting, water gently until you see a little water begin to escape from the drainage holes.
This helps settle the potting mix around the roots.
After that, avoid watering on an automatic schedule without checking the plant first.
Small containers can dry out faster than larger pots, especially when they are sitting in warm sunlight.
At the same time, watering too frequently can keep the roots overly wet.
I like to check the soil with my finger before watering. If the surface feels dry and the particular plant prefers to dry slightly between waterings, it may be time to water.
Where to Display Your Can Planters
Once your little planters are finished, don’t hide them away.
A collection of colorful cans can make a lovely garden display.
Try arranging them:
- Along a sunny windowsill
- On a wooden garden shelf
- Around a patio
- On a balcony railing
- Beside a kitchen window
- On a small plant stand
- Along a porch step
- Around an outdoor seating area
You can also group several cans together at different heights to create more visual interest.
Make a Small Herb Garden From Cans
One of my favorite ways to use this project is creating a tiny herb garden.
Instead of putting every herb into one large container, give each herb its own can.
Label them with small wooden tags or handwritten labels so you know exactly what you’re growing.
A row of basil, thyme, parsley, and chives can look adorable while also giving you fresh ingredients for cooking.
Place the cans somewhere convenient so you’ll actually remember to harvest from them.
Can You Grow Vegetables in Can Planters?
You can grow some smaller vegetables and edible plants in cans, but container size matters.
Small cans aren’t suitable for large plants with extensive root systems.
Instead, look for compact crops or young plants that can tolerate containers.
Depending on the can size and growing conditions, you could experiment with:
- Green onions
- Radishes
- Baby lettuce
- Small salad greens
- Microgreens
- Compact herbs
For larger vegetables, choose a much bigger container.
How to Keep Your Can Planters Looking Good
Your planters will need a little maintenance just like any other container garden.
Check them regularly for:
- Dry soil
- Pests
- Faded paint
- Rust
- Blocked drainage holes
- Overcrowded roots
If the can begins to rust badly, it is better to replace it.
You can also refresh painted cans occasionally if the finish begins to look tired.
A Few Can Planter Mistakes to Avoid
Don’t Skip Drainage
This is probably the biggest mistake.
A decorative container isn’t useful if water has nowhere to escape.
Don’t Use a Can That’s Too Small
A tiny container may look cute, but it can become difficult to keep the plant properly watered.
Choose the container based on the plant rather than simply choosing the prettiest can.
Don’t Overwater
Small containers don’t necessarily need water every day. Always consider the plant, temperature, sunlight, and moisture level of the soil.
Don’t Ignore Sharp Edges
Always prepare the can carefully before planting.
Don’t Block the Drainage Holes
Decorations, soil, or other materials shouldn’t completely cover the holes.
Easy Ideas to Personalize Your Can Planters
Once you’ve made one, you’ll probably start thinking of dozens of ways to decorate the next one.
Here are a few simple ideas:
- Paint each can a different color.
- Create a matching herb collection.
- Add handwritten plant labels.
- Use simple floral patterns.
- Wrap the outside with garden twine.
- Add small painted dots or stripes.
- Create a rustic farmhouse look.
- Make a colorful windowsill garden.
- Group cans by size.
- Use seasonal colors for different times of the year.
You could even create a small themed collection for your kitchen, patio, or porch.
Final Thoughts
Making can planters is one of those projects I keep coming back to because it is simple, inexpensive, and genuinely useful.
Instead of throwing an empty can away, you can give it a second life and turn it into something that helps your garden grow.
I especially love how easy it is to make each planter feel personal, whether you prefer colorful painted containers or a simple rustic finish.
Start with one or two cans, choose a small plant you love, and see where your creativity takes you. Before long, you may have a whole little collection of handmade planters brightening your home and garden.
