
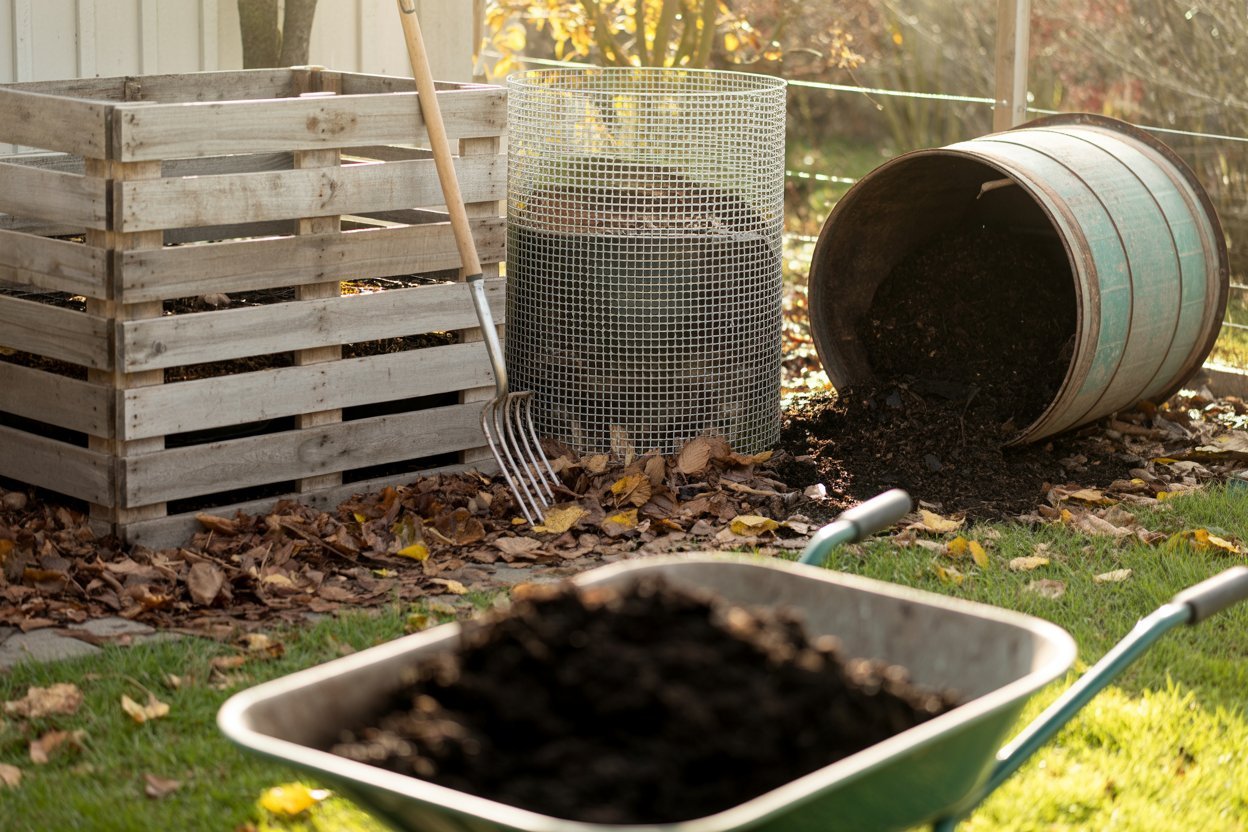

I’ve killed more compost piles than I care to admit. My first attempt was a sad, soggy heap in the corner of the yard that smelled like regret and attracted every raccoon in the neighborhood.
It took a few seasons of trial, error, and stubbornness to figure out what actually turns kitchen scraps and yard waste into rich, crumbly, garden-ready compost.
Now that I’ve got a system that works, I want to hand you the shortcuts I wish I’d had from day one twenty compost station ideas, with the materials and steps to build each one yourself.
Why Your Backyard Needs a Proper Compost Station
Before we get into the ideas, let’s talk about why this matters. A well-built compost station isn’t just a place to dump your banana peels it’s the engine room of your garden.
Good compost improves soil structure, feeds beneficial microbes, retains moisture, and cuts down on the fertilizer bill.
If you’re already working on a raised bed garden, homemade compost is the single best amendment you can add to that soil.
The trick is picking a compost system that fits your space, your climate, and how much effort you actually want to put in. Some gardeners want a simple pile they can ignore for months.
Others want a tidy, three-bin rotation system that finishes compost in weeks. This list covers both ends of that spectrum, plus everything in between.
A quick note before we dig in: whatever style you choose, every compost pile needs the same basic recipe a mix of “greens” (nitrogen-rich material like food scraps, grass clippings, and coffee grounds) and “browns” (carbon-rich material like dried leaves, straw, and cardboard), plus air and moisture.
Keep that ratio roughly 1 part greens to 2-3 parts browns, and you’re most of the way to compost success no matter which station you build.
1. The Classic Three-Bin Compost System
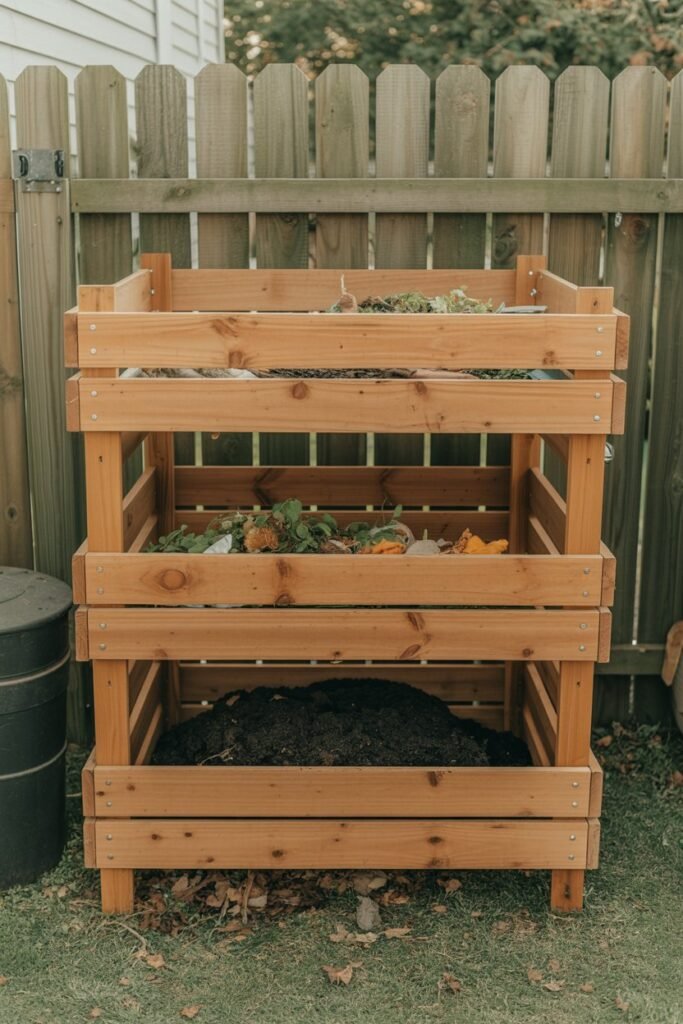
This is the gold standard for gardeners who generate a steady stream of organic waste and want an efficient, rotating system.
One bin holds fresh material, the second holds material that’s actively breaking down, and the third holds compost that’s nearly finished.
It looks tidy, and it lets you “turn” compost simply by forking it from one bin to the next.
Materials needed:
- 12-16 pressure-treated 2×4 boards (untreated cedar is a safer choice near food gardens)
- Wood screws or deck screws
- Hardware cloth or chicken wire (optional, for pest control)
- A drill/driver
- A saw (or have your lumber cut at the store)
Step-by-step:
- Decide on bin size 3×3 feet per bin is a comfortable standard.
- Build three simple open-front box frames using the 2x4s, leaving gaps between boards for airflow.
- Line the bottoms with hardware cloth if burrowing pests are a concern.
- Position the bins side by side against a fence line or a shaded corner.
- Load bin one with fresh scraps and yard waste, turning material into bin two every couple of weeks.
- Let bin three cure undisturbed until it’s dark, crumbly, and earthy-smelling.
If you’re already handy with lumber from building raised beds under $50, this project will feel familiar it uses many of the same tools and joints.
2. The Tumbling Compost Barrel
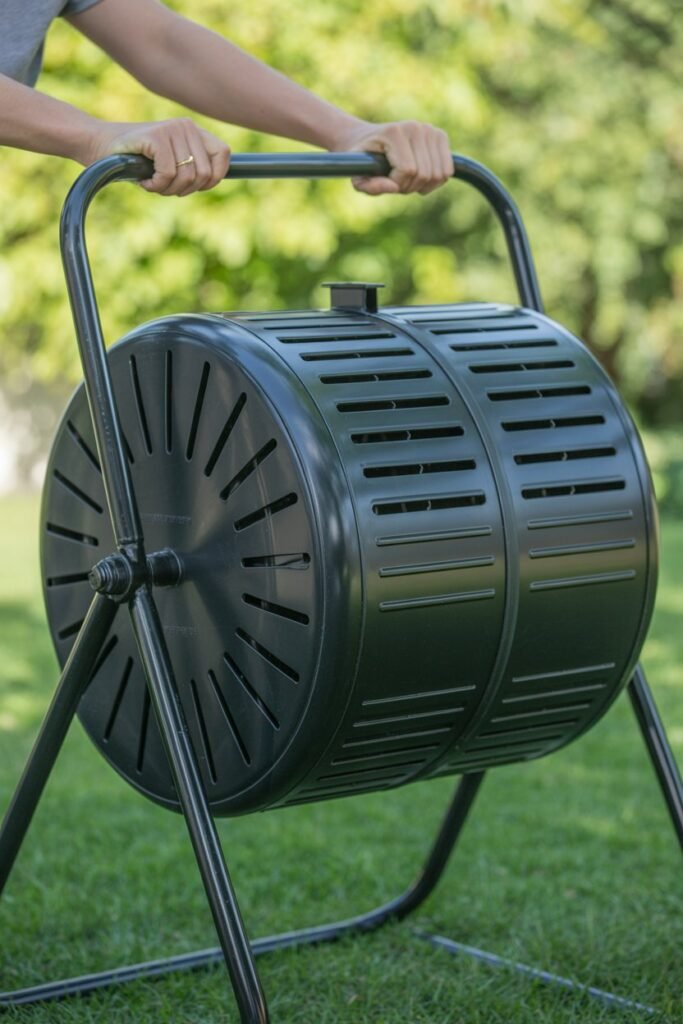
For gardeners who hate turning a pile with a pitchfork, a tumbler is a back-saver.
These enclosed, rotating drums speed up decomposition because they’re easy to aerate just give the barrel a spin every few days.
Materials needed:
- A repurposed food-grade plastic barrel (or a store-bought tumbler kit)
- A metal rod or axle to run through the barrel
- Two sturdy support posts or a cradle frame
- Drill for aeration holes
Step-by-step:
- Drill rows of half-inch holes around the barrel for airflow.
- Cut a hinged door into one side for loading and unloading.
- Mount the barrel horizontally on the axle between two support posts, high enough that it can rotate freely.
- Add roughly equal parts greens and browns, then spin the barrel a few times.
- Give it a quarter turn every 2-3 days to keep oxygen circulating and speed the breakdown.
3. The Cinder Block Compost Bin
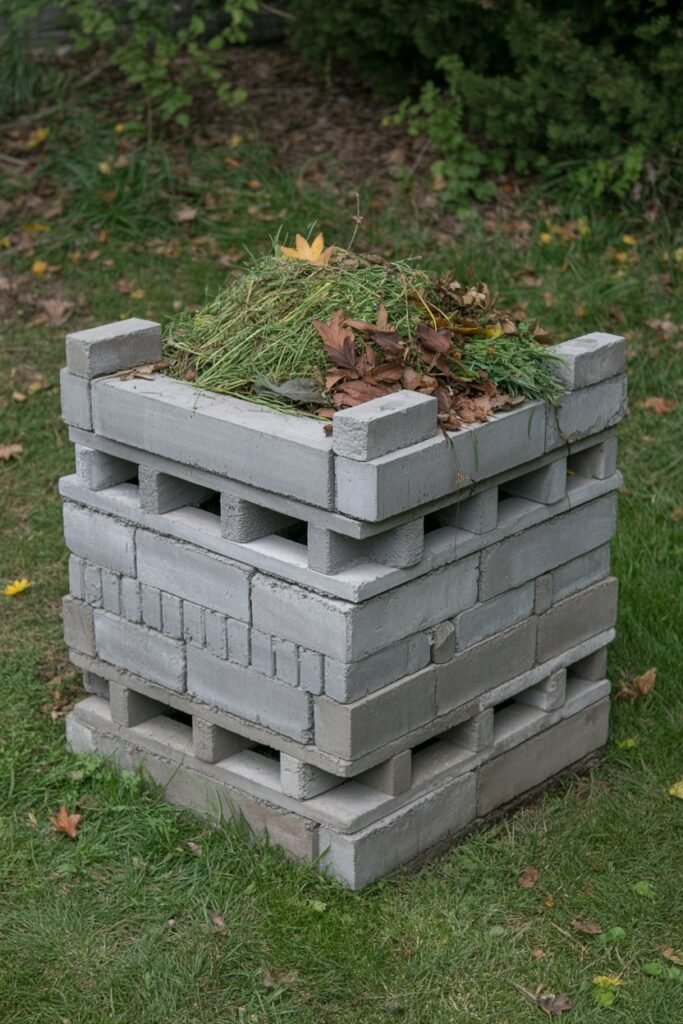
Cinder blocks are inexpensive, weatherproof, and require no cutting or fasteners. This is one of the easiest compost stations to build in an afternoon.
Materials needed:
- 30-40 standard cinder blocks
- A level surface
Step-by-step:
- Choose a level, well-draining spot in the yard.
- Stack cinder blocks two or three courses high in a U-shape or square, leaving the holes exposed for airflow.
- Leave one side open or stack blocks loosely there so you can access the pile with a shovel.
- Fill with your greens and browns mixture, turning periodically with a garden fork.
4. The Wire Mesh Compost Ring
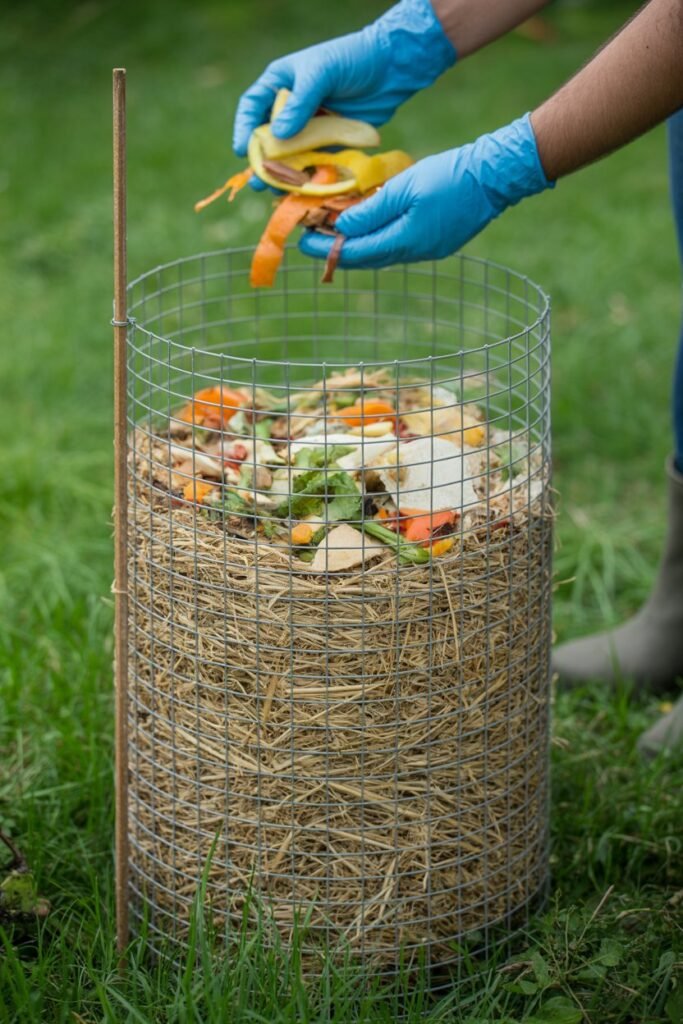
If budget is tight, a simple wire ring is one of the cheapest and fastest compost stations you can put together often in under 30 minutes.
Materials needed:
- A roll of galvanized hardware cloth or welded wire fencing (about 10-12 feet)
- Zip ties or wire for fastening
- Wooden stakes
Step-by-step:
- Form the wire into a cylinder about 3 feet in diameter and secure the ends together.
- Drive stakes into the ground around the ring to hold its shape.
- Fill with kitchen scraps, leaves, and grass clippings.
- Lift the entire ring off and set it up beside the pile when you need to turn the compost this makes flipping the material easy without extra tools.
5. The Pallet Compost Bin
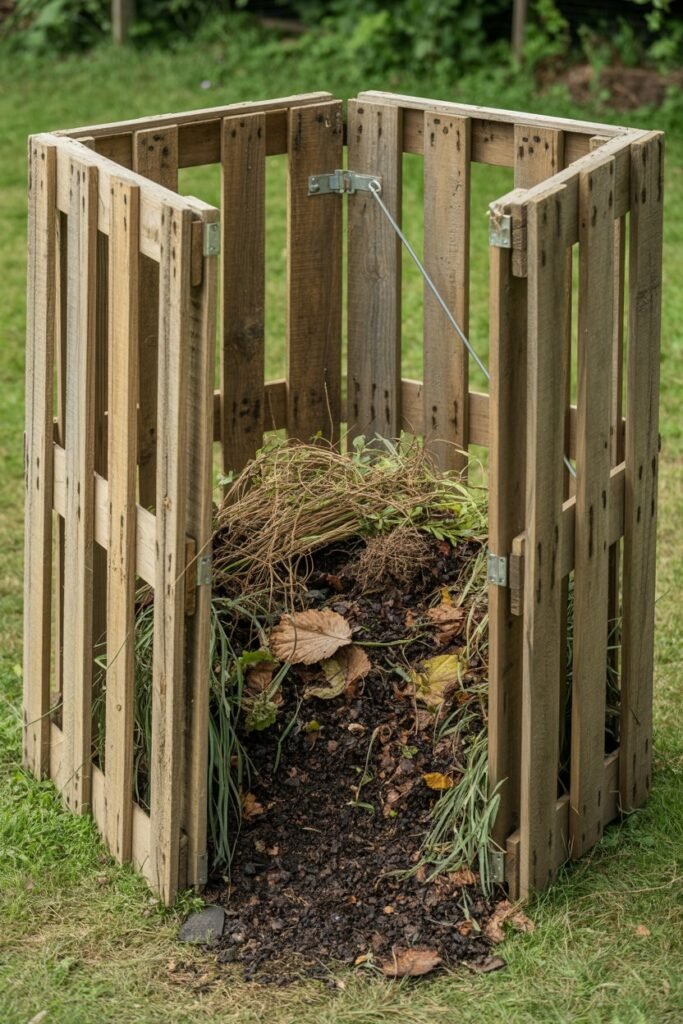
Wooden pallets are often free from hardware stores or garden centers, which makes this one of the most budget-friendly compost station ideas on this list.
Materials needed:
- 4 wooden pallets (untreated)
- Sturdy wire, zip ties, or corner brackets
- A hammer and nails (optional)
Step-by-step:
- Stand four pallets on their edges to form a square.
- Secure the corners together with wire, zip ties, or brackets.
- Leave one pallet unattached or hinged so it can swing open for access.
- Fill the enclosure with alternating layers of greens and browns.
6. The Trash Can Compost Bin
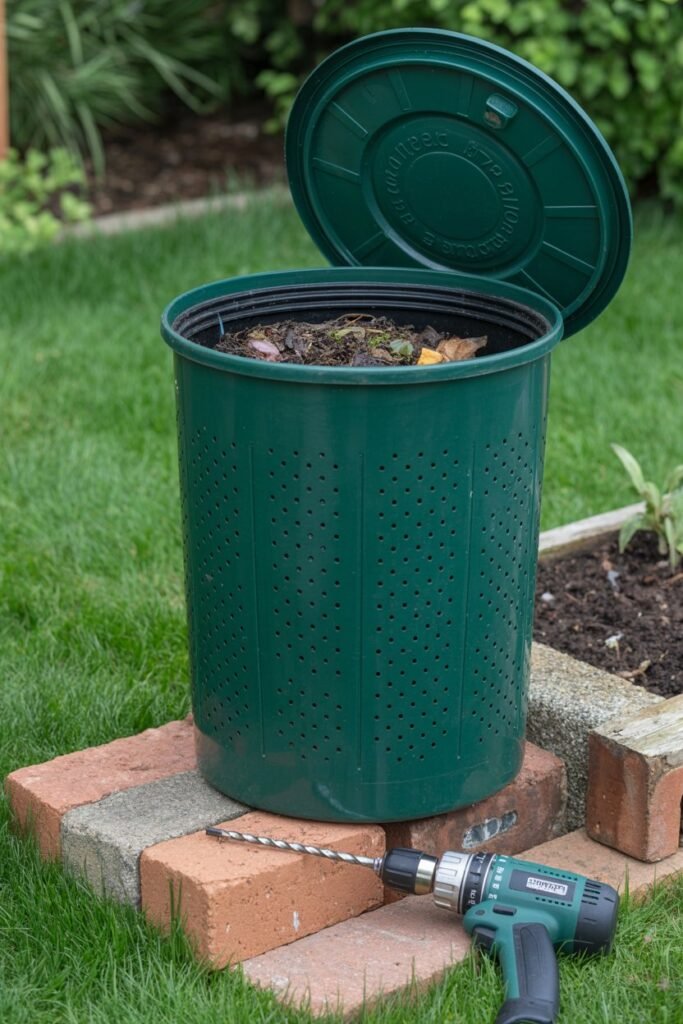
A repurposed garbage can with a lid makes an excellent enclosed compost bin especially useful if you’re dealing with curious pets or wildlife.
Materials needed:
- A plastic garbage can with a tight-fitting lid
- A drill
- Bricks or a stand (optional, to lift it off the ground)
Step-by-step:
- Drill rows of ventilation holes around the sides and a few in the bottom for drainage.
- Set the can on bricks so excess moisture can escape and worms can enter from the soil below.
- Add scraps and yard waste, replacing the lid tightly each time.
- Roll the can on its side every few days to mix the contents (a great arm workout, if nothing else).
7. The Worm Bin (Vermicomposting Station)
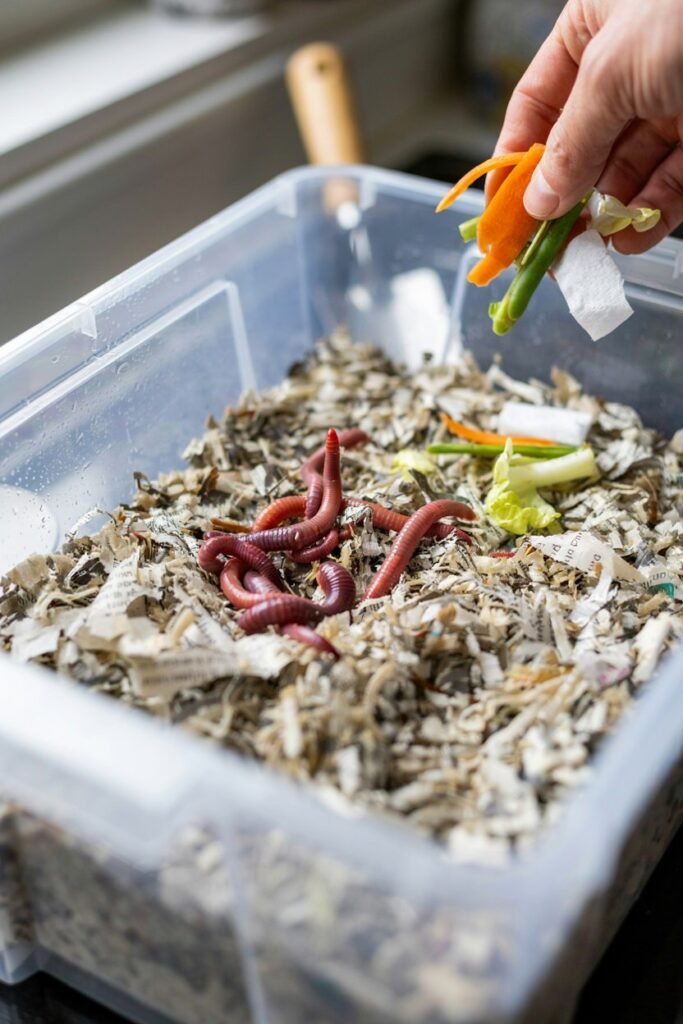
Worm composting is ideal for small yards, apartments with a patio, or anyone who wants finished compost in a matter of weeks rather than months.
If you’re already exploring apartment vegetable gardening, this is a natural pairing.
Materials needed:
- A shallow plastic storage tote with a lid
- Red wiggler composting worms
- Shredded newspaper or cardboard (bedding)
- A drill for air holes
Step-by-step:
- Drill small air holes in the lid and upper sides of the tote.
- Add a few inches of damp, shredded newspaper as bedding.
- Introduce the red wigglers and let them settle for a day.
- Bury small amounts of fruit and vegetable scraps under the bedding, rotating burial spots each time.
- Harvest the dark, rich worm castings every couple of months by pushing everything to one side and adding fresh bedding to the other the worms migrate toward the new food, leaving finished castings behind.
8. The Hügelkultur Compost Mound
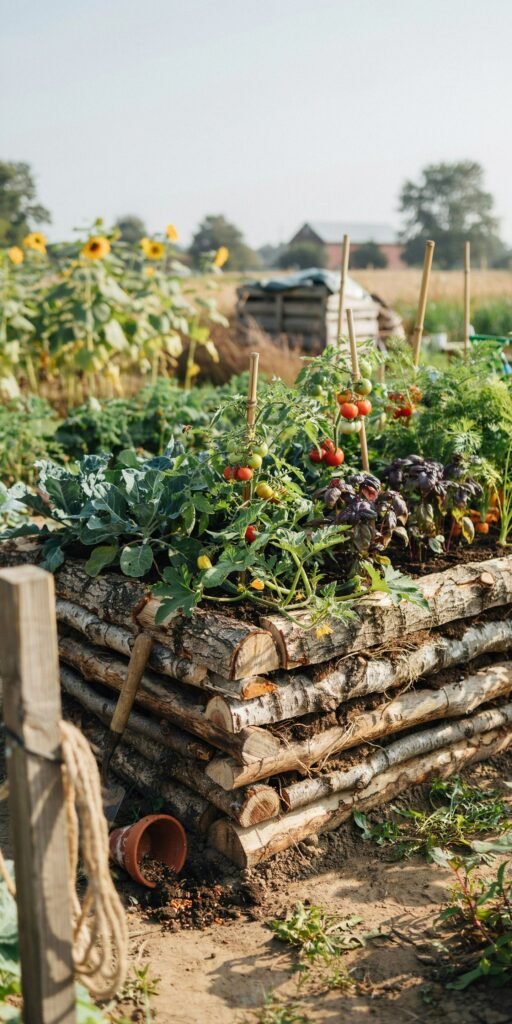
This is less a bin and more a landscape feature a raised mound built from logs, branches, and organic debris that slowly composts from the inside out while you grow directly on top of it.
Materials needed:
- Logs and large branches
- Smaller sticks and twigs
- Leaves, grass clippings, and compost-rich soil
- A shovel
Step-by-step:
- Dig a shallow trench or simply mark out the mound’s footprint.
- Layer logs and large branches as the base.
- Fill gaps with smaller sticks, leaves, and compostable yard waste.
- Cap the entire mound with a thick layer of soil and finished compost.
- Plant directly into the mound as the wood breaks down over the following seasons, it feeds whatever you’re growing.
9. The Compost Trench
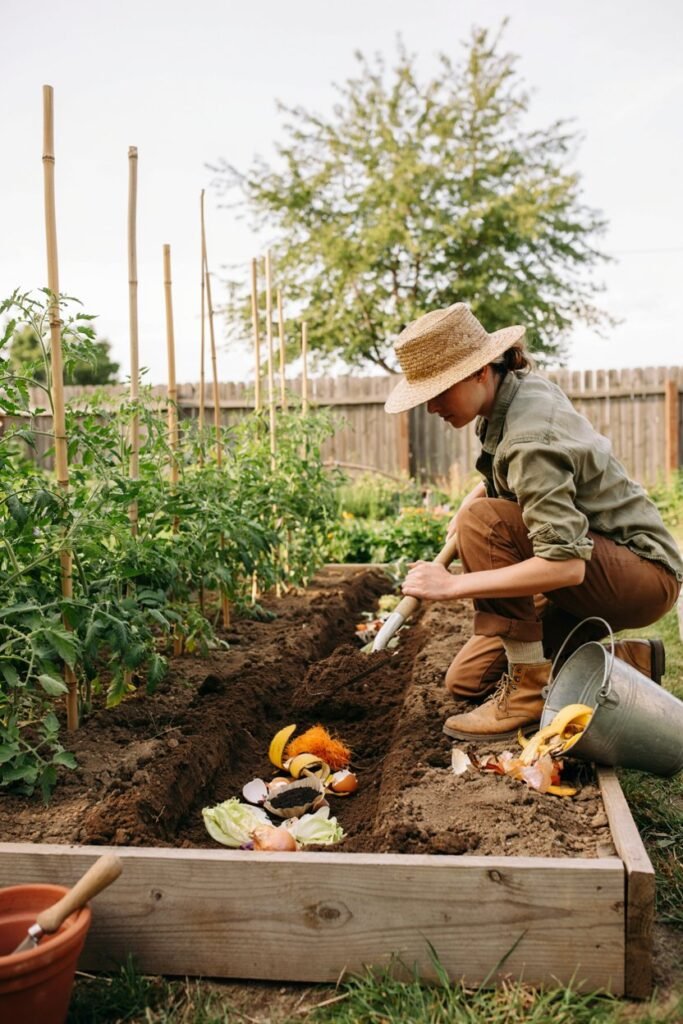
If you’d rather not build a visible structure at all, trench composting buries scraps directly in unused garden beds, letting them break down right where next season’s plants will grow.
Materials needed:
- A shovel or trenching spade
- Kitchen scraps
Step-by-step:
- Dig a trench roughly 12 inches deep in an empty garden bed.
- Add a layer of kitchen scraps.
- Cover completely with the removed soil.
- Repeat along the trench as you generate more scraps, moving down the row.
- Let the trench rest for a season before planting directly over it.
10. The Bokashi Bucket System
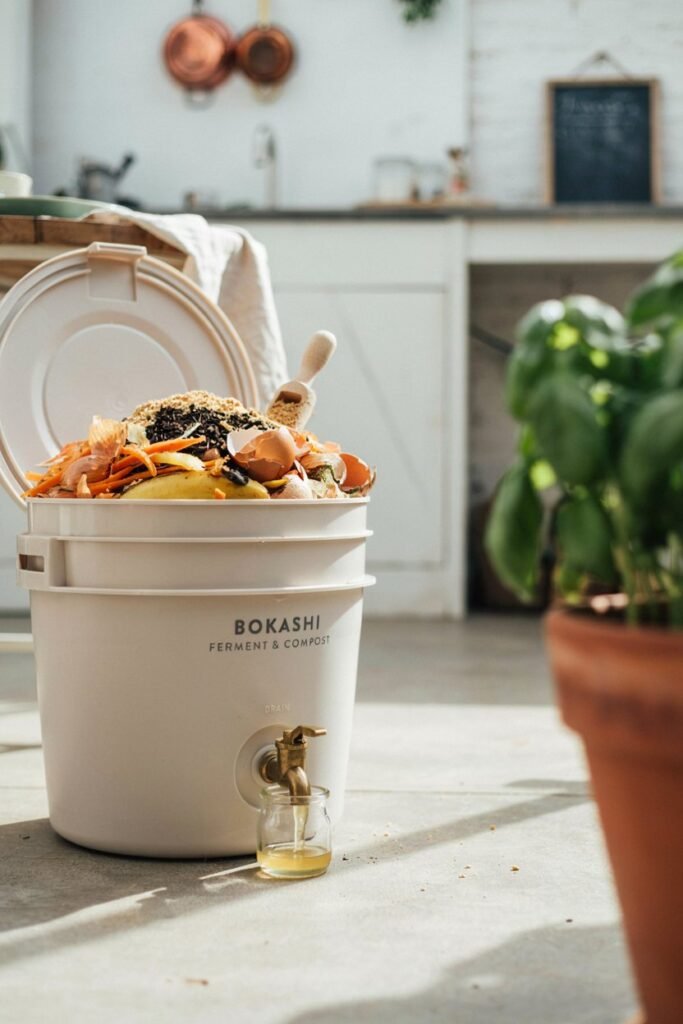
Bokashi is a fermentation-based method that can handle meat, dairy, and oily foods that traditional composting can’t a huge advantage if your kitchen waste includes more than fruit and veggie trimmings.
Materials needed:
- Two food-grade buckets with airtight lids
- A spigot (for draining liquid, or drill a small hole and add a valve)
- Bokashi bran (inoculated with beneficial microbes)
Step-by-step:
- Drill a small hole near the bottom of one bucket and fit it with a spigot for draining liquid.
- Nest a second bucket with holes drilled in the bottom inside the spigot bucket, so liquid drains through.
- Add a layer of food scraps, then sprinkle with bokashi bran.
- Press down to remove air pockets and seal the lid tightly.
- Drain the collected liquid every few days (dilute and use as a potent fertilizer).
- Once the bucket is full, let it ferment sealed for about two weeks before burying the pre-composted contents in soil to finish breaking down.
11. The Corner Chicken Wire Compost Nook
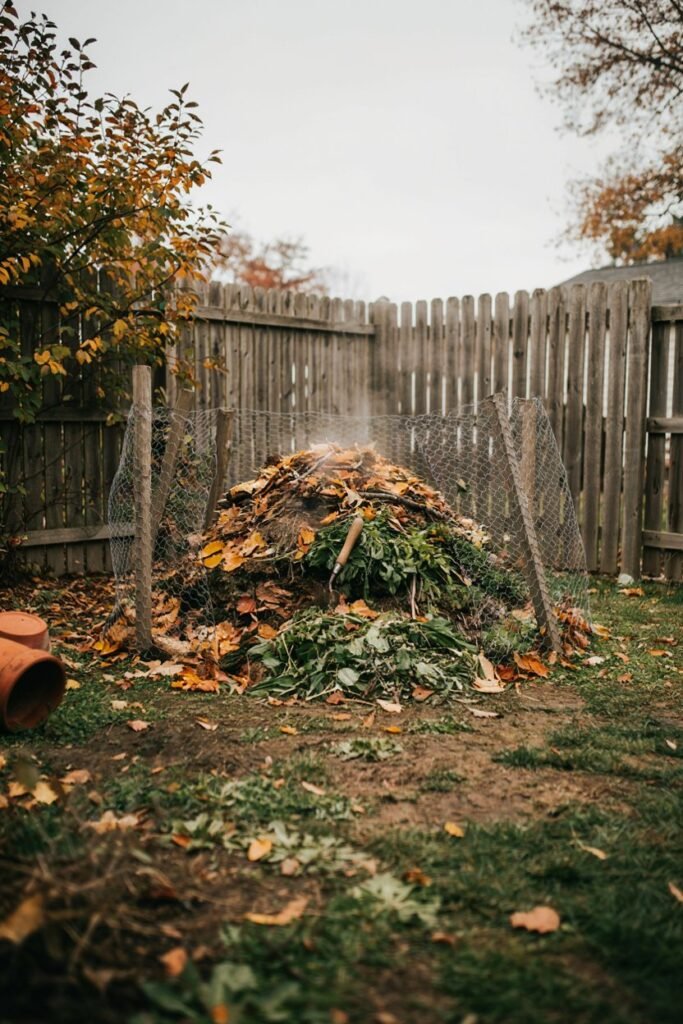
Tucked into an awkward corner of the yard, this simple nook uses two existing fences or walls as two sides of the bin, cutting your material costs in half.
Materials needed:
- Chicken wire or hardware cloth
- Wooden stakes or T-posts
- Zip ties
Step-by-step:
- Choose a corner where two fences or walls meet.
- Drive two stakes out from the corner to mark the open sides.
- Wrap chicken wire around the stakes to close off the remaining two sides.
- Fill the nook with your compost materials, turning with a fork as needed.
12. The Raised Compost Bin with a Lid
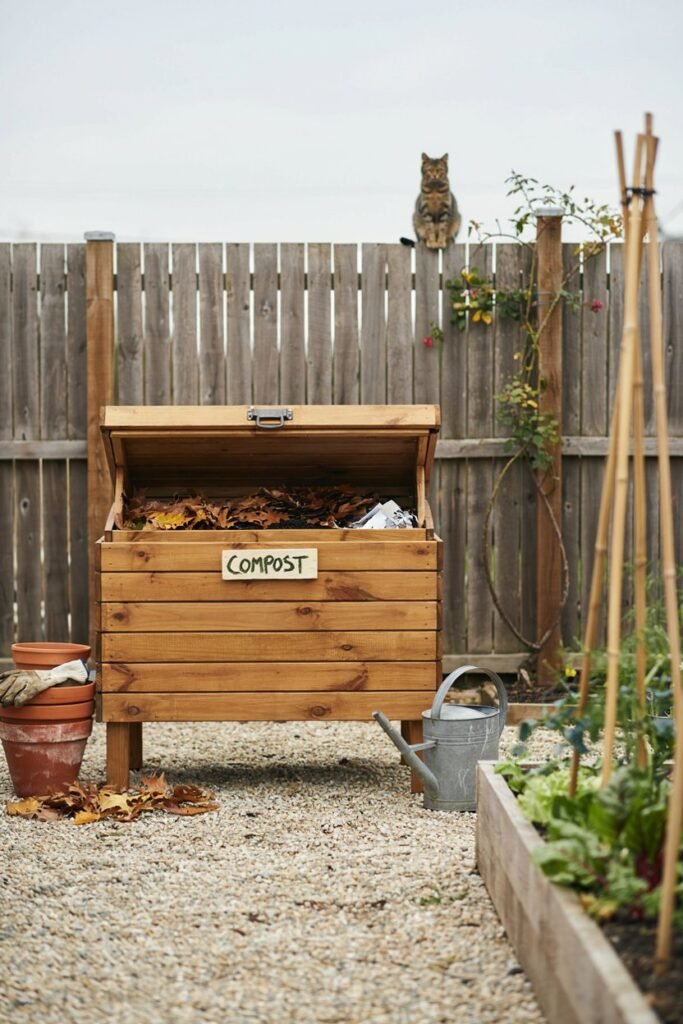
Raising your compost off the ground on legs makes it easier on your back and improves drainage and airflow from below.
Materials needed:
- 2×4 lumber for the frame and legs
- Plywood or slatted boards for the walls
- Hinges and a lid
- Screws
Step-by-step:
- Build a simple box frame, sized to your needs (3×3 feet is typical).
- Attach four legs to raise the bin 12-18 inches off the ground.
- Use slatted boards for the walls to allow airflow.
- Attach a hinged lid on top to keep out rain and pests.
- Load, turn, and harvest as with any standard bin.
13. The Compost Sock (Geobin Style)
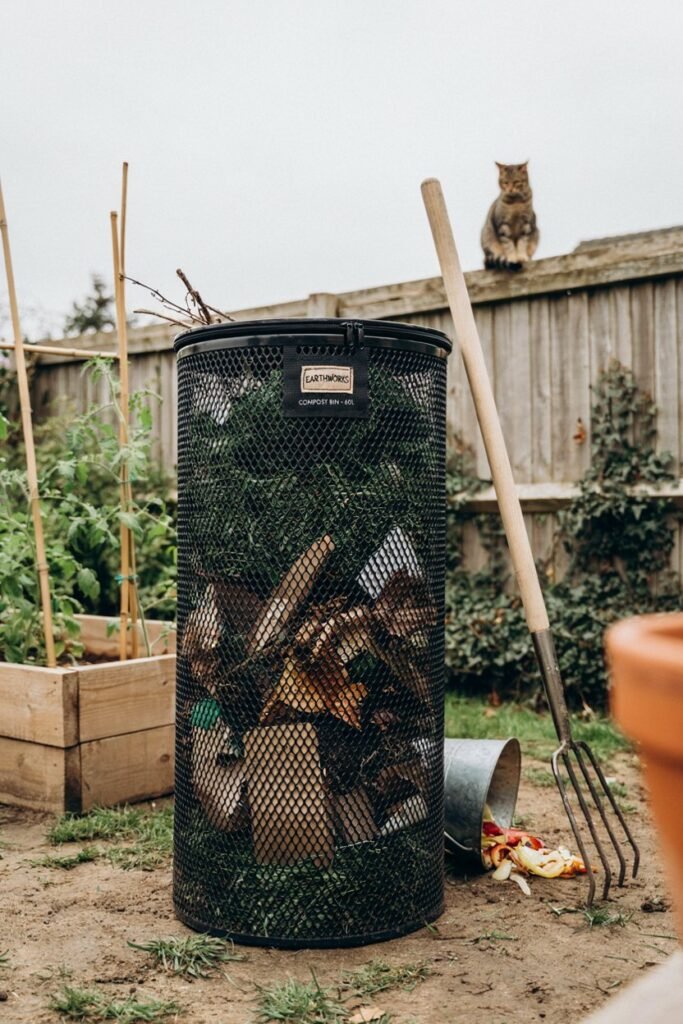
A flexible mesh “sock” bin is lightweight, portable, and easy to store flat when not in use great for renters or anyone who might need to relocate their compost setup.
Materials needed:
- A roll of flexible plastic mesh or a purchased Geobin-style kit
- Zip ties or the kit’s built-in fasteners
Step-by-step:
- Unroll the mesh into a cylinder shape.
- Connect the ends using the fasteners provided (or zip ties).
- Place the bin in a level, well-draining spot.
- Fill and manage as you would any open bin expand or contract the diameter as needed by adjusting the fasteners.
14. The Multi-Tier Stacking Bin
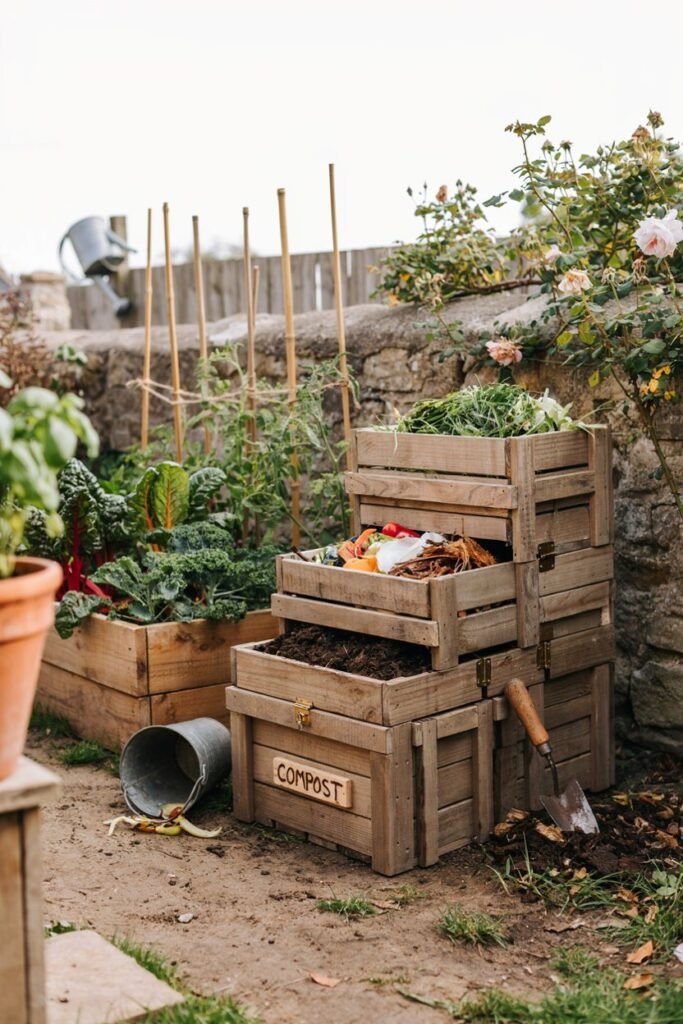
Stacking bin systems let you add or remove layers as your pile grows, which is handy if your yard waste production swings seasonally (hello, autumn leaf drop).
Materials needed:
- Multiple identical wooden or plastic frame “rings”
- Interlocking corner brackets or notched joints
Step-by-step:
- Build (or buy) several identical square frames that stack on top of each other.
- Start with a single frame on the ground and begin filling it.
- Add another frame on top as the pile grows taller.
- Remove frames from the bottom once that material has fully composted, leaving the rest of the stack intact.
15. The Old Bathtub Compost Station
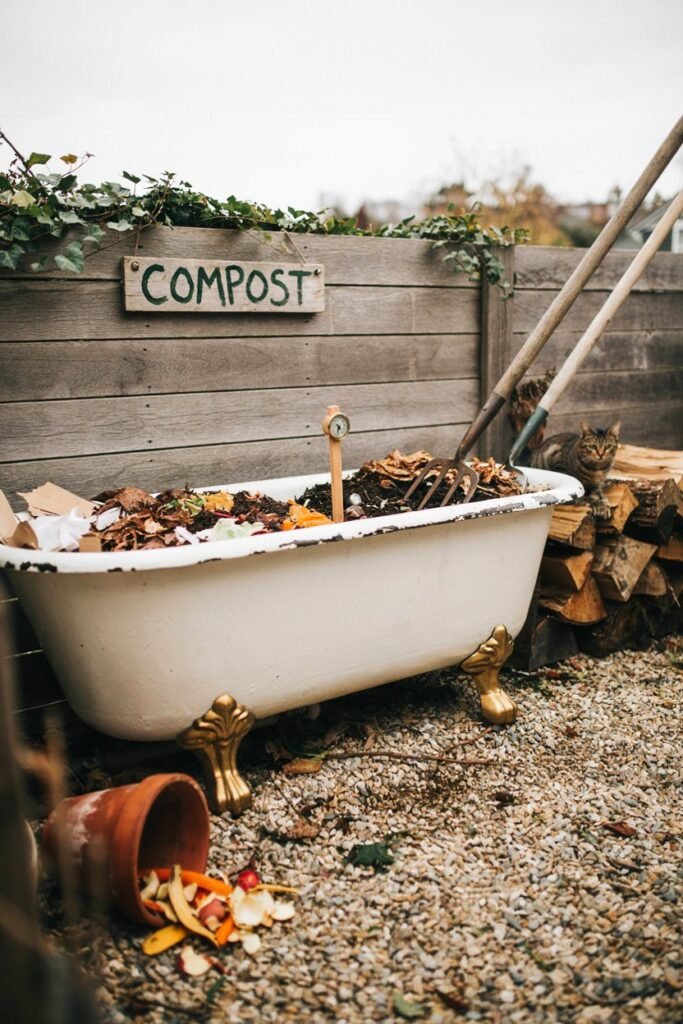
A reclaimed bathtub already has drainage built in (the plug hole) and sturdy walls, making it a surprisingly practical, zero-build compost container.
Materials needed:
- A reclaimed cast iron or acrylic bathtub
- Gravel (for drainage layer)
- A tarp or lid (optional, for rain cover)
Step-by-step:
- Position the tub on a level surface with the drain end slightly lower for runoff.
- Add a couple inches of gravel over the drain for drainage.
- Fill with greens and browns, turning periodically.
- Cover loosely with a tarp during heavy rain to avoid waterlogging.
16. The Straw Bale Compost Bin
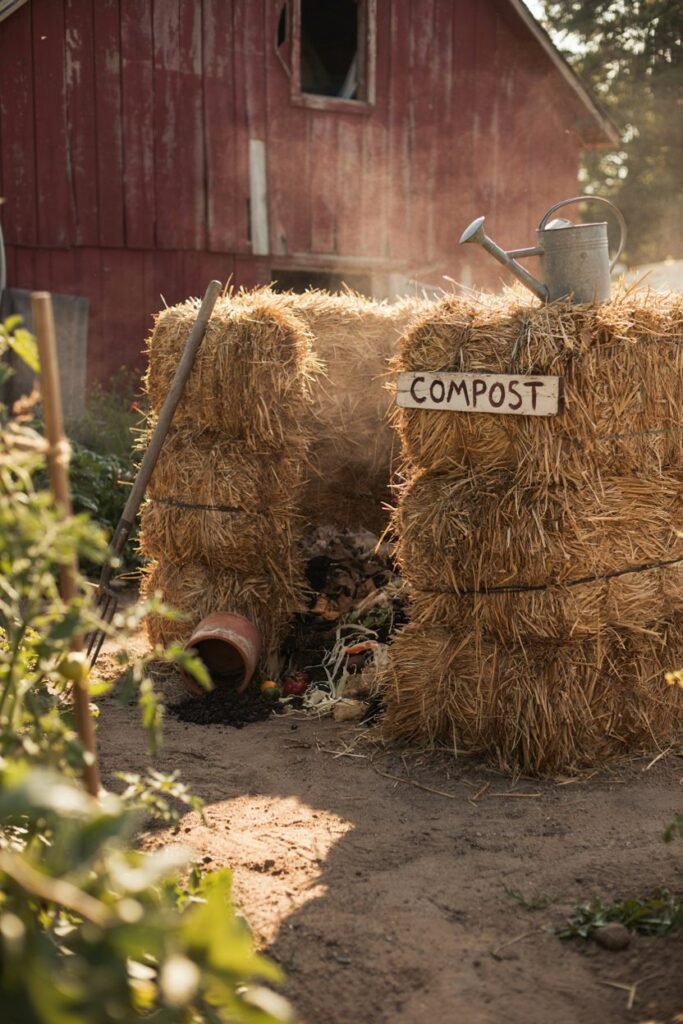
Straw bales double as both the bin walls and, eventually, additional compost material themselves once they start breaking down.
Materials needed:
- 8-10 straw bales
- Stakes (optional, for stability)
Step-by-step:
- Arrange bales in a square or U-shape, stacked one or two bales high.
- Stake the bales together if the site is exposed to wind.
- Fill the enclosed area with your compost materials.
- Over time, the inner-facing straw will begin composting too simply rebuild the bin with fresh bales as needed.
17. The Underground Compost Digester
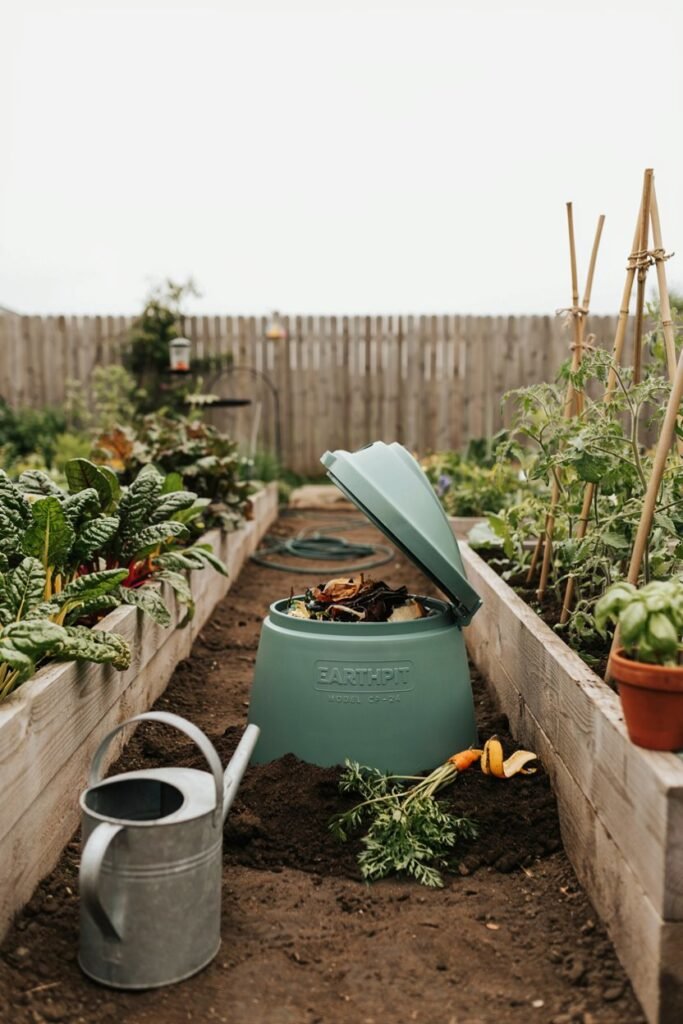
An in-ground digester (sometimes sold as a “green cone”) uses soil insulation and solar heat to speed decomposition while keeping pests fully sealed out.
Materials needed:
- A perforated basket or digester cone
- A shovel
- Gravel for the base
Step-by-step:
- Dig a hole deep enough to bury the perforated basket two-thirds into the ground.
- Add a layer of gravel at the bottom for drainage.
- Set the basket in place and backfill soil around the sides.
- Add scraps through the top opening and seal with the lid between uses.
18. The Greenhouse-Adjacent Compost Corner
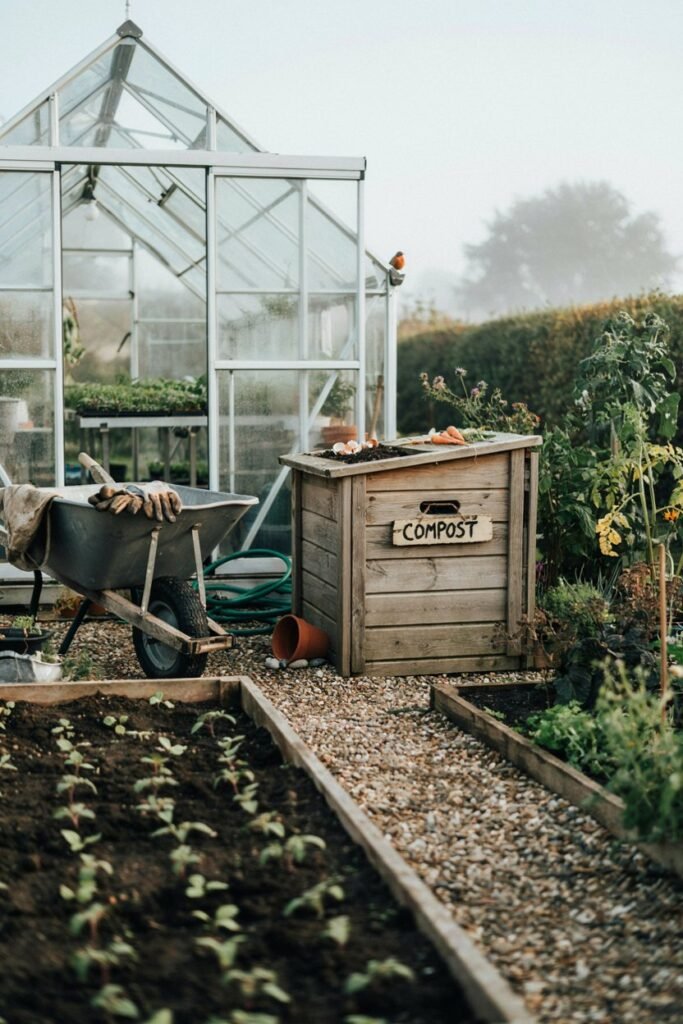
If you already maintain a greenhouse, placing your compost station right beside it lets the gentle heat compost gives off help buffer the greenhouse against cold snaps, and keeps your soil amendments within arm’s reach.
This pairs well with the tasks on a greenhouse maintenance checklist.
Materials needed:
- Any of the bin styles above (pallet, cinder block, or wire ring work best here)
- A wheelbarrow for easy transport in and out of the greenhouse
Step-by-step:
- Choose a compost bin style based on available space beside the greenhouse.
- Build or place it within a few feet of the greenhouse wall for shared warmth and easy access.
- Keep a wheelbarrow staged nearby to move finished compost straight into greenhouse beds or containers.
19. The Decorative Screened Compost Enclosure
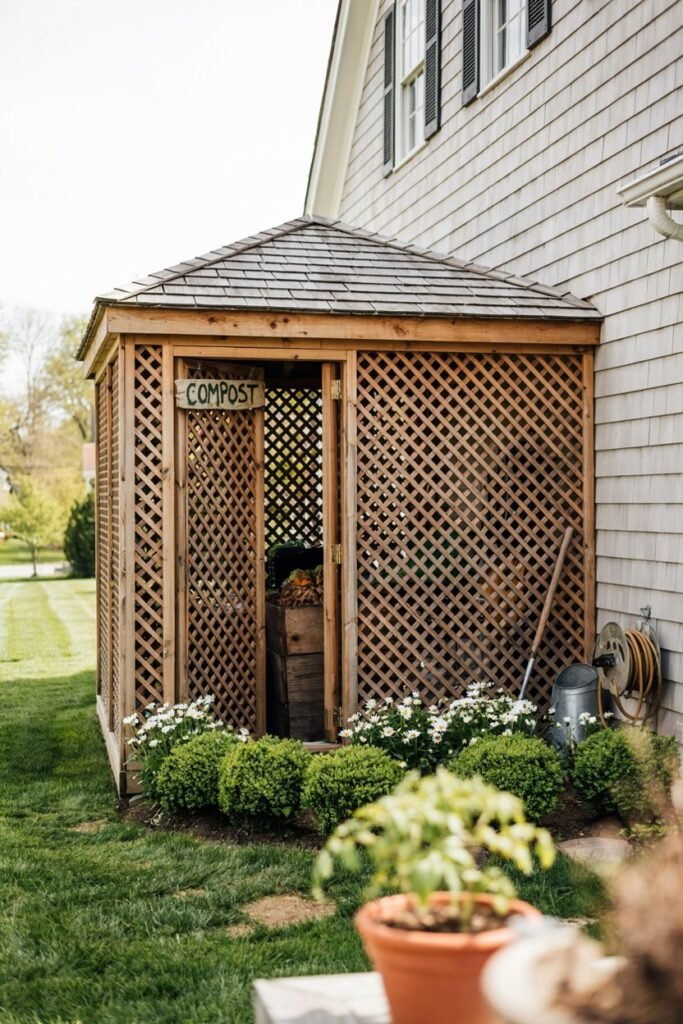
For front yards or small urban lots where a compost pile needs to look intentional, a screened enclosure hides the working parts behind an attractive lattice or fence panel.
Materials needed:
- Lattice panels or decorative fence sections
- 4×4 corner posts
- Post concrete or ground anchors
- A functional bin (wire, pallet, or cinder block) to sit inside
Step-by-step:
- Set corner posts in the ground where the enclosure will sit.
- Attach lattice or fence panels to the posts on three or four sides.
- Leave a gate or removable panel for access.
- Place a simple wire or pallet bin inside the enclosure to do the actual composting work.
20. The Kitchen Counter to Backyard Caddy System
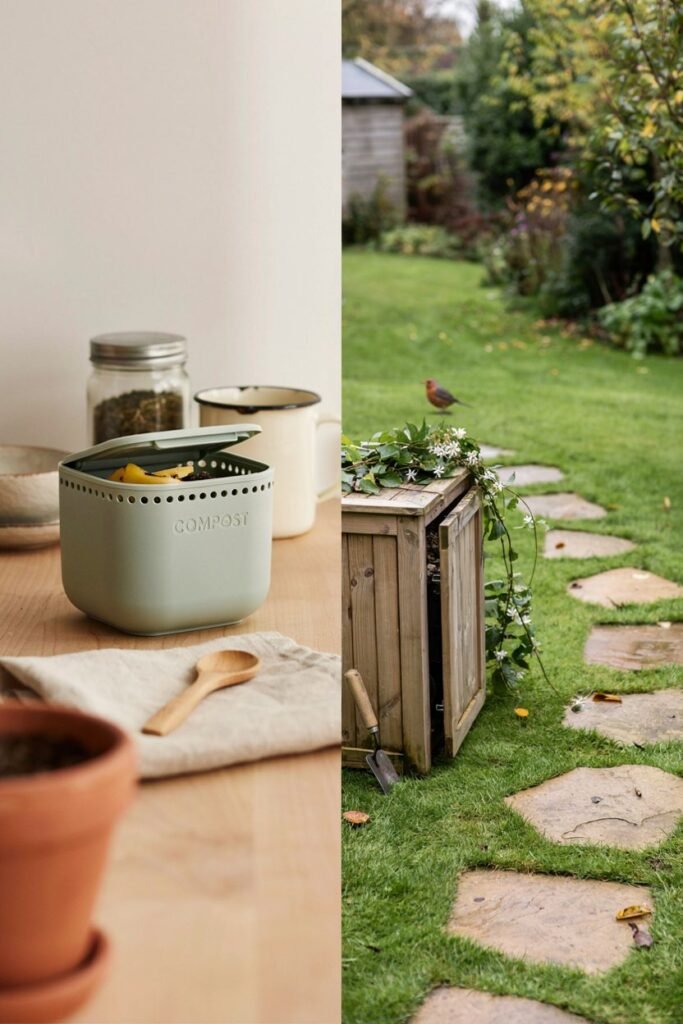
This isn’t a single station, but a workflow: a small countertop caddy that bridges your kitchen scraps to whichever backyard bin you’ve built, making it far more likely you’ll actually keep the habit going.
Materials needed:
- A small vented countertop compost caddy
- Compostable liner bags (optional)
- A short garden path or stepping stones to your main bin
Step-by-step:
- Keep the caddy on the counter or under the sink for daily scraps.
- Empty it into your main backyard station every 1-2 days to avoid odor buildup.
- Rinse the caddy occasionally with warm water and a splash of vinegar.
- Position your main bin along a clear, short path from the kitchen door so the trip never feels like a chore.
Keeping Your Compost Station Healthy
Building the bin is the easy part keeping it productive takes a little ongoing attention. A few habits that make a real difference:
- Turn regularly. Oxygen speeds decomposition and prevents the sour smell that comes from anaerobic (airless) conditions.
- Watch the moisture. Your pile should feel like a wrung-out sponge damp, not soggy, and not bone dry.
- Balance greens and browns. Too many greens creates a slimy, smelly mess; too many browns slows everything down.
- Chop it small. Smaller pieces break down faster, so give kitchen scraps a rough chop before tossing them in.
- Keep meat and dairy out of traditional bins (bokashi is the exception) to avoid pests and odor.
If you’re building your compost station as part of a bigger garden overhaul, it’s worth working it into your seasonal routine.
Add it to your August garden to-do list or your September checklist so it doesn’t get forgotten once the fall leaves start piling up which, conveniently, is exactly the kind of brown material your compost will be craving.
Where to Put Your Compost Station
Location matters almost as much as the bin design itself. Look for:
- Partial shade. Full sun can dry out a pile too quickly; deep shade can leave it too wet.
- Good drainage. Avoid low spots where water pools after rain.
- Reasonable distance from the house, especially in warm climates, to keep any occasional odor from drifting toward open windows.
- Easy access from both the kitchen and the garden beds where the finished compost will end up.
If you’re still finalizing your yard layout, this is worth thinking through alongside other structural additions the same way you’d plan out a garden trellis or a fire pit area before committing to a permanent spot.
Final Thoughts
Composting isn’t complicated once you find the system that matches how you actually garden.
Maybe that’s a low-effort wire ring tucked behind the shed, or maybe it’s a full three-bin operation that keeps your raised beds fed all season long.
Whichever of these twenty ideas you choose, the payoff is the same free, nutrient-rich soil for every bed, pot, and border you tend.
Pick the one that fits your space, gather the materials, and get that pile started this weekend. Your garden will thank you by next spring.
If you’re new to all this and want the bigger picture beyond composting, my new gardener checklist rounds out everything else I wish someone had told me when I started.
