
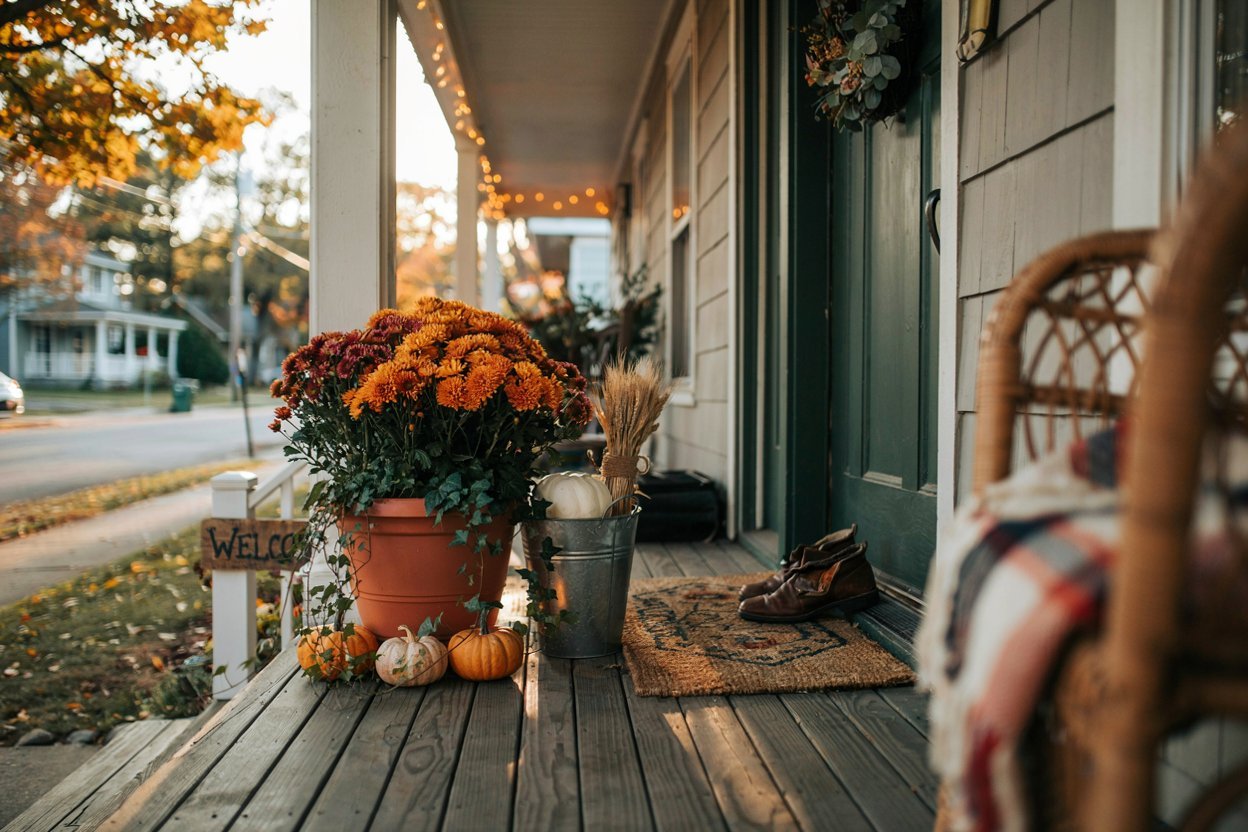

My porch is the first thing I fix every September, before the pumpkins even come out of storage.
Something about swapping tired summer blooms for mums, mini pumpkins, and trailing greenery makes the whole house feel ready for sweater weather.
If you’ve been eyeing those gorgeous fall porch displays on Pinterest and wondering how to recreate one without spending a fortune, you’re in exactly the right place.
I’m walking you through everything I’ve learned from years of building fall planters, so you can skip the trial and error I went through.
Why Fall Planters Deserve More Attention Than You Think
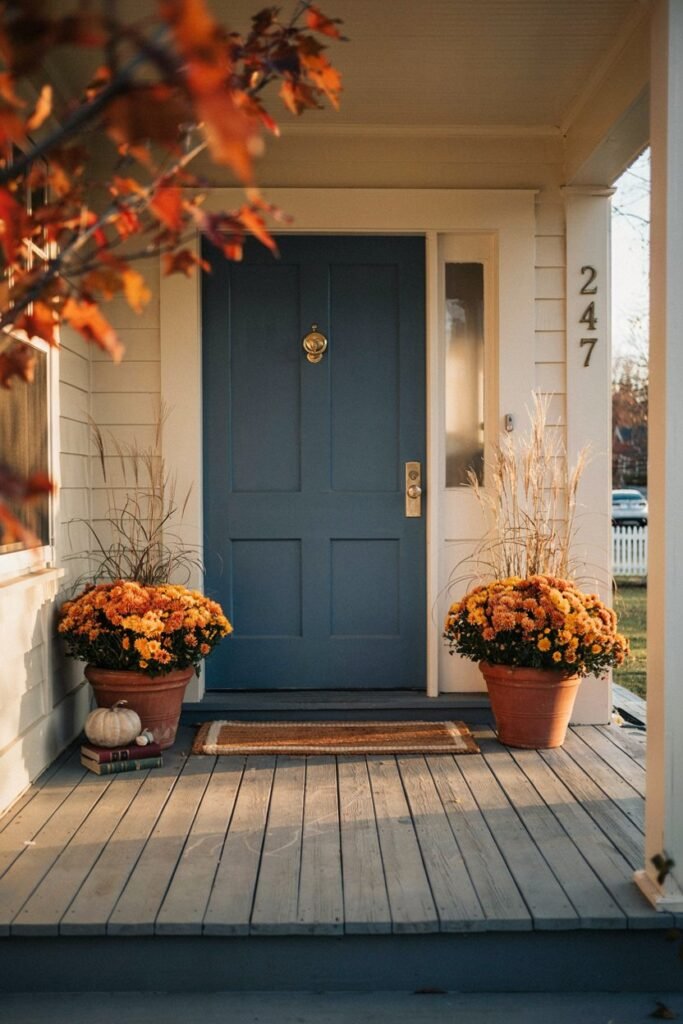
Most homeowners treat fall décor as an afterthought squeezed in between back-to-school chaos and Halloween shopping.
But your front porch planters do more heavy lifting for curb appeal than almost any other seasonal decoration.
They’re the first thing guests, delivery drivers, and neighbors see, and unlike a wreath or a doormat, a well-built planter is a living thing that keeps evolving and blooming for weeks.
A great fall planter isn’t just about jamming a mum into a pot and calling it done.
It’s about layering height, texture, and color the same way you would arrange flowers in a vase, then choosing plants that can actually handle dropping temperatures.
If you want a deeper dive into color pairing and design principles for seasonal pots, I’ve got a whole guide on building stunning fall container gardens that pairs nicely with the projects below.
What Every Gardener Needs to Know Before Starting
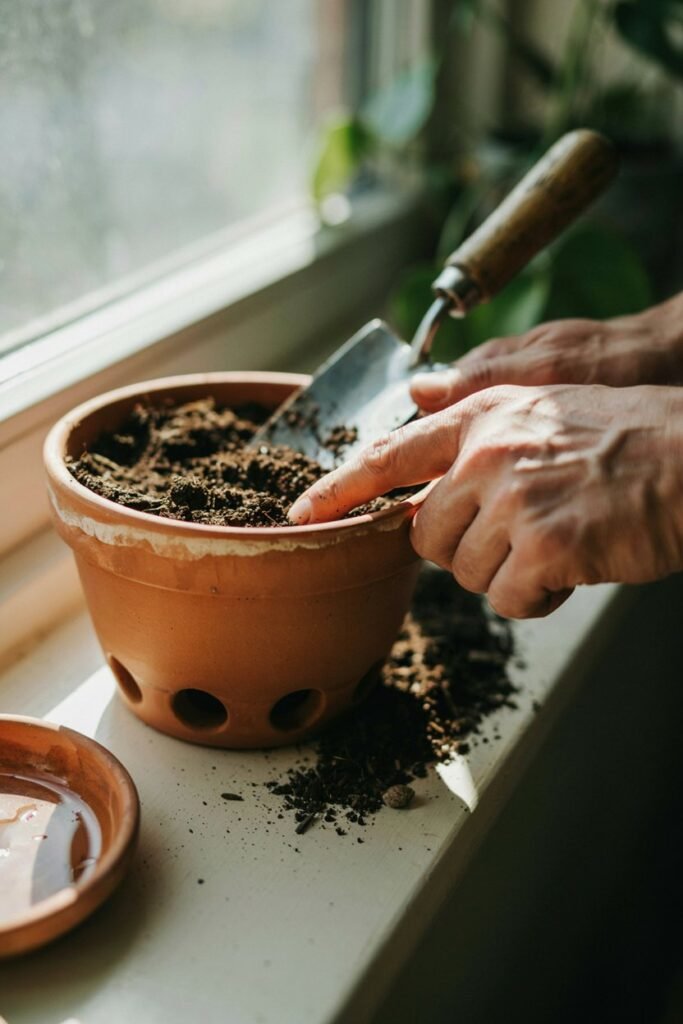
Before you buy a single mum, there are a few fundamentals that will make or break your fall planters. I’m listing these first because skipping them is the number one reason DIY planters fail within a few weeks.
1. Drainage is non-negotiable. Fall brings more rain in most regions, and a pot without proper drainage holes will drown your plants’ roots within days. If you’re repurposing a container that doesn’t have holes, drill some before you plant anything.
2. Match plants to your first frost date. Not everything labeled “fall plant” tolerates a hard freeze.
Pansies, ornamental kale, and mums can handle a light frost, but tender foliage like coleus or sweet potato vine will blacken and die the first cold night.
Know your zone and your average first frost date before you commit to a plant list.
3. Soil matters more than the container. A gorgeous ceramic urn filled with old, compacted summer soil will still produce weak, leggy plants.
Always refresh your soil, or at minimum amend it with fresh compost, when you switch out a planter for the season.
4. Think in thirds. Professional container designers use a simple formula: a “thriller” for height and drama, a “filler” for body, and a “spiller” that cascades over the edge.
Keeping this ratio in mind will instantly make your arrangements look more polished, whether you’re using pumpkins, mums, or grasses.
5. Weight and placement matter for porches specifically. Porches often get more shade than open yards, and railings or overhangs can block rain, meaning your planters may need manual watering even in a rainy season.
Check your specific porch’s light exposure before choosing plants, since a north-facing porch will need shade-tolerant options like heuchera or ferns rather than sun-loving mums.
If you’re new to gardening in general and want the broader basics nailed down before tackling anything seasonal, my new gardener checklist covers everything I wish someone had told me when I started.
The Supplies You’ll Need
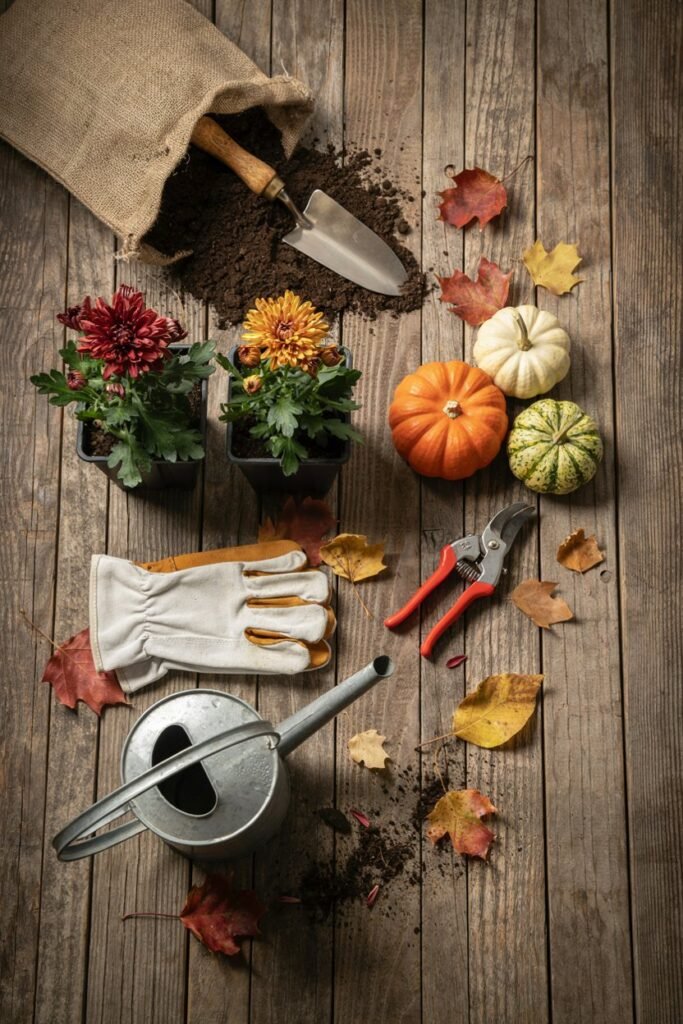
I always recommend gathering everything before you start, because running back to the store mid-project kills momentum.
Here’s the master list, broken into categories so you can see exactly what applies to your chosen project.
Containers and Structure
- A container or planter box (at least 12–14 inches wide for a full look)
- Pot feet or bricks (to lift containers off the porch floor for drainage)
- Landscape fabric or a coffee filter (to line the bottom and prevent soil from washing out of drainage holes)
- A drill with a masonry or general-purpose bit (if your container needs drainage holes added)
Soil and Amendments
- Fresh potting mix (not garden soil, which compacts too densely in containers)
- Compost or slow-release fertilizer
- Perlite (optional, for extra drainage in heavier mixes)
Plants
- A “thriller” plant for height (ornamental grass, dried millet, or branches)
- A “filler” plant for body (mums, asters, ornamental kale, or pansies)
- A “spiller” plant for cascading edges (creeping jenny, ivy, or trailing sedum)
Seasonal Accents
- Mini pumpkins or gourds
- Dried corn stalks or wheat bundles
- Faux or real fall foliage sprigs (maple leaves, bittersweet vine)
- Cinnamon sticks or dried orange slices for texture (in smaller arrangements)
Tools
- Hand trowel
- Pruning snips
- Gardening gloves
- Watering can with a narrow spout for precision watering
If you don’t already own a solid set of basics, it’s worth checking my breakdown of essential gardening tools every gardener should have so you’re not improvising with kitchen utensils (we’ve all done it).
Project 1: The Classic Layered Mum and Pumpkin Planter
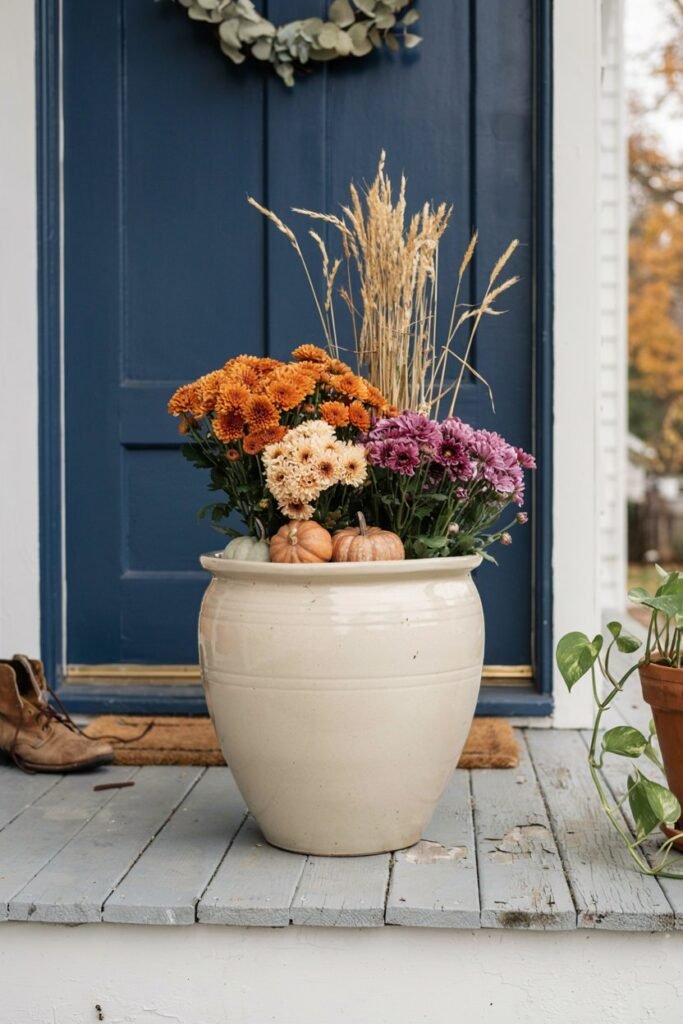
This is the planter everyone pictures when they think “fall porch,” and it’s the easiest place to start if you’re newer to container design.
What you’ll need:
- One large ceramic or resin planter
- Three mums in complementary or contrasting colors (think burnt orange, deep purple, and cream)
- One or two mini pumpkins
- A bundle of dried wheat or pampas grass stems
- Fresh potting soil
- Sphagnum moss (optional, for finishing the surface)
How to build it:
Start by lining the bottom of your container with landscape fabric if it has large drainage holes, which keeps soil from washing out while still letting water pass through. Fill the container about two-thirds full with fresh potting mix.
Position your tallest element first, whether that’s a mum with more height or a bundle of dried grass stems pushed into the soil at the back or center of the pot. This creates your visual anchor.
Next, nestle your mums around the base, angling them slightly outward so they aren’t all facing the same direction.
Mums are usually sold pot-bound, so gently loosen the root ball with your fingers before planting to encourage the roots to spread into the new soil.
Tuck your mini pumpkins into any gaps near the front of the arrangement. Since pumpkins won’t root into the soil, you can simply rest them on the surface or nestle them slightly into the mix for stability.
Finish by covering any exposed soil with sphagnum moss for a tidier look, then water thoroughly until it drains from the bottom.
Maintenance tip: Mums need consistent moisture but hate soggy roots, so check the top inch of soil daily and water only when it feels dry.
For a deeper understanding of watering rhythms and seasonal plant care, my flower garden maintenance checklist breaks this down season by season.
Project 2: The Rustic Wooden Crate Planter
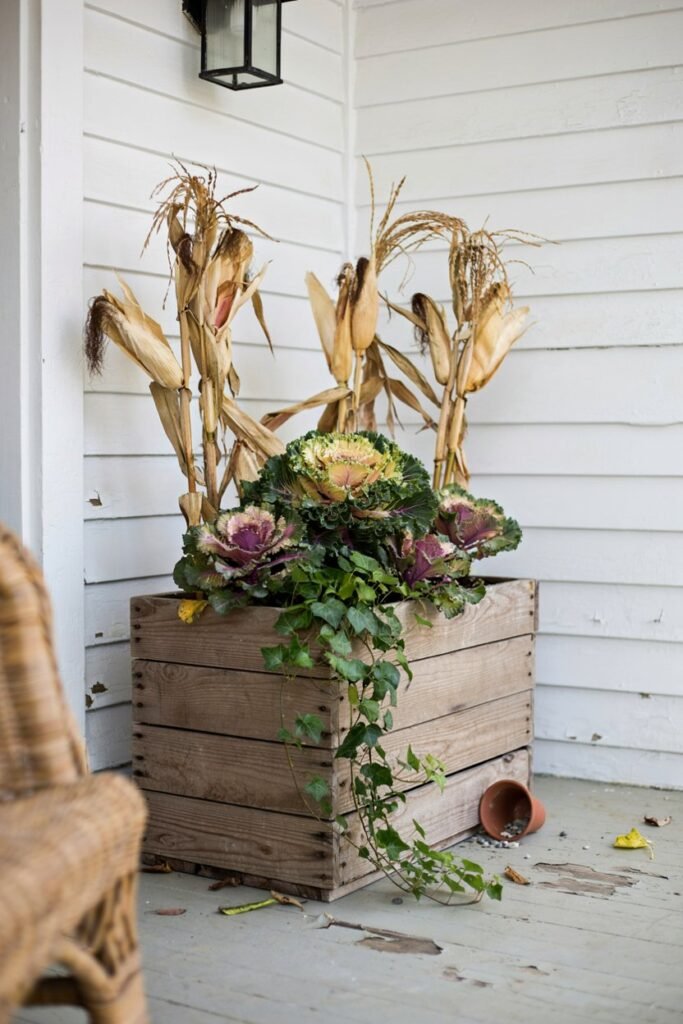
If your porch has a farmhouse or cottage feel, a wooden crate planter brings texture that a plastic or ceramic pot simply can’t match.
What you’ll need:
- A wooden crate (thrifted, repurposed, or new)
- A plastic liner or several plastic nursery pots that fit inside
- Ornamental kale or cabbage
- Trailing ivy or creeping jenny
- Dried corn stalks
- Burlap ribbon (optional, for wrapping the crate’s edges)
How to build it:
Wooden crates weren’t built to hold wet soil directly, so line the interior with a heavy-duty plastic liner or simply nest a few plastic nursery pots inside that are already planted.
This protects the wood from rot and lets you swap plants easily each season.
If using a liner, poke a few small drainage holes in the bottom of the plastic before filling with soil, then drill or hand-poke matching holes through the crate’s base so water has somewhere to go.
Plant your ornamental kale toward the back for its ruffled, cabbage-like texture and deep purple-to-cream coloring, which holds up beautifully even after light frosts.
Add trailing ivy along the front edge, where it will spill over the crate’s slats as it grows.
For height, tuck dried corn stalks or tall dried grasses into the back corners, securing them in the soil at an angle for visual interest rather than standing perfectly straight.
Wrap the crate’s top edge with burlap ribbon if you want a more finished, styled look, securing it with hot glue or a staple gun on the underside where it won’t show.
Maintenance tip: Wood crates are more susceptible to moisture damage than most containers, so keep an eye out for any soft or discolored spots developing on the wood over the following weeks.
If you ever notice fuzzy white or gray growth on the soil surface inside, that’s mold, and I’ve written a full guide on how to get rid of mold in a potted plant that walks through simple, safe fixes.
Project 3: The DIY Concrete Pumpkin Planter
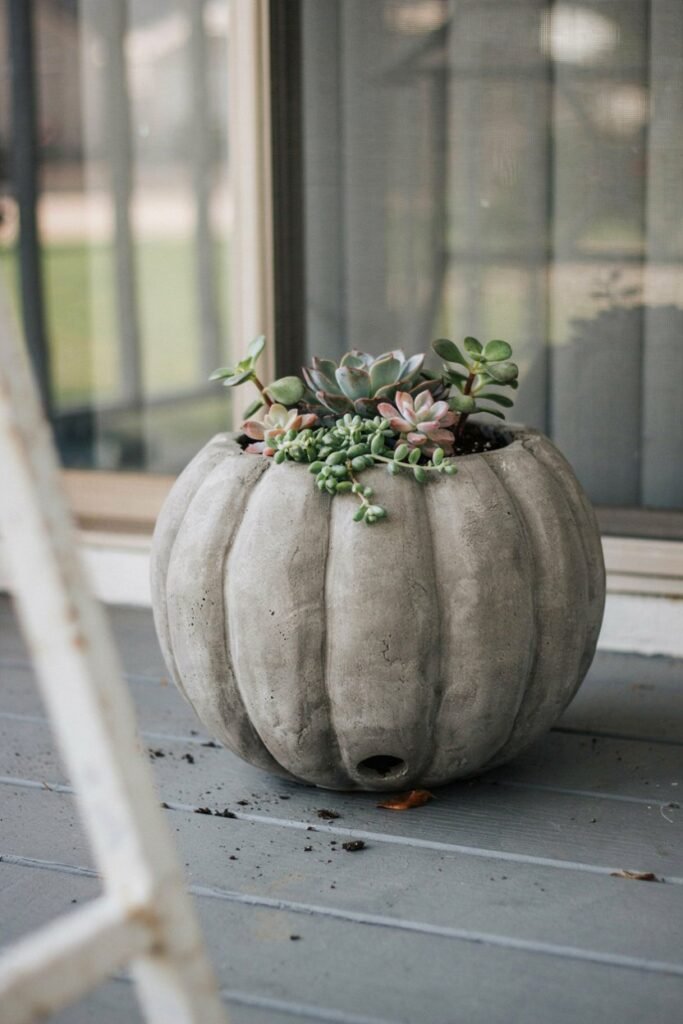
This one takes a little more effort but results in something genuinely unique that you won’t find at any garden center.
What you’ll need:
- Quick-setting concrete mix
- A pumpkin (real, for a mold, ideally a firm, smooth-skinned variety)
- Cooking spray or petroleum jelly
- A mixing bucket and stir stick
- A drill (for adding a drainage hole after curing)
- Small succulents or fall annuals for planting
How to build it:
Choose a pumpkin with a relatively flat bottom so it can sit upright while curing.
Coat the entire outer surface generously with cooking spray or petroleum jelly, which prevents the concrete from bonding permanently to the pumpkin’s skin.
Mix your concrete according to the package instructions until it reaches a thick, oatmeal-like consistency, not too runny or it won’t hold its shape as it drapes over the pumpkin.
Using gloved hands, apply the concrete mixture over the top and sides of the pumpkin in an even layer, about half an inch to an inch thick, leaving the bottom open.
Smooth the surface as best you can, though a slightly textured, organic look actually suits the pumpkin shape.
Let the concrete cure undisturbed for at least 24 to 48 hours in a shaded, dry spot.
Once fully hardened, gently pull and scrape away the decomposing pumpkin flesh from the inside, which will come away easily thanks to the release agent.
Drill a drainage hole in the base once the shell is fully cured and dry. Fill with potting soil and plant small succulents, sedum, or a single compact mum inside.
This method borrows heavily from general concrete container casting, so if you want to expand into more shapes and techniques beyond pumpkins, my complete guide to DIY cement pots covers the full process in more detail, including troubleshooting cracks and choosing the right mix ratio.
Project 4: The Vertical Tiered Fall Display
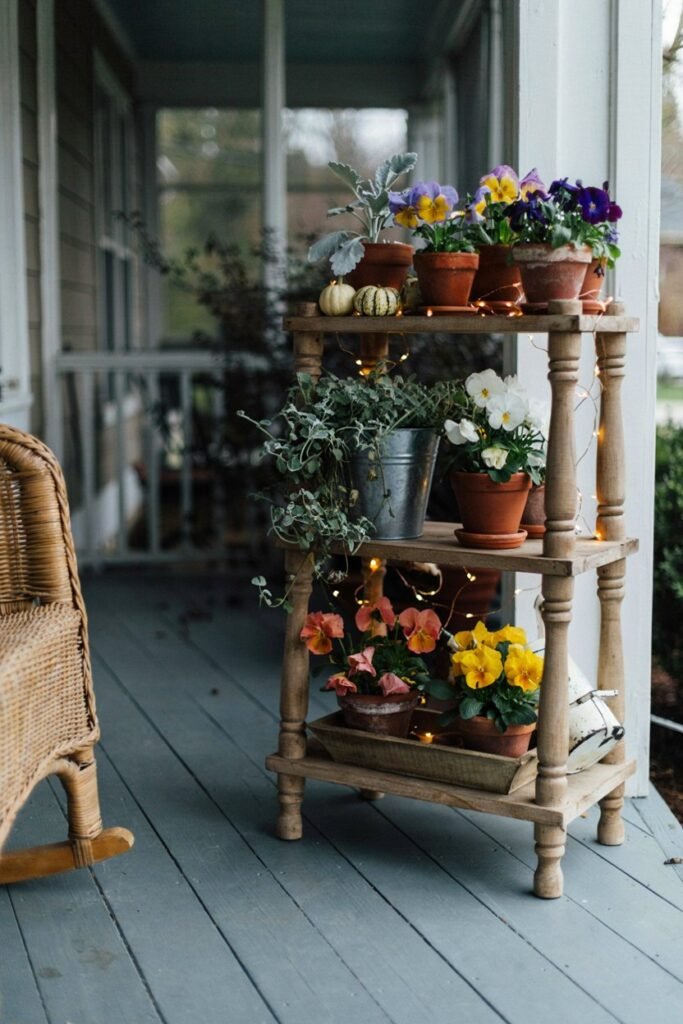
If your porch is narrow or you want to make a bigger visual impact without taking up much floor space, a tiered plant stand transforms a flat display into something with real presence.
What you’ll need:
- A wooden or metal tiered plant stand (three tiers work well)
- A mix of small and medium pots in varying heights
- Mixed fall annuals: pansies, violas, and dusty miller
- Small gourds and mini pumpkins for the top tier
- Battery-operated string lights (optional, for evening ambiance)
How to build it:
Set up your tiered stand on a level section of the porch, ideally somewhere it catches at least a few hours of indirect light per day.
Assign each tier a role: bottom for your fullest, boldest plants, middle for medium color pops, and top for smaller accents like pumpkins or a single trailing plant.
Plant pansies and violas on the lower tiers since their compact size and cheerful color range (deep purple, burnt orange, warm yellow) fill space quickly. Dusty miller’s silvery foliage works as a neutral buffer between bolder colors, so tuck a few pots of it between your brighter blooms.
Reserve the top tier for a mix of small gourds, a mini pumpkin or two, and maybe a single trailing plant like ivy that can spill down toward the middle tier, visually connecting the levels.
If you want extra evening charm, weave battery-operated string lights loosely through the tiers before finishing the arrangement, tucking the battery pack behind a pot where it’s hidden from view.
Maintenance tip: Because tiered stands expose plants to more airflow and sun on all sides, they tend to dry out faster than ground-level planters.
Check soil moisture on each tier individually rather than assuming they’ll all need water at the same rate.
Project 5: The No-Fuss Faux Fall Planter
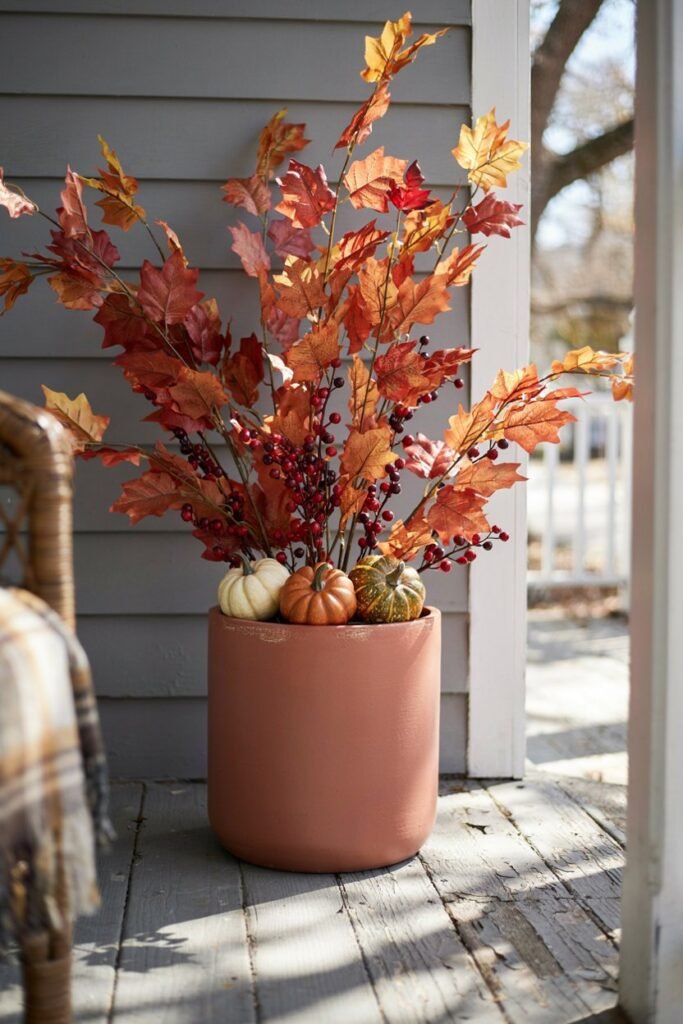
Not every porch needs live plants, especially if you travel often or your porch gets brutal afternoon sun that fries anything real. A faux arrangement, done well, can look just as rich.
What you’ll need:
- A weatherproof resin or fiberglass planter
- Floral foam block (the dry kind, made for silk arrangements)
- Faux fall stems (maple leaf picks, wheat stalks, faux berries)
- A few faux or real mini pumpkins
- Hot glue gun
How to build it:
Wedge the floral foam block into your container so it fits snugly and sits an inch or two below the rim. This foam is what your faux stems will anchor into, so make sure it’s the dry floral type, not the wet kind meant for fresh flowers.
Insert your tallest faux stems first, positioning them off-center for a more natural look rather than dead center like a Christmas tree.
Layer in medium-height stems next, angling some outward so the arrangement doesn’t look flat when viewed from the porch steps.
Add faux berries or smaller filler stems to close any visible gaps in the foam, then finish by nestling mini pumpkins around the base, securing them with a small dab of hot glue if your porch gets windy.
Why this works: A well-built faux arrangement can last multiple seasons if stored indoors during the off-season, making it a smart option if you want fall curb appeal without replanting every single year.
Choosing the Right Plants for Your Region
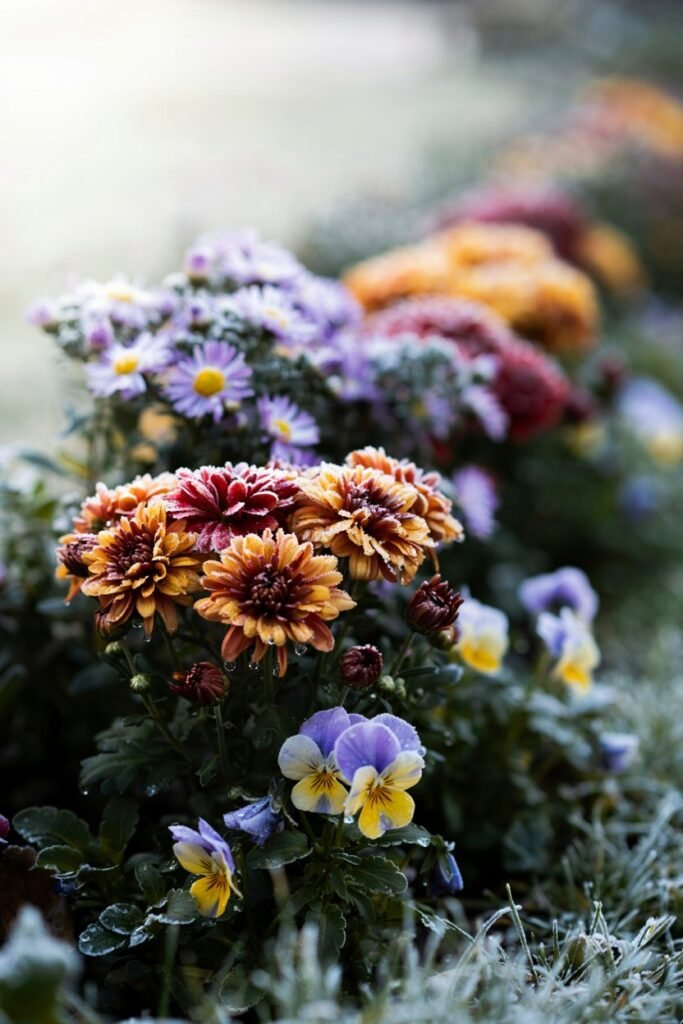
One of the most common mistakes I see is gardeners buying whatever looks pretty at the store without checking whether it’ll actually survive their local fall weather.
A few reliable options across most growing zones include mums, ornamental kale, pansies, asters, and dusty miller, all of which tolerate light frost and cooler nights far better than typical summer annuals.
If you want blooms that keep going well past the first cool snap and even survive a light frost, I put together a list of 15 fall flowers that bloom until frost, which is worth a look before you finalize your plant list for any of the projects above.
Fall Planter Care Through the Season
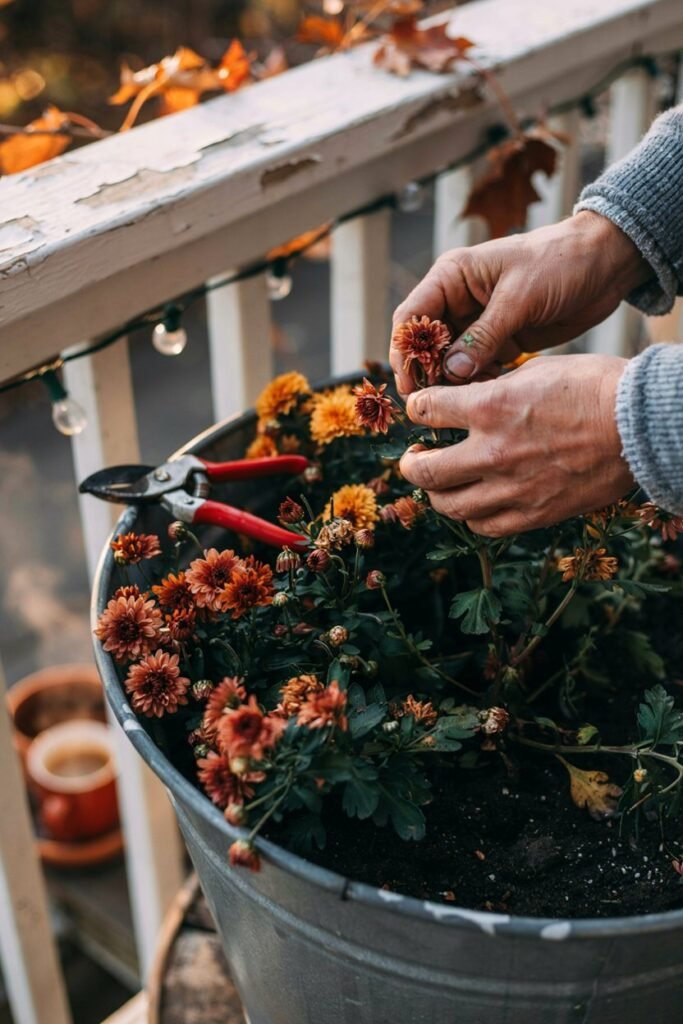
Building the planter is honestly the easy part. Keeping it looking good for two to three months takes a little ongoing attention.
Deadhead regularly. Removing spent blooms from mums and pansies encourages new buds rather than letting the plant put energy into seed production.
Watch for pests. Cooler weather doesn’t mean pests disappear entirely. Aphids and slugs still show up on fall plantings, especially on tender new growth. My garden pest prevention checklist covers simple, non-toxic ways to keep bugs from wrecking your porch display.
Adjust watering as temperatures drop. Plants need less water as the weather cools and days shorten, so cut back your watering frequency gradually through October and November rather than sticking to a summer schedule.
Refresh as needed. If a mum finishes blooming before the season ends, don’t be afraid to swap it out for a fresh one or a pot of pansies rather than leaving a tired, brown patch in your arrangement.
Prune leggy growth. If any of your filler or spiller plants start looking stretched and thin, a light trim encourages fuller, bushier regrowth rather than more of the same sparse stems.
For general tips on encouraging fuller growth in almost any plant, this guide on making plants grow bushier applies just as well to porch planters as it does to houseplants.
Timing Your Planters Right
Fall porch planters typically go up anywhere from early September through mid-October, depending on your region and how early your local nurseries stock mums and ornamental kale.
Planting too early, while it’s still consistently hot, can stress cool-weather plants like pansies before they’ve even had a chance to establish. Planting too late risks missing the peak color window before a hard frost ends the season entirely.
If you like working from a seasonal checklist so you never miss the right planting window, both my September gardening checklist and October gardening checklist lay out exactly what to plant, prune, and prep during those months.
Styling Tips to Make Your Porch Look Pulled Together
A few small styling choices make the difference between a porch that looks like a collection of random pots and one that looks intentionally designed.
Repeat a color, not just a theme. Pick one or two accent colors, like a deep burgundy and warm gold, and repeat them across all your planters, your door wreath, and any additional accents like a welcome mat.
Vary height, but keep it balanced. If you’re using multiple planters flanking your front door, they don’t need to be identical, but they should feel like a matched pair in scale and color story.
Don’t overcrowd the walkway. It’s tempting to keep adding pots, but leaving clear walking space matters both for safety and so the arrangement doesn’t feel cluttered.
Consider what frames your porch. If you have a fence, gate, or garden bed leading up to your porch, coordinating that space with your entryway planters creates a cohesive first impression.
My guide to garden entrance ideas is a great next step if you want that same fall styling to extend beyond just the porch itself.
Common Mistakes to Avoid
Even experienced gardeners fall into a few predictable traps with seasonal planters, so here’s what to watch for.
Using leftover summer soil. Old, compacted soil from your summer annuals won’t support healthy fall root growth. Always refresh at least the top few inches, if not the entire pot.
Ignoring your porch’s specific microclimate. A covered porch gets less rain and often less direct light than the rest of your yard, which changes both your plant choices and your watering schedule.
Skipping the “thriller, filler, spiller” structure. Planters that use only one plant type, like a pot of nothing but mums, tend to look flat compared to a layered arrangement with varied height and texture.
Forgetting about weight and wind. Tall arrangements in lightweight pots can tip over in strong fall winds. Choose heavier ceramic or concrete containers for anything with significant height, or add rocks to the base of lighter pots for stability.
Not accounting for frost timing. Planting tender annuals too close to your first expected frost date wastes both money and effort when a single cold night wipes out the display.
Choosing the Right Container Material
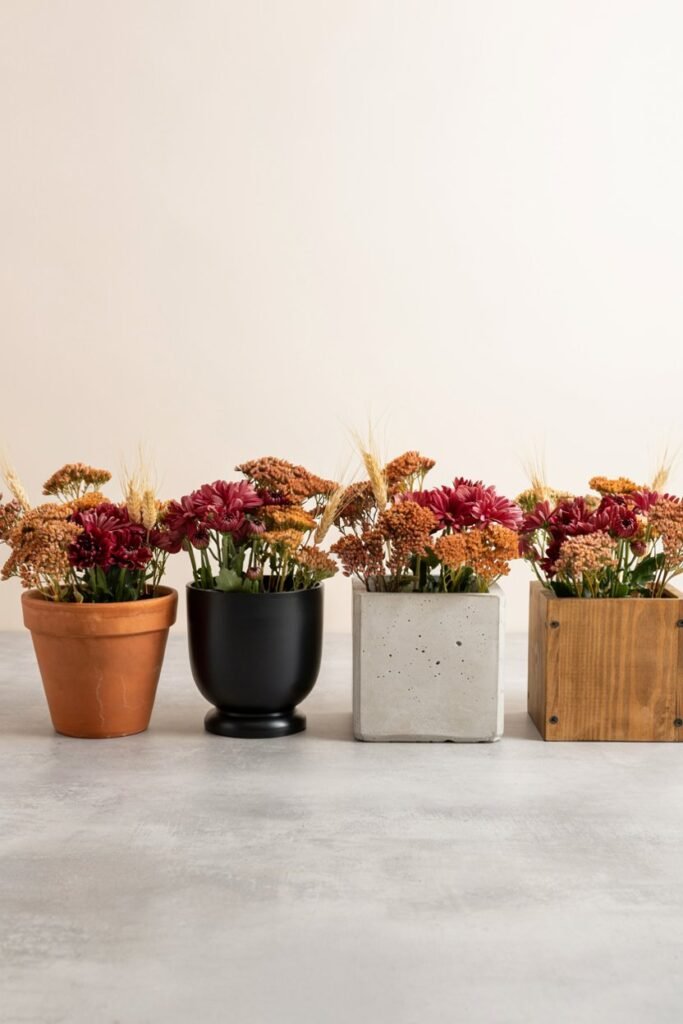
The container itself does more than hold soil, it sets the entire tone of your porch display, and different materials behave very differently once the weather turns cold and wet.
Terracotta is classic and breathable, which helps prevent overwatering, but it’s also porous and can crack if water freezes inside the clay during an early cold snap.
If you love the look, bring terracotta indoors or into a garage once temperatures start dropping below freezing overnight.
Resin and fiberglass planters are lightweight, weather-resistant, and increasingly designed to mimic the look of stone or ceramic, making them a practical choice for anyone who wants low maintenance without sacrificing style.
Concrete containers, whether store-bought or the DIY pumpkin version above, are heavy and extremely durable through wind and rain, though they take longer to warm up in spring, which isn’t a concern for fall use but is worth knowing if you plan to reuse the container year-round.
Wood brings warmth and texture that pairs beautifully with a farmhouse-style porch, but it needs a liner and occasional sealing to prevent rot, especially through a rainy autumn.
Metal galvanized buckets and tins have become popular for rustic fall displays, but keep in mind metal conducts cold quickly, which can stress plant roots on an unusually cold night even before the air temperature itself would be a concern.
A Quick Word on Budget
You genuinely don’t need to spend a lot to make your porch look magazine-ready.
Thrifted crates, repurposed nursery pots, and a few well-chosen mums can look just as intentional as an expensive matched set from a garden center.
I’d rather see someone spend their budget on quality soil and two or three healthy, well-established plants than stretch that same money across five smaller, weaker ones.
A full, slightly smaller arrangement will always read better from the street than a sparse, oversized one.
If cost is a bigger factor for you this season, focus your spending on the plants themselves since containers can almost always be sourced secondhand, repurposed from something you already own, or built by hand using the concrete method above.
Transitioning From Summer to Fall Without a Hard Reset
You don’t necessarily need to rip out every summer plant the moment September arrives.
Many gardeners ease into the transition by removing only the most heat-stressed or leggy summer annuals first, replacing just those with mums or pansies while leaving hardier perennials or ornamental grasses in place.
This staggered approach saves money and avoids that jarring “everything changed overnight” look, letting your porch evolve gradually as the weeks get cooler.
By mid-October, most of the original summer planting will have been swapped out naturally, and you’ll land on a full fall display without ever doing one big, disruptive overhaul.
Frequently Asked Questions
How long do fall porch planters typically last? With proper care, most fall planters look good from early September through late November or even into December in milder climates, especially if you choose frost-tolerant plants like ornamental kale and mums.
Can I reuse the same soil from my summer containers? It’s best to refresh at least the top layer of soil, if not replace it entirely, since summer plants deplete nutrients and compact the mix over the growing season.
Do fall planters need full sun? It depends on your plant choices. Mums and pansies generally prefer at least four to six hours of sun, while ornamental kale and heuchera tolerate more shade, which makes them better suited to covered porches.
What’s the easiest fall planter for a beginner? The classic layered mum and pumpkin planter is the most forgiving option since mums are widely available, low-maintenance, and easy to arrange even without much design experience.
How do I keep pumpkins from rotting in my planter? Since pumpkins aren’t planted into the soil, keeping them slightly elevated on a small saucer or dry moss layer, rather than directly on wet soil, helps slow decay and extends how long they’ll look good.
Bringing It All Together
The best part about fall porch planters is how forgiving the season actually is.
Unlike a delicate summer arrangement that wilts under one hot afternoon, most fall plants are built for cooler, more unpredictable weather, which gives you a much wider margin for error while you’re still learning what works.
Start with one project from this list, get comfortable with the basic layering technique, and you’ll find yourself building bigger and more ambitious displays every year after this one.
If you build any of these, I’d genuinely love to see how your porch turned out. Happy planting, and here’s to a beautifully cozy fall season ahead.
