
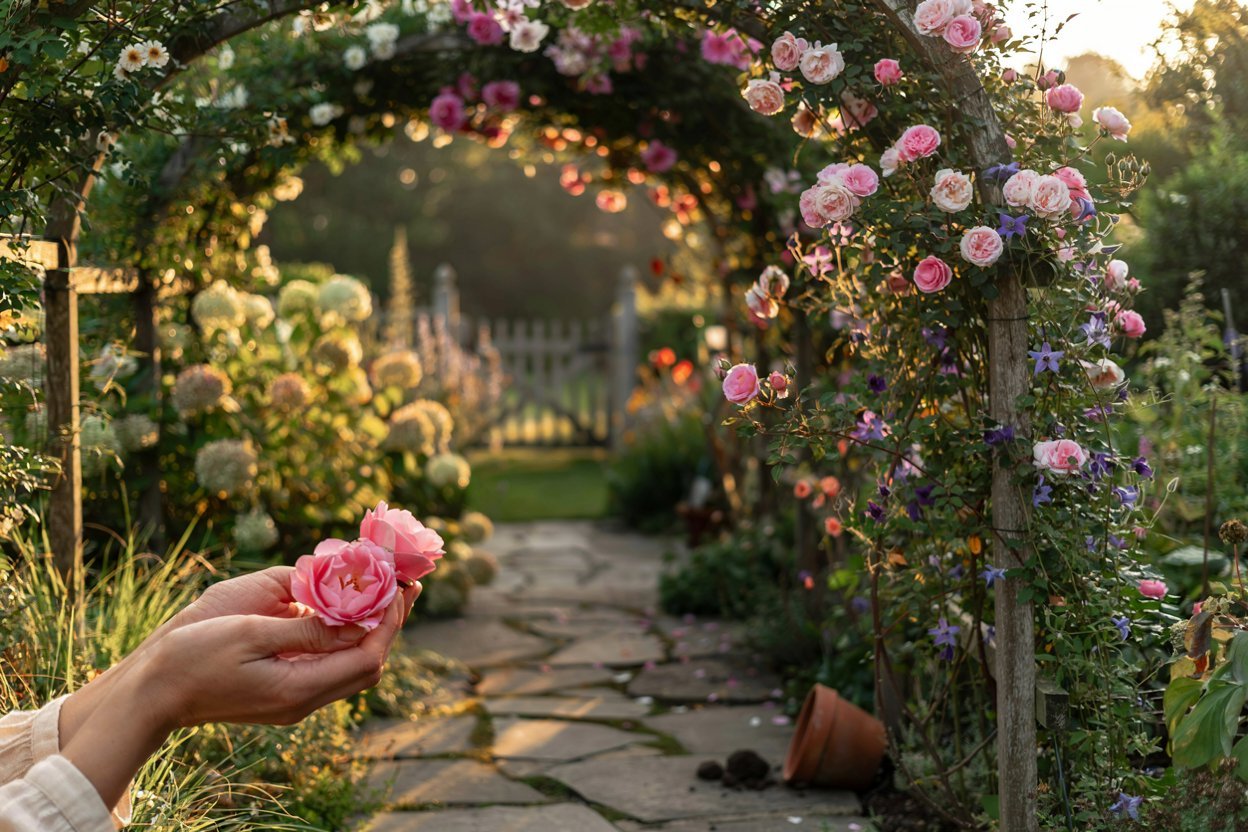

I have always believed that a garden without height feels a little unfinished, like a room with no artwork on the walls.
My own backyard didn’t truly feel like “mine” until I leaned my first wobbly trellis against the fence and watched a clematis vine finally have somewhere beautiful to climb.
That one small addition changed everything about how the space felt, layered, romantic, and so much bigger than it actually was.
If you’ve been staring at a flat, ground-level garden and wondering how to give it that dreamy, storybook feeling, you’re exactly who I made this list for. Let’s add some height together, shall we?
Why Trellises Are a Garden’s Best-Kept Secret
Before we get into the list, let’s talk about why height matters so much.
A trellis does double duty: it gives climbing plants a home, and it draws the eye upward, making even a tiny yard feel expansive.
If you’ve already explored vertical garden ideas for small spaces, you know that going up instead of out is one of the smartest moves a gardener can make.
Trellises also create privacy, soften harsh fence lines, and give your garden that lush, “cottagecore” layered look we all secretly want.
Alright, my dear, let’s get into the good stuff.
Choosing the Right Trellis Material First
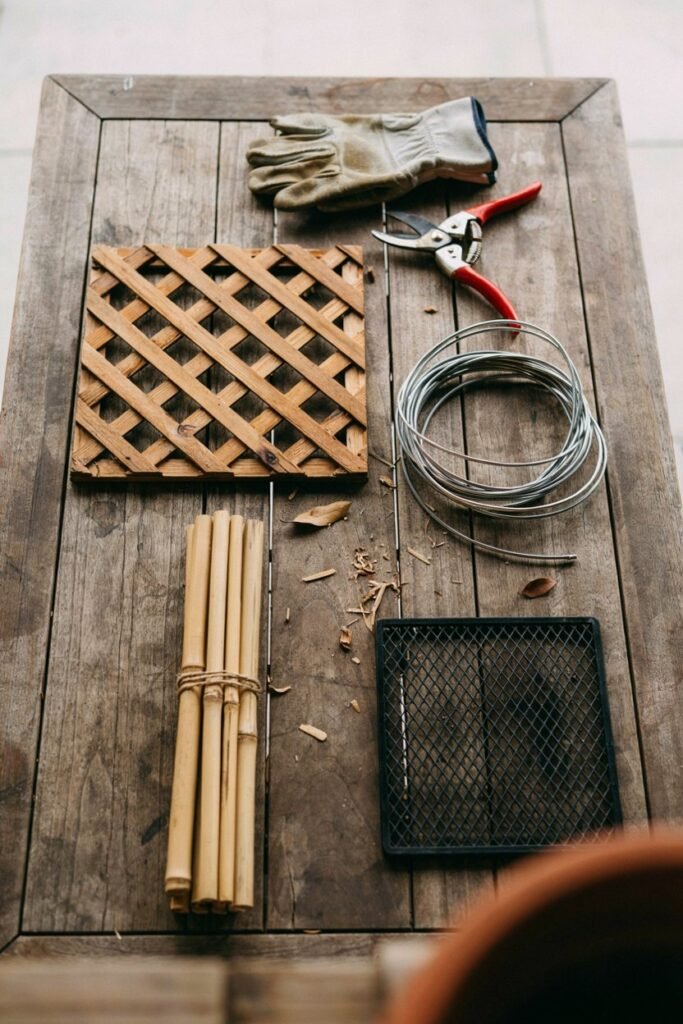
Before you fall in love with a particular look, it helps to think about what your trellis will actually be holding up, because that decision saves you so much frustration later.
Wood, whether it’s cedar, redwood, or pressure-treated pine, gives you that soft, cottage-garden warmth and is easiest to customize with a saw and a few screws, but it does need occasional resealing to fight off rot.
Metal, like powder-coated steel or wrought iron, is the better choice for heavier climbers such as wisteria or climbing roses, since it simply won’t sag or splinter under years of woody growth.
Bamboo and willow are wonderful for lightweight annual vines, sweet peas, morning glories, and beans, but they break down within a few seasons and should be treated as temporary, renewable structures rather than permanent fixtures.
And vinyl or PVC trellises, while less charming to look at, are practically maintenance-free and shrug off moisture, which makes them a smart pick for humid climates or for gardeners who’d rather spend their weekends actually enjoying the garden than sealing wood.
A good rule of thumb I always share with friends: match the strength of your structure to the eventual weight of your plant, not the weight it has today as a tiny seedling. So many trellis disasters happen because a delicate-looking lattice panel was asked to hold up three years of thick, woody wisteria growth it was never built for.
Classic & Romantic Trellises
Lattice panels, obelisks, and rose arches for a soft, storybook cottage garden feel. Perfect if you love flowers like clematis, sweet peas, and climbing roses
1. The Classic Wooden Lattice Trellis
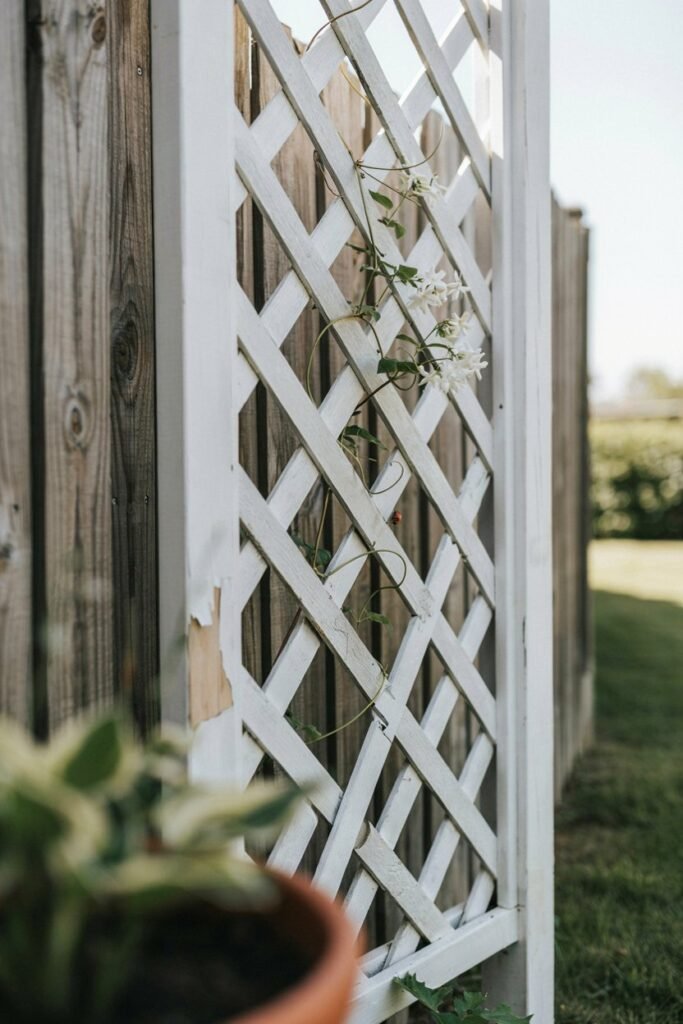
There’s a reason this one never goes out of style. A simple crisscross lattice panel, painted white or left natural, is the backbone of the romantic garden look.
What you’ll need:
- Pre-made wood lattice panel (or 1×2 furring strips to build your own)
- Two 4×4 wood posts
- Exterior-grade screws or galvanized nails
- Post-hole digger and quick-set concrete
- Exterior wood sealant or paint
How to achieve it: Purchase a pre-made lattice panel from your local hardware store or build one from 1×2 furring strips stapled in a diamond pattern.
Anchor it into the ground with two sturdy posts set in concrete, or attach it directly to a fence.
Care tip: Reseal or repaint wood lattice every two years to prevent rot, and check the base each spring for soft, water-damaged wood before your climbing plants get too heavy for it.
2. Obelisk Trellis for Cottage Charm
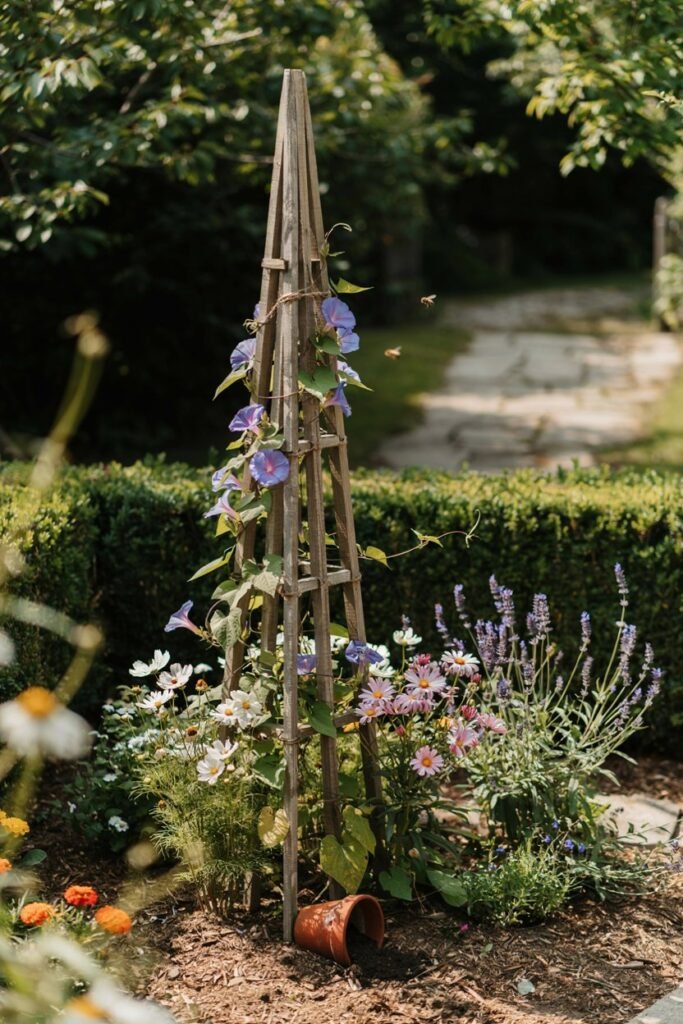
An obelisk is that tall, pointed, almost fairy-tale-looking structure you see anchoring the center of a flower bed. It’s a showstopper even before anything climbs it.
What you’ll need:
- Freestanding wood or metal obelisk kit
- Rubber mallet (to set the legs)
- Your chosen climbing plant
- Garden twine for the first few weeks of training
How to achieve it: Choose a freestanding wood or metal obelisk and push its legs firmly into loosened soil, then plant your climber directly at its base so the roots wrap naturally around each leg.
Care tip: Rotate young vines gently around the obelisk every week or two in the beginning; they need a little guidance until they learn to climb on their own.
3. Sweet Pea Arch Trellis
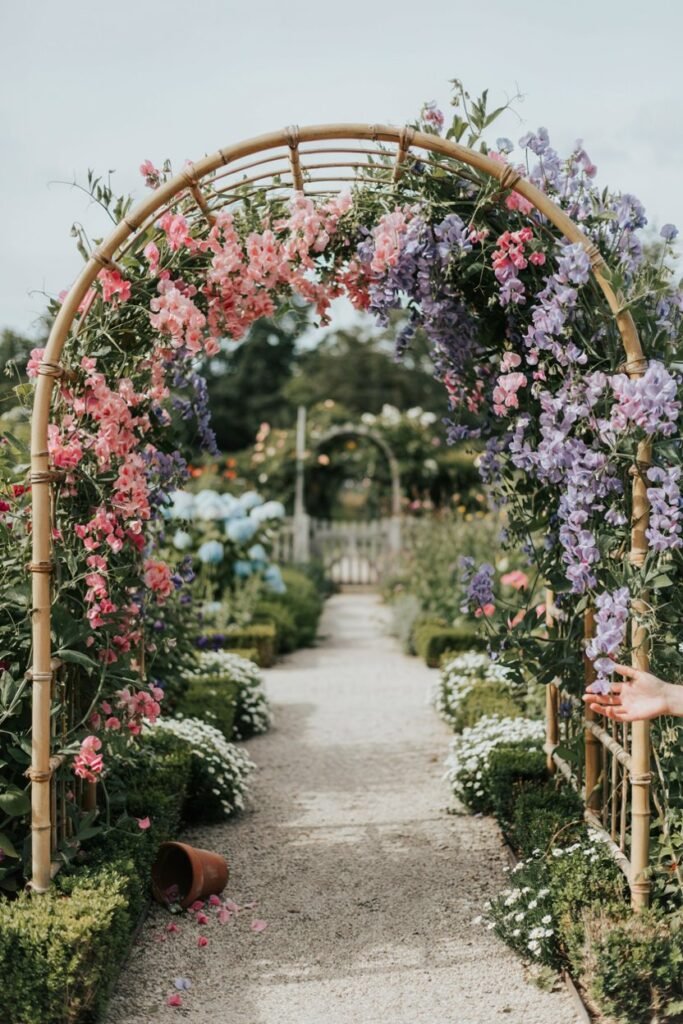
If you love a cutting garden, a sweet pea arch is pure joy. These delicate, fragrant blooms practically beg for something to scramble up.
What you’ll need:
- One 16-ft cattle panel or 6–8 bamboo poles
- Zip ties or garden wire
- Two T-posts or sturdy wood stakes
- Sweet pea seeds
- Balanced liquid fertilizer
How to achieve it: Use bent cattle panel or bamboo poles tied into an arch shape over a garden path, then direct-sow sweet pea seeds at the base in early spring.
Care tip: Sweet peas are hungry little climbers, so feed them a balanced liquid fertilizer every two weeks and keep the soil consistently moist for the biggest blooms.
4. Rose Climbing Trellis
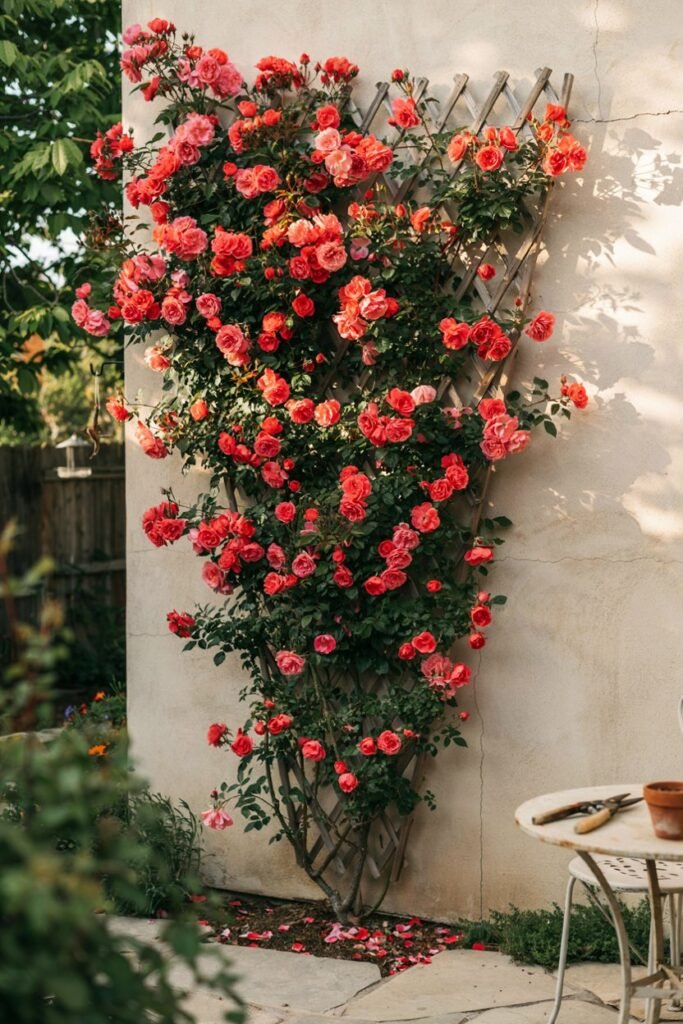
Nothing says romance quite like a climbing rose spilling over a trellis. This is the ultimate “I have my life together” garden feature.
What you’ll need:
- Sturdy trellis at least 6 feet tall (wood or metal)
- Masonry anchors or ground posts
- Soft plant ties
- Pruning shears
- A climbing rose
How to achieve it: Install a sturdy trellis at least six feet tall against a sunny wall, then loosely tie the rose canes horizontally rather than vertically, this actually encourages more blooms along the length of the cane.
Care tip: Prune climbing roses in late winter, removing dead wood and shaping the canes so they don’t strangle the structure as they thicken over the years.
5. Clematis and Lattice Combo
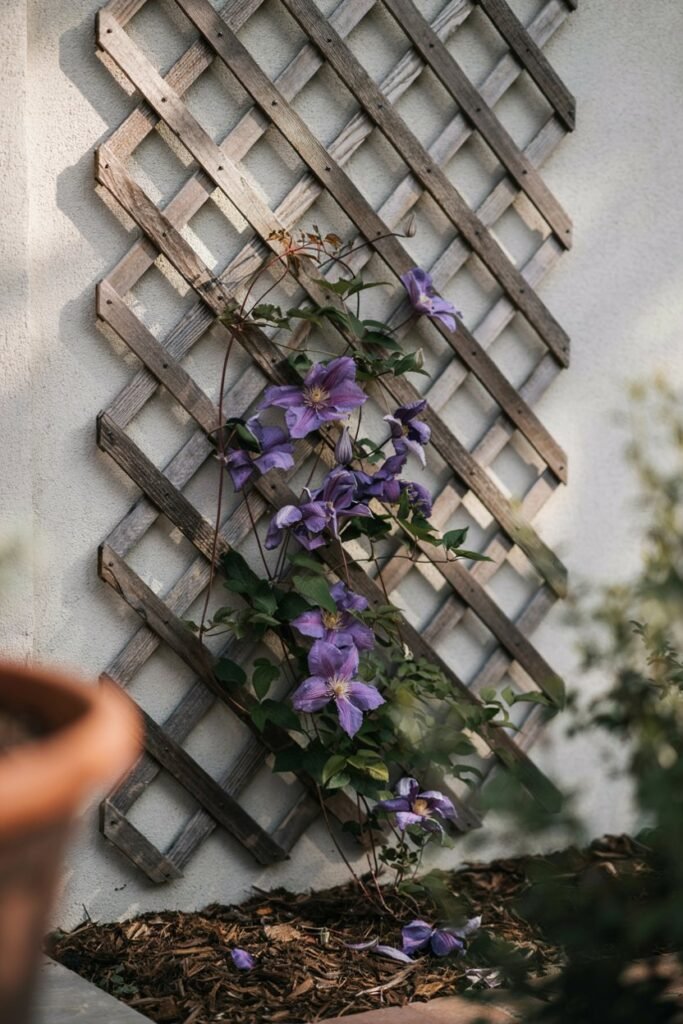
Clematis vines are the queen of flowering climbers, and they practically melt over a simple lattice panel.
What you’ll need:
- Wall-mounted lattice panel
- Mounting brackets or spacer blocks
- Mulch or a flat stone (to shade the roots)
- A clematis plant
- Pruning shears
How to achieve it: Plant clematis with its roots shaded (mulch heavily or place a flat stone at the base) and its top growth in full sun, then let it wind naturally through a wall-mounted lattice.
Care tip: Clematis loves “cool feet, warm face,” so keep mulch fresh at the base year-round and prune according to your specific variety’s bloom group.
6. Wisteria Arbor Trellis
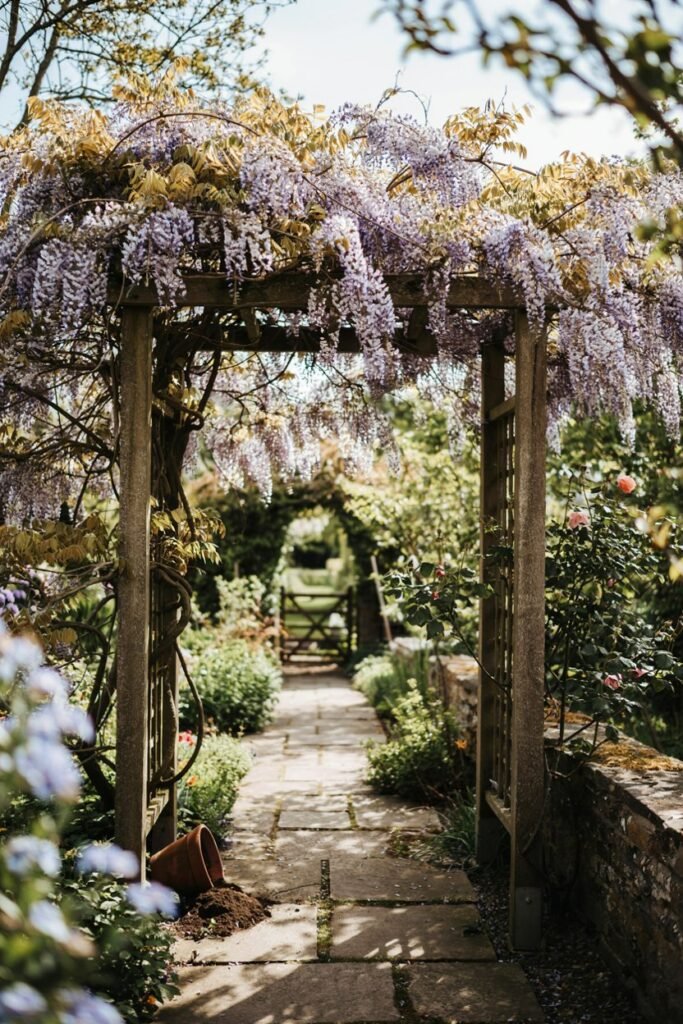
Wisteria demands a strong, dedicated structure, but the payoff is a cascading, lavender-colored dream.
What you’ll need:
- Heavy-duty wood or metal arbor kit
- Concrete for post footings
- A wisteria plant
- Loppers or heavy-duty pruning shears
- Sturdy garden twine
How to achieve it: Build or buy a heavy-duty wooden or metal arbor, since wisteria can become surprisingly heavy over the years, then train the main vine along the top beams.
Care tip: Prune wisteria twice a year, once in summer to control growth and once in winter to encourage next year’s blooms; it truly needs a firm hand to behave.
Modern & Sleek Trellises
Clean metal grids, cable wire systems, and geometric panels for a minimalist, architectural look. Great for courtyards and contemporary backyards.
7. Minimalist Metal Grid Trellis
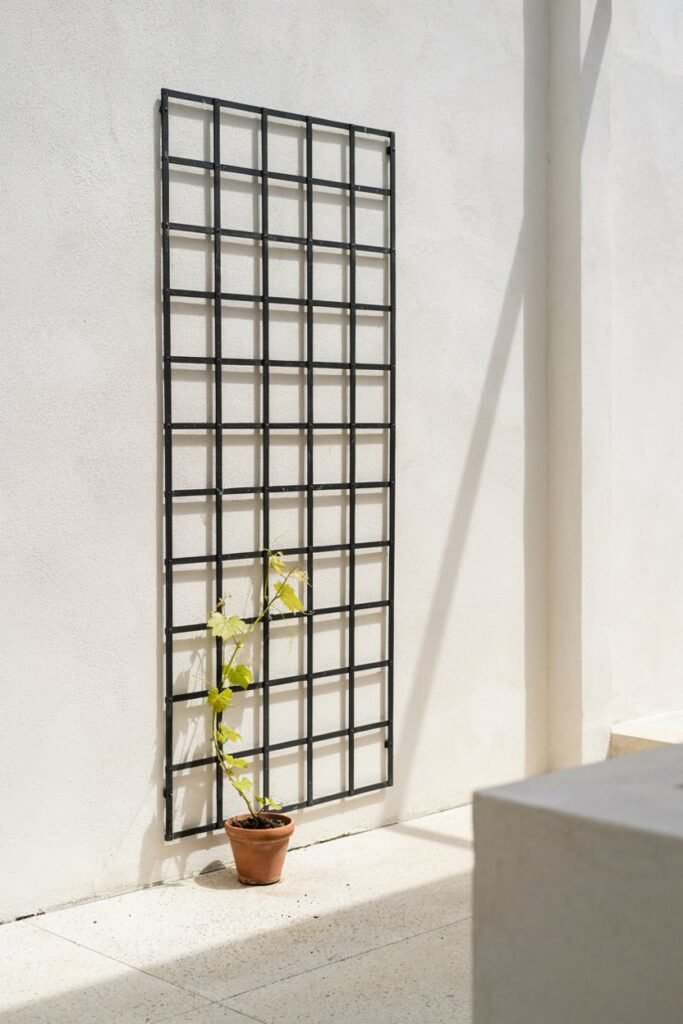
For a clean, modern courtyard, a black powder-coated metal grid feels architectural and grown-up.
What you’ll need:
- Welded steel grid panel
- Masonry anchors
- Drill
- Spacer blocks (for an airflow gap behind the panel)
How to achieve it: Mount a welded steel grid panel flush against a wall using masonry anchors, leaving a small gap behind it for airflow and easier plant attachment.
Care tip: Wipe down metal trellises occasionally to prevent rust streaks, and choose stainless or powder-coated steel in coastal or humid climates.
8. Cable Wire Trellis System
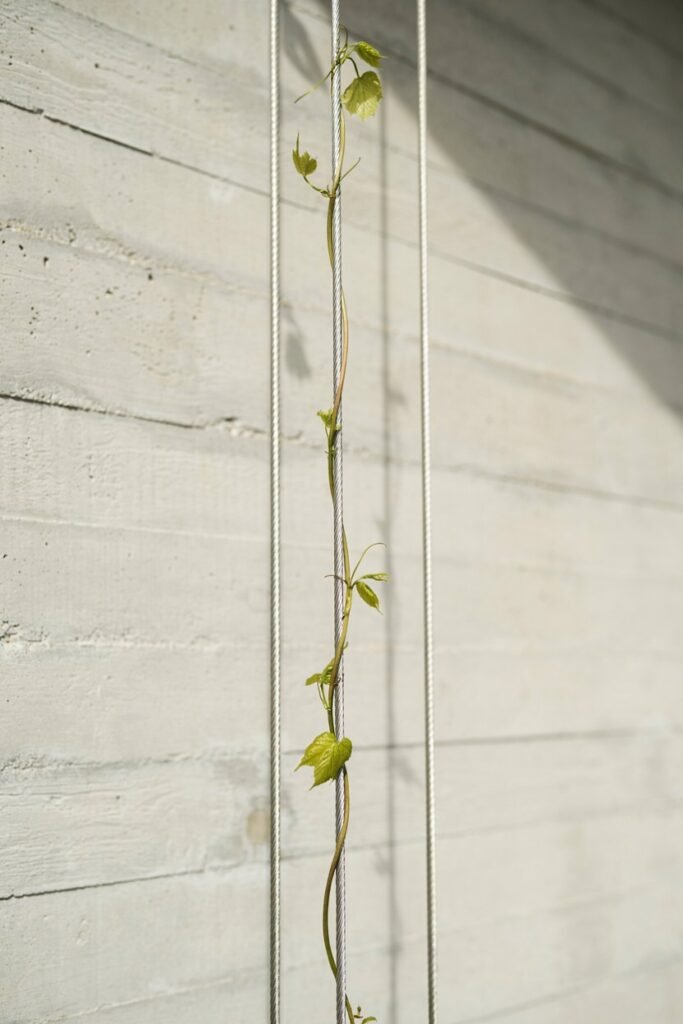
This nearly invisible trellis is a favorite among designers because it lets the plant be the star, not the structure.
What you’ll need:
- Eye hooks
- Turnbuckles
- Tensioned stainless steel cable
- Cable cutters
- Drill
How to achieve it: Install eye hooks and turnbuckles at the top and bottom of a wall, then run tensioned stainless steel cable vertically or in a diamond pattern between them.
Care tip: Check cable tension seasonally, since wood posts can shift slightly and loosen the wire, causing your climbers to sag.
9. Geometric Panel Trellis
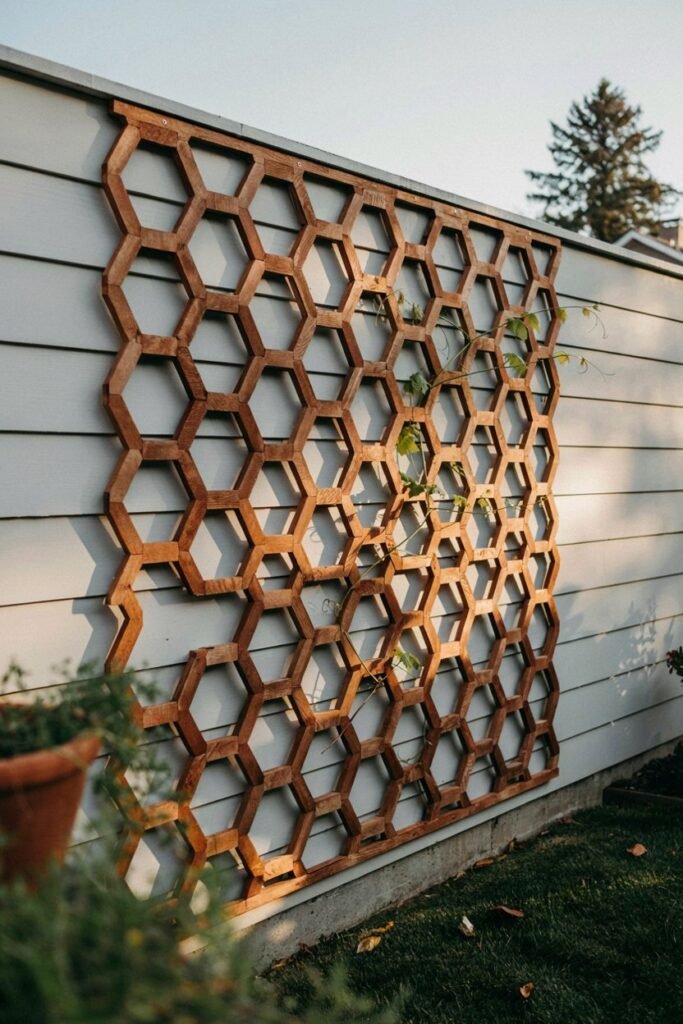
Hexagon or diamond-cut wood panels bring a contemporary edge to an otherwise soft, green space.
What you’ll need:
- Laser-cut geometric wood panel(s)
- Simple wood frame
- Exterior-grade screws
- Drill
How to achieve it: Purchase or build laser-cut geometric panels and mount them on a simple wood frame, then attach to fence posts with exterior screws.
Care tip: Choose cedar or teak for these panels since they resist warping better than pine when exposed to direct sun for long hours.
10. Freestanding A-Frame Trellis
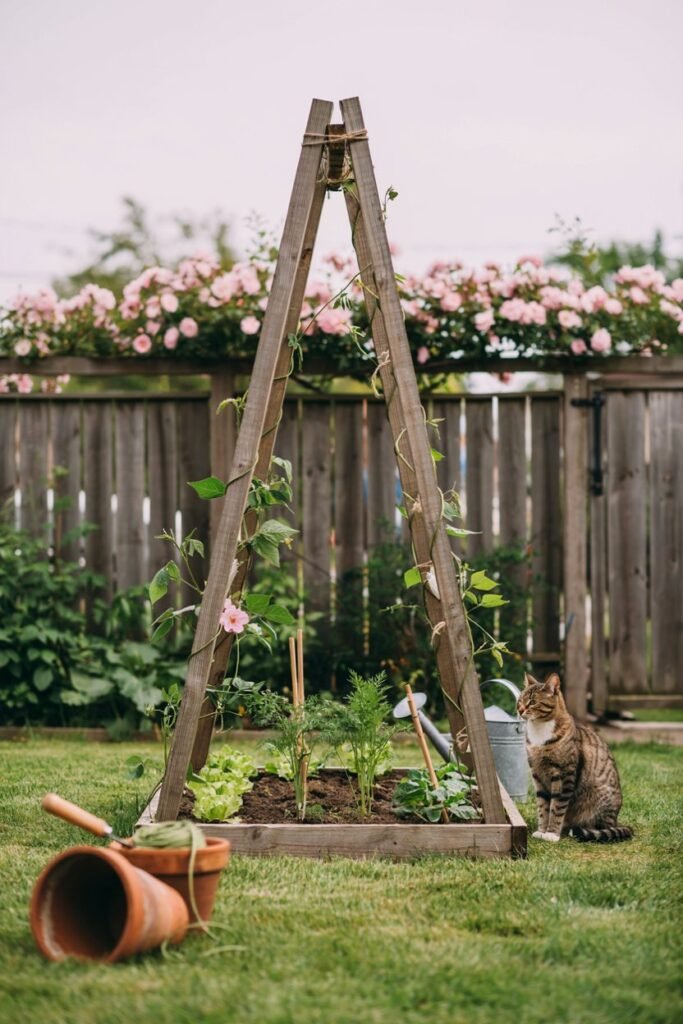
An A-frame trellis looks sculptural even without a single leaf on it, and it works beautifully as a room divider in an open backyard.
What you’ll need:
- Two matching lattice panels
- Sturdy hinges
- Exterior-grade screws
- Ground stakes for stability
How to achieve it: Build two matching lattice panels, hinge them together at the top like a tent, and let them stand freely over a garden bed or path.
Care tip: Weigh down or stake the base in windy climates, since A-frames can topple if the soil is loose or recently tilled.
11. Powder-Coated Fan Trellis
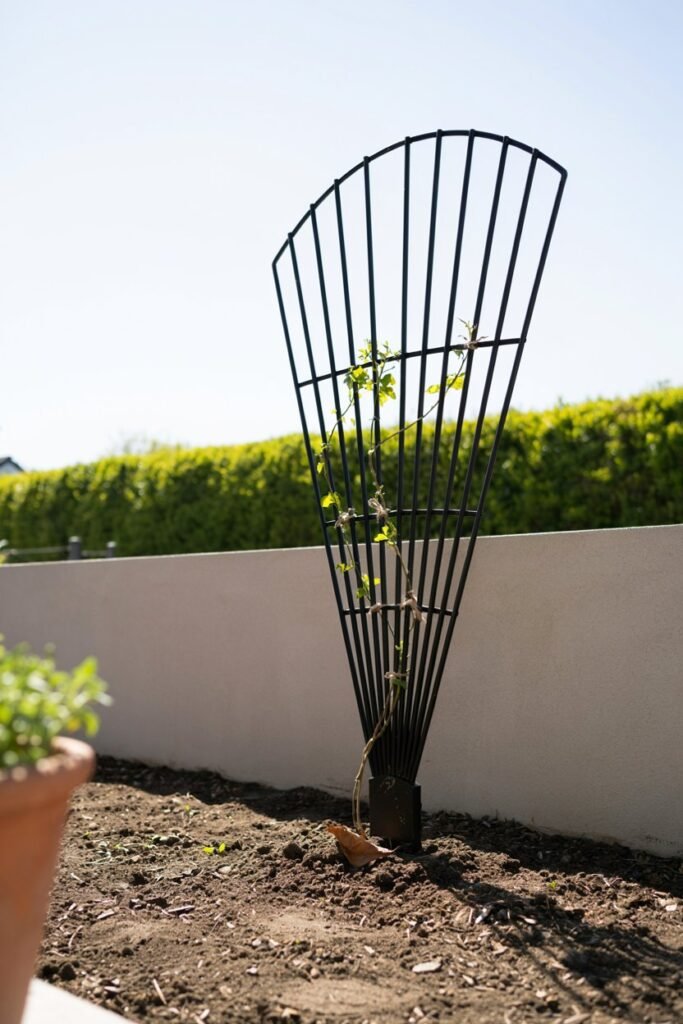
The fan shape is a modern take on the traditional trellis, spreading wide at the top to support a fuller, denser plant canopy.
What you’ll need:
- Pre-made fan-shaped trellis
- Rubber mallet
- Garden twine for early training
How to achieve it: Push the trellis legs into the soil near your climbing plant, angling it slightly backward against a wall or fence for stability.
Care tip: Because fan trellises spread growth outward, prune the sides regularly so the plant doesn’t overwhelm walkways.
12. Concrete and Rebar Trellis
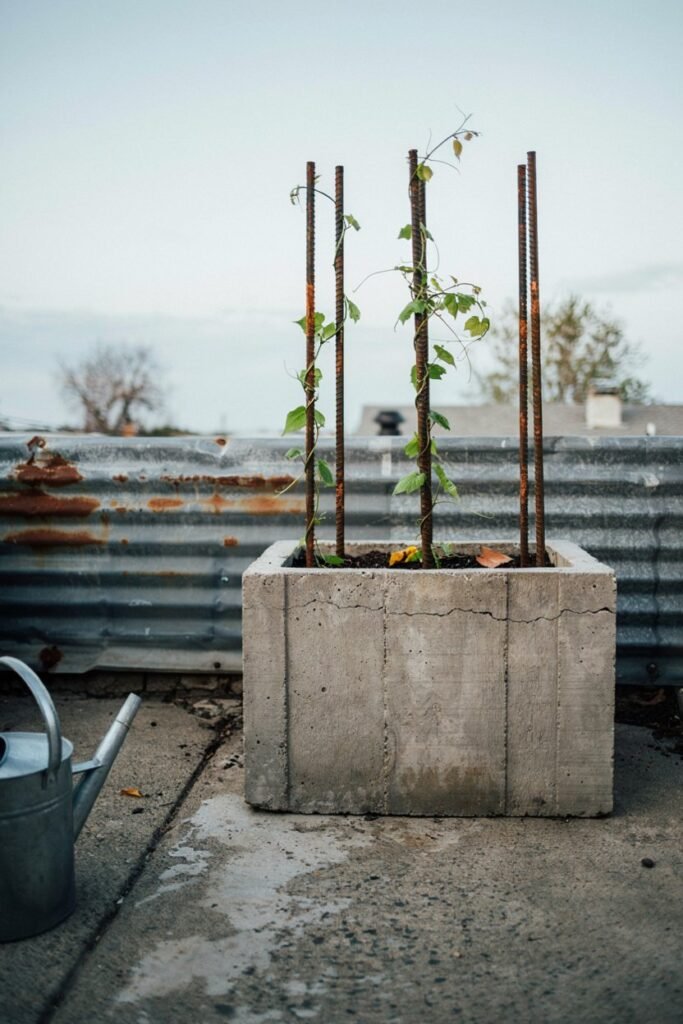
For an industrial-chic garden, a poured concrete base with rebar climbing rods is unexpectedly beautiful.
What you’ll need:
- Planter box or form
- Concrete mix
- Rebar rods
- Level
- Work gloves
How to achieve it: Set rebar rods into a concrete-filled planter box before the concrete cures, spacing them evenly for the plant to weave through.
Care tip: Rebar can rust and stain lighter-colored concrete, so seal exposed metal ends or choose galvanized rebar to keep things looking crisp.
Rustic & Repurposed Trellises
Vintage ladders, old bed frames, willow branches, and reclaimed pallets. Ideal for a budget-friendly, one-of-a-kind farmhouse feel.
13. Vintage Ladder Trellis
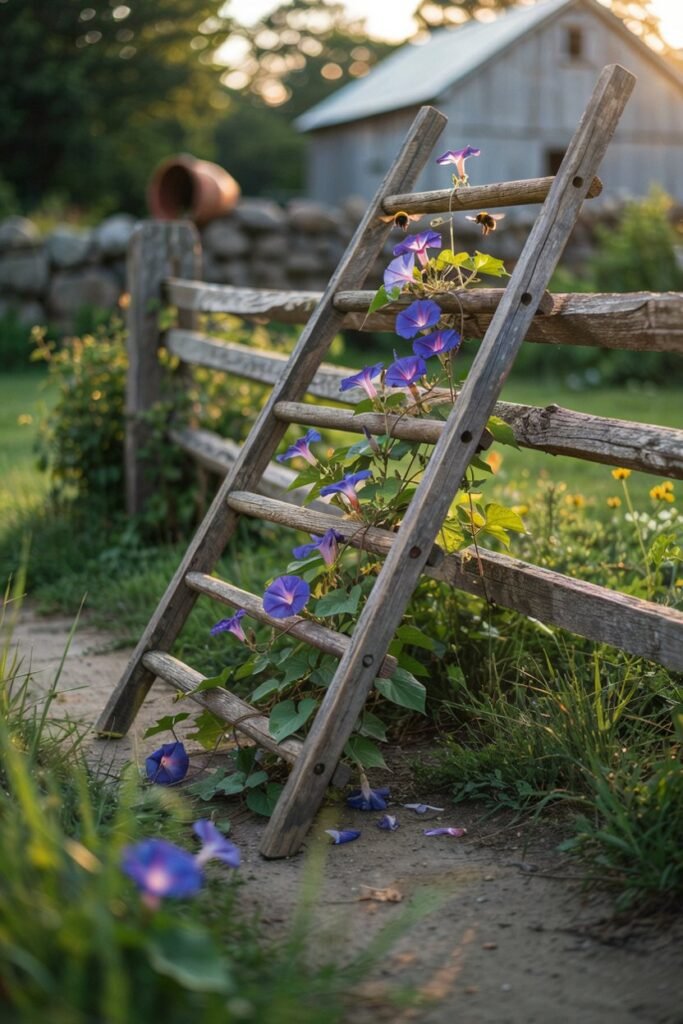
An old wooden ladder leaned against a wall is one of the easiest, most charming trellises you’ll ever make, and it costs almost nothing.
What you’ll need:
- An old wooden ladder
- Outdoor wood sealant
- Paintbrush
- Ground stakes or bungee cord for extra stability
How to achieve it: Secure a weathered wooden ladder at a slight backward angle against a fence or wall, then plant vining flowers at its base and let them climb the rungs.
Care tip: Treat the wood with a protective outdoor sealant once a year to slow decay, especially at the point where the legs meet damp soil.
14. Repurposed Bed Frame Trellis
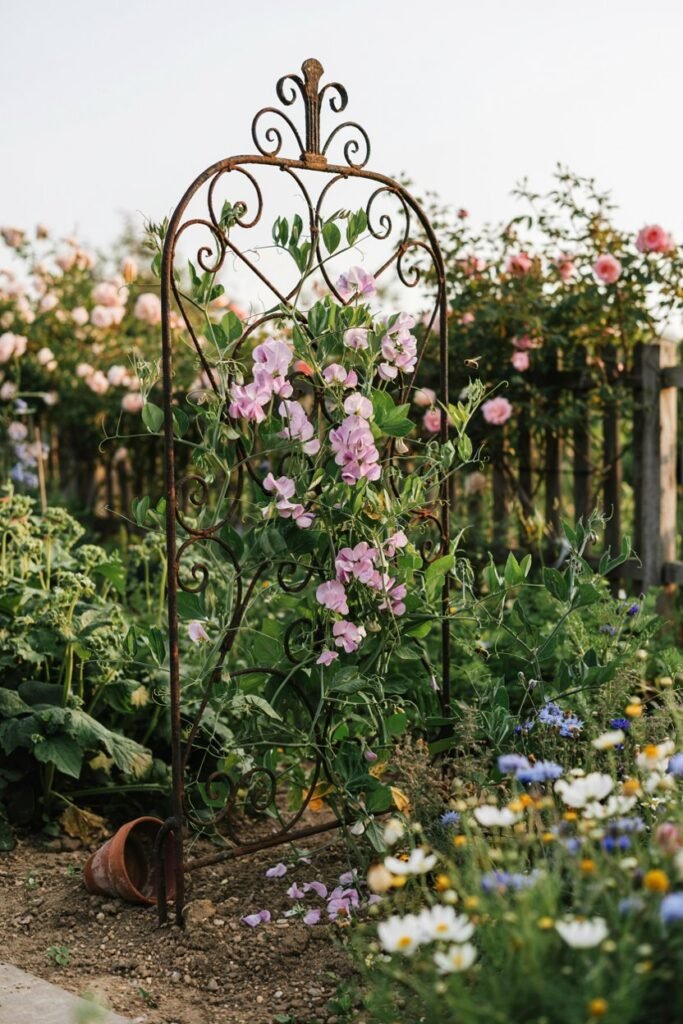
That old iron headboard in your garage? It’s basically a trellis in disguise.
What you’ll need:
- An old iron or wood bed frame/headboard
- Rust-inhibiting spray paint
- Sandpaper
- Post-hole digger or bolts (for mounting)
How to achieve it: Sink the headboard legs into the soil at the back of a flower bed, or bolt it to a fence, then plant climbers directly beneath the scrollwork.
Care tip: Sand off any rust spots and apply a rust-inhibiting spray paint before installing so it holds up through rain and snow.
15. Willow Branch Trellis
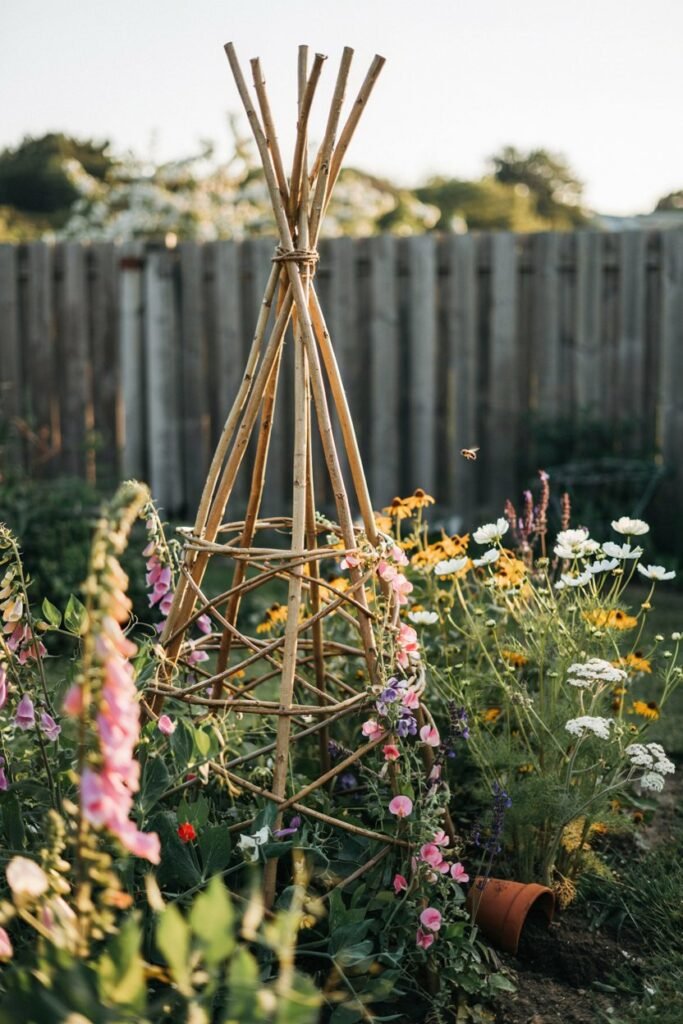
Woven willow trellises have an old-world, fairy-tale look that fits perfectly into a wildflower or cottage garden.
What you’ll need:
- Fresh, flexible willow or grapevine branches
- Garden twine
- Pruning shears
How to achieve it: Weave flexible willow or grapevine branches into a teepee or fan shape while they’re still green and pliable, tying joints with garden twine.
Care tip: Willow trellises naturally biodegrade over a few seasons, so treat them as a renewable, compostable structure rather than a permanent fixture.
16. Bicycle Wheel Trellis
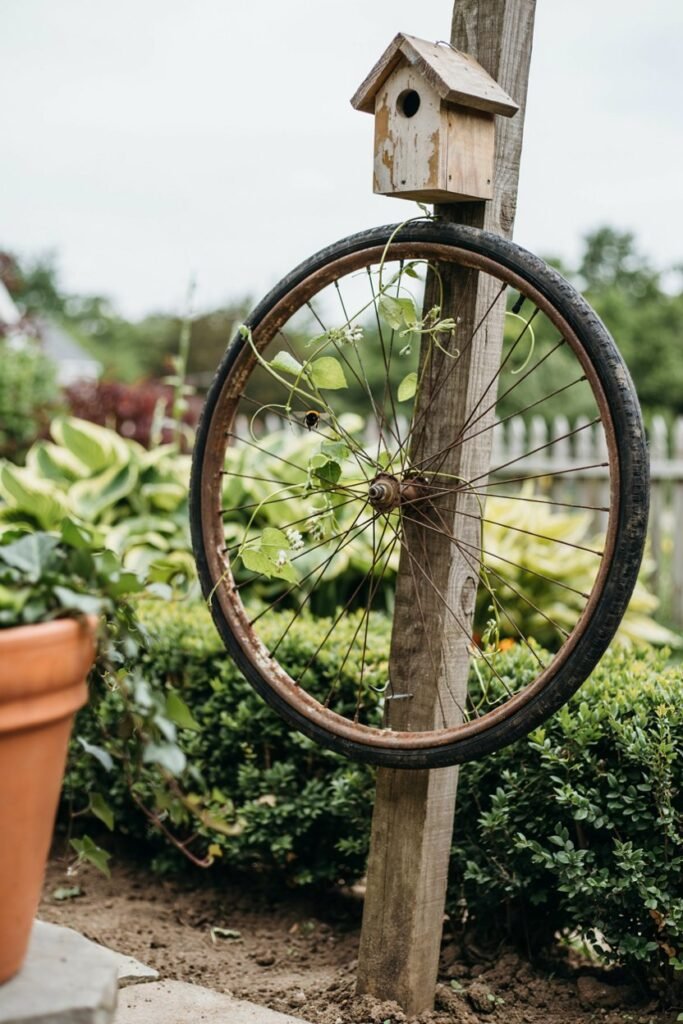
This one always gets compliments. An old bike wheel mounted on a post makes a whimsical, spoke-like climbing surface.
What you’ll need:
- An old bicycle wheel
- Wooden post
- U-bolts
- Wrench
- Clear rust-preventative spray
How to achieve it: Attach the wheel horizontally or vertically to a wooden post using U-bolts, then plant a light climber like morning glory at the base.
Care tip: Spray the metal rim with a clear rust-preventative coating, since exposed steel spokes will corrode quickly outdoors.
17. Reclaimed Pallet Trellis
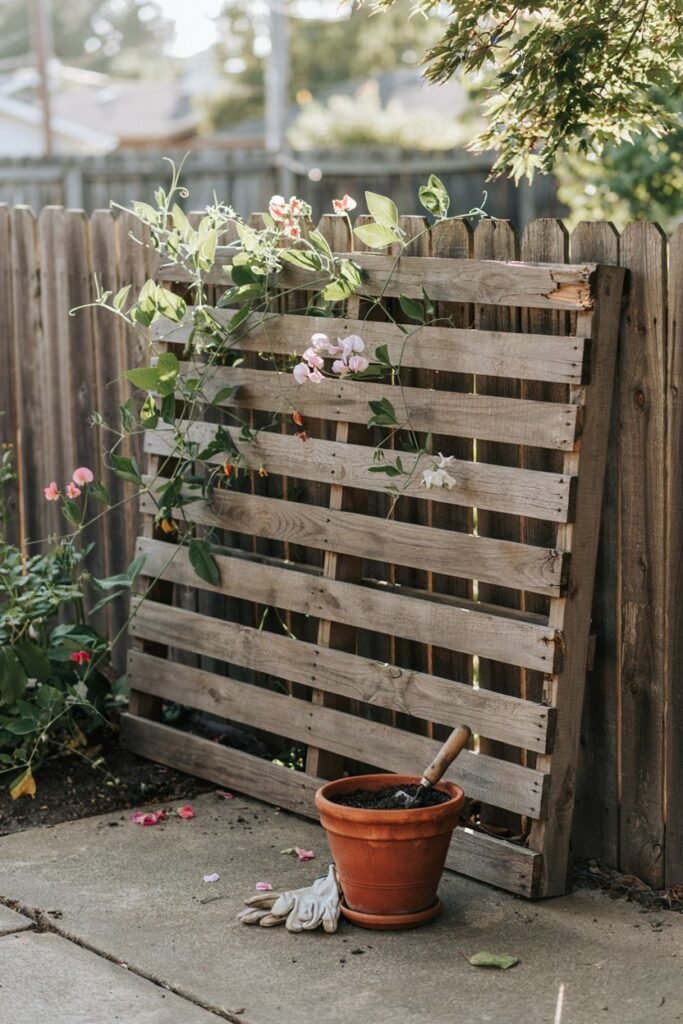
If you’re working with a tight budget, pallets are basically free trellis material waiting to happen. For more budget-savvy garden builds, my DIY raised beds under $50 guide pairs perfectly with this idea.
What you’ll need:
- A wood pallet (look for the ‘HT’ heat-treated stamp)
- Two ground stakes
- Exterior screws
- Sandpaper
How to achieve it: Stand a pallet on its end, secure it to two ground stakes, and let climbing plants weave through the natural slats.
Care tip: Sand down rough or splintered edges before planting nearby, and confirm the pallet wasn’t chemically treated (look for the “HT” heat-treated stamp, not “MB”).
18. Driftwood and Branch Trellis
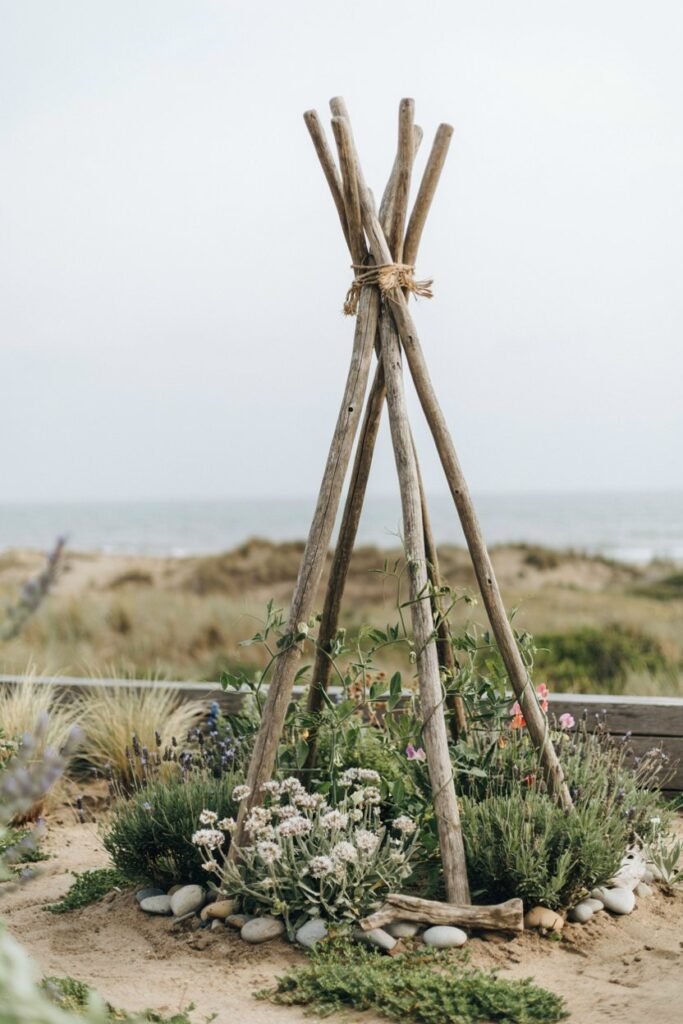
For a beachy or woodland-inspired garden, tying together fallen branches or driftwood pieces creates an organic, sculptural trellis.
What you’ll need:
- Fallen branches or driftwood pieces
- Jute twine
- Pruning shears
How to achieve it: Gather sturdy branches of similar length, lash them together in a teepee or fan shape with jute twine, then push the base firmly into the soil.
Care tip: Untreated wood will eventually soften and break down, so inspect the base each spring and replace weakened pieces before a heavy vine pulls the whole thing over.
19. Wine Barrel Ring Trellis
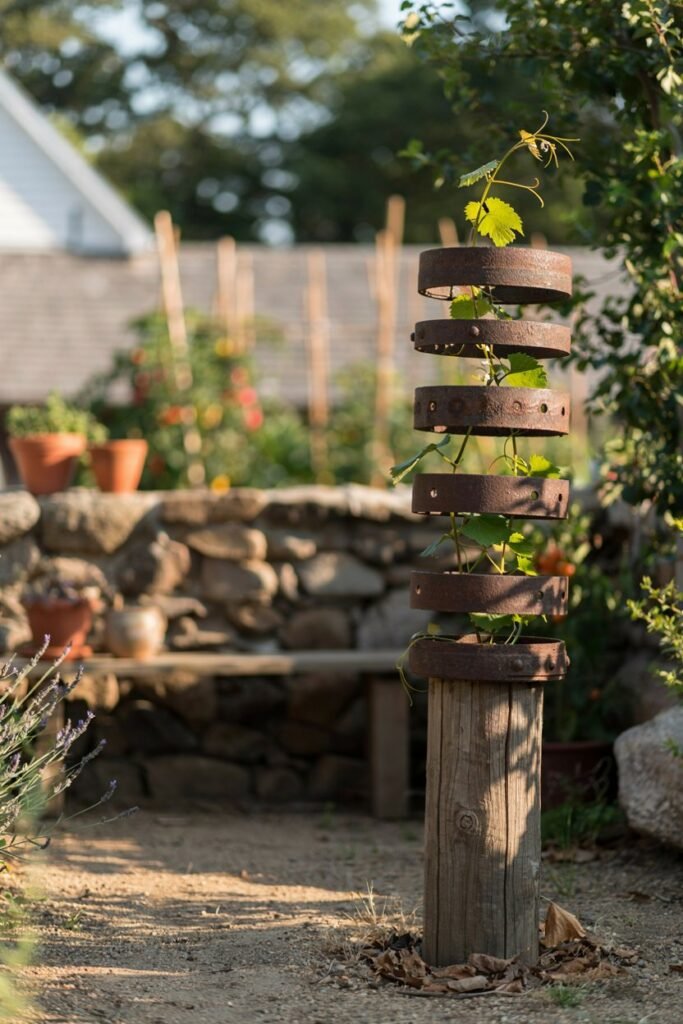
The metal rings from an old wine barrel make for a rustic, farmhouse-style trellis that’s full of personality.
What you’ll need:
- Metal rings from an old wine barrel
- Wooden post
- Exterior screws
- Clear outdoor sealant
How to achieve it: Stack two or three barrel rings vertically on a wooden post, spacing them evenly, and let vines climb through the open circles.
Care tip: Watch for rust bleeding onto nearby light-colored blooms; a coat of clear outdoor sealant on the metal will help prevent staining.
20. Garden Gate Trellis
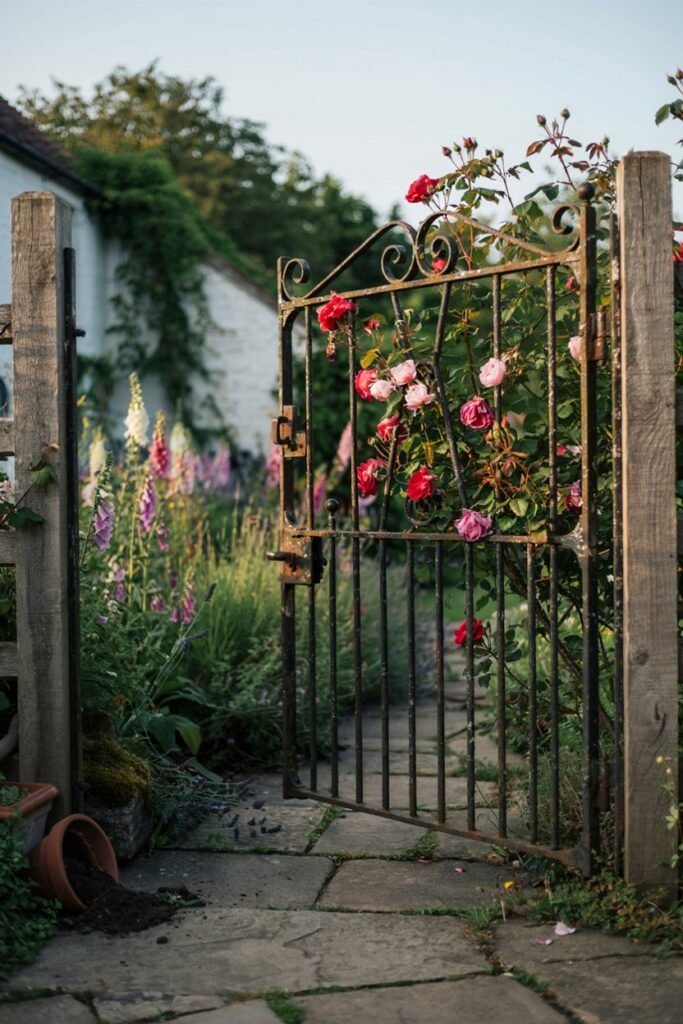
An old, unused garden gate is an instant trellis with built-in character and history.
What you’ll need:
- An old garden gate
- Two wood or metal posts
- Hinges or mounting brackets
- Exterior, plant-safe paint (if repainting)
How to achieve it: Mount the gate upright between two posts (it doesn’t need to open), then let climbing roses or clematis weave through the existing ironwork or slats.
Care tip: If the gate is painted, check for chipping paint that could contain lead if it’s a truly old piece, and repaint with an exterior-rated, plant-safe paint if needed.
Vegetable & Edible Garden Trellises
Sturdy, functional supports for tomatoes, beans, peppers, melons, and squash. This is where form meets function in the kitchen garden.
21. Cattle Panel Vegetable Trellis
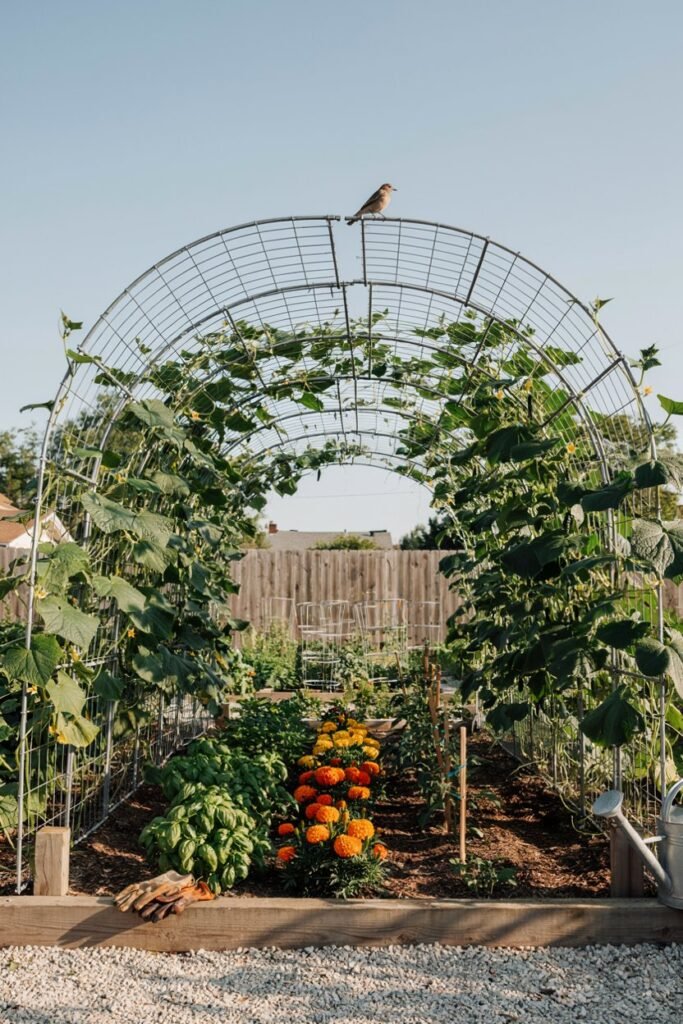
This is the workhorse of the vegetable garden, strong enough for heavy squash and cucumbers, and it looks surprisingly tidy too.
If you’re building out a full kitchen garden, this pairs beautifully with the guidance in my ultimate raised bed gardening checklist.
What you’ll need:
- One 16-ft cattle panel
- T-posts
- Wire cutters
- Zip ties or garden wire
- Mallet
How to achieve it: Bend a 16-foot cattle panel into an arch or lean it upright against T-posts driven two feet into the ground on either side of a raised bed.
Care tip: For heavier fruit like squash or melons, sling small fabric hammocks under the developing fruit so the vine doesn’t snap under the weight.
22. Tomato Cage Trellis Tower
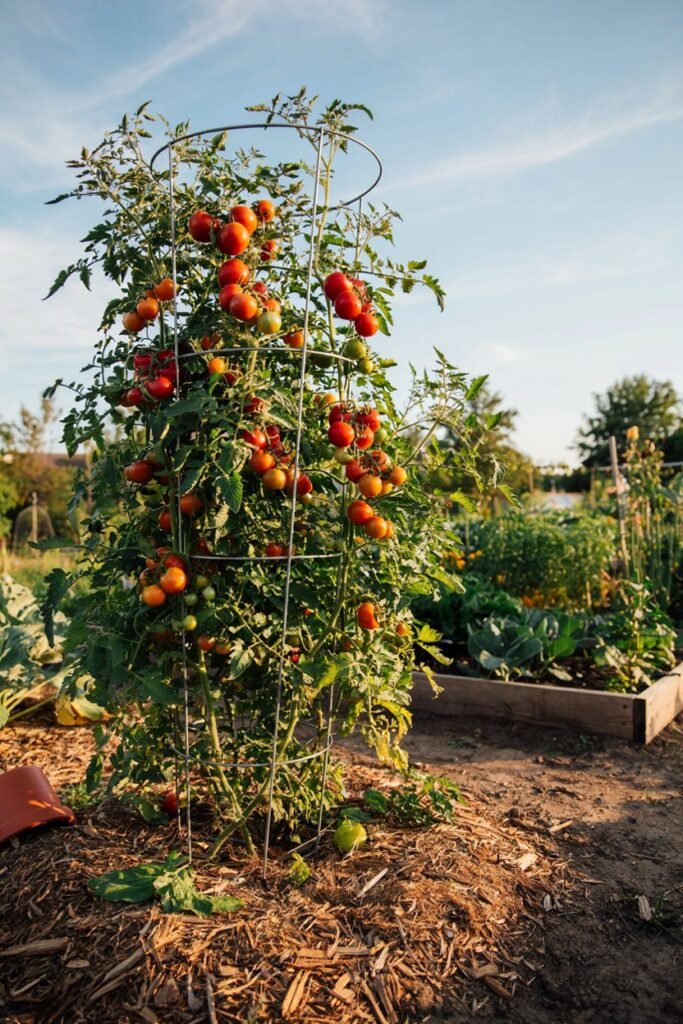
We all have a tomato plant that’s grown wildly out of control by August, this simple upgrade fixes that. My tomatoes in a pot guide has more on getting the healthiest harvest possible.
What you’ll need:
- Heavy-gauge wire cage or wood slats for a tower
- Soft plant ties
- Tomato seedlings
How to achieve it: Use a heavy-gauge wire cage or build a wooden tower with horizontal slats, placing it over the tomato seedling while it’s still small so roots aren’t disturbed later.
Care tip: Tie the main stem loosely to the support every foot of new growth using soft plant ties, never wire, which can cut into the stem.
23. Bean Teepee Trellis
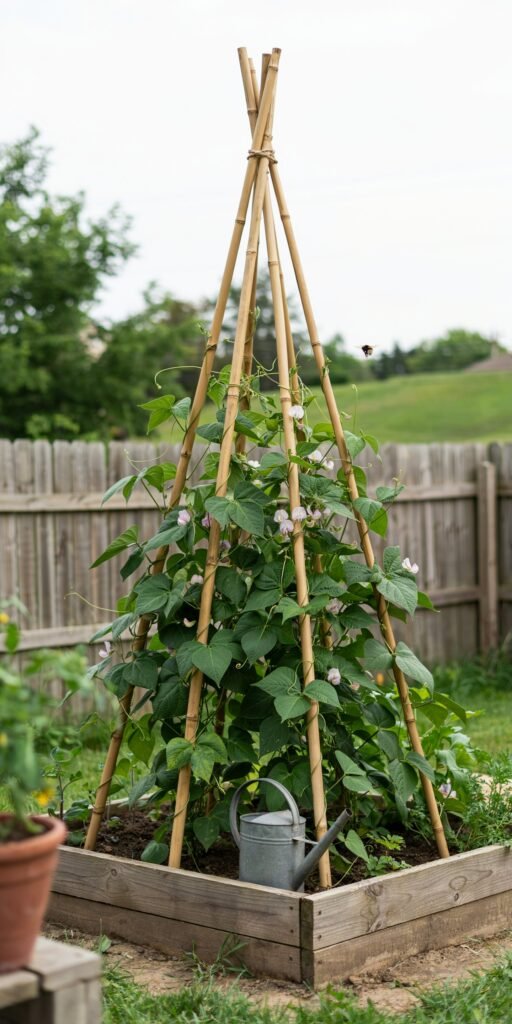
Kids and beginner gardeners alike love this one because it’s practically foolproof and grows into a magical little green hideaway.
What you’ll need:
- 4–6 bamboo poles
- Garden twine
- Pole bean seeds
How to achieve it: Tie four to six bamboo poles together at the top in a teepee shape, spread the legs into a circle, and plant pole beans at the base of each pole.
Care tip: Pinch off the growing tip once the vine reaches the top of the poles to encourage bushier, more productive side growth.
24. Pepper and Jalapeño Support Trellis
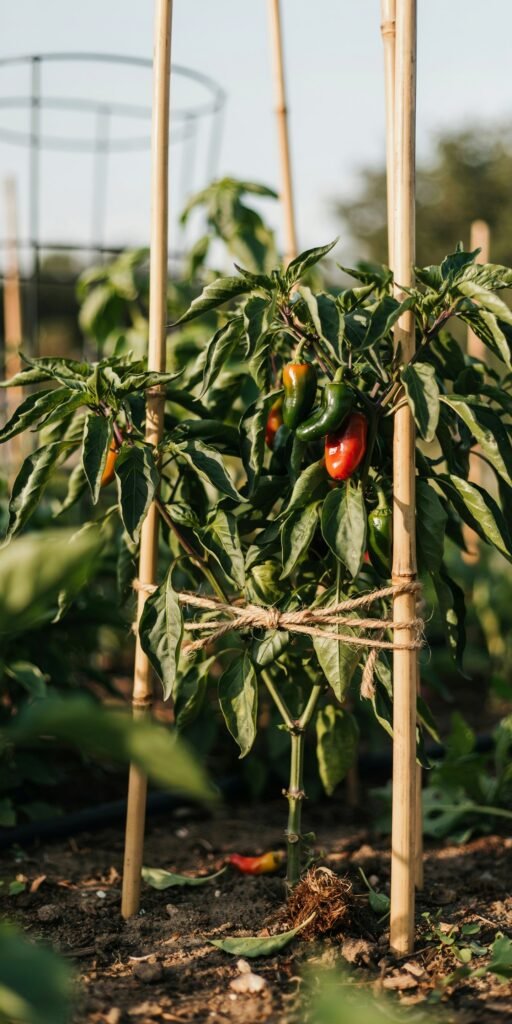
Pepper plants get top-heavy fast once fruit sets in, and a simple support trellis keeps branches from snapping.
For more on growing peppers successfully, take a peek at my jalapeños in a pot tactics.
What you’ll need:
- Three thin stakes per plant
- Garden twine
- Pepper or jalapeño seedlings
How to achieve it: Circle three thin stakes around each plant and wrap garden twine in a spiral from bottom to top, gently containing the branches as they grow.
Care tip: Add supports early, before the plant is heavy with fruit, since trying to prop up a leaning, loaded pepper plant later often causes stem damage.
25. Melon and Squash Vertical Trellis
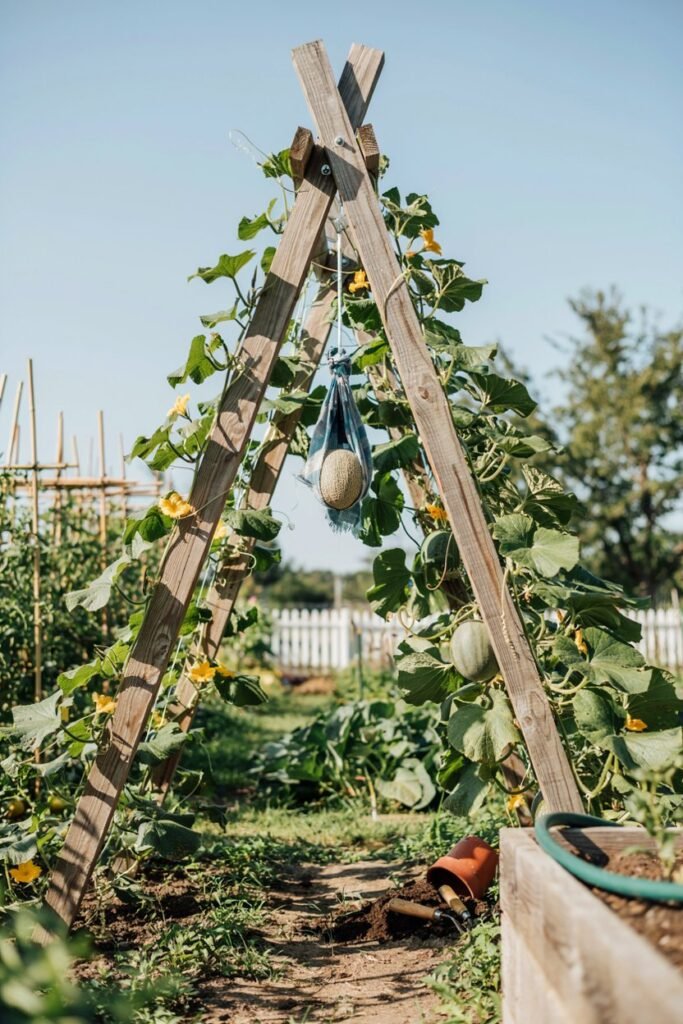
Growing melons vertically saves an enormous amount of ground space and keeps the fruit cleaner and less prone to rot. My full guide to growing melons covers everything else you’ll need to know.
What you’ll need:
- Reinforced A-frame or cattle panel trellis
- Soft cloth for fruit slings
- Garden twine
- Melon or squash seedlings
How to achieve it: Use a reinforced A-frame or cattle panel trellis and train the vine up it from the seedling stage, tucking tendrils onto the mesh as they appear.
Care tip: Support developing melons in cloth slings tied to the trellis frame so their weight doesn’t tear the vine away from the structure.
Small-Space & Balcony Trellises
Compact, lightweight options built for apartments, balconies, window boxes, and container gardens.
26. Balcony Rail Trellis Panel
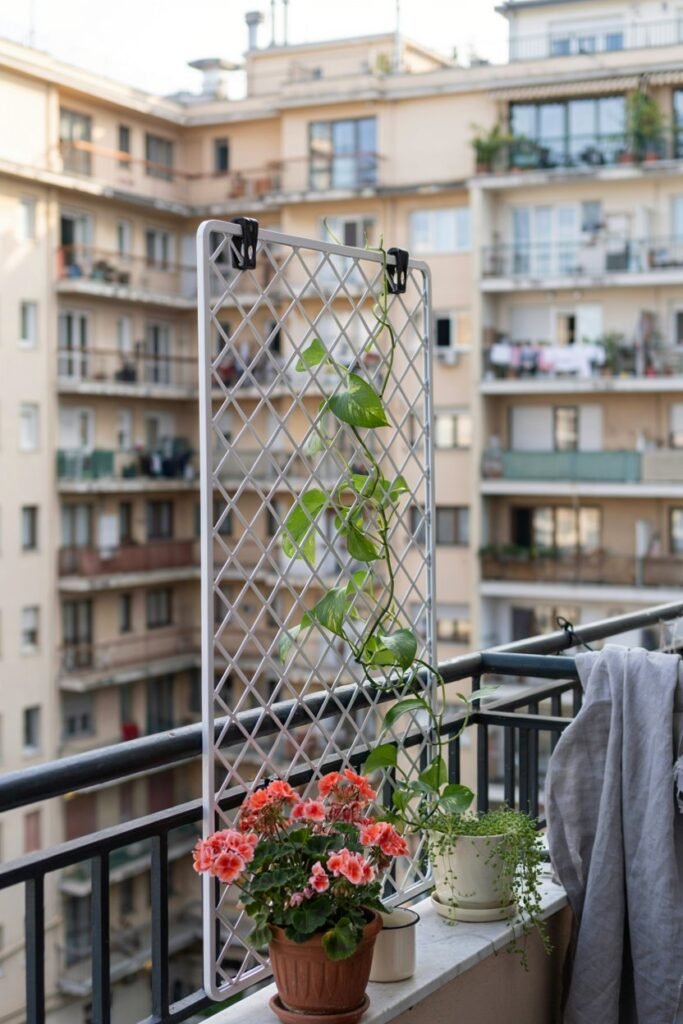
If you’re gardening on a balcony or in an apartment, a rail-mounted trellis lets you grow up instead of out. My apartment vegetable garden ideas post is full of clever tricks for exactly this kind of space.
What you’ll need:
- Lightweight trellis panel
- Zip ties or hose clamps
- Drill (optional, for mounting brackets)
How to achieve it: Attach a lightweight trellis panel directly to your railing with zip ties or hose clamps, positioning it so it doesn’t block sightlines or airflow.
Care tip: Choose lightweight plastic or coated metal panels for railings, since heavy wood can strain the mounting hardware over a full growing season.
27. Container Trellis Combo
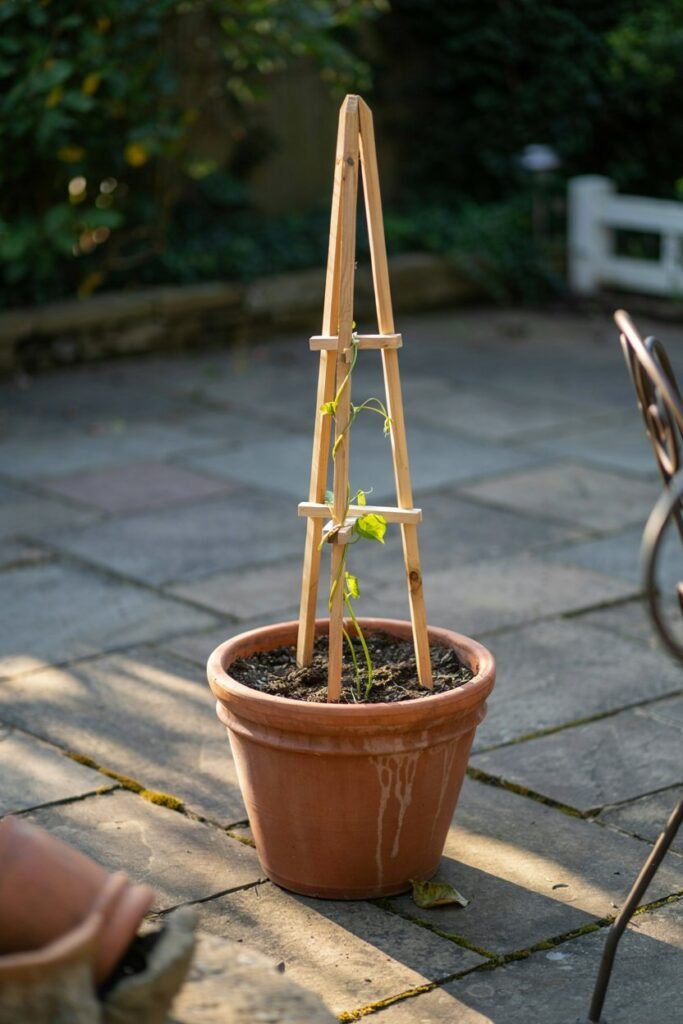
A trellis built right into a large pot means you can move your entire vertical garden wherever the sunlight is best.
This idea pairs wonderfully with my seasonal fall container garden ideas if you want to keep the display going year-round.
What you’ll need:
- A large container
- Small obelisk or 3 bamboo stakes
- Garden twine
- Quality potting soil
How to achieve it: Insert a small obelisk or three bamboo stakes tied at the top directly into a large container before planting, giving climbers immediate support from day one.
Care tip: Container-grown climbers dry out faster than in-ground plants, so check soil moisture daily during hot summer weeks.
28. Window Box Mini Trellis
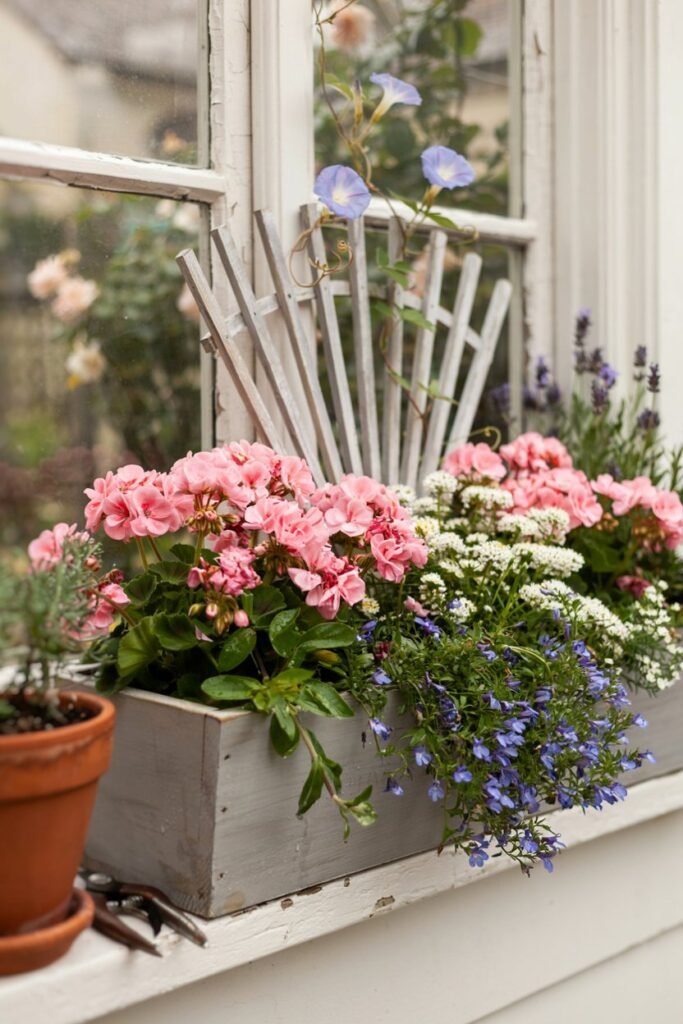
Even a small window box can have height with a mini trellis fan tucked into the back of the planting.
What you’ll need:
- Small fan-shaped or grid trellis
- A window box
- Trailing or climbing annuals
- Diluted liquid fertilizer
How to achieve it: Push a small fan-shaped or grid trellis into the back third of the window box soil, then plant trailing or climbing annuals like black-eyed Susan vine in front of it.
Care tip: Because window boxes have limited soil volume, feed with a diluted liquid fertilizer every other week to keep the vigorous growth this small space needs.
29. Hanging Basket Trellis Loop
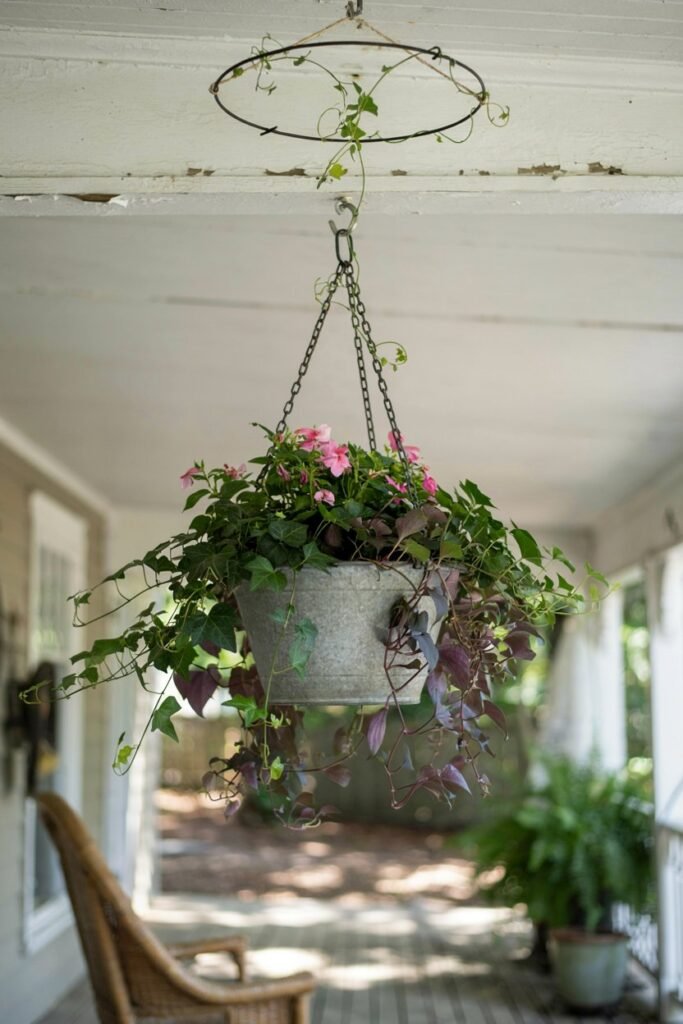
This clever trick turns a simple hanging basket into a mini vertical garden by adding a circular support loop above the plant.
What you’ll need:
- Wire hoop or small circular trellis
- A hanging basket
- Sturdy ceiling hook or bracket
- A lightweight climbing vine
How to achieve it: Attach a wire hoop or small circular trellis above the basket’s rim, letting a light vine like ivy or nasturtium climb the loop instead of only trailing downward.
Care tip: Keep hanging trellises lightweight, since anything too heavy puts strain on your ceiling hook or bracket over time.
Statement & Focal-Point Trellises
Bold, full-scale structures like living privacy walls, designed to transform an entire section of your yard.
30. Living Privacy Screen Trellis Wall
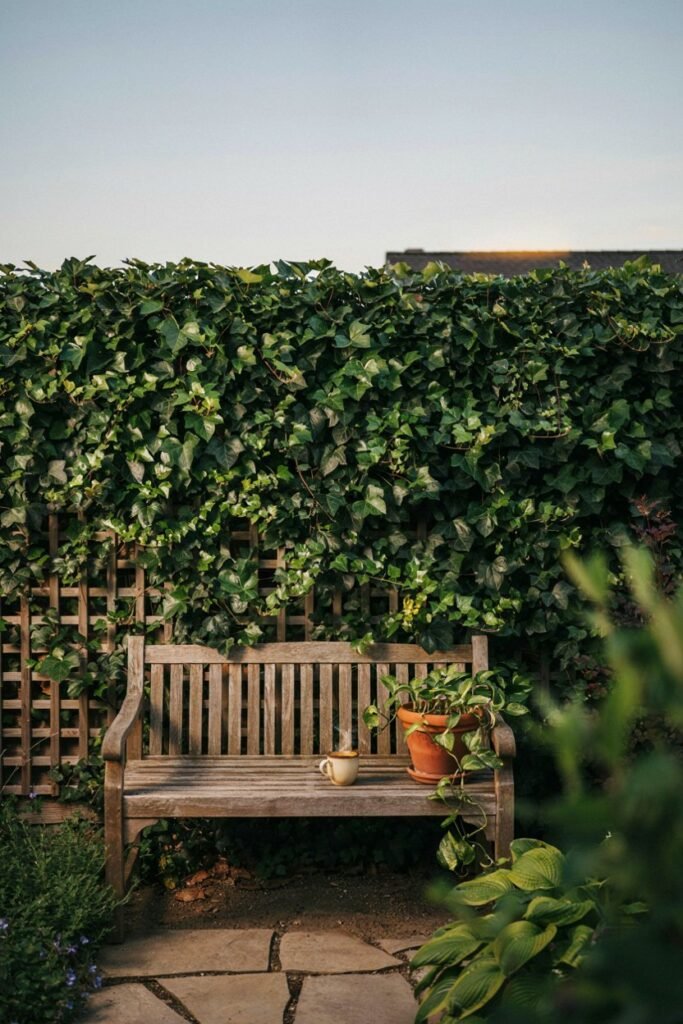
If your goal is a full wall of green, this is the ultimate height-adding trellis project. Pair it with ideas from my backyard privacy plants guide for a truly enclosed, secret-garden feeling.
What you’ll need:
- Full-height cedar or metal trellis panels
- Ground posts and concrete
- Fast-growing climbers (Boston ivy, star jasmine, etc.)
- Pruning shears
How to achieve it: Install a full-height cedar or metal trellis panel run along your property line, then plant fast-growing climbers like Boston ivy or star jasmine every few feet along the base.
Care tip: Prune privacy vines twice a year to keep them from growing into neighboring yards or overtaking gutters and rooflines.
Planning Your Trellis Around the Seasons
One thing I didn’t understand in my early gardening years is that timing matters just as much as design.
Installing your trellis in early spring, before you plant anything at all, gives the soil time to settle around the posts and lets you walk the space for a few weeks to confirm you’ve picked the sunniest, most sheltered spot.
If you’re working with perennial climbers like clematis or roses, plant them in early fall or early spring when temperatures are mild, so the roots can establish themselves before facing the stress of summer heat or winter cold.
Annual vines are far more forgiving with timing, and you can tuck them in any time after your last frost date without much fuss.
I like to stagger my plantings a little, tucking sweet peas in early for spring color, then following up with morning glories or beans once the weather warms, so my trellises stay covered in something beautiful from the first warm week straight through until frost.
A Few Extra Notes Before You Get Planting
Whatever style you land on, remember that a trellis is only as strong as its foundation, wobbly posts are the number one reason beautiful vines come crashing down mid-summer.
If you’re new to gardening altogether, my new gardener checklist walks through the basics I wish someone had told me when I started.
And if you’re not sure which tools you actually need for a project like this, my essential gardening tools list will save you a trip (or three) back to the hardware store.
For ongoing care, keep your trellis maintenance on a seasonal rhythm.
My July gardening checklist and August garden to-do list both include reminders for tying, pruning, and inspecting climbing supports before things get too heavy.
And once the weather turns, don’t let your trellises go bare, my fall flowers that bloom until frost post has gorgeous options to keep the color going.
If a full trellis project feels like too much right now, you can absolutely start small.
A few of my easy garden hacks using everyday items show how to rig up a temporary support with things you already have at home, and my tiny garden ideas post proves that even the smallest yard can go vertical beautifully.
Building height into your garden isn’t just about the plants themselves, it changes how the whole space is experienced, drawing your eye up and creating little pockets of shade, privacy, and drama that a flat garden simply can’t offer.
And once you’ve got your vines climbing happily, don’t forget to give your garden a place to sit back and admire the view. My garden seating ideas post will help you carve out that perfect little spot to enjoy everything you’ve built.
Common Trellis Mistakes to Avoid
I’ve made most of these mistakes myself, so let me save you the trouble.
The biggest one is planting a climber too close to the actual trellis, only an inch or two away, which sounds helpful but actually crowds the roots and makes it harder for young stems to find their way onto the structure.
Give your plant six to twelve inches of breathing room and simply guide the first few stems over by hand.
Another common misstep is choosing a trellis that’s too short for the plant you’ve picked.
Clematis, roses, and wisteria all want to keep climbing well past that cute four-foot panel from the garden center, so it’s worth sizing up, especially for anything described as a “vigorous” grower on the plant tag.
Skipping proper anchoring is another one. A trellis that simply leans against a wall looks fine in spring, but by midsummer, once it’s carrying the full weight of wet foliage after a storm, it can tip right over.
Always sink posts at least eighteen inches into the ground, or secure panels with heavy-duty brackets if you’re mounting to an existing wall or fence.
Finally, don’t forget about sun exposure when placing your trellis. A shady trellis with a sun-loving climber will give you plenty of green leaves and disappointingly few flowers.
Take a day to actually watch how light moves across your yard before you commit to a permanent spot.
Frequently Asked Questions
How tall should a garden trellis be? Most garden trellises range from four to eight feet tall, but the right height really depends on your plant.
Annual vines like sweet peas do beautifully on a four to six-foot support, while perennial climbers such as wisteria, climbing roses, and mature clematis are happiest with something in the seven to ten-foot range, since they’ll only get bigger with each passing year.
Do trellises damage walls or fences? They can, if they’re mounted directly against a solid surface without any airflow behind them.
Trapped moisture between the plant and the wall can lead to mildew or paint damage over time.
A simple fix is to mount your trellis an inch or two off the wall using spacer blocks, which keeps air moving freely behind the greenery.
Can I build a trellis without any tools? Absolutely, and this is one of my favorite low-effort projects. Leaning an old ladder, ironwork gate, or bundle of tied branches against a fence requires little more than some twine and a bit of creativity, no power tools necessary.
How do I train a young vine onto a trellis? Gently loop the new growth around the structure by hand every few days until it “catches on,” and use soft plant ties or strips of cloth rather than wire, which can girdle tender stems as they thicken.
What’s the fastest-growing trellis plant for beginners? Morning glory and scarlet runner beans are wonderfully forgiving for first-time gardeners, often covering a trellis within just a few weeks of steady sun and water.
Final Thoughts
However you choose to add height, whether it’s a rustic ladder leaned against the fence or a full cedar privacy wall dripping in jasmine, know that this is one of the most rewarding upgrades a garden can get.
Give it a season, and you’ll wonder how your space ever felt finished without it. Happy climbing, my friend!
