
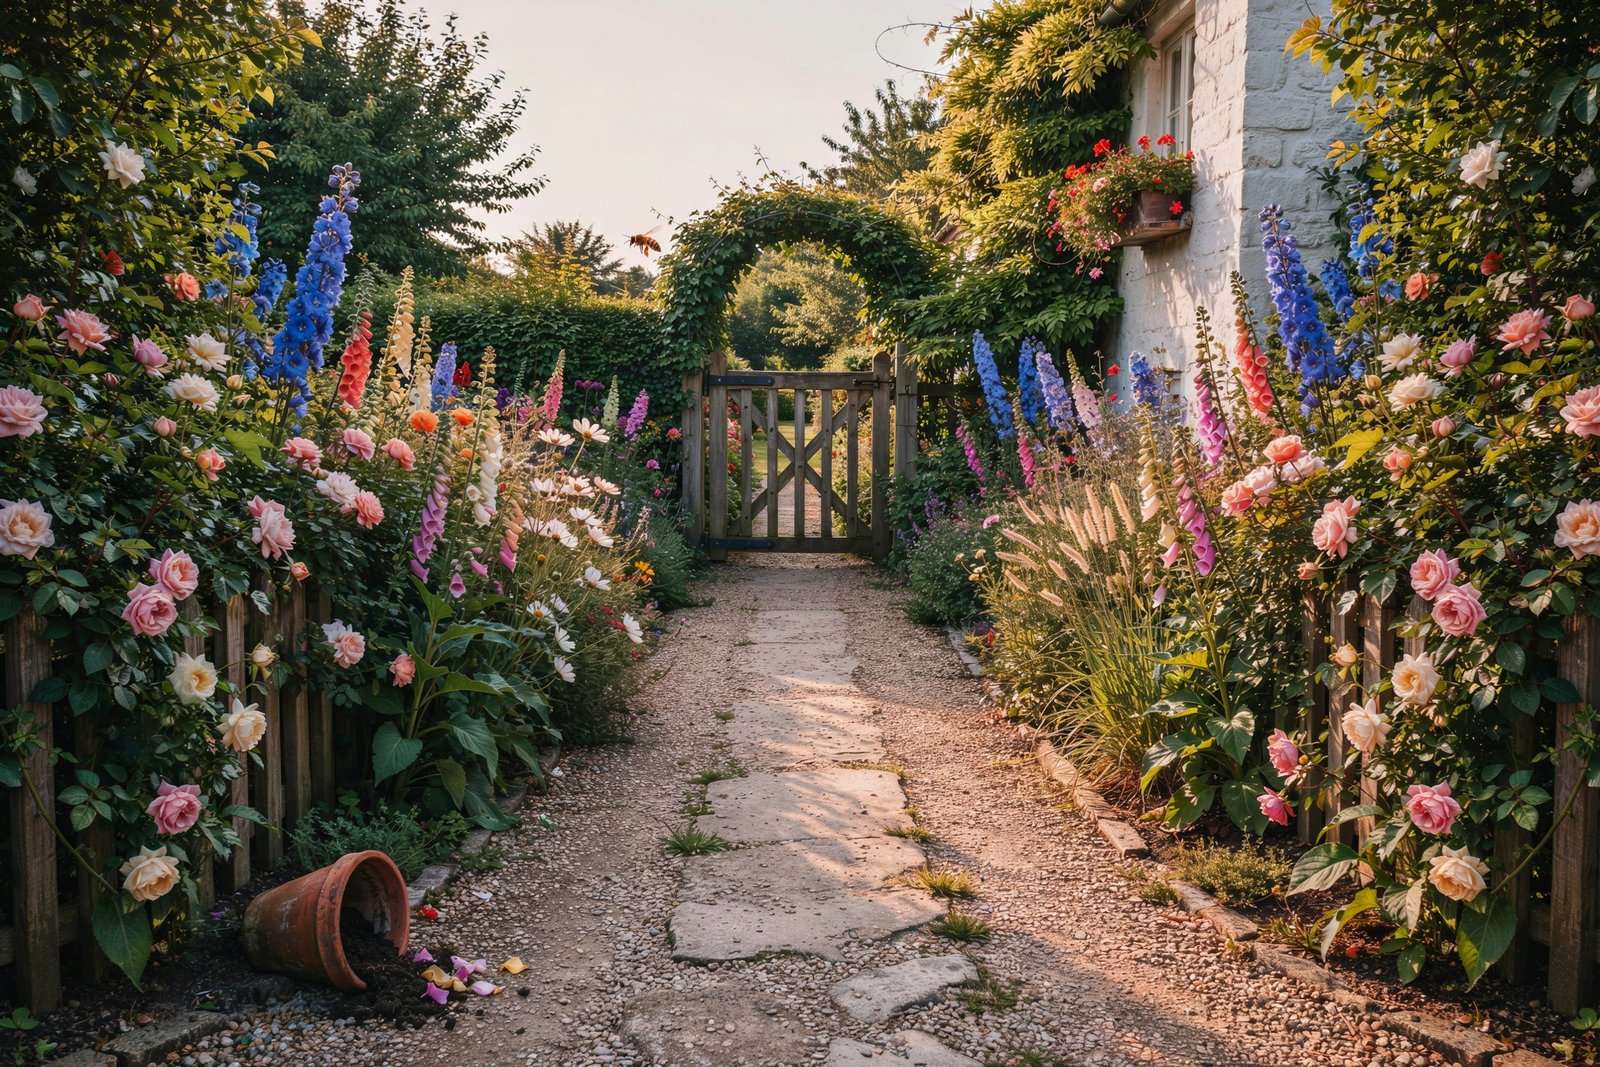

My cottage garden makeover started with a bare, boring patch of lawn and a Pinterest board I couldn’t stop scrolling through.
I wanted that dreamy, overflowing look, the kind where flowers spill over pathways and every corner feels like a little surprise.
It took some trial and error (and a few plants I definitely killed), but the transformation was worth every dirty fingernail.
If you’re standing in your own backyard wondering where to begin, I’m walking you through exactly what worked for me.
What Is a Cottage Garden, Really?
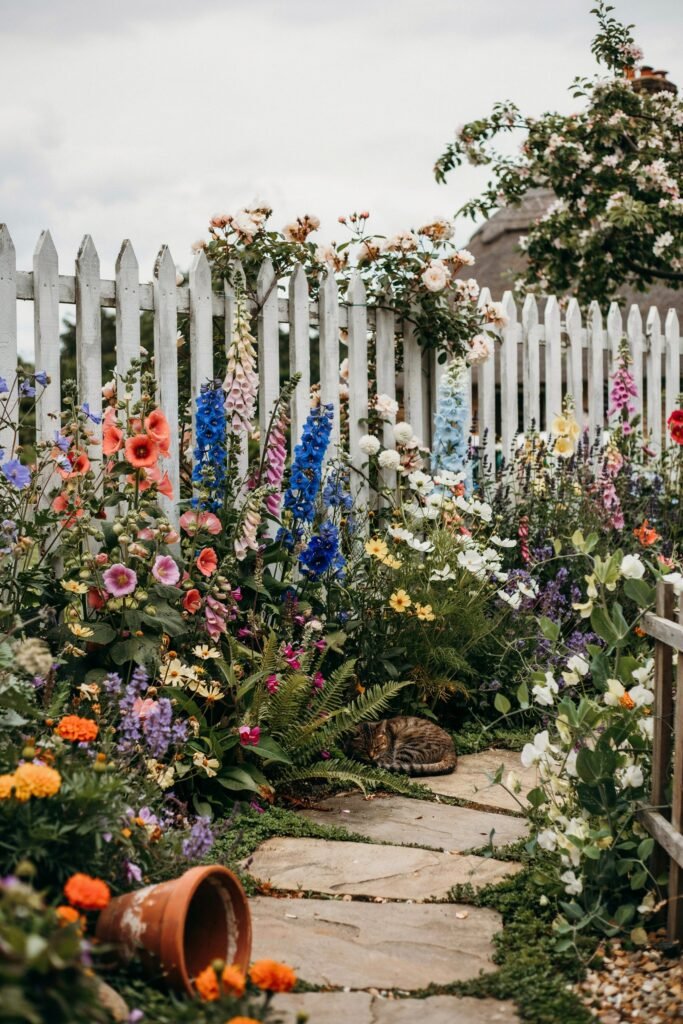
Before I ever touched a trowel, I had to figure out what actually makes a “cottage garden” different from a regular flower bed.
The cottage garden style traces back to English countryside gardens, where practicality met beauty.
Cottagers grew vegetables, herbs, and flowers together in the same small space because there simply wasn’t room for separate plots, and the result was this wonderfully informal, densely packed look that we now romanticize.
What sets a cottage garden apart is its relaxed structure.
There are no rigid rows, no perfectly matched color schemes, and no strict symmetry. Instead, you get curved pathways, a mix of heights, and plants that lean into and complement each other like old friends at a dinner party.
The charm comes from that “planned chaos” it feels natural and untamed, but it’s actually the result of thoughtful layering and repetition.
A few defining features I kept coming back to while planning mine:
- Dense planting with little to no bare soil showing
- A mix of flowers, herbs, and even vegetables growing side by side
- Soft, curving pathways instead of straight lines
- Vintage or rustic accents like arbors, picket fencing, or repurposed containers
- A palette that leans toward pastels and cheerful brights, rather than a single controlled color story
Once I understood these building blocks, the whole project felt a lot less overwhelming. It wasn’t about achieving some unattainable, magazine-perfect symmetry. It was about layering charm one plant at a time.
Before You Grab a Shovel: Planning Your Makeover
I’ll admit it: my first instinct was to run to the garden center and buy every pretty flower I saw.
That is exactly the mistake to avoid. A little planning goes a long way toward a garden that actually thrives instead of one that looks lovely for two weeks and then falls apart.
Assess Your Space
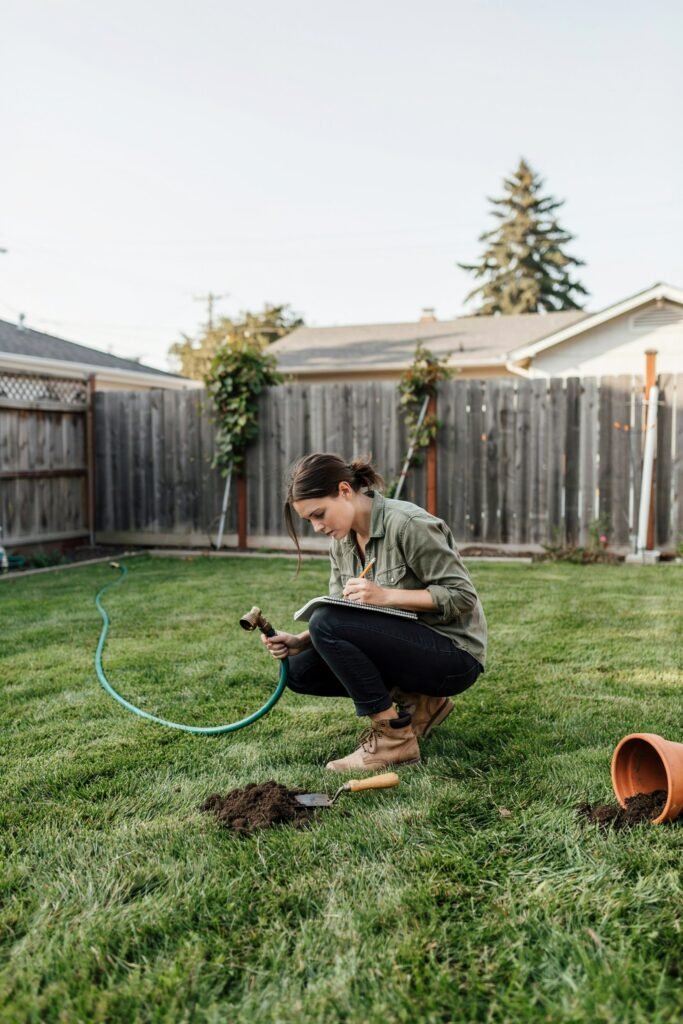
Walk your yard at different times of day and take notes on:
- Sun exposure. Most classic cottage garden flowers (foxgloves, roses, delphiniums, phlox) want at least six hours of sun. Shadier spots will need a different plant palette, which I cover further down.
- Soil drainage. Dig a small hole, fill it with water, and see how long it takes to drain. If water is still sitting there after a few hours, you’ll need to amend your soil or consider raised beds.
- Existing structures. Fences, trees, and the house itself will all shape your layout and give you natural “walls” to build borders against.
Set a Realistic Budget
Cottage gardens can be surprisingly budget-friendly since much of the charm comes from perennials that spread and self-seed over time, meaning you don’t need to buy enormous quantities of plants right away.
I started with a modest number of anchor plants and let the garden fill in naturally over two growing seasons.
If you’re building raised beds as part of your layout, my DIY raised beds for under $50 guide can help you keep hardscaping costs low.
Think About Time Commitment
Cottage gardens have a reputation for being low maintenance, but that’s only partly true.
The “wild” look does mean less precise trimming, but you’ll still be deadheading, dividing perennials, and staying on top of self-seeders so they don’t take over.
Be honest with yourself about how much time you can give it weekly, and choose your plant list accordingly.
Designing Your Layout
This is the part where my Pinterest board finally became a real plan.
Cottage garden design isn’t about a rigid blueprint, but you do want a loose structure to build from, otherwise you risk ending up with something that looks messy rather than romantically abundant.
Start With Curves, Not Lines
Straight edges read as formal and modern, which works against the cottage aesthetic.
I used a garden hose to lay out flowing, curved borders before digging anything, which let me adjust the shape as many times as I wanted without committing.
Curved beds also naturally create those little “rooms” and surprise corners that make a cottage garden feel bigger than it is.
Layer From Back to Front (or Center Out)
Classic cottage borders are planted in tiers: tall plants like hollyhocks or delphiniums at the back, medium plants like coneflowers and salvia in the middle, and low, spilling plants like alyssum or creeping thyme at the front edge.
If your bed is an island rather than pushed against a fence, put your tallest plants in the center and work outward instead.
Plan Your Pathways
A meandering path through the garden invites people to slow down and actually walk through the space rather than just viewing it from a distance.
Gravel, stepping stones, or even mulch paths all work beautifully and keep maintenance low.
If you’re adding seating along the way (which I highly recommend for a garden you actually want to sit in), take a look at these garden seating ideas for relaxing outdoors for inspiration on cozy nooks that fit the cottage vibe.
Sketch It Out
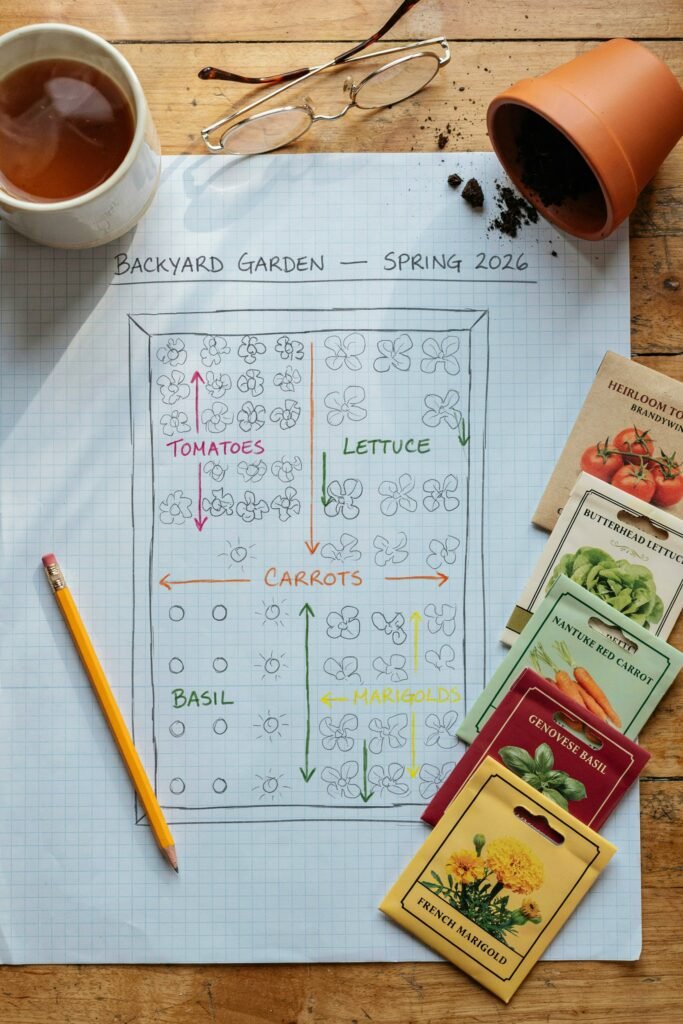
I’m no artist, but a rough sketch on graph paper (or even the back of an envelope) saved me from a lot of costly mistakes.
Mark your sun and shade zones, sketch your curved beds, and pencil in where your tallest anchor plants will go.
For more layout inspiration specifically around flower placement, my post on colorful flower garden layout ideas is a great companion resource.
Building the Bones: Structure and Hardscaping
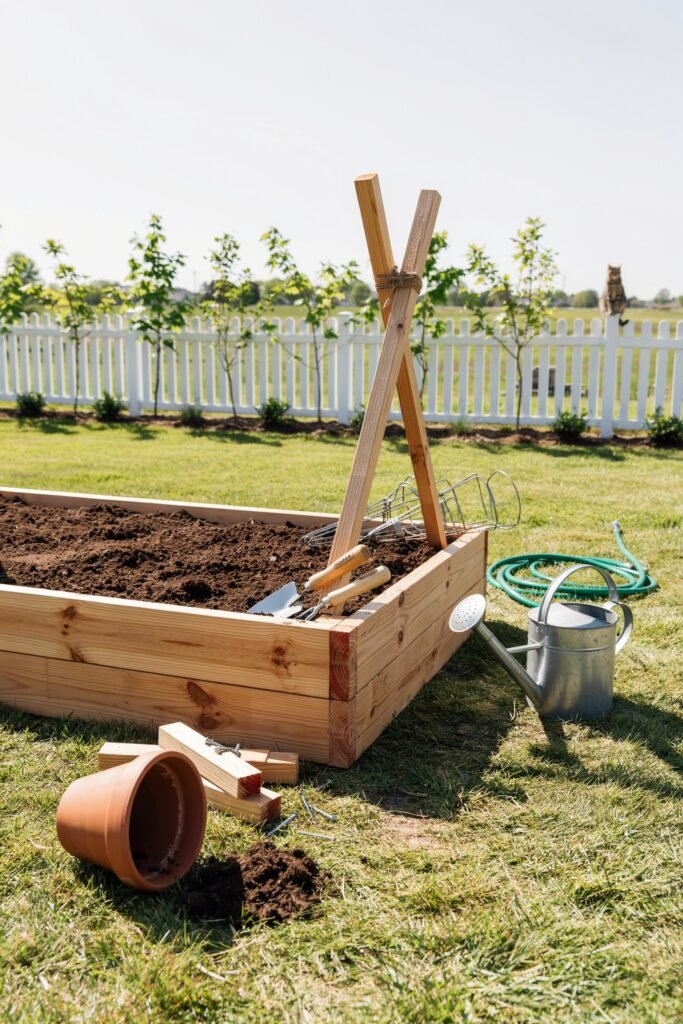
A cottage garden might look wild and free-flowing, but it actually leans hard on structure to hold that look together.
Without some kind of framework, all those billowing flowers can start to look like an unkept mess instead of an intentional design.
Raised Beds
Raised beds are fantastic for cottage gardens because they define your planting areas clearly, improve drainage, and make it easier to mix flowers, herbs, and vegetables the traditional cottage way.
If you’re new to building them, my ultimate raised bed gardening checklist walks through everything you need from materials to soil mix.
Trellises and Vertical Interest
Climbing roses, clematis, and sweet peas are cottage garden staples, and they need something to climb.
A trellis or obelisk not only supports these plants but also adds vertical height that keeps the eye moving through the space.
I added a simple wooden trellis against my back fence and it instantly made the garden feel taller and more established. For plenty of options and styles, check out these garden trellis ideas that add height.
Fencing and Edging
A classic white picket fence is the quintessential cottage garden image for a reason, but even a low wooden edging or a border of stacked stones can give your beds a defined, intentional edge.
This is especially important in a cottage garden because the planting itself is so loose. The hard edge is what tells the eye “this chaos is on purpose.”
Seating and Gathering Spaces
Don’t forget to build in a place to actually enjoy the garden once it’s grown in.
A small bench tucked into a flowering corner, a bistro table near the herbs, or even a fire pit area extends how you use the space into the evening.
These backyard fire pit ideas pair beautifully with a cottage-style layout if you want a cozy gathering spot.
Vertical and Small-Space Solutions
If your yard is on the smaller side, you can still capture the cottage look using vertical elements like tiered planters, wall-mounted troughs, and hanging baskets stuffed with trailing flowers.
My guide to vertical garden ideas for small spaces has some lovely options that translate well into a cottage aesthetic.
Choosing Your Cottage Garden Plants
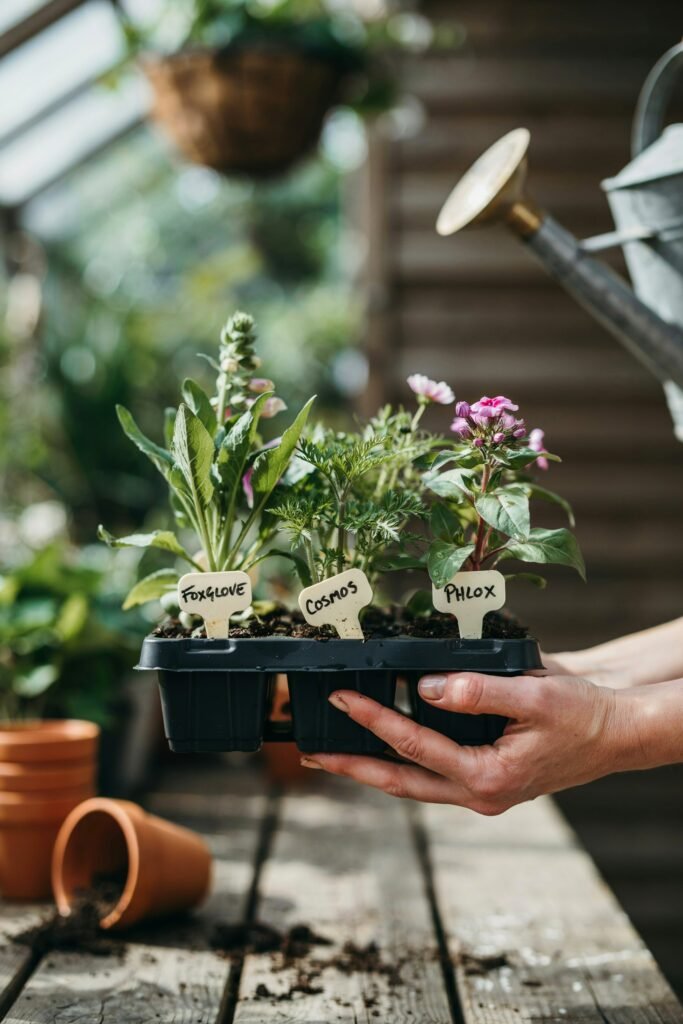
This is the fun part, but also where it’s easiest to get carried away. A great cottage garden plant list balances old-fashioned perennials, self-seeding annuals, and a few climbing or vining plants for height.
Classic Perennials
- Roses (especially old garden and shrub varieties) — the backbone of most cottage gardens
- Peonies — for that lush, romantic look in late spring
- Delphiniums — tall spires of blue and purple
- Foxgloves — dramatic height and cottage charm, though they self-seed generously
- Lupines — colorful spikes that pair beautifully with roses
- Coneflowers (Echinacea) — hardy, pollinator-friendly, and long-blooming
- Catmint (Nepeta) — a soft, spilling edge plant that blooms for months
- Phlox — fragrant and available in nearly every pastel shade
Cheerful Self-Seeding Annuals
- Cosmos — airy, colorful, and they bloom right up until frost
- Sweet peas — climbing, fragrant, and endlessly romantic
- Poppies — for that wild meadow look
- Larkspur — a lovely companion to delphiniums with a similar spire shape
- Zinnias — bold color and excellent as cut flowers
Extending the Season
Cottage gardens shouldn’t peak in June and then fade for the rest of the year. Mixing in some late-blooming perennials keeps color going well into autumn.
My post on fall flowers that bloom until frost is a great place to round out your plant list so the garden has something happening in every season, not just early summer.
Herbs and a Few Vegetables
Staying true to the cottage garden’s practical roots, tuck in some herbs like lavender, rosemary, and sage, and don’t be afraid to let a few vegetables join the party.
Lettuces, pole beans on a trellis, and even a tomato plant or two fit right into the informal style. If you want a productive twist on your beds, my guide on growing tomatoes in a pot has some tips that translate well to raised cottage beds too.
Planting in Layers: The Secret to That Overflowing Look
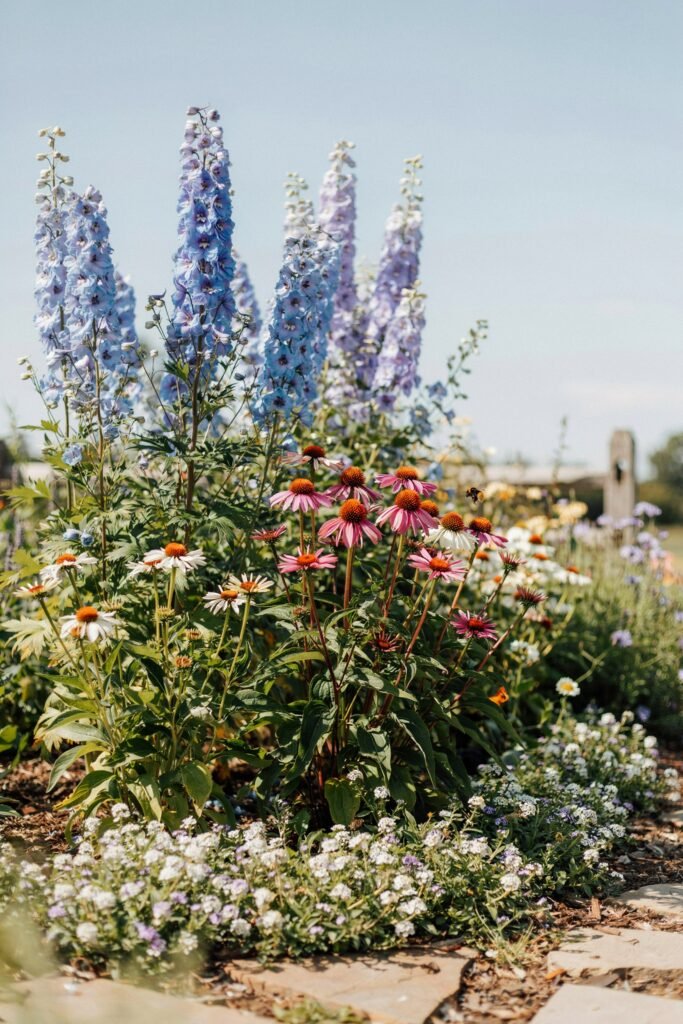
The single biggest thing that took my garden from “flower bed” to “cottage garden” was learning to plant in layers and repeat colors throughout the space. Here’s how I approached it.
The Three-Tier Rule
Think of your bed in thirds: back third for your tallest plants (delphiniums, hollyhocks, climbing roses on a trellis), middle third for medium-height bloomers (coneflowers, phlox, salvia), and front third for low, spilling plants (alyssum, creeping thyme, dianthus).
This creates the layered, full look without leaving gaps of visible soil.
Plant Densely (But Not Recklessly)
Cottage gardens are meant to look full, which means planting closer together than you might for a typical border.
I still left enough room for airflow between plants to avoid mildew and disease, but I aimed for that just-slightly-crowded look where foliage from one plant gently touches its neighbor.
Repeat, Repeat, Repeat
Rather than buying one of everything, I picked about eight to ten “anchor” varieties and repeated them in clusters of three or five throughout the garden.
This repetition ties the whole space together visually, even with such a wild mix of plants, and it’s a trick borrowed straight from professional garden designers.
Mind Your Bloom Times
Map out when each plant flowers so you always have something blooming.
I like to sketch a simple bloom calendar showing which months each plant is at its peak, which makes it obvious where I have gaps to fill with something new.
Adding Personality: Accessories and Focal Points
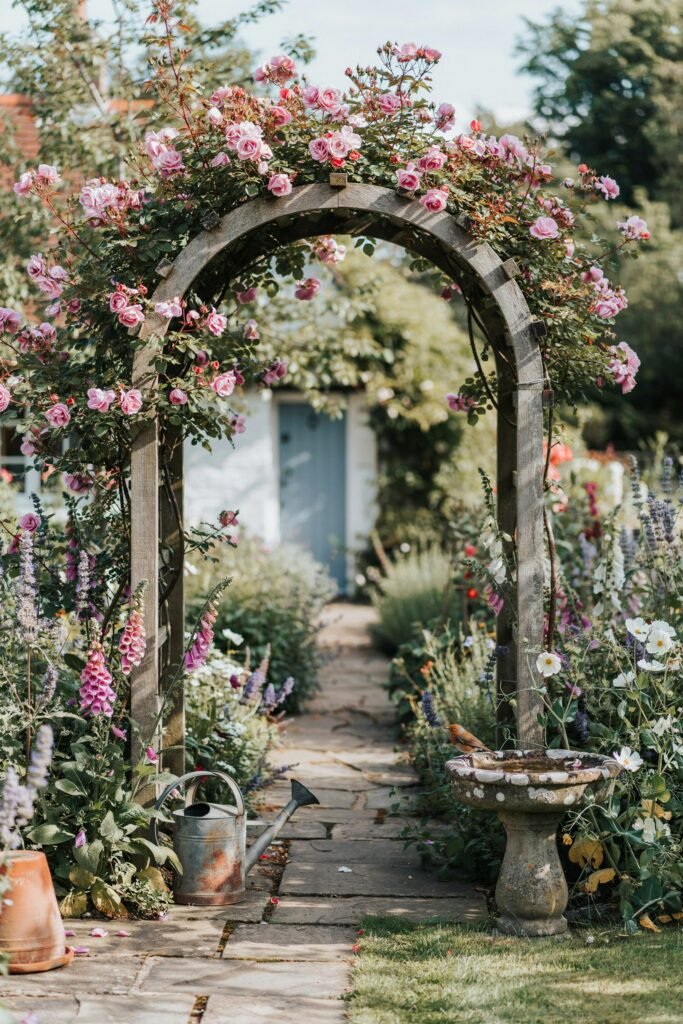
Once the bones and the plants were in, the accessories are what made the garden feel like mine.
Arbors and Obelisks
A simple wooden arbor at the entrance to a path, covered in climbing roses or clematis, instantly signals “cottage garden” and creates a lovely transition point into the space.
Vintage and Repurposed Containers
Old watering cans, wheelbarrows, and even weathered ladders make charming planters when tucked among the flowers. I used a few DIY cement pots for a slightly more rustic, handmade texture that fit right in with the informal style.
Privacy and Screening
If your cottage garden backs up to a neighbor’s yard or a busy street, a natural privacy screen keeps the space feeling like a private retreat rather than an exposed patch of flowers.
These backyard privacy plants that create a natural screen blend beautifully into a cottage layout without looking like a hard barrier.
Bird Baths, Sundials, and Garden Art
Small touches like a birdbath, a weathered sundial, or a hand-painted sign add whimsy and give the eye somewhere to rest among all the blooms. Just be careful not to overdo it.
One or two thoughtful pieces will always look better than a garden cluttered with too many trinkets.
Prepping Your Soil the Right Way
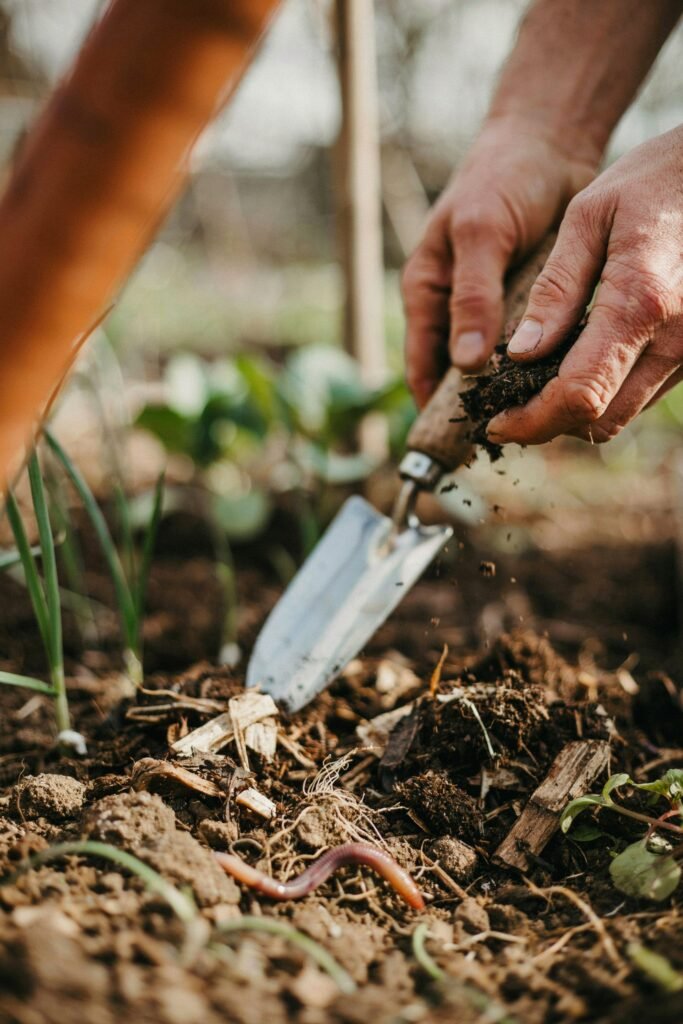
None of the pretty design work matters if your soil can’t support it. This is the unglamorous step that made the biggest difference in how well my plants actually performed.
Test Before You Amend
A basic soil test (available cheaply from most garden centers or extension offices) tells you your pH and nutrient levels so you’re not guessing.
Most cottage garden favorites like a slightly acidic to neutral pH between 6.0 and 7.0.
Work In Organic Matter
I dug several inches of compost into my beds before planting anything. This single step improved drainage in my heavier clay soil and gave my plants a nutrient boost right from the start.
If you’re building raised beds, getting your soil mix right from day one saves a ton of headaches later, and my raised bed gardening checklist covers exactly what ratio of soil, compost, and amendments works well.
Mulch Generously
A two to three inch layer of mulch around your plants (but not touching the stems) helps retain moisture, suppress weeds, and keep soil temperature more stable.
This is especially helpful in a densely planted cottage garden where you want the plants competing with each other for beauty, not for water.
A Simple Seasonal Care Calendar
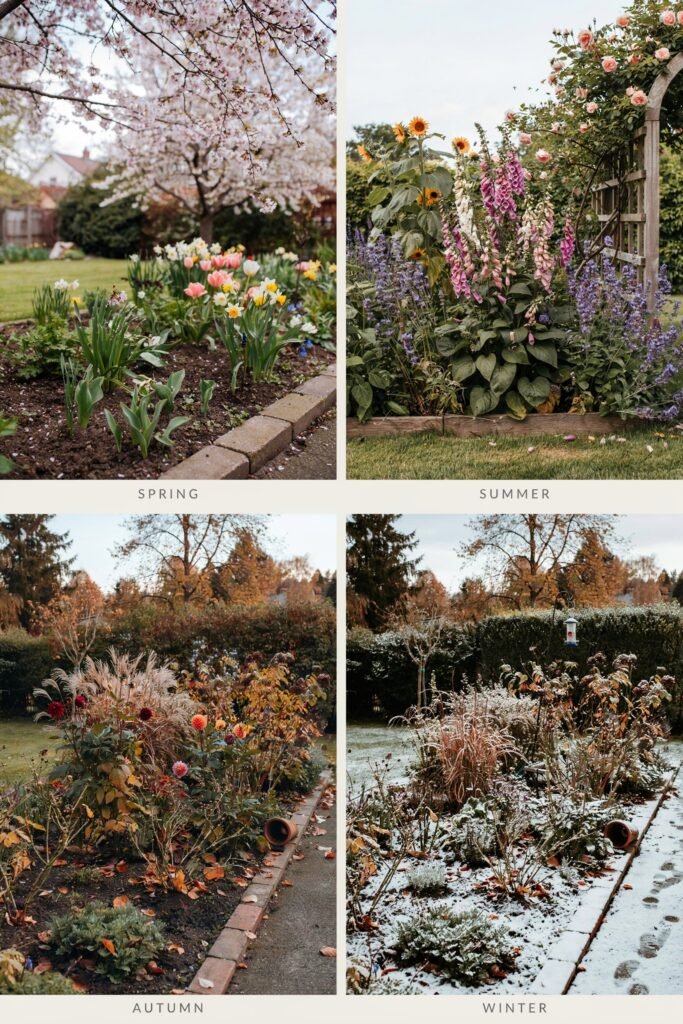
A cottage garden changes with the seasons, and staying just a little ahead of each one keeps things from getting overwhelming.
Spring
This is when most of your planting and dividing happens. Get perennials in the ground once the danger of frost has passed, and direct-sow your self-seeding annuals like cosmos and poppies.
Summer
Your garden’s biggest performance season. Regular deadheading keeps blooms coming, and consistent watering is key during hot stretches. My July gardening checklist and August garden to-do list are both great weekly references during this stretch.
Autumn
Time to plant spring bulbs, divide overgrown perennials, and clean up spent annuals while leaving some seed heads for winter interest and birds.
My September gardening checklist and October gardening checklist both walk through exactly what to prioritize as the weather cools.
Winter
A quieter season for most cottage gardens, but a great time to plan next year’s additions, order seed catalogs, and do any structural work like building new raised beds or trellises while the garden is dormant.
Mistakes I Made (So You Don’t Have To)
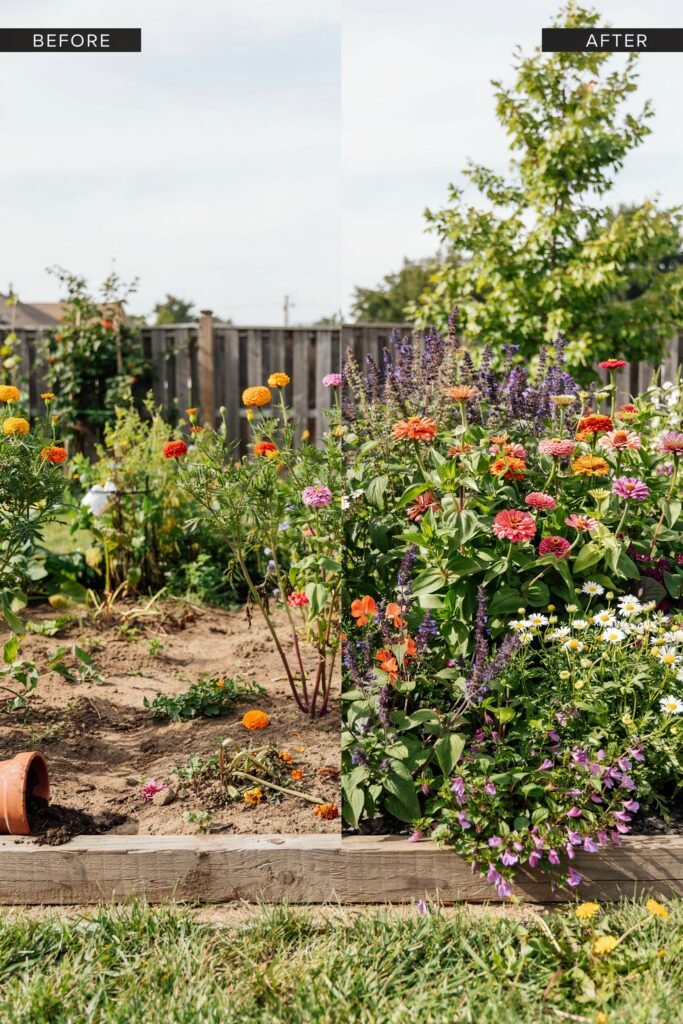
I want to be honest about the parts of this process that didn’t go smoothly, because I think it’s more helpful than pretending my garden was perfect from day one.
I Planted Too Sparsely at First
My first year, everything looked scraggly and gap-toothed because I was worried about overcrowding.
Cottage gardens genuinely do need dense planting to achieve that lush look, so don’t be afraid to plant closer together than feels natural.
I Ignored Mature Size
I planted delphiniums right at the front of a bed, not realizing how tall they’d get, and ended up blocking the view of everything behind them. Always check mature height and width before deciding where a plant goes.
I Let Self-Seeders Run Wild
Foxgloves and poppies are wonderful, but they will absolutely take over if you let every seed head mature and drop.
I now deadhead selectively, letting a few go to seed and removing the rest so I stay in control of where new plants pop up.
I Skipped Soil Prep the First Time
I was so eager to get flowers in the ground that I skipped amending my clay-heavy soil. Several plants struggled and a few didn’t make it. Taking the extra weekend to work in compost before planting the second time around made a massive difference.
Keeping It Looking Effortlessly Beautiful
A cottage garden should look like it takes no effort at all, even though a bit of regular upkeep is what actually gets you there.
- Deadhead regularly to keep blooms coming and prevent unwanted self-seeding
- Stake tall plants like delphiniums and hollyhocks before a summer storm knocks them flat
- Divide overcrowded perennials every few years to keep them healthy and to create new plants for free
- Edge your beds every so often to maintain that intentional line between “wild” and “unkept”
- Water at the base of plants in the early morning to reduce disease and evaporation
- Watch for pests early, since dense planting can sometimes hide problems until they’ve spread
If you’re just getting into gardening generally and want a broader foundation of good habits, my new gardener checklist covers a lot of the basics that apply just as much to a cottage garden as any other style.
Final Thoughts
My cottage garden makeover took patience, a fair number of plant casualties, and a willingness to let things look a little wild before they settled into that lush, layered charm I’d been dreaming of.
If you’re starting your own, give yourself grace for the first season. Cottage gardens are a bit like friendships: they take time to grow into something rich and comfortable, but once they do, they’re absolutely worth it.
I’d love to hear how your own cottage garden makeover comes together.
Take your time with the planning stage, choose plants you genuinely love rather than what’s trendy, and don’t be afraid to let your garden surprise you along the way.
